

YinTx
-
Posts
3,794 -
Joined
-
Last visited
Content Type
Profiles
Forums
Events
Blogs
Gallery
Store
Everything posted by YinTx
-

Custom Bowie and Sheath
YinTx replied to Rossr's topic in Gun Holsters, Rifle Slings and Knife Sheathes
Yep, I'd be proud to carry that. 'Cept ya kant, here in the great state of Texas... YinTx -
New bag
YinTx replied to NarmoDaria's topic in Purses, Wallets, Belts and Miscellaneous Pocket Items
That is a lot of knotwork. No small feat, and came out really nice! YinTx -
Progression of a knife sheath
YinTx replied to Rossr's topic in Gun Holsters, Rifle Slings and Knife Sheathes
Night and day difference in skill and craftsmanship. Awesome work! YinTx -
Can you show a photo of what you mean? I didn't have an issue with it when I used it, but now I tend to use linens. YinTx
-
Astounding detail. Wish I could watch you do this. YinTx
-
I did this with an Atoma 1200 diamond plate, and a 1000/4000 water stone, followed by a leather strop. It started with a pretty rough edge that I reprofiled on the diamond plate. I don't think you need to be fancy, just steady and persistent. YinTx
-
This came in the mail. Couldn't resist. YinTx
-
English Bridle Revisited: Dyeing Flesh Side
YinTx replied to Hardrada's topic in Leatherwork Conversation
I have used Fiebing's dyes on this section myself, with a bit of dubbin or oil after it dries. You could seal it if you are concerned. I would think it a bit much for Edge Kote or paint. Interested to see what others have done as well. YinTx -
Remington 1858 Holster.
YinTx replied to Forester's topic in Gun Holsters, Rifle Slings and Knife Sheathes
Awesome! YinTx -
Leather is wrinkling on folds, not sure how to fix
YinTx replied to sonataworks's topic in How Do I Do That?
You absolutely should recondition the leather with neatsfoot oil after applying dye. Dubbin is good too, it usually has NFO in it. If you don't it may also tend to crack over time. Also, purchase high quality harness or bridle leather helps too, as well as using thinner leathers as mentioned when going round bends. YinTx -
Pretty dang good one then. still watching... YinTx
-
Thanks! Hahah I try to differ from my original statement also, but alas, here I am with too many and looking at others! YinTx
-
Definitely nice. Feel free to link your instagram page in your signature! And welcome! YinTx
-
this is fun... and looking like you know what you are doing, so far...but then, I've never made a shoe so...I'm here to learn and admire! YinTx
-
Medieval Knife Sheaths (and knives)
YinTx replied to AlexOstacchini's topic in Gun Holsters, Rifle Slings and Knife Sheathes
Those are pretty unique. I don't see how you could make them any "prettier." I rather like the look. YinTx -
Hope it suits you well. The more I look at it, the more I like it. Even the wood grain in the handle is fantastic. Worked up a prototype sheath today, will finish stitching and send a photo tomorrow to see if you like it! YinTx
-
Medieval Knife Sheaths (and knives)
YinTx replied to AlexOstacchini's topic in Gun Holsters, Rifle Slings and Knife Sheathes
Those are really cool! What about the backs? YinTx -
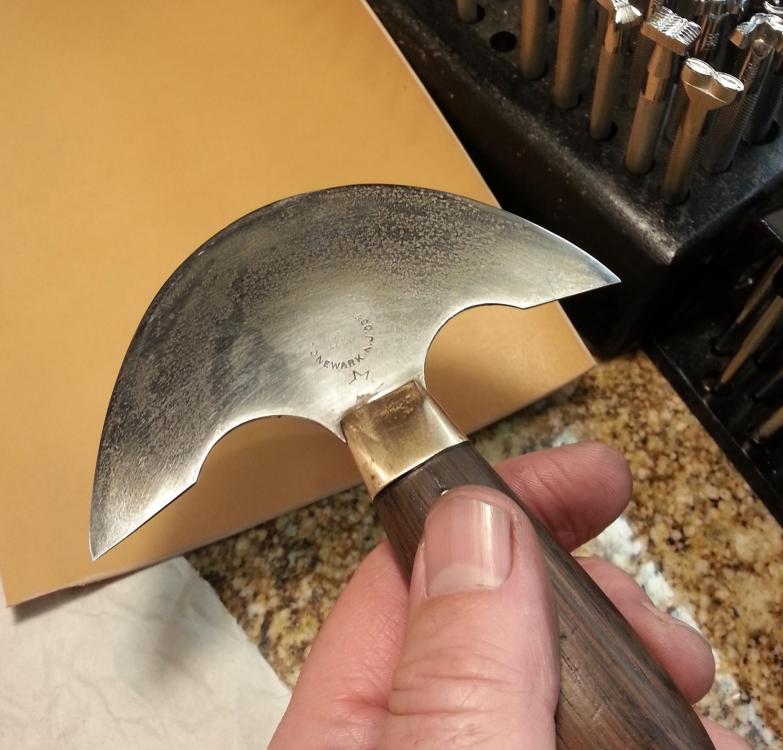
Thank you and yes, a lot of patience and steady hands - along with a lot of practice. I am sure there are others that do it faster, but I do mine on a 1200 grit diamond plate, followed up with Japanese water stones at up to 4000 grit, then stropping for the final polish. Depending on the condition of the blade, it can take me up to 4 or 5 hours to get a good edge that I am happy with. YinTx
-
Sometimes. Usually, I get to work on one when someone is looking for one. Usually takes several days to get one dialed in like this. YinTx
-
Top notch! Thread color on the left one is cool. YinTx
-
Awesome, I am glad it is working well for you! YinTx
-
Oddly no one commented after a year, but I'd say your set up is quite neat and seems pretty functional. YinTx
-
Thanks! These older knives really perform when you dial them in. Presuming it is pre 1906 when CS Osborne moved from Newark to Harrison, it would be 115 years old at least. Rings like a bell when tapped, cuts really nice. I have several of these that I have been working over, and selling off one at a time - I can only use so many myself! Do wish I could keep them all tho, this one is pretty nice. YinTx
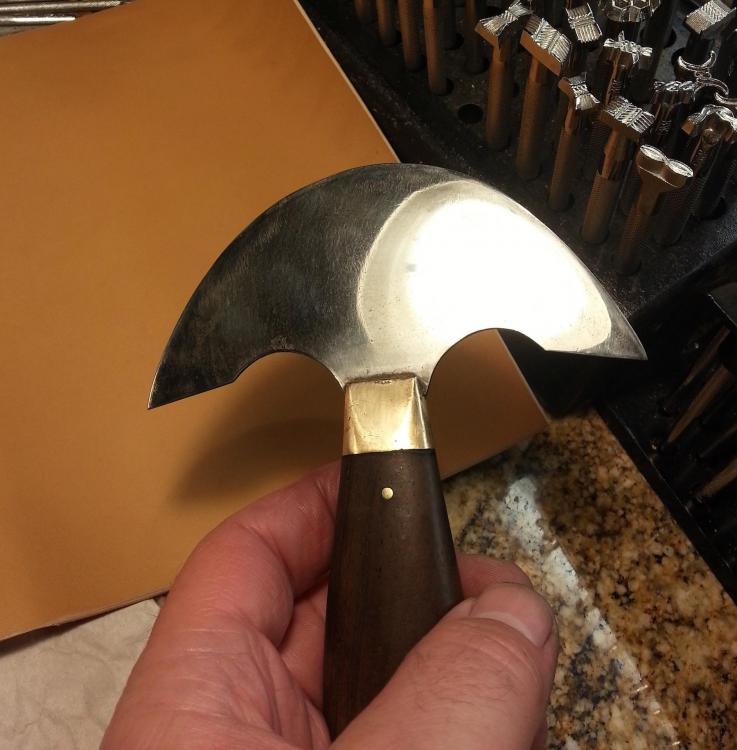
-
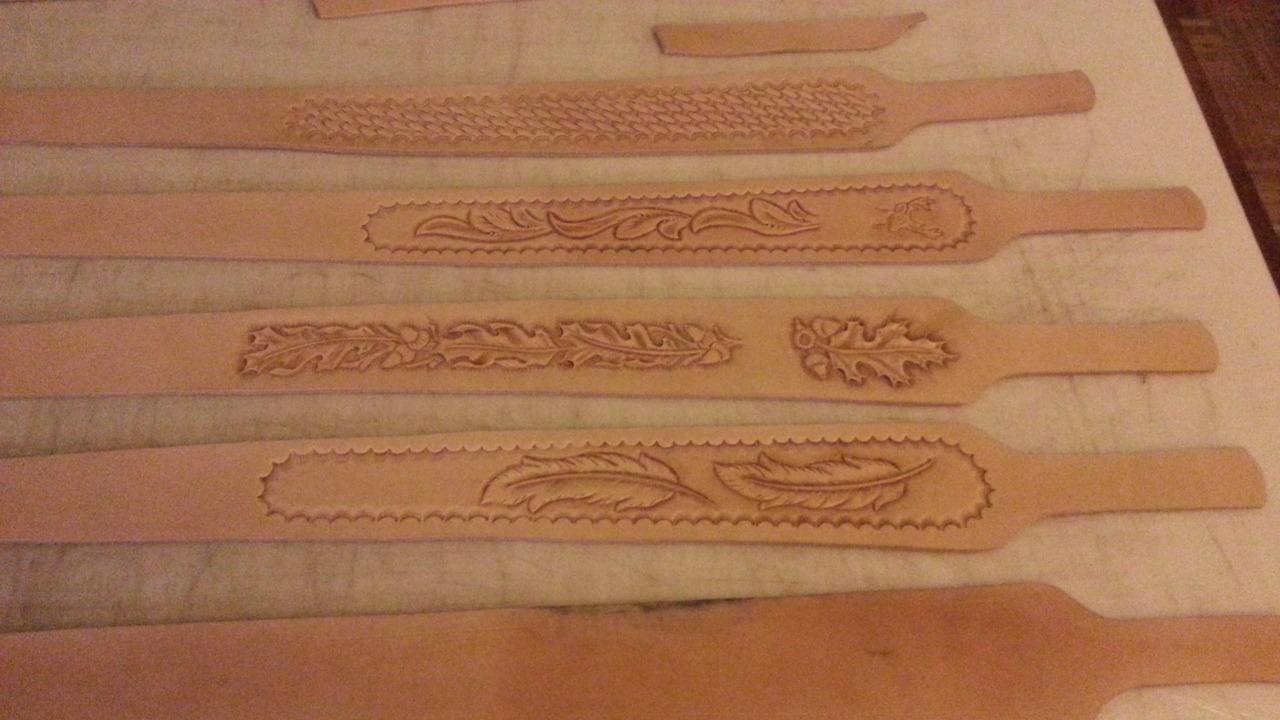
Just wanted to show off a round knife I just refurbished. Lighting wasn't the best, but it gets the point across ok I think. Let me know what you think!
-
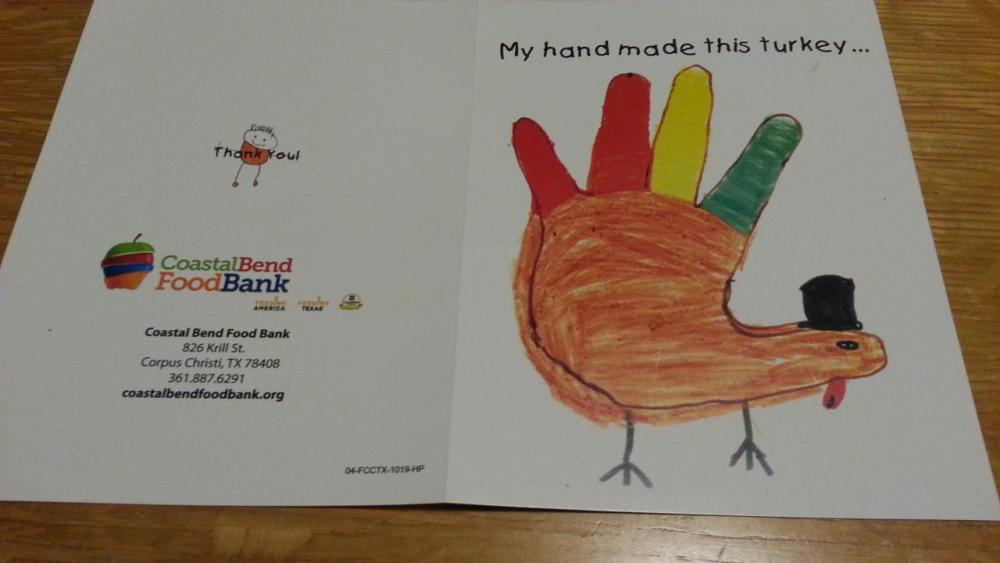
I have often pondered this topic myself. I believe it is too obfuscated and full of grey areas to succinctly define. So for my own purposes, I let my customers know what my definition of hand made or hand crafted is, thus addressing what I believe to be the true crux of the matter: avoiding deception. Items made en masse overseas and imprinted with a stamp here by hand and dropped into an Etsy shop as "handmade" are imho deceptive. I want my customers to know what I do by hand, the types of tools I use, and where I use a production style machine when I sell an item as "hand crafted." Or, I don't tell them anything and just sell an item and let my craftsmanship compete directly with everything else out there. Doesn't always work - Clayton English Bridle leather belts with solid stainless steel buckles I made - not selling at $39. Meh. Maybe I need to price it like a Veblen good. YinTx


