maxdaddy
-
Posts
201 -
Joined
-
Last visited
Content Type
Profiles
Forums
Events
Blogs
Gallery
Store
Everything posted by maxdaddy
-
 Thats beautiful! The bird and animal heads are a nice design surprise.
 -
@JDsimms55 Love the control knobs! Surely there's a backstory to that project. I'm interested even if nobody else is...
-
That project turned out great! Wow.
-
THat's great. Love it. My game requires that I practically hang a Pez dispenser of golf balls off my belt.
-
wooooowee, that's cool.
-
Hand aged Leather Wallet
maxdaddy replied to Adonis's topic in Purses, Wallets, Belts and Miscellaneous Pocket Items
thanks for sharing that... I've used wax to 'age' leather on a few bags and hats but have always felt that the time spent burnishing and rubbing the wax in gets lost soon after the piece is put into use and exposed to sunlight. What I mean is that the random dark areas that I got from the application of the wax into certain areas seems to 'fade' away as the surrounding areas develop a natural patina and I lose the areas of the hand aging. -
Design question. Leather LBE style suspenders
maxdaddy replied to JeffB957's topic in Leatherwork Conversation
The heavens are crying out... "IT SHOULD BE MADE! MAKE IT!" -
EDC pouch / Sling bag
maxdaddy replied to JerrySaagar's topic in Purses, Wallets, Belts and Miscellaneous Pocket Items
Nice job. Looks very functional and durable. -
Leather hats
maxdaddy replied to Trikegator's topic in Purses, Wallets, Belts and Miscellaneous Pocket Items
Thanks... the 'stache didn't survive the pandemic. But neither did the mohawk or other silly looks that I experimented with while I was working from home most of 2020. -
Leather hats
maxdaddy replied to Trikegator's topic in Purses, Wallets, Belts and Miscellaneous Pocket Items
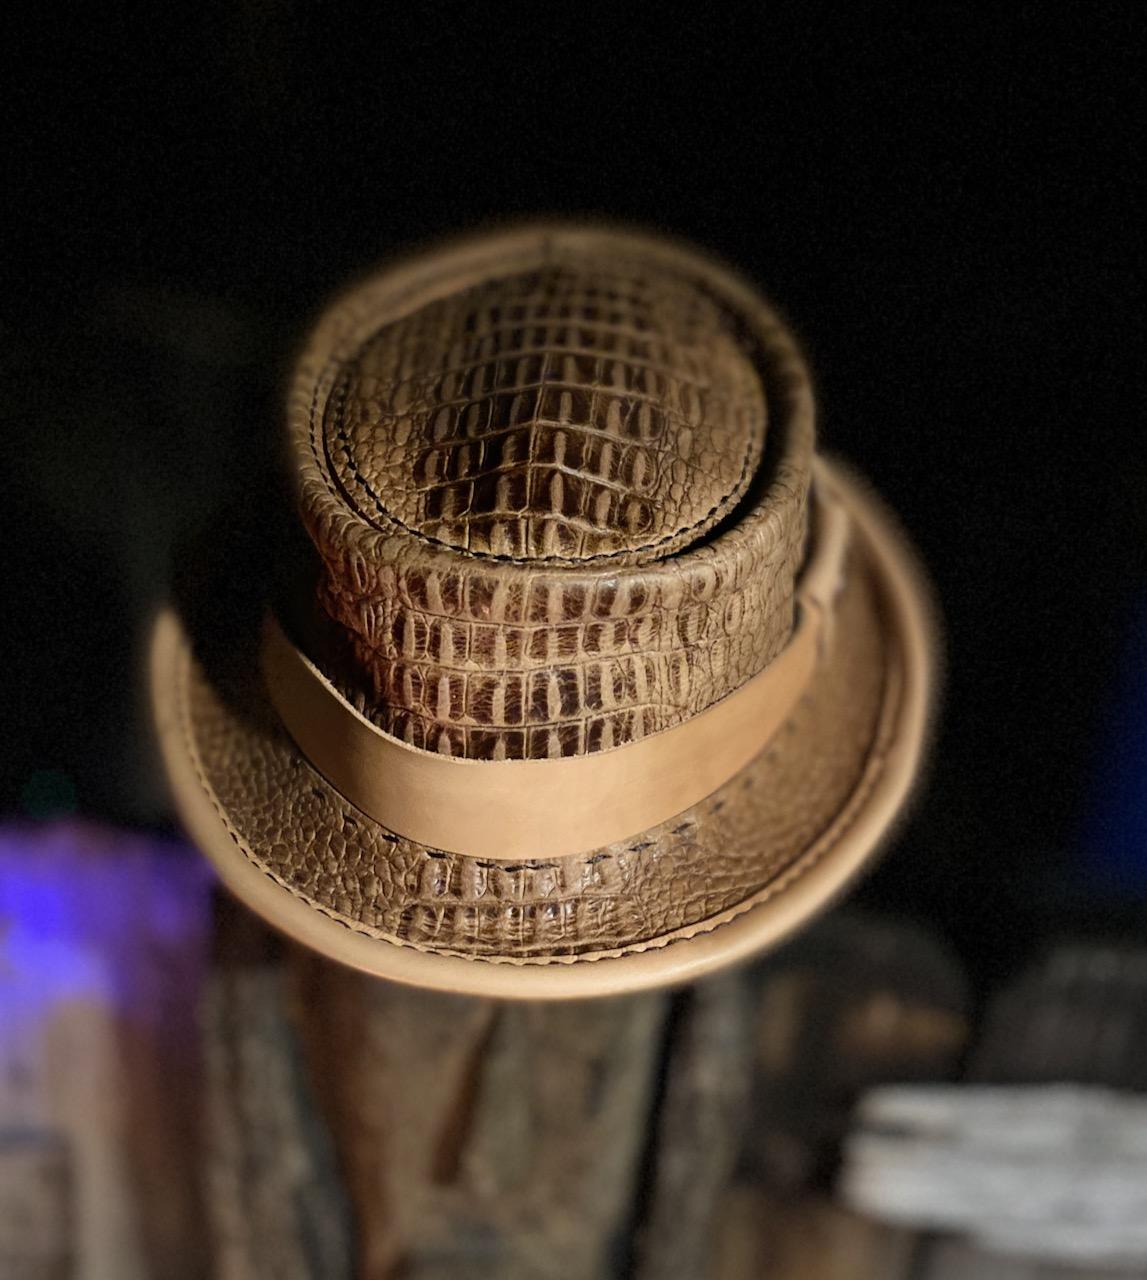
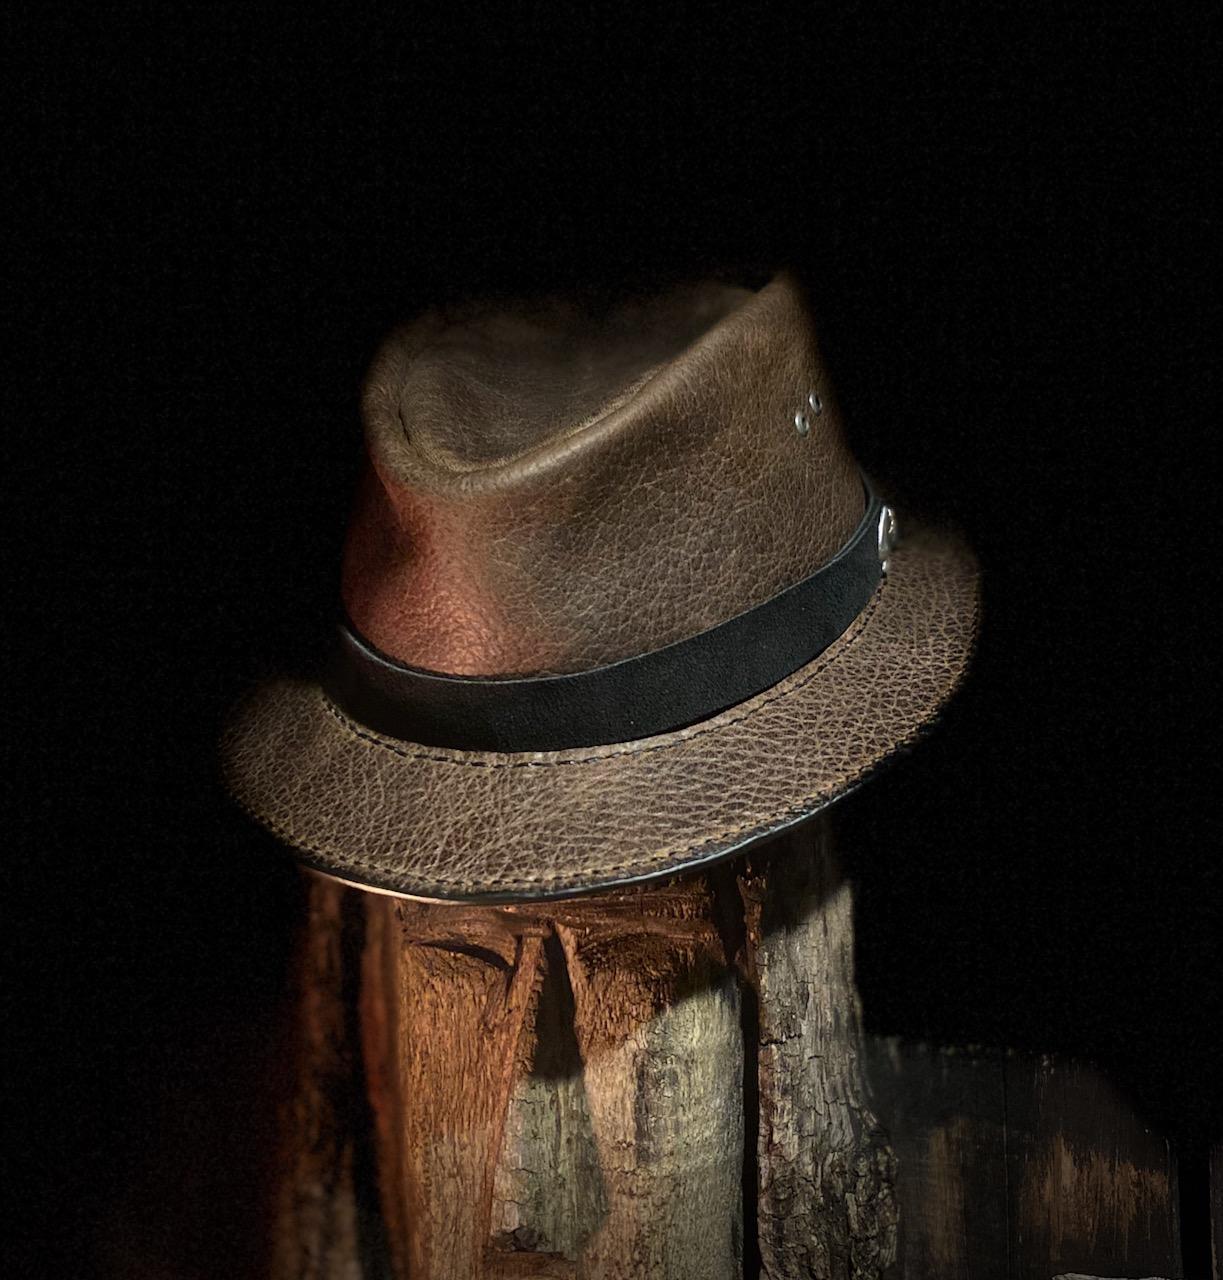
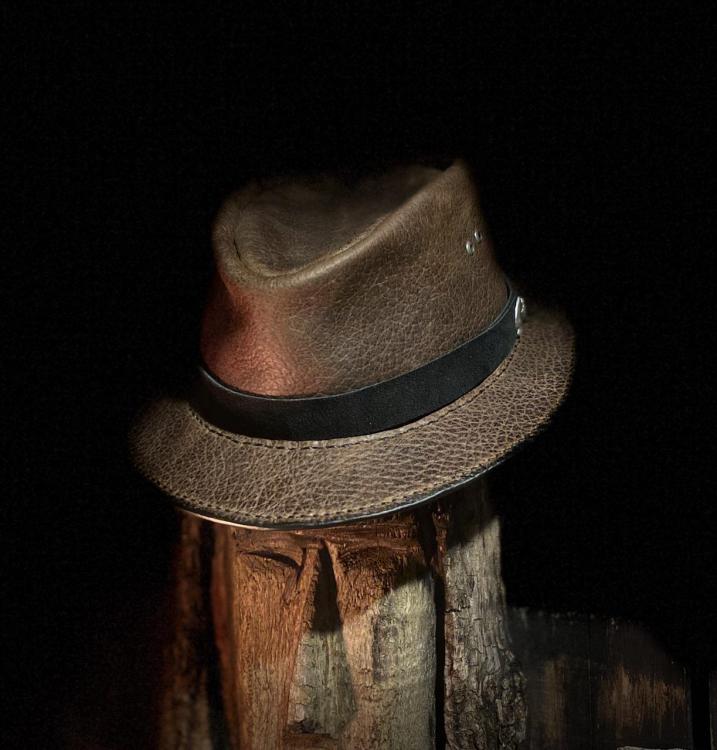
Here's a few of my recent hats that I wear often.... a fedora, a porkpie, and a bowler. (Apologies for appearing in the bowler picture... I don't have a picture of it on a prop. ) The bowler gets the most comments and questions from strangers, by far. I used from patterns from Tony See (DieselpunkRO) as starting points. Even if I'll likely never sell a hat they are a lot of fun to make and wear out.

-
Leather hats
maxdaddy replied to Trikegator's topic in Purses, Wallets, Belts and Miscellaneous Pocket Items
I'm in Florida and wear my own leather hats all of the time. I've made several styles for myself and enjoy switching up the look. I get comments on them and occasionally the question comes up of "how much I would charge to make one for them?" I never suggest that I make them to sell, but some folks think that I should be happy to make one for them with the same look for about $40. When I explain that there's about 8 hours worth of work that goes into one (depending on the style), plus the cost of the leather I say that if I did sell them I'd probably charge a couple hundred. I've never had anyone respond that they felt that a leather hat was worth that much. Hats are not something that I would be able to make and sell profitably in my area of Central Florida. It seems that most folks are happy to buy something mass-produced. -
Wow, that's impressive. Have you had any of your pieces used in other films?
-
Thanks for sharing that with us. I've never heard of 'greases' being applied to or into leather.
-
That piece turned out great. He's clearly proud of it and you should be too.
-
Welcome to the forum as a contributor. It sounds like you've worked through lots of efficiency improvements over the years and hopefully you'll share some of the insights with us. It really is a strange scenario when one person looks at a handmade leather item and thinks "that guy must be getting rich selling those things for $XXX" yet we look at the same piece walking out the door and think "dang, I made way less than minimum wage on that piece".
-
New holster rig
maxdaddy replied to corkscrew's topic in Gun Holsters, Rifle Slings and Knife Sheathes
Nice work. That red border stamp really pops out. -
That's a very meaningful gift.
-
What you wish you had known when you were getting started
maxdaddy replied to bigsig11010's topic in Leatherwork Conversation
I wish I had known that $15 was a bargain price to pay for a well-designed pattern. Admittedly, initially I did learn a lot by struggling along trying to make hats, bags, and whatnot based on my own designs, but when Tony See (DieselpunkRO) had a 50% off discount a few years ago I bought a few hat patterns. My skills improved a lot once I had good patterns to start with. I also found that it made it easier to come up with my own designs for other custom pieces once I had cut and assembled some well-designed pieces. I've bought many patterns from other designers since then, including from some of the folks who contribute to this forum. -
Mother & Daughter Totes
maxdaddy replied to stormcrow's topic in Purses, Wallets, Belts and Miscellaneous Pocket Items
Those are certain to be family treasures. They look great. -
Hat band and knife. Making a set pic
maxdaddy replied to Bawarrior's topic in Gun Holsters, Rifle Slings and Knife Sheathes
Looks great... I always struggle with getting my hat bands to look and fit right. -
Wow, that's stunning. A gold-medal project!!
-
Laser Engraved Wallet
maxdaddy replied to Bert03241's topic in Purses, Wallets, Belts and Miscellaneous Pocket Items
That's a unique wallet. What weight leather did you use? In addition to the engraving do you cut the pieces and the stitching holes with the laser? -
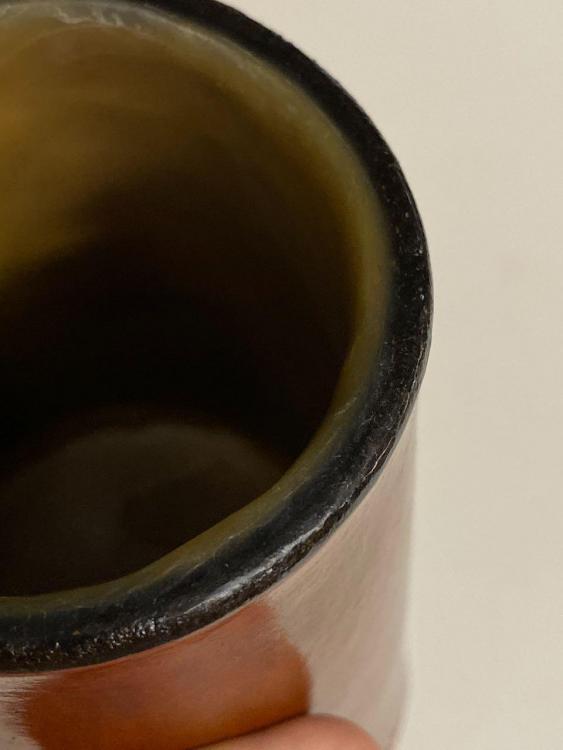
That's cool... I'm interested in knowing what you buy and how it works out. I did perform a test with some Envirotex Lite brand epoxy just to see how it worked and it was VERY messy and much more difficult to apply than the beeswax. The company says it is safe for food contact, like a cutting board, but not rated for immersion, like a bowl or cup. So, I just did it to test how I would apply an epoxy to the inside of a mug in the style that I make. Beeswax cools from liquid to solid much faster than the epoxy hardens which means that the epoxy will try to settle to the lowest point for several minutes, and while it's settling it is trying to find stitching holes to seep through. So I had to keep rotating the mug to keep it from collecting at the bottom, all the while it was getting on my hands. Good luck!
-
Looks good Frodo. I've made well over a hundred mugs that I sealed with beeswax have never had an issue with the wax melting. It is susceptible to cracking if dropped/squeezed/compressed too hard. But under normal usage melting will not be an issue. I've even left mugs outside on my picnic table in the sun for a few days at a time with no harm done. If you use it for cold and room temperature drinks it will be fine. I've always been able to get 10 pound blocks of beeswax from a local keeper so that's what I started with. Unfortunately he passed away last week so I may have to explore other options. I'll probably try some of Townsend's pitch and I can give a full report here if anyone is interested. Shoot me a message if you want me to mail a bit of beeswax to you to do this. Or, better yet, mail it to me and I'll seal it here and send it back. You'll want a double-boiler to be safe and it took me a while to get the technique figured out to apply a nice smooth thick coating.
-
That's nice.... I remember going to Weeki Wachee as a kid and seeing the mermaids.