


maxdaddy
-
Posts
201 -
Joined
-
Last visited
Content Type
Profiles
Forums
Events
Blogs
Gallery
Store
Everything posted by maxdaddy
-
sooooo..... this is what I found when I searched the web for "woodpecker stamp".

-
Maybe try something like this. I experimented with a similar approach and was able to get a printed image transferred onto leather. You'd want to seal it real good afterwards with resolene or something similar but I think you might have some luck with this.
-
I apply 3 or 4 coats of shoe polish on the flesh side of veg tanned leather and then seal it with with liquid floor wax or Resolene to get white leather. I've made white top hats, straps, and other projects this way and it looks and holds up pretty well. The flesh side is typically the 'back' side of a piece since does not have the smooth finish on it that the grain side does. That smooth finish is what makes the grain side so difficult to apply an opaque finish to, because brush strokes are impossible to avoid (at least for me). Spraying a white acrylic paint on might work, but I still think there'd be adhesion issues and the white might flake off if the piece is flexed. The backside of the leather is more 'porous' and so the white has lots of teeny-tiny surfaces to adhere to. Give it a try on some scrap... shoe polish is cheap and it comes with a built-in applicator! .
.thumb.jpeg.f18b4db73025add981424f3365cb06e0.jpeg)
.thumb.jpeg.f639ac5376e51ccfa3fc91f6c457de58.jpeg)
-
Welcome to the group. Hope we get to see some pictures of some of your projects soon.
-
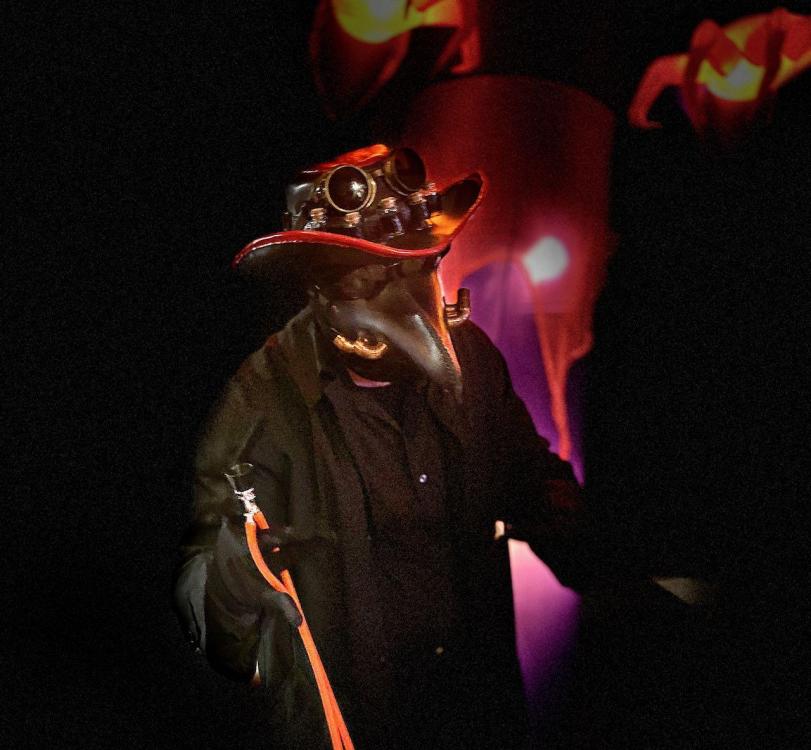
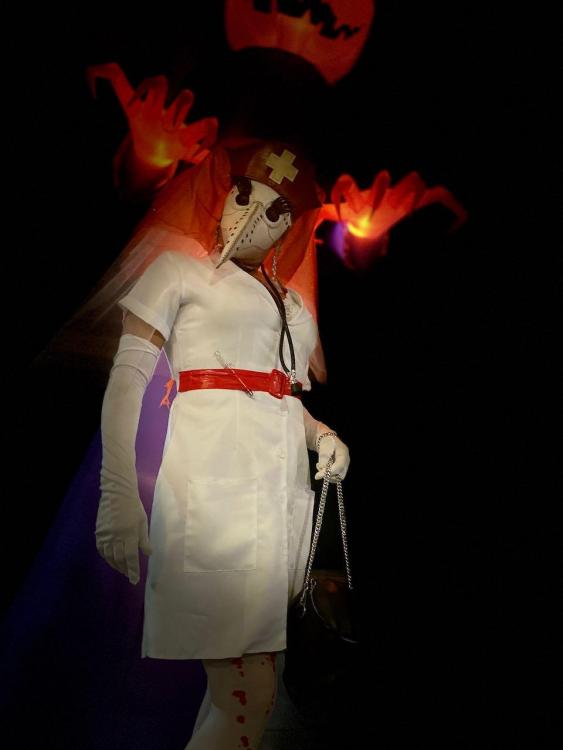
We went to our first Halloween party over the weekend and snapped a few pictures.
-
You may only need a few touches with a stylus to get a couple of dimples in the narrow area. I'd give something like that a try in a small area.
-
This works great for me... relatively cheap and easy to source at the big box stores. I only buy the unscented variety. https://www.lowes.com/pd/Holloway-House-64-oz-Floor-Polish/1000194489
-

designing leather jacket, comfortable sleeves
maxdaddy replied to aru's topic in Leatherwork Conversation
Tandy has some free patterns for leather coats and jackets. The link below is for the men's coat but they have a few others for ladies coats. THere's probably some helpful information in there. https://www.leathercraftlibrary.com/product/1214/2665-mens-top-coat-pattern-size-38 -
That came out great. Did you put any feet or tabs on the bottom?
-
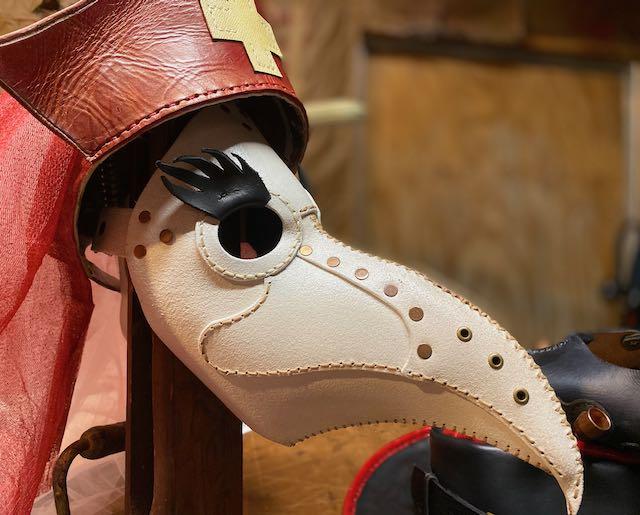
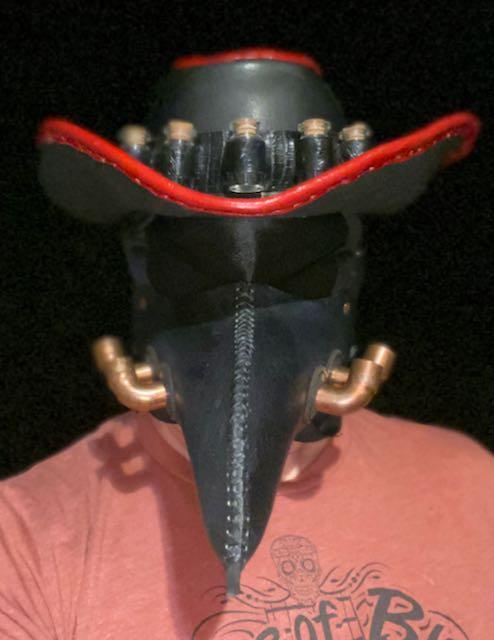
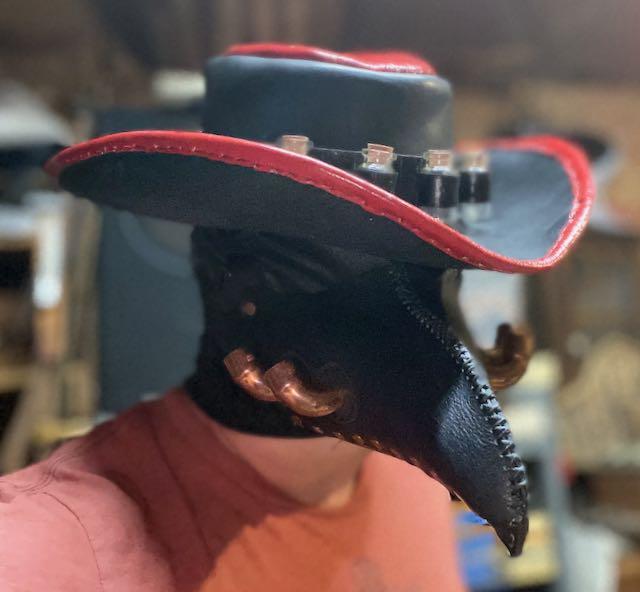
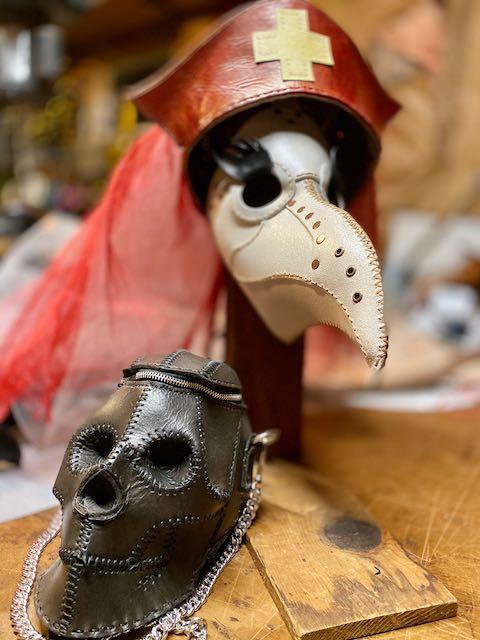
Fun post! Here's my Halloween projects. My wife will be the plague nurse in the white mask and hat. I'll be the plague doctor wearing black half-mask and hat. I'll follow up with some full costume poses after the weekend. The leather is all 6-7 ounce veg-tan from Tandy. I get the white by applying 3 or 4 coats of cheap white shoe polish to the flesh side and then sealing with liquid floor wax. The black on the skull bag was obtained with vinegroon. The black on the half-mask is Fiebings pro dye with floor wax finish.
-
Tandy sells something they call Tanner's Bond double sided tape and it works very well for me in many situations. It comes in a few different widths and is relatively inexpensive. Give it a try, you'll probably find sometime to like about it. https://tandyleather.com/products/2535-650-tanners-bond-adhesive-tape
-
Big Red drill holster
maxdaddy replied to philmb's topic in Gun Holsters, Rifle Slings and Knife Sheathes
That looks great. The holster will outlive the drill for sure. -
Scott... that's very interesting. If it's not a trade secret, which of the ingredients acts as a sealant? I'm going to try my hand at making some beeswax-based conditioner and would like to experiment with the sealant idea as well. Thanks
-
Funky Skull Bag
maxdaddy replied to DebHop's topic in Purses, Wallets, Belts and Miscellaneous Pocket Items
That turned out great! I made the same pattern and afterwards I was found myself wishing I had used another closure type besides the zipper. I really like how you did yours, and may make another and steady your solution. Can you share a few more pictures of it open along with the latch, if any. -
Nice job on the design and the build! Looks great.
-
Thanks for sharing all of that insight. Very interesting.
-
Yes, the splitter is still available.
-
Copy of the favorite wallet
maxdaddy replied to zenhas's topic in Purses, Wallets, Belts and Miscellaneous Pocket Items
He should love the new wallet. Looks great -
My $0.02.... unless your punching and stitching skills are real good, I'd leave it just like it is. If/when the glue ever stops holding, you could punch it then and re-glue/stitch. I'd be afraid of one of my punches not being aligned and ruining the look.
-
Tested Cricut Maker new debossing tool (photos attached)
maxdaddy replied to AmyK's topic in Leatherwork Conversation
I know that this is an old thread, but I just got a Cricut Maker being and this kind of information is very helpful. Thanks @AmyK for putting it together and sharing -
Thanks for sharing those details. I have that splitter and have needed to adjust it for a while now but didn't know where to start.
-
Strawberry Short Cake I-Pad Case
maxdaddy replied to Silverd's topic in Purses, Wallets, Belts and Miscellaneous Pocket Items
Wow, that' a really great design. -
Those letter do look great. I'll give that a try tomorrow after work. My worry would be the accidental touchdown of the alphabet stamp in the wrong spot.
-
nice job. I think it looks great... One of your comments make made literally LOL out loud. I'm at the point in my leather craft journey to REALLY need to learn how to tool leather like that. But at the same time, I also REALLY don't think I would enjoy it.
-
Mouse purse
maxdaddy replied to ironwrx's topic in Purses, Wallets, Belts and Miscellaneous Pocket Items
THat's really cool. I think it needs some little feet though.
.jpeg.90155da9de9e509ddb0f11be8ed3e0d2.jpeg)
.jpeg.2f716892d29cdcf6769abbeefeb9e657.jpeg)

