


dikman
-
Posts
4,828 -
Joined
-
Last visited
Content Type
Profiles
Forums
Events
Blogs
Gallery
Store
Everything posted by dikman
-
Most interesting. No measurements, he just eye-balled everything. That leather sounded pretty hard when he was bevelling the edges!!
-
Doesn't really matter what is used as the clutch is obviously not disengaging completely.
-
Can you identify this Pfaff walking foot?
dikman replied to MrBurns's topic in Leather Sewing Machines
That label on the switch might just be referring to its maximum switching capacity. -
Has the brake got enough tension on it and is the clutch completely disengaging when you take your foot off the pedal?
-
What should I look out for when buying a Durkopp 291?
dikman replied to MrBurns's topic in Leather Sewing Machines
Quite a bit of machinery there! I'm also curious what the more knowledgeable folk on here will advise. Me, I would only have it if someone gave it to me as if something went wrong with it I reckon it could be an expensive nightmare to fix. And if that was the only machine you had and were relying on it...... -
" Try sewing a while with only one hand to guide the work and you'll realise why very few industrial machines were intended to be powered by hand" . When I got my 117 working it seemed like a great idea to fit a handle to the large pulley I fitted, so no motor needed. It didn't take me long to realise that unless I could grow a third hand it wasn't very practical.
-
Chris, it's all good fun...... Brian, maybe you could start a "new" career designing 3D files for those of us who are mentally challenged.
-
I'm not. Unfortunately 3D printing requires a fair bit of effort to sort out, as you're finding out. I suspect that for most it's either too daunting a prospect or they don't have the time. Brian, sorry to hear you've been on the sick list, hope you're on the mend.
-
Very nice, Peter, I like it! I shall file that idea away for future use.
-
Mexican Loop Holster
dikman replied to Forester's topic in Gun Holsters, Rifle Slings and Knife Sheathes
That's a bit different. I like the "floral" design on the front, a very clever use of stamps. What colour is the dye? -
Machine Choice Heavier Than A Juki 1541S
dikman replied to stickandtin's topic in Leather Sewing Machines
There's no hope for you now.......... -
hunting holster belt and ammo case
dikman replied to Samalan's topic in Gun Holsters, Rifle Slings and Knife Sheathes
I'm certainly interested in how you made your template, while my method works I figure there has to be a better way. -
hunting holster belt and ammo case
dikman replied to Samalan's topic in Gun Holsters, Rifle Slings and Knife Sheathes
If you look carefully it's not quite perfect....once you've tried it you know what to look for, but you have to look hard, and to the average casual observer they will never notice. I've done three of them, all hand stitched, and I'm not in a hurry to do any more! I forgot to mention, nice edges on the belt. -
hunting holster belt and ammo case
dikman replied to Samalan's topic in Gun Holsters, Rifle Slings and Knife Sheathes
I've no idea how others do the stitch, but I made a template that covers half the stitch (top half, for example) extending from the pointy end of a curved part to the halfway point of the smaller diamond shape. I (lightly) drew a line down the centre of the belt then worked my way along with the template, alternating top and bottom. It would probably be easier to make a template for the top and bottom together, but this ensured that the top curve matched the bottom. It's still a pain to stitch, though, trying to get the stitches to line up with the pointy bits of the pattern. -
hunting holster belt and ammo case
dikman replied to Samalan's topic in Gun Holsters, Rifle Slings and Knife Sheathes
Very nice, looks quite elegant, BUT.... more info needed, leather weights used, colour, finish etc. We always like to know these things. -
Son-of-a-gun! Just what you wanted, must be Christmas.
-
I had a similar issue when making speed reducers. The only pulleys I could find were on ebay but had a keyway, so I drilled and tapped them for set screws. These were 45mm so pretty easy to do.
-
Dressing up the ugly duckling
dikman replied to Treed's topic in Gun Holsters, Rifle Slings and Knife Sheathes
Damn, that is nice! -
A common "mod" is to cut a piece of picture frame glass the same size as the bed and clamp it on with a couple of spring binder clamps. This prevents wear on the original bed and is easier to clean if using the hair spray or glue stick method to hold the printed item in place. A razor blade scraper can be used to clean the glass, but the downside is (for me) it needs regular checking for bed levelling. Which doesn't matter as I'm getting good at it! And yes, mine has been modified somewhat from the original. It seems the more you learn the more you see needs to be done........ Chris, I just looked up the Ender 3 and found a nice review on it, sounds like a nice machine. The reviewer mentioned this youtube site - It has some basic settings for Cura. It might be of some interest.
-
I have 123D Design, solvespace and FreeCAD, all free programmes. I haven't spent much time on them yet, but I need to figure out which one will do what I want without spending (wasting?) a lot of time on them - if that's possible! I'm also interested in trying to make stamps for tooling. It's a good idea to start printing existing designs first to get familiar with using the beastie. Thingiverse is a good source for all sorts of things. I forgot to ask, are you using a glass bed for printing on?
-
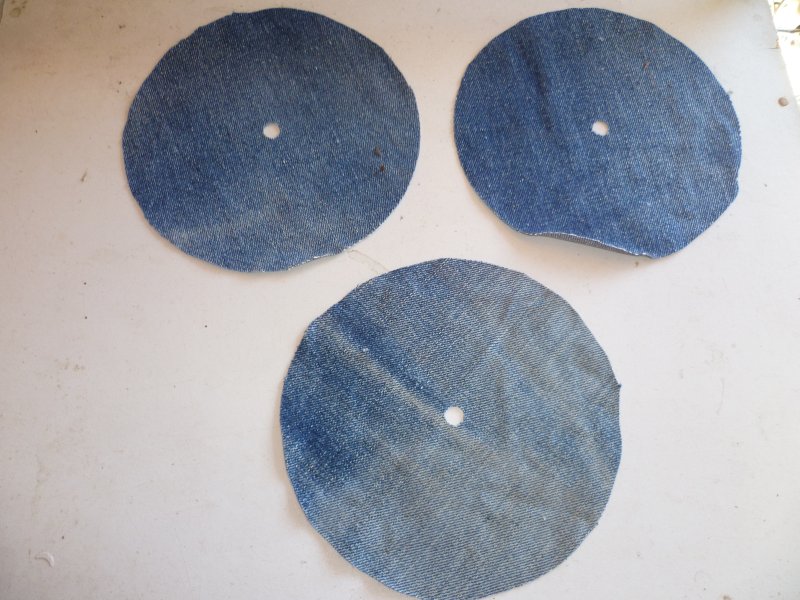
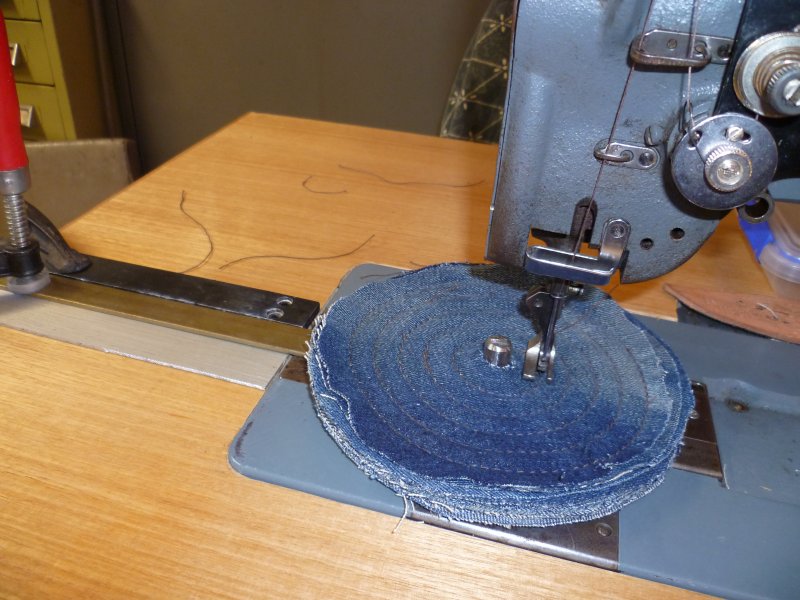
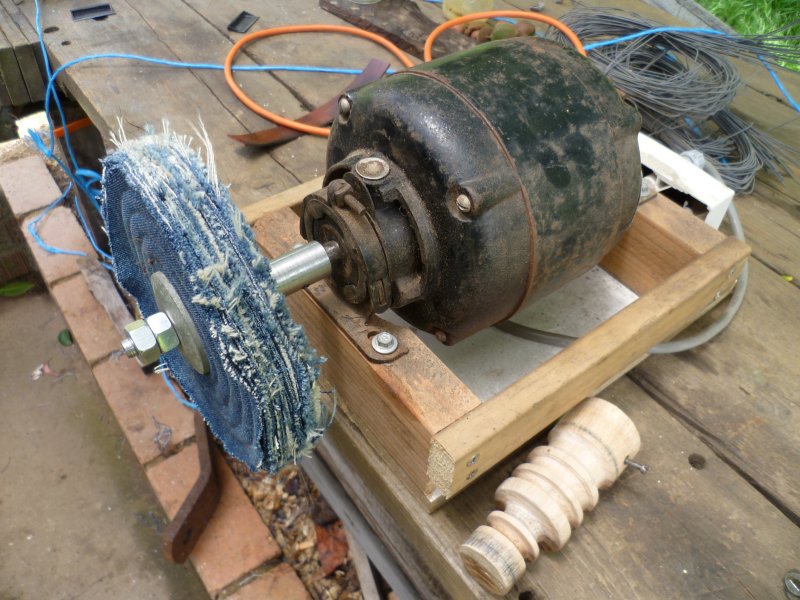
Now that I have a machine (the W117) that can actually sew through 1/2" of stuff, I started thinking. I had a couple of pairs of old denim jeans, so started cutting discs out of them and punching a 3/8" centre hole. I made a jig that would allow them to rotate under the sewing foot and stuffed as many as I could under the feet, then started sewing concentric circles with #138 thread (#69 probably would have been adequate, but I wanted to see how it performed with the heavier thread - it worked well). I ended up with two wheels. I had a motor (1725 rpm) that I fitted with a burnishing wheel so figured that would work well. I turned a suitable arbor down with a 1/2" shaft, threaded on the end. Only one slight problem (!) due to the direction of rotation the nut tends to unscrew itself! Using two nuts to locknut it fixed that. It actually works well, and I made the arbor long enough that I can fit extra wheels on if I stitch up any more. It also has the advantage that I can now fit any sort of wheel (grinding, buffing etc) on the motor as long as it has a 1/2"bore.
-
Tombstone, Johnny Ringo's Holster
dikman replied to Forester's topic in Gun Holsters, Rifle Slings and Knife Sheathes
Government bureaucracies are indeed strange animals, totally bereft of logic, reason and commonsense. In the UK handguns are illegal and yet you can own replicas. Here in Oz we can own (some) handguns albeit for club shooting only and under heavy licencing conditions, BUT replicas are treated the same i.e. a full licence is needed to own one! Which can make it difficult when someone asks you to make a holster for a gun you don't own. -
PLA should be fine (you can now buy PLA+, which is supposed to be a bit tougher). ABS requires higher temps and a heated bed, my attempts so far at making small items with ABS have been mostly unsuccessful - the item tends to lift from the bed part way through. Bigger items are fine. I use Slic3r, although I have tried Cura. I learned to use it through trial and error and lots of googling! I'm not aware of a simple guide to using them (which doesn't mean it's not out there).
-
It depends on the shaft diameter, 1/2" is pretty common but you will have to measure it to make sure. Yes, a larger pulley is all you'll need (and a longer belt). There was a recent post from a member who bought a pulley for a Grizzly lathe that fitted his machine. A word of warning, if you tend to handwheel a lot then be very careful as a pulley will put your fingers right next to the belt!
-
I'm running a 550w on my 335, mind you I have a 45mm pulley on the motor and a 200mm on the head unit! No problems with power, it will go through whatever I can fit under the feet. Personally, I doubt if there's much difference between those two motors, judging by the brochure.