


dikman
-
Posts
4,848 -
Joined
-
Last visited
Content Type
Profiles
Forums
Events
Blogs
Gallery
Store
Everything posted by dikman
-
A Holster and belt
dikman replied to OLDNSLOW's topic in Gun Holsters, Rifle Slings and Knife Sheathes
Mighty purty.....(to use a US colloquialism). -
There you go, Dorothy, talking to Rocky will be of immense value and could save you from buying the wrong thing and hopefully make sure you get the right machine for your needs.
-
Sounds a bit on the high side price-wise (to me, at least), given that it's not even a walking foot (probably asking a lot because of its age, I guess). From the little I could find out about this model it should do what you want, but bear in mind it has a clutch motor and for someone new to industrial machines they can be pretty scary, particularly when you want to sew very slow. I wouldn't mind it myself, only for what it is, but there's no way I'd pay that much for it. I think you'd be better off looking around a bit more and perhaps trying to find a walking foot machine, and if it doesn't have a servo motor then allow for that in the budget too. I reckon you should be able to find better value than that. Have a read of the "stickies" at the top of this section, they should help you to understand these machines a bit more.
-
Singer thread tension slide - part #264527
dikman replied to dikman's topic in Leather Sewing Machines
An interesting story, must have been quite a collection you ended up with. I guess if you ever get bored then sorting and selling them will give you something to do . I should clarify regarding your offer to help me. I've found in the past that some places in the US aren't interested in shipping to Aus, some won't take an Aus credit card (even to ship within the US) and many put ridiculous shipping prices on, presumably to deter buyers. This is why I buy much of my stuff out of China and Hong Kong - prices are good, they take Paypal and Aus credit cards and shipping is generally included, just makes my life easier. This, by the way, is how I got into leatherwork. I needed a particular holster, and I had so much trouble trying to get what I wanted out of the US that I decided to make my own - and now this leatherwork thing is all getting a bit out-of-control!! -
Singer thread tension slide - part #264527
dikman replied to dikman's topic in Leather Sewing Machines
You reckon you've got a W117 in your group? Quite a coincidence, as until I asked about it I couldn't find any mention of that model on the forum. They would appear to be somewhat uncommon, and, in my opinion, pretty useless as they come in standard form!! -
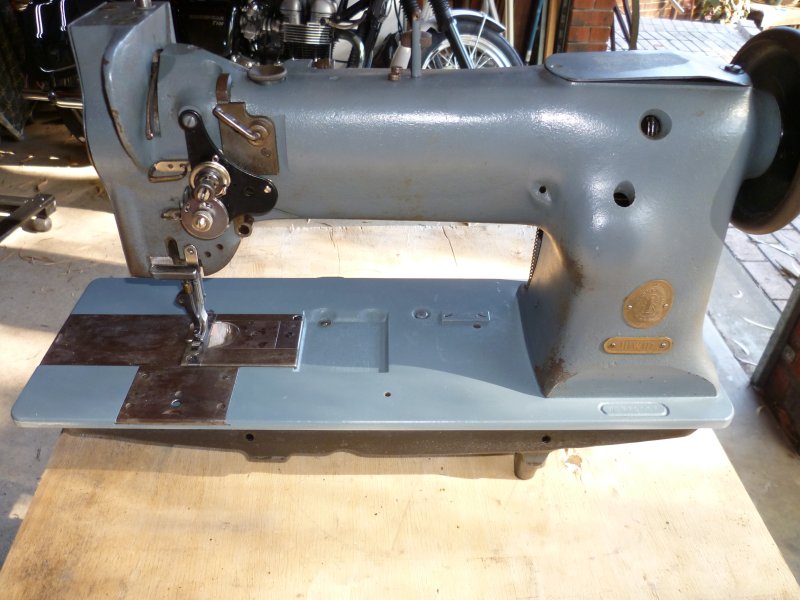
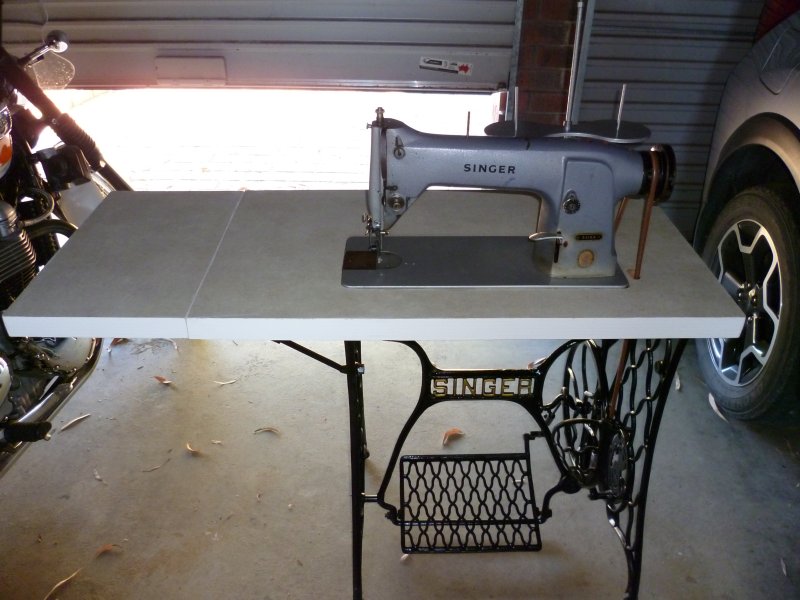
It's cleaned up fairly well. The gray paint on the base is a fraction lighter in colour but close enough (it came from my modelling stuff - I used to make plastic kits) - and is an old Humbrol paint. My airbrush tip is just a little too fine for something this large but it was better than using a bigger spray gun. The metal plates around the needle area were rubbed down with fine wet and dry paper to remove most of the rust, then rubbed with steel wool and coated with a heavy wax. I figure the chances of getting replacement plates for this slightly weird beastie is probably nil and Buckley's so they'll have to do. Now all I need is the tension release slide mentioned in my other thread. Everything else appears to be in pretty good shape internally. I'm toying with the idea of finding/making a suitable handwheel and fitting a handle to turn it into a handcrank machine. It also looks like it might handle #138 thread - maybe.
-
Singer thread tension slide - part #264527
dikman replied to dikman's topic in Leather Sewing Machines
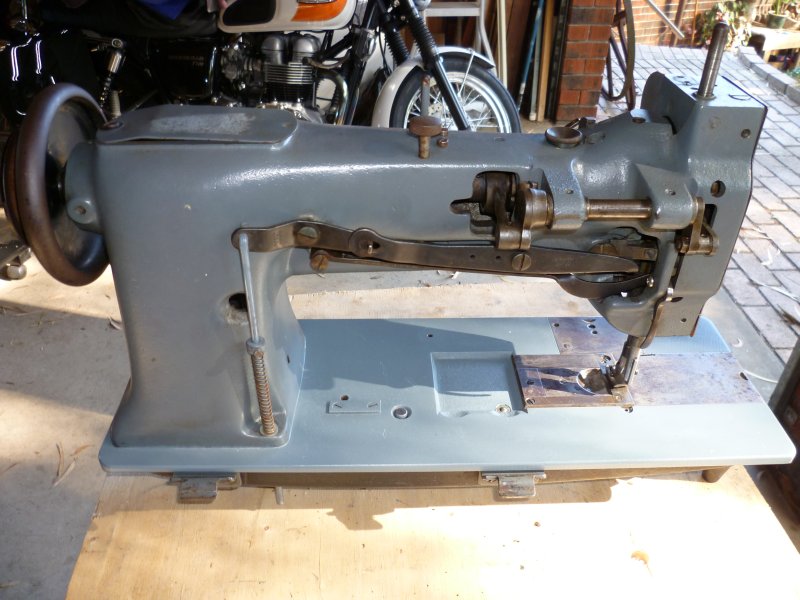
Gregg, thanks for doing the detective work! I knew this particular model has an "automatic tension release", but couldn't figure out how it worked ('cos mine's missing the factory one but had a homemade version fitted). I also wondered about that big arm coming down from the top, now I know what it's for and how it worked! An unusual machine, to say the least. As for the internal release parts, I had already noticed, in the parts list, that these parts aren't fitted to the 117 but are fitted to the 116. I'm making an assumption here that being a 111 class machine there is going to be a commonality of design and parts fitting in many cases. I've already removed all the presser foot pieces and from what I can tell that missing piece should just drop straight in. At the moment the only way to release the thread tension is to push down on the arm at the back that goes to the knee lift linkage. Kellyblues, thanks for the kind offer, I'll keep it as a last resort (my past experience at doing it that way has had "difficulties"). -
ZigZag beat me to it! Here in li'l old Adelaide pure wool felt is very hard to find, every haberdashery/millinery/material shop I went to had felt, yes, but it's all synthetic stuff! One possible (cheap) source is second-hand shops, if you can pick up an old felt hat it may be usable (that's what I did).
-
Singer thread tension slide - part #264527
dikman replied to dikman's topic in Leather Sewing Machines
I think it is, I'll send him an email. -
Singer thread tension slide - part #264527
dikman replied to dikman's topic in Leather Sewing Machines
Saw that one, unfortunately he (she?) doesn't ship to Australia! -
Can't find one. I just spent the better part of a day trying to get my 111W117 thread tension disc to release - the 117 doesn't come with a "normal" tension setup as it has an "automatic tension release" (whatever that is). I fitted a standard tension assembly but after fitting a suitable pin I found that every time the foot lifted during normal operation it released the tension disc!! Eventually, after viewing one of Uwe's excellent videos I realised this part was missing - 'cos it isn't fitted on this model!! Anyone know of a source (preferably cheap) for this part? If not I'll have to make one, I guess. Other than this bit the rest of it appears to be in pretty good condition and looks like it's basically an early version of a 111W152/153.
-
"American" big iron machine - anyone ever seen one of these?
dikman replied to Cantab91's topic in Leather Sewing Machines
Yup, should never have got this far and is most disappointing. -
"American" big iron machine - anyone ever seen one of these?
dikman replied to Cantab91's topic in Leather Sewing Machines
Or an anchor for a big ship....... -
"American" big iron machine - anyone ever seen one of these?
dikman replied to Cantab91's topic in Leather Sewing Machines
Make sure your living room has a concrete floor!! -
That big lever below the stitch adjuster wheel, just push it down (same as most lever-operated reverse).
-
Now that is nice! I haven't seen a post bed walking foot before. Other than the paint being worn off the baseplate it looks to be in very good condition. I've given up using my Singer post bed (roller wheel) because it's too easy to deflect the needles and break them! A walking foot, however, would be real nice to have...
-
Suzelle, that one has reverse on it. The machine was free (!), someone was giving it away, it cost me $25 for a replacement shuttle race (very worn), a can of paint for the baseplate and about $17, I think, for the roller wheel. Haven't sewn much with it yet, I only got it 'cos it was free .
-
Buried somewhere in that vast warehouse, maybe?
-
Commercial Singer Treadle (motorized) w/96-10 Head
dikman replied to suzelle's topic in Leather Sewing Machines
Nice one, Suzelle, at that price I would have grabbed it just for the base! I'm getting a bit scared because I'm starting to look at treadle bases but I've run out of room!! -
-
Yep, fit a speed reducer, depending on the size of the pulleys it will give you much slower speed and increased torque. Plus fit the smallest pulley you can to the motor, it will all help.
-
Good point in removing the belt. Then start/stop the motor a few times and see which way it turns - always the same way or is it inconsistent?
-
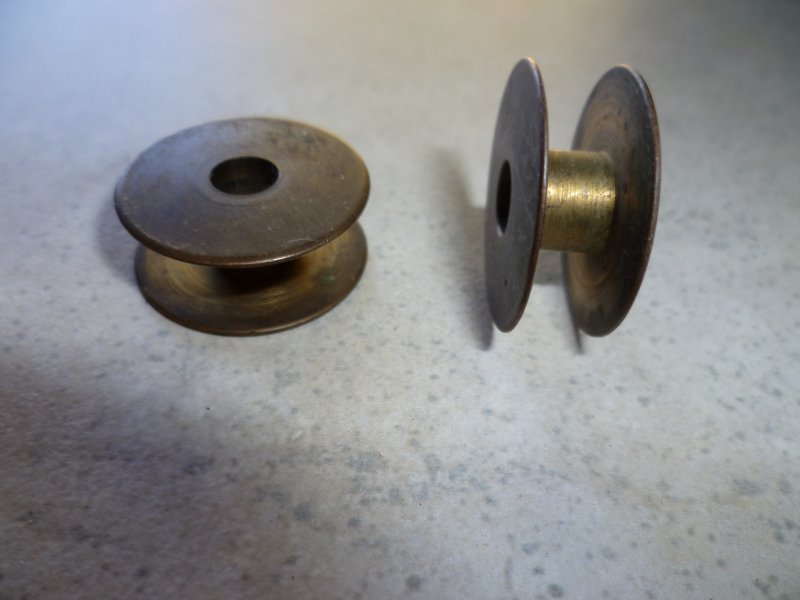
Having finished off the treadle, I had a quick look at the machine itself and noticed there is a lot of backwards/forwards free play when turning the handwheel, so I suspect it may be pretty worn somewhere. I think I'll put this aside for a while as it's not something I need. One interesting (to me) thing I found in the bits that came with it is a heap of bobbins, all made of brass! They measure 15/16" diameter x 0.37" wide and unfortunately don't match any other machine that I have - but they do look nice.
-
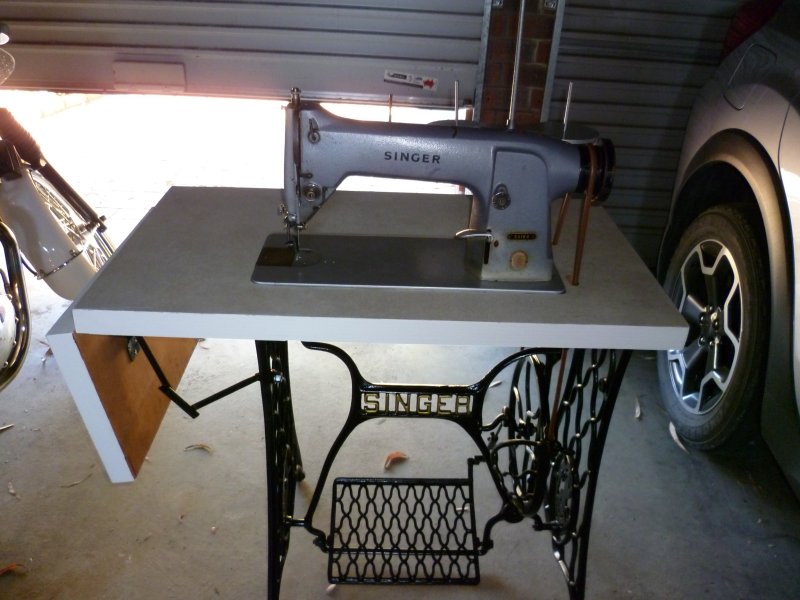
This is pretty well the finished product (other than making the bearers to fit under the little wheels, may take some time). Now I just have to learn to treadle!!
-
Hi CSM, as Uwe said an AC (Alternating Current which is what normal mains power is) electric motor can be difficult to start spinning without help (and can start in either direction). The usual way to do this is with a separate start winding or a capacitor (electrical component) which assists it to start (and in the right direction). My old Singer motor, which is at least as old as yours, has a large switch box with a capacitor inside, and while it still works I won't use it. Modern motors often have the capacitor mounted in the base or in a housing attached to the motor. I recently had a problem with a belt grinder, it was slow starting and I needed to spin it by hand to help it get up to speed. I replaced the capacitor and all was well. In your case, however, I agree with Uwe in that I wouldn't mess around with a motor that old (unless you know exactly what you're doing). Replace it with a servo, it will make sewing so much easier. I recently bought an old Singer that had an equally old original Singer motor. I took one look at it and junked it, I didn't even try it to see if it would work! It's one thing to restore an old sewing machine, it's another to mess around with old, and potentially lethal, motors. I hope this helps you? (I do have a tendency to waffle a bit).