Dwight
-
Posts
5,257 -
Joined
-
Last visited
Content Type
Profiles
Forums
Events
Blogs
Gallery
Store
Everything posted by Dwight
-
And here are the ones I was trying to design the other day when I saw your post, . . . May God bless, Dwight
-

Carved/tooled Gunbelts
Dwight replied to Josh Ashman's topic in Gun Holsters, Rifle Slings and Knife Sheathes
You are a credit to the profession. May God bless, Dwight -
Go to my website, . . . on the sample page, . . . bottom center. It is actually my favorite of all I have ever made. May God bless, Dwight
-
Like above, I don't do a lot of these, . . . but I have done several. I make the tip fit snug, type snug, . . . as oposed to loose type snug. It has to be forced in with both hands. I use my razor knives, . . . a belt sander, . . . and skiving tool to get it this way. The key I have found is in the trimming, . . . take your time, . . . be very careful how you cut the tip so it goes in and fits as near perfect as possible. The one thing that will destroy your good job is if the tip is loose. Then it'll wiggle and wrangle till it comes off. I don't drill mine, . . . I just tighten tht screw down as tight as I can with my small tipped screwdriver, . . . then use my Dremel tool to flatten the back and remove any burrs that could scratch the front of the belt. It's worked so far. May God bless, Dwight
-
First Holster Rig
Dwight replied to keplerts's topic in Gun Holsters, Rifle Slings and Knife Sheathes
I would think that Will would be proud of your iteration of his pattern. I only saw one place where I would have done any serious changing, . . . In the picture of the buckle, . . . the belt keeper that goes in back was fastened with 4 copper rivets. I always actually sew mine into the belt itself, because I only make lined belts. The top of the keeper is sewn in with my machine about an inch after I make that turn from end to main run on the belt, . . . and I machine sew all the way around to the other end of the keeper. The second end is hand sewn. The keeper is sewn in between the two layers of the belt. Not to sound overly critical, . . . just pointing out a way to make your final product look a bit cleaner. But all in all, . . . from what my 68 year old eyes could make out, . . . looks good. May God bless, Dwight -
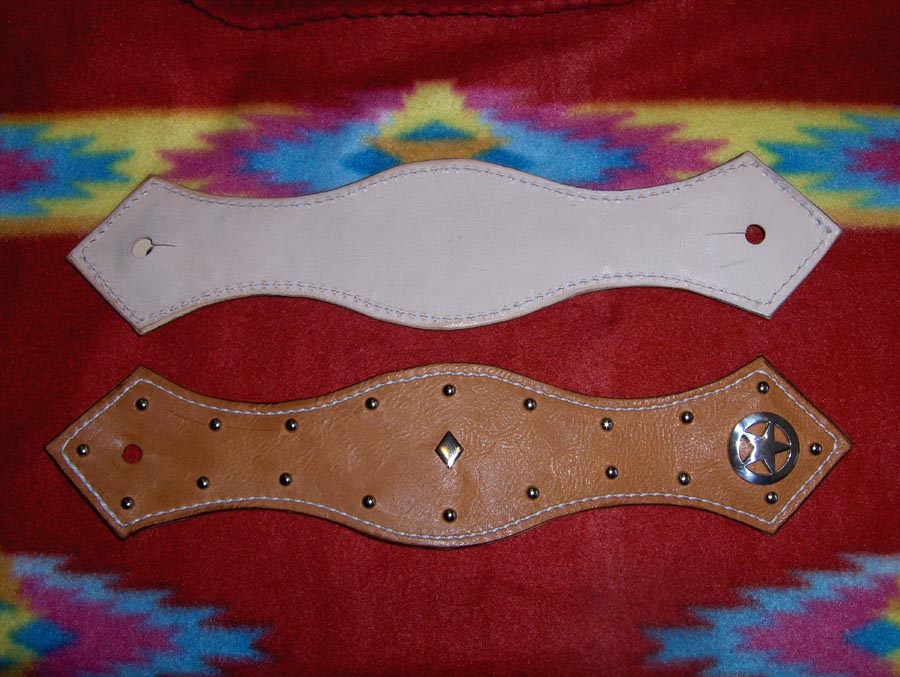
If you have any trouble putting them together, . . . just holler. I kinda laughed earlier today when I saw your post, . . . I was in the middle of trying to come up with a "different" design for a new pair of straps for that one pair of boots. I have one of them made, It is sitting on my sewing table right now, . . . gotta take and trim the edges tomorrow, . . . made it out of two pieces of 3/4 oz all contact cemented together and sewn. They're kinda blingy, . . . spots, a diamond, and a Tx star all are part of the design. I'm also taking a page out of an old Western I once read, . . . cowboy drilled out two silver dollars, . . . used them for the rowels in his spurs, . . . I'm going to do the same, . . . but I'm using the sandwiched dollars, . . . I'd have to sit up and guard em if they were real "silver" dollar rowels. Anyway, . . . have fun, . . . this is one of the items I do really enjoy making. I guess it is because they are done so quickly, . . . don't have a chance to sit and fret about "did I do it right????" May God bless, Dwight
-
Let Me Know What You Guy's Think
Dwight replied to Hollingsworth5107's topic in Gun Holsters, Rifle Slings and Knife Sheathes
If John Wayne would have seen it, . . . he'd a probably said, . . . "Ya done good, pilgrim". May God bless, Dwight -
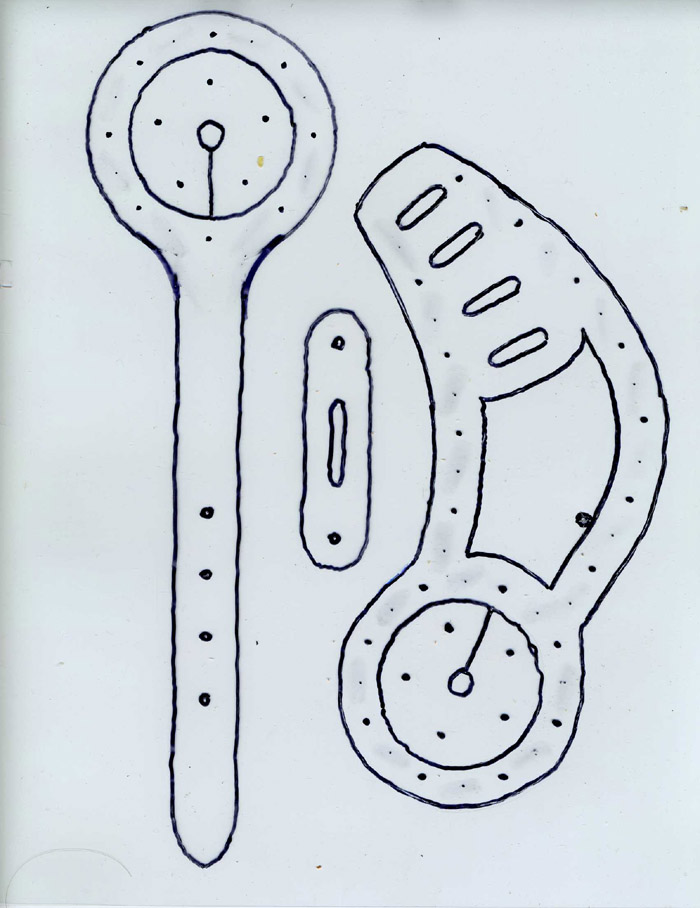
This is my version of a pattern I use. Full size, . . . for my boots, . . . this needs to be printed on an 8 1/2 by 11 sheet of paper. It will then be full size, . . . no needing to tweek it. You will have to cut this out, . . . and play with it to see if the off side strap is long enough for your boots. I do have one pair of Red Wings that this pattern will not fit. May God bless, Dwight
-
JWP, . . . for your pictures, . . . resize them to something like 800 x 600, . . . save them as a jpg not a jpeg. That should work. May God bless, Dwight
-
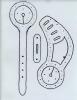
I needed that rounding effect on my holsters and belts, . . . so necessity being the mother of invention, . . . I "fixed" my edger. First, . . . it is a #4 edger, purchased at Tandy's. Second, . . . I took a piece of (I think 3/16ths) round wooden dowel and impregnated it with valve grinding compound. Using very small nails only at each end, . . . I nailed it to a larger piece of 1 x 4. Third, . . . I pulled that edger across that dowel a couple hundred times (seemed like it any way). It rounded the underside of my edger. Fourth, . . . I made a board with a piece of leather and "edged" it with my newly reformed edger. The leather sticks up between two pieces of wood about 3/16ths of an inch, . . . and is heavily impregnated with jeweler's rouge. Fifth, . . . I use that board & leather to resharpen my "rounded" edger. Anyway, . . . that's how I did it. May God bless, Dwight
-
My Newest Holster Job
Dwight replied to Hillbilly tim's topic in Gun Holsters, Rifle Slings and Knife Sheathes
Looks good from here, . . . May God bless, Dwight -
Best Machine For Sewing Cuts/vests.
Dwight replied to EMCSeaDog's topic in Motorcycles and Biker Gear
Seadog, . . . I have two machines, . . . and seem to have some of your same problems. One machine (Tippmann Boss) is hand operated, . . . so it can never speed away from me, . . . but it simply will not do some of the intricate, thin leather things I would sometimes like to mess with. Others may be different, . . . but mine just doesn't like thin leather work. OTOH, . . . my little Singer electric (have no idea of model number) will sew the thin stuff, . . . but you need to be awful careful with the foot switch. Just one sneeze or cough at the wrong time, . . . you've got a stitch line right down the middle of your project. I have been fully tempted though, . . . to try out the walking foot machine they have at Harbor Freight. It was in the $750 range last time I looked, . . . and the manager of my local store told me he'd order it, . . . I could take it home, . . . use it for up to 30 days, . . . if I couldn't get it to do what I wanted, . . . he would take it back. I would be very much interested if any of our associates have used the Harbor Freight machine, . . . and how it worked out for them. May God bless, Dwight -
How Do I Make This Sander/polisher?
Dwight replied to NewYorkerInSydney's topic in How Do I Do That?
That looks like one of those "winter projects" for when one just has to do a little welding, cutting, woodworking, . . . just to keep in touch. May God bless, Dwight -
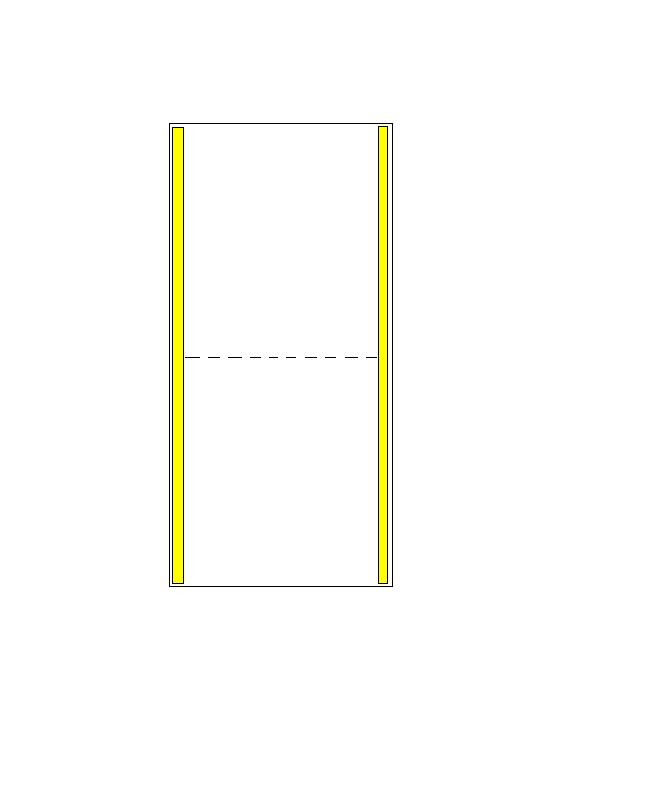
The vinyl is to use to make the bag. Fold it in half like the drawing, . . . after you have a 2 inch wide path of weldwood contact cement down each long side. Their vinly I think was 45 inches wide, . . . I bought a 2/3 of a yard piece (24 inches wide) when the bag was folded and made, . . . it was basically a 23 by 24 bag. The $15 was for the bag valve, . . . I cannot tell you the number of times I've used mine, . . . no problems so far. Forgot to tell you there is one problem, . . . getting the pump adapted to the hose for the bag can be a headache. I needed mine to turn 90 degrees off the pump and be able to come apart readily, . . . the brass fittings cost me more than the bag did. Anyway, . . . make your bag, . . . have fun. May God bless, Dwight

-
Sounds like a good one to me, . . . my press, the ram comes out the front with 4 screws, . . . would be neat to have the flat foot on one end, . . . drill chuck on the other. Drill one end, . . . tap it for the threaded stud to hold your chuck, . . . you're good to go. May God bless, Dwight
-
Another thing you can do, . . . I've only done it once, . . . boil parafin wax, . . . dunk it in the boiling parafin, . . . leave it for just a few seconds, you don't want to cook it, . . . shake all the loose drops off it when you pull it out, . . . hang it up on a string to cool and harden, . . . leave it for at least several hours so it colls through and through, . . . UGH, is it hard. I was told that some ancients used this technique to mold their leather "sunday go to meeting" personal, fancy, armor. Got it all cut, trimmed and ready, . . . dunked it in liquid beeswax, . . . actually laid it on the "owner" and formed it to his body. Not something I would like to do, . . . but the one item I did was seriously hard being parafin infused as it was. May God bless, Dwight
-
Snap Loop Question
Dwight replied to shooter55's topic in Gun Holsters, Rifle Slings and Knife Sheathes
Hey, Shooter, . . . if you look on my website, . . . the holster in the upper left hand corner of the sample work page, . . . that IS my carry holster. I have others, . . . but this is the 95% most likely one. When I make these, . . . during the dye process, . . . I use a small pine board to simulate the 1 1/2 inch belt most folk will use, . . . while the leather is moist with the dye, . . . I fold, bend, and mold those straps to the general shape they will be when the item is done. Mind you, . . . the female part of the snap is not on the strap, . . . that is the last thing I do, . . . so they "spring" back some after molding. After the dye is dry, . . . generally a good 24 hours later, . . . I apply the resolene 50/50 mixture, . . . and I like the end product. The single downfall to Resolene, . . . it does like to wrinkle, . . . but as the kids say, . . . "ain't to biggee" ! Hope this helps, . . . whereabouts in Buckeye land are you? I'm within 10 miles of Marion. May God bless, Dwight -
I do it on a custom basis (what few I do), . . . take a searmstress tape measure, . . . put it in the belt loops, . . . measure and note where they should be, . . . put them there. And the one pair of jeans that she has, . . . will probably be different from some of the others, . . . and if she wears guy's jeans, . . . that is different too. Good luck. May God bless, Dwight
-
Weldwood contact cement from the hardware or lumber store. Much better product (IMHO). I like the gel, especially for belts, . . . I get a uniform application with it, . . . sometimes get puddles with the liquid. May God bless, Dwight
-
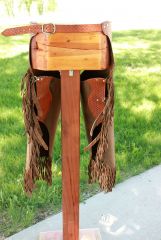 I hope you didn't hear me laughing when I first saw old Sam on these chinks, . . . caught me off guard, . . . but I needed to get my heart started today, . . . so thanks. Just a curious question: I see some type of strap hanging down on each side (3 of them per side) that look like little belts. I've never made chinks, . . . need to make a pair for a young lady cowgirl, . . . and for the life of me, . . . cannot come up with the function / need of those straps. Would you care to enlighten me? I don't know if these threads transfer, so if you don't mind, . . . send me a PM on the answer. BTW, . . . they are beautiful, . . . you are a credit to the leather working trade. May God bless, Dwight
 -
Belt Clips Question
Dwight replied to Hillbilly tim's topic in Gun Holsters, Rifle Slings and Knife Sheathes
Tim, . . . most spring clips will open up and not be as tight, . . . but in just about every case I've ever seen, . . . it was because the owner/wearer pulled too hard on the opening end. The will not tolerate constant abuse. But if you do get one that is pulled out too far, . . . put the closed end in a small "C" clamp, . . . tighten down slowly, . . . check it often, . . . and you can usually pull them back into their proper "springyness". There are also Kydex clips available, . . . but I don't know where. I'm not a "plastic fantastic" lover, . . . so I don't use it, . . . but if you contact the suppliers who advertise on here, . . . I'd imagine at least one or two of them have the Kydex clips. There are too many guys using them out there for all to be making their own and they look so much alike. May God bless, Dwight -
Embossing Two Numbers At Once Into Leather Belt Straps
Dwight replied to kevturbo's topic in How Do I Do That?
Kevin, . . . I used to work in a factory, . . . and we were all the time making "jigs" to do a specific / certain problem. This is a perfect candidate for that type work. The one I would envision is like this little drawing, . . . two retangular guides to position the belt, . . . a block above it made from small pieces, . . . with square holes for the stamps. Don't make it out of aluminum, . . . it will over time begin to leave a greyish color on some of the leather it touches. Use steel, . . . paint it with a good spray paint, . . . and you should be good to go. You can tack weld the pieces together or solder them, . . . since there is no real stress on them, . . . either should work. May God bless, Dwight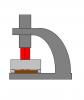
-
Belt Clips Question
Dwight replied to Hillbilly tim's topic in Gun Holsters, Rifle Slings and Knife Sheathes
Tandy Leather Factory, . . . if you are using only one clip use their number 1239, . . . if you are using two (one on each side) use their number 1240. Those are the ones I use. May God bless, Dwight -
Embossing Two Numbers At Once Into Leather Belt Straps
Dwight replied to kevturbo's topic in How Do I Do That?
To keep them lined up, . . . put a gear driven clamp around them, . . . put the clamp on the end of a stick, . . . pull down on the arbor press, . . . done !!! May God bless, Dwight -
I did a similar one for a full size 1911, . . . they are a challenge. Good job on the SP, . . . I like it. May God bless, Dwight