Dwight
-
Posts
5,247 -
Joined
-
Last visited
Content Type
Profiles
Forums
Events
Blogs
Gallery
Store
Everything posted by Dwight
-
I assume you want to fold the edges over the white portion of the face of the Samsung case . . . or at least enough to hold it in the case. If it were me . . . I'd find a piece of PVC or similar plastic . . . slightly thinner than the tablet . . . say may 30 or 40 thousandths thinner . . . and I'd cut it a half inch short of the length of the tablet . . . and only 2/3 or 3/4 as wide. I'd then take a router and round the edges to match that of the Samsung. THEN . . . very carefully cut the leather so it lays a good 1/4 inch over the tablet . . . and cut the corners so they match up in a nice 45 deg angle at each corner. THEN . . . very carefully wet the leather (that 1/4 inch plus a tad) . . . with 135 deg water . . . working one edge at a time . . . then the top . . . the other side . . . last the bottom . . . I'd work it over with a flat plastic rod . . . until it went over and stayed over. I'd work it until I got all 4 sides done . . . then put it under a lamp with a thermometer . . . don't let it get over 140 degrees . . . but heat dry it . . . Then all you do is carefully dye and finish . . . and you will have a pretty case. Use a light dab of glue or contact cement to pull and keep the corners together . . . and then be very careful with it. You'll have a case like no other. I started to do that with my Samsung Note 8 . . . but I am Mr. Fumblefingers . . . and I bit the bullet and bought a bouncy rubber case for it so I didn't have to pop for a new glass face for it. Post pics when you get it done . . . May God bless, Dwight
-

Lined Loop Holster for 5" 1911
Dwight replied to Josh Ashman's topic in Gun Holsters, Rifle Slings and Knife Sheathes
You are a definite credit to the leather working industry . . . May God bless, Dwight -
I have some fairly rigid white foam . . . cut a round hole in it . . . stuck it down in there. Took all of 15 seconds . . . the solution will outlast me . . . by decades . . . unless someone comes in after I'm worm food and tosses it. Or cut the bottom off a long skinny pill jar . . . screw the lid to a board . . . put the bottle down into the lid . . . drop the skiver into the bottle. . . done. May God bless, Dwight
-
As always . . . you do beautiful work Bruce . . . I still crack up at your tag line about squatting with spurs on . . . May God bless, Dwight
-
How do I splice the suede lining on a western gun belt?
Dwight replied to Chick41's topic in How Do I Do That?
Both Tandy Leather factory and Weaver Leather in Berlin, Ohio . . . they accept credit card orders . . . I've never gotten a bad piece of leather from Weaver . . . Tandy leather can sometimes be just not quite what I was looking for . . . but I can usually make it work. They both sell sides . . . as well as ST leather in St. Louis. I've not dealt with them in a few years . . . but would guess they are still in business . . . see them mentioned from time to time. May God bless, Dwight -
How do I splice the suede lining on a western gun belt?
Dwight replied to Chick41's topic in How Do I Do That?
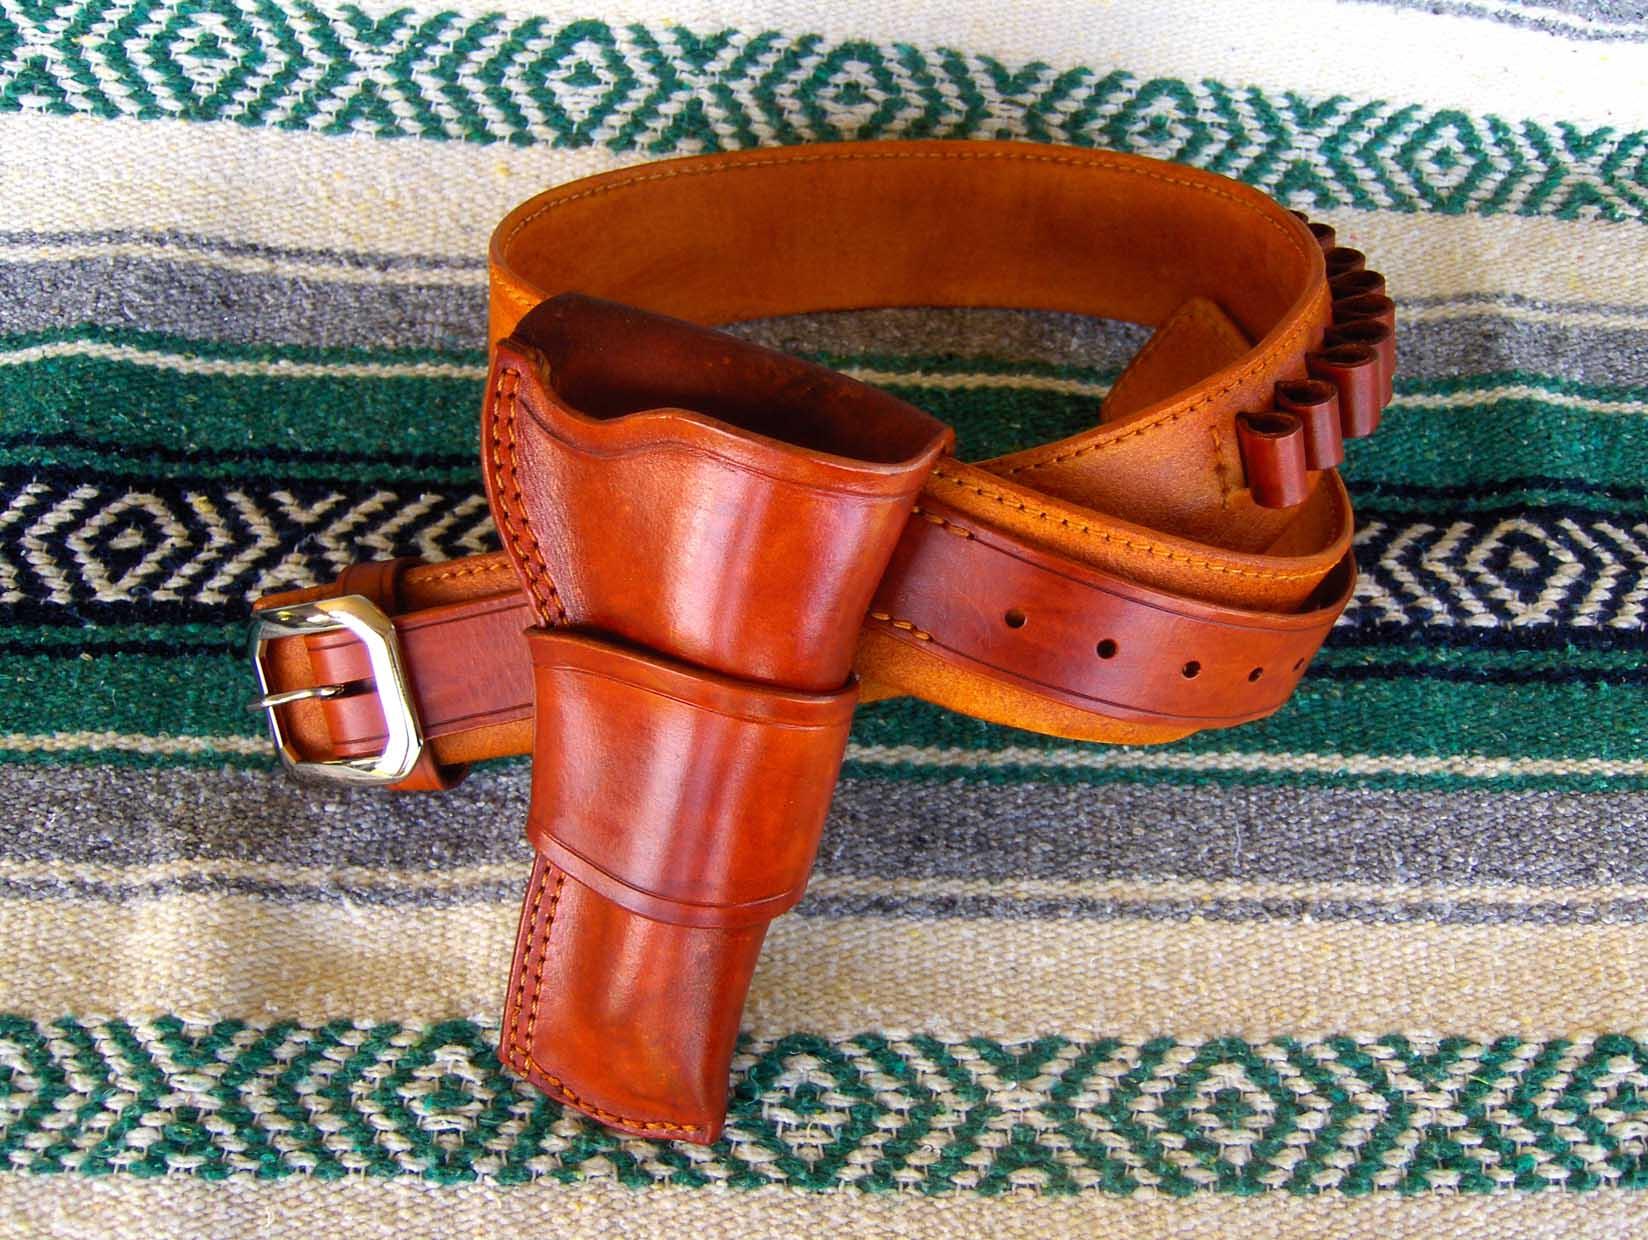
I've done some pretty big gun belts (one was a 53 when he ordered it . . . 56 when he came to pick it up 6 weeks later) lol........... But I've never had to splice the outside or the liner. Just buy leather that is big enough . . . cures that problem. Double shoulders are fine for the holsters . . . use side leather for the belts . . . I tend to try to use the higher up leather for the outside piece . . . line it with the lower leather down near the belly. Don't really understand your glue problem . . . if you use contact cement . . . they go together right now . . . it is done . . . trim and sand the edges . . . stitch it and you have a belt. May God bless, Dwight

-
Building my first holster
Dwight replied to kiwican's topic in Gun Holsters, Rifle Slings and Knife Sheathes
Forget the vacuum sealer . . . they don't pull the vacuum this little guy will. https://www.harborfreight.com/25-cfm-vacuum-pump-61245.html May God bless, Dwight -
Building my first holster
Dwight replied to kiwican's topic in Gun Holsters, Rifle Slings and Knife Sheathes
As is easily seen in the pictures earlier in this thread . . . pancakes I make are generally almost flat backed. They ride well . . . are super comfortable . . . make for both easy drawing and for easy re-holstering . . . I make the front first . . . by cutting a piece of leather that is generally the right size . . . but somewhat bigger. If I'm putting on a front strengthening piece . . . it goes on first . . . sometimes it is tooled or otherwise decorated . . . that is done first . . . then glued and sewn in place. Wet the leather . . . lay it on the gun . . . place the gun on a white plastic cutting board . . . into the vacuum bag . . . do any special molding that is necessary or desired . . . and my front is "formed" so to speak. Hang it up to dry in my oven box at 135 to 140 degrees. Next day . . . finish cutting and trimming the front so it gets the final shape. Lay it down on the blank leather with the gun in it . . . trace the outside . . . adding a sweat shield (if so desired) . . . cut it out . . . glue it to the front . . . sand the edges . . . bevel the inside of the holster mouth and the toe . . . Get the back wet . . . insert the gun . . . using thumb pressure . . . do a bit of molding such as you see above in the pictures. It really isn't much . . . but it helps in the retention. Again . . . into the oven box . . . same temp . . . dry the rascal. Give it a light coat of neatsfoot oil . . . ONLY on the outside . . . hair side of the leather. . . . allow it to dry overnight hanging in your shop (at least 16 hours). Dip dye the whole thing . . . and let is set for about 15 minutes . . . carefully touch up any boogered up spots on the front panel if you carved / stamped / traced anything on there. Back in the oven until it is DRY. Put the gun or gun mold in it . . . and buff it like you are trying to shine up an old bowling ball. Sew it . . . and pull your stitches up TIGHT to the molded edges. From there it is finish the beveling . . . dress the edges . . . add final finish coat(s) . . . you are done. That is my way of making pancake holsters . . . May God bless, Dwight -
Building my first holster
Dwight replied to kiwican's topic in Gun Holsters, Rifle Slings and Knife Sheathes
You're welcome . . . make sure to show us what you came up with. May God bless, Dwight -
Building my first holster
Dwight replied to kiwican's topic in Gun Holsters, Rifle Slings and Knife Sheathes
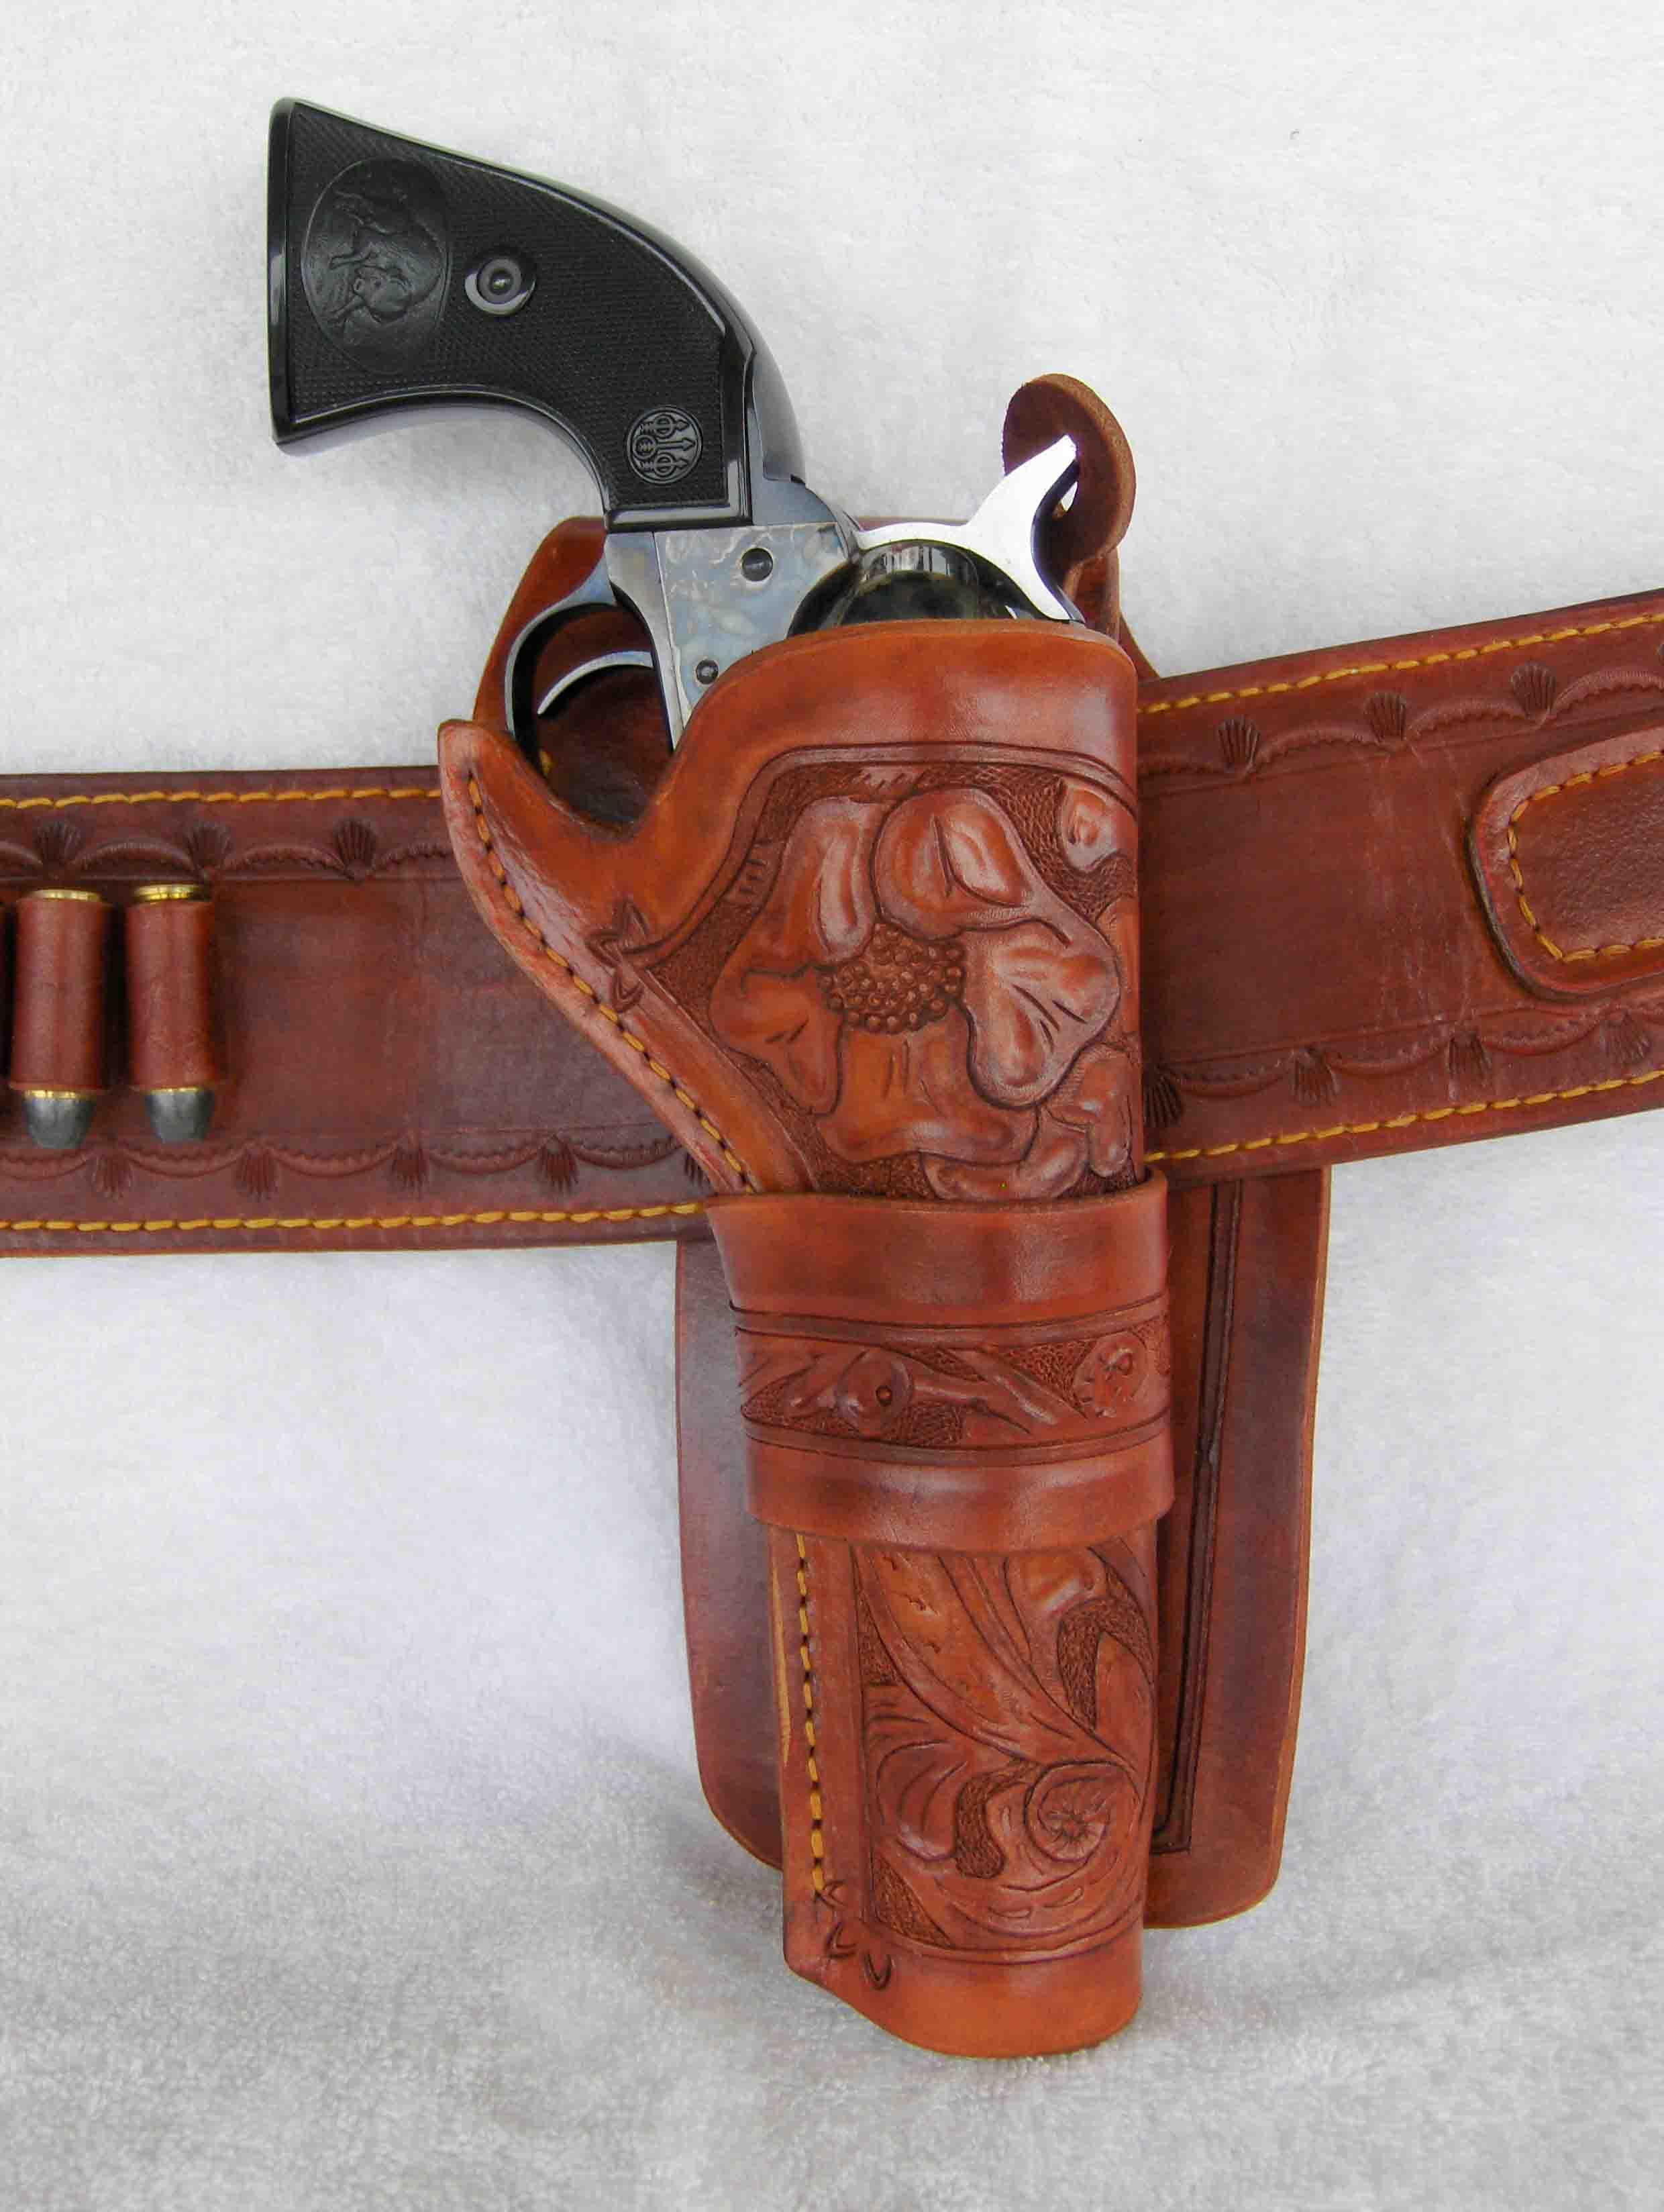
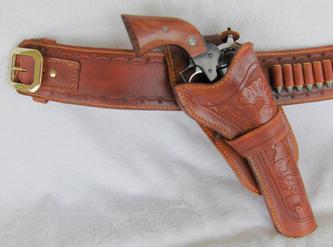
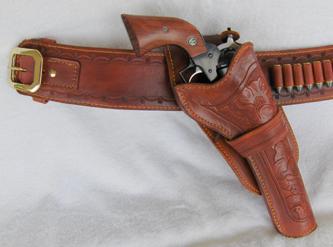
On a pancake with no suicide strap or thumb break . . . stiffener is a good idea. Over time, the holster will tend to loosen up . . . the stiffener stretches that time out a bit. When you go to do the wet mold . . . use water in the neighborhood of 135 deg F . . . and if you heat dry it (not over 140 deg F) it will also become harder. I have a wooden box with light bulbs in the bottom . . . works as my oven . . . they get right real rigid that way. Also . . . pull those stitches in tight to the gun. Once molded, dyed, dried, and finished . . . wearing it a couple days will loosen up any "extra" tightness from the stitches . . . so get close. Here are some pics of a typical one I make . . . owner wanted black wings on this one. May God bless, Dwight


-
Resolene will seal it and it won't rub off any more . . . . at least where you will notice it. It will rub off, . . . but in incredibly small amounts . . . you'll never know when it happens. Takes a couple coats . . . thin it 50/50 with tap water. May God bless, Dwight
-
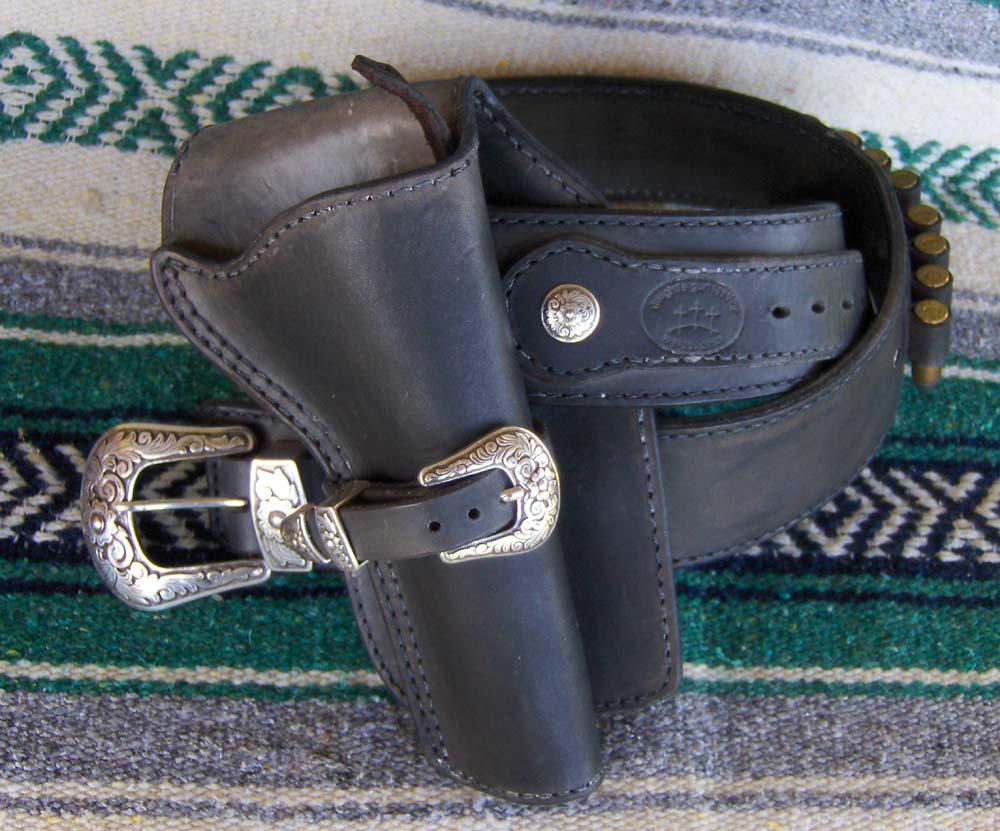
Belt, Holster, Mag pouch set
Dwight replied to Hildebrand's topic in Gun Holsters, Rifle Slings and Knife Sheathes
Looks good to me.......... May God bless, Dwight -
That wasn't the question . . . did you BUFF the item after it dried??? There are a few dyes . . . few and far between . . . that do not need a serious buffing after they dry. The rule of thumb is sorta . . . the darker the dye . . . the more you buff . . . and if you use USMC Black . . . you will never buff off all of the loose pigment. It is the loose pigment that is giving you the problem. Take a white terry cloth wash cloth from your wife's stash . . . don't get caught . . . lay down whatever you have made . . . and buff that thing like you are trying to burnish a brass bell. Then . . . put the next coats of laquer on with a brush . . . preferably a cheap bristle brush like the 50 cent ones you get at Harbor Freight. You will probably have your problem cured by then. May God bless, Dwight
-
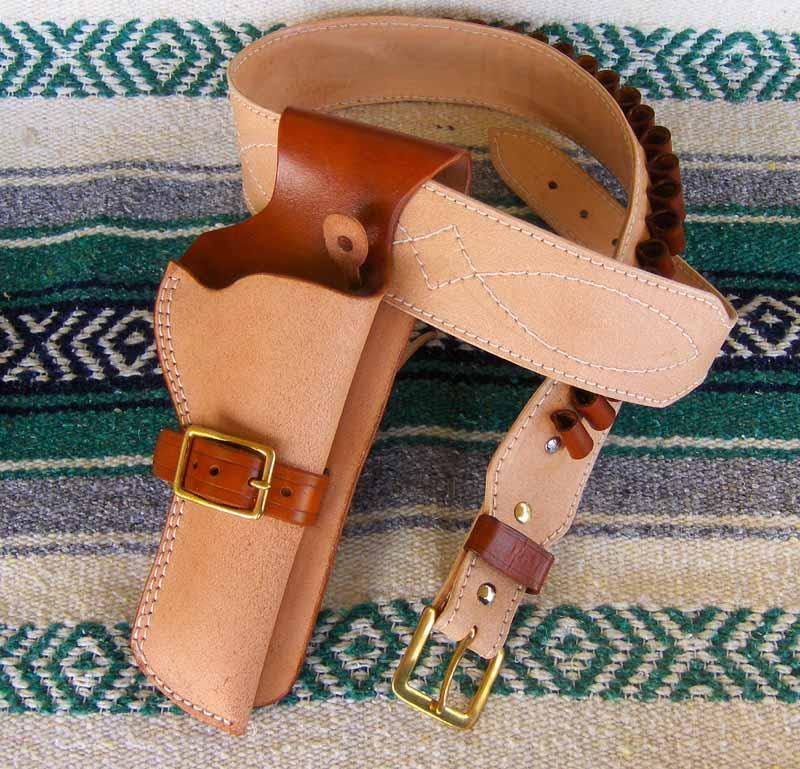
Holster Liner Material
Dwight replied to DuqQuaid's topic in Gun Holsters, Rifle Slings and Knife Sheathes
Like blue62 . . . +1 on the veg tan leather liner. Generally if I'm lining a holster . . . I cut out my outside piece . . . flip the rest of my leather over . . . cut out the liner . . . put the two together with contact cement . . . sand the edges smooth . . . and proceed with my leather holster making. I generally use 6/7 oz for both the outside and the liner. John Bianchi teaches that technique . . . and he has probably made more holsters than any 20 you can find on this forum all put together . . . I learned from his videos. The other reason to leave deer skin . . . pig skin . . . etc out of your holsters is they absorb and suck the oil off your gun much worse than veg tan . . . and as mentioned earlier . . . will also become a repository for every last piece of sand, dust, dirt, and other garbage . . . in addition to being softer than veg tan . . . and will mush up, cut, and become ugly . . . very quick. These are some I've made. . . . all are double leather . . . 6/7 oz . . . most where both pieces are cut from the same hide. . . next to each other. The only time I break that rule above . . . I put suede as a liner on my trucker holsters that basically are a chest holster for hunting. The gun is never in the suede long enough to get chrome salts on it that will hurt it . . . and the suede makes drawing it just a tad more quiet than the veg tan. Animals have very sensitive hearing. . . so I do that only for my hunting customers. May God bless, Dwight
-
Unless someone had more definitive knowledge . . . my guess is contact cement. It IS the product of choice for me when I do anything similar. AND . . . it is a rather unique product . . . but I'm not sold on that plastic case . . . the rubber case I have extends up around the sides . . . not sure what protection these cases provide if the phone would be dropped on concrete and land on its edge. Personally . . . while I like the esthetic properties . . . but not the practical application. May God bless, Dwight
-
How about tossing us a picture or two . . . make sure what we are discussing. May God bless, Dwight
-

-
I made an envelope from some thick vinyl . . . hooked up a vacuum pump . . . I slip the holster with the gun in it on a plastic cutting board . . . slide it in the bag . . . turn on the pump . . . and watch the magic. Depending on how detailed I want it . . . sometimes I'll turn off the pump . . . let air back in the bag . . . reposition the holster or sheath or case . . . hit the pump again and mold it while it is in the vinyl bag. I get what I believe are really good results . . . May God bless, Dwight
-
A lot of the answer will be determined by the type of holster he wants. If for example he wants a flap over holster . . . similar to the old cavalry holsters of 150 years ago . . . the molding will be VERY minimal. If he wants a "wrap around" holster similar to what John Wayne wore in his westerns . . . you do a bit more molding. If he wants a pancake holster with lots of "grab" and no suicide strap or thumb break . . . you will do a lot of molding. Let us know which type holster . . . we can go from there with much better and more detailed information. May God bless, Dwight
-
Rhino 60DS Holster
Dwight replied to thawk8541's topic in Gun Holsters, Rifle Slings and Knife Sheathes
You have your work cut out for you on that one. I doubt if any of the mold makers have one for that. You will either have to have him give you the gun . . . or . . . make a mold yourself. It can be done . . . I have a drawer full of mold models I've made over the years . . . a band saw, drill press, a 12 inch disc sander . . . and a 30 inch belt sander are all used for just about any I've done. Personally . . . I'd have to hit him up for some mold money as well as the holster . . . OR . . . you make just a generic fold over holster that wlll hold it. The one good thing about making the mold yourself. . . . you will learn skills that cannot be taught in a school or class . . . Best wishes my friend . . . may God bless, Dwight -
If I'm cutting rounded pieces . . . I cut a bit . . . turn the leather . . . cut a bit . . . turn the leather. AND . . . I use a razor knife exclusively . . . nothing else. Can't get confused that way as to which knife to use. For sanding blocks of glued together leather . . . glue first . . . then sand. I have a 12 inch disc sander and a 30 inch belt sander. . . . they both do great jobs. I make holster toes . . . bottoms for cell phone cass . . . bottom for special purses . . . May God bless, Dwight
-
Go to the Salvation Army or Goodwill . . . you may find a leather vest there or a denim vest . . . I've done similar when I needed a pattern . . . cut the dude apart and you have the pattern. May God bless, Dwight
-
Then that should be a piece of cake to sew with a machine. After you sew it . . . get the outside piece pretty damp and roll it. That will stretch it . . . and you are good to go. Make sure you glue them together first . . . I use only Weldwood contact cement . . . works every time. May God bless, Dwight
-
Without a special machine, . . . I think they call it a patcher . . . it ain't gonna happen unless you have another seam behind your strap that we cannot see. The other alternative would be (what I would do) to hand sew it. Make a dowel that fits inside it quite nicely . . . use it to back up your punch going thru the leather . . . practice on some cheap belly leather first, till you get your procedure down. For me it would be a 2 hour project (the stitching that is). May God bless, Dwight
-
Biggest problem I've ever found is finding just the "right" piece of leather so it looks good. Inspect it real good . . . then go for it. I've made any number of em . . . pretty much always liked the end result. BUT . . . I cannot think of but one I always do that way . . . if I make one similar to Clint Eastwood's spaghetti western rig . . . Otherwise . . . they are all CCW holsters. The rough texture keeps it from moving around as much . . . and while some folks like that . . . I am NOT a fan of it. Personal choice. May God bless, Dwight