Dwight
-
Posts
5,248 -
Joined
-
Last visited
Content Type
Profiles
Forums
Events
Blogs
Gallery
Store
Everything posted by Dwight
-
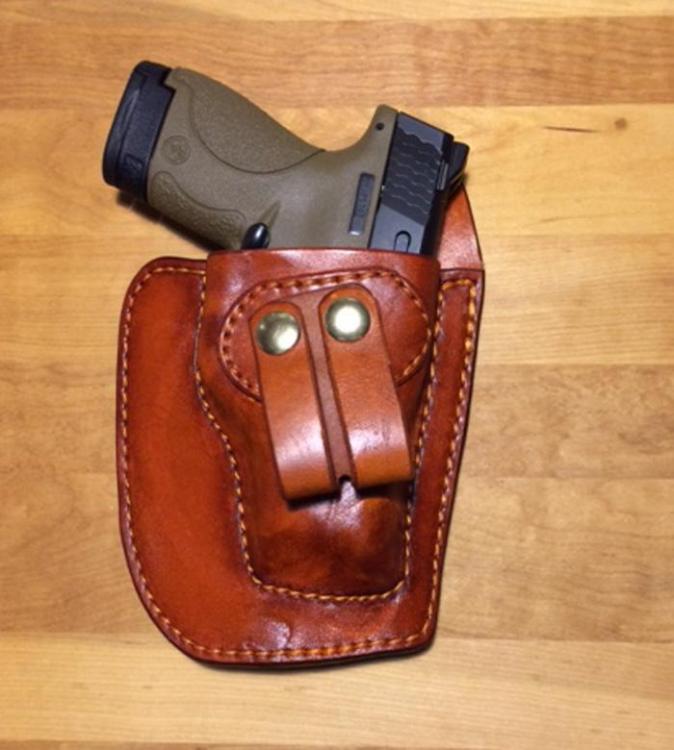
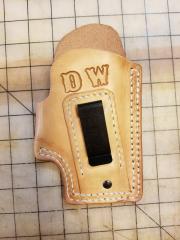
Here is one of my favorite holsters, . . . 346 thread. May God bless, Dwight
-

Rough out IWB step by step
Dwight replied to Josh Ashman's topic in Gun Holsters, Rifle Slings and Knife Sheathes
I got stuck on 346 about 15 years ago . . . if I do something in 277, . . . looks like I used my wife's sewing thread, . . . I'm so used to the heavier look. Got a spool of 4 something, . . . REALLY BIG, . . . gonna do a white stitch black belt with that one of these days, . . . just for kicks and giggles. I'ma lika dat holster there Josh, . . . always have been kinda partial to roughout, . . . although I don't do very many of em. May God bless, Dwight -
Here are the thread sizes I use: Again, . . . the 346 is my favorite. May God bless, Dwight Size 277 / Tex 277 / Govt. 4-Cord Heavyweight thread used for hand and machine sewing. Typical uses include horse saddles and tack, knife sheaths, holsters, tarpaulins, banners, boat and pool covers. Its stitches are a focal point. Size 346 / Tex 350 / Govt. 5-Cord Heavyweight thread used for hand and machine sewing. Typical uses include canvas tarpaulins, saddles, horse tack, shoe repair, conveyer belts, holsters, and sheaths. Its stitches are a focal point. Size 415 / Tex 410 / Govt. 6-Cord Heavyweight thread used for hand and machine sewing. It is also a survival pack staple. Typical uses include canvas tarpaulins, saddles, horse tack, shoe repair, conveyor belts, holsters, and sheaths. Its stitches are a focal point.
-
Nahh, . . . that's an old wives tale, . . . Somewhere after I've done a half dozen holsters, . . . or maybe 3 belts, . . . there will be a stack of the wax on the upper left of the machine where it goes thru that little port, . . . paper towel wipes it off. Same for the lanyard above the needle, . . . and sometimes on the top of the needle. Worst part is your fingers are around that super sharp needle, . . . and it can lace you good if you are not careful. I tried non waxed, . . . think I threw the spool away, . . . don't know what happened to it, . . . I DID NOT LIKE IT. May God bless, Dwight
-
Cowboy Single Action loading strips
Dwight replied to noobleather's topic in Gun Holsters, Rifle Slings and Knife Sheathes
OK, . . . I'm confused, . . . how do you use them? Looks like something you would load up, . . . toss in a shooting bag, . . . Are they worn in any way on the body? Thanks, may God bless, Dwight -
My Tippmann Boss likes 346 waxed thread, . . . for belts, holsters, and knife sheaths. I have others on the shelf, . . . they mostly gather dust. May God bless, Dwight
-
I bought an arbor press from Harbor Freight https://www.harborfreight.com/1-ton-arbor-press-3552.html I use it for other things as well, . . . but it does my maker's stamp perfectly every time on my belts and my holsters and knife sheaths I make. May God bless, Dwight
-
It looked (in the photo clips from the "promo") like s simple Colt dragoon holster style made for a SAA size instead of the larger Colt. It also looked like, from what I could see, . . . that the holster was attached by wings from the top of the holster flap rather than by the usual belt loop. It should not be hard to make, . . . if you have had some experience in making holster patterns from scratch. Let me know if you have not done this, . . . I'll see if I can pop out a pattern for you, . . . but it would be home grown, . . . not necessarily perfect according to the movie. May God bless, Dwight
-
IF, . . . she has back problems, . . . let me suggest that you make her a "butt pack" type bag, . . . that will be worn in the back. I can tell you from personal experience that with back problems, . . . if it is worn in front, . . . it will have to be carried low with the belt going around the top of the hips and carrying the weight. It will not work to carry it on either side unless it is miniscule and has no weight to speak of. For a larger bag, . . . wide suspenders, a wide belt, . . . and the pack suspended off the suspenders and attached to the belt. It is a really great arrangement for carrying up to about 20 lbs. even if you do have back issues. May God bless, Dwight
-
Abby, if I may make a suggestion, . . . Go ahead and buy your first tools from Tandy, . . . I've used their tools now for 20 years or so, . . . have never had one "go bad". No, . . . they probably are not the best ones in the world, but they will get you going and you will not have to apply to a NY bank for operating capital to get you going. Once the leather is stamped, . . . it is very hard to tell the difference, . . . unless you want to be seriously picky, . . . and believe me, . . . the 99.5% of the world out there seeing the leather stampings will never know the difference. They will be either oooooed and awwwwed by the work, . . . or will dismiss it because it doesn't have Harley Davidson attached to it. The single most important tool you will buy, however is your swivel knife, . . . and get it SHARP type sharp, . . . and keep it that way. Practice is what you need to do, . . . practice, practice, practice, . . . stamp stuff out on scraps and put em in little plastic boxes so you can come back in a while and see how you are progressing. Best wishes, . . . may God bless, Dwight
-
Well, Mountain Momma, . . . transplanted Ky boy here, . . . now a buckeye, . . . But a few years ago, I got real sick and tired of my thread busting on some things I would sew. Went to Joann Fabric, . . . found their carpet thread, . . . comes in several colors, . . . sews with every machine I've got (except my Tippmann Boss), . . . and I just about double dog dare anyone to rip those stitches out. It is pretty much all I use any more: zippers, . . . chaps, . . . vests, . . . Should work well on your saddle too I would think. May God bless, Dwight
-
Conceal carry holster for middle of back
Dwight replied to Pappys Leather's topic in How Do I Do That?
Yes, . . . as long as it is to one side or the other of the actual spine itself, . . . it is much safer. And you can disregard the asinine comments of folks who put profit above the safety of their customers. Accidents do happen, . . . non lethal encounters also happen, . . . falling backward on a handgun underneath your spine can be a serious problem. May God bless, Dwight -
Conceal carry holster for middle of back
Dwight replied to Pappys Leather's topic in How Do I Do That?
Pappy, . . . just a piece of info, . . . before you make that for him, . . . make sure he knows the danger of wearing a handgun directly behind his spine. If he goes down hard in any kind of accident or confrontation, . . . better than 50/50 he will be in a wheel chair for the rest of his life. I don't make them myself, . . . for that single reason. I do not want to be part of a person being maimed for life. May God bless, Dwight -
I'm with nylonRigging on this one. Bic lighters are in my drawers there by the sewing machine. By the time I'm sewing, . . . there is nothing on that piece that will burst into flames, . . . and nothing in the immediate vicinity. I just "flick my Bic", . . . melt em and rub em a bit so there is not sharp burnt piece. May God bless, Dwight
-
Tapering a welt
Dwight replied to SShepherd's topic in Gun Holsters, Rifle Slings and Knife Sheathes
Success is always good, . . . no matter how you get there. Make sure we see the final piece. Pictures are great things you know.............. May God bless, Dwight -
Fred, . . . If you are planning on allowing a buckle to go into the belt with beadwork nearby, . . . you most likely are asking for a lot of returned goods. The stress at the buckle will not work with the beads. Make your belt a two layer belt, . . . the top (outside) layer being about 7/8 oz, . . . and the inside layer at least a 5/6 oz. make your beading 1/4 inch narrower on both sides (total 1/2 inch) than the outside dimension of the belt, . . . cut a window in the outside layer for the beading such as you see in the image below. Contact cement the beading into the area of the window, . . . cement it to the inside piece of the belt. Contact cement the outside piece over top of the beading and the strings on which you did the beading. Sew the edges at 1/8 inch all around the belt, . . . then assemble the buckle etc. May God bless, Dwight

-
My stitch gouge is set +/- at 1/8 inch, . . . everything I do gets that treatment, . . . have never had a complaint. My gouge allows my stitches to lay flat, . . . tried the divider trick, . . . just looks shabby in my opinion, . . . stitches lay up on top of the work. May Got bless, Dwight
-
Tapering a welt
Dwight replied to SShepherd's topic in Gun Holsters, Rifle Slings and Knife Sheathes
Contact cement the welt to one side of the sheath, . . . take it to a belt sander, . . . Least that is what I would do. Wish I had $5 for every one I've done for my holsters. AND, . . . that is one GOOD LOOKING knife there. Gonna build me one of those some day IF . . . IF I live long enough (lol), . . . I want a Jim Bowie that altogether will top out somewhere between 18 and 24 inches. May God bless, Dwight -
From the album: Dwight
-
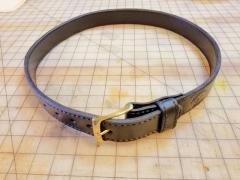
From the album: Dwight
-
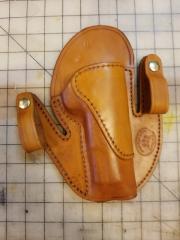
From the album: Dwight
-
Well, my friend, . . . I also am beginning to think you are trying to produce a product that will never age, never wear out, etc. Leather products are by design, . . . going to wear, . . . and the harder the work, . . . the more the wear: ie shoe soles as an example, . . . one year is a long life for leather shoe soles. And 20 meters from the shop, . . . they will look worn and the finish will start coming off. Your dog collars, . . . unless they are only put on for dog shows, . . . or walking the dog up and down the street, . . . they are going to show wear and scratches, etc, . . . especially if there are other dogs that interact with him/her. May God bless, Dwight
-
Vovi, . . . I see three problems, . . . which contribute to an overall process that needs to be scrapped, . . . or severely changed. 1) the paint definitely needs to be thinned, . . . and if you would first use a swivel knife to outline the area you want to paint, . . . you could use dye in that area, . . . which would penetrate and not ever flake off like paint will ALWAYS DO. Paint and leather simply are not made for each other, . . . but like driving a convertible car in Iceland, . . . under certain conditions it is OK. 2) resolene must first be thinned, . . . I do a 1 to 1 thinning, equal parts of both resolene and thinner. It also must be put on in thin coats. Thick coats of resolene will produce a top coat that will crack, break, flake and be generally not acceptable. AND 2 or 3 at the most, . . . THIN coats is more than adequate to protect the leather. 3) beeswax conditioner put on after the resolene is a total waste of a good product. The resolene will prevent the conditioner from doing anything but laying on top of the surface, actually only giving you an added bit of shine that you can get from a much cheaper and better product: shoe polish. May God bless, Dwight
-
That is some pretty cool thinking, . . . Like the execution too, . . . looks really good. I doubt if any of my wait staff needs them though, . . . not much of a market at White Castle and Burger King. May God bless, Dwight
-
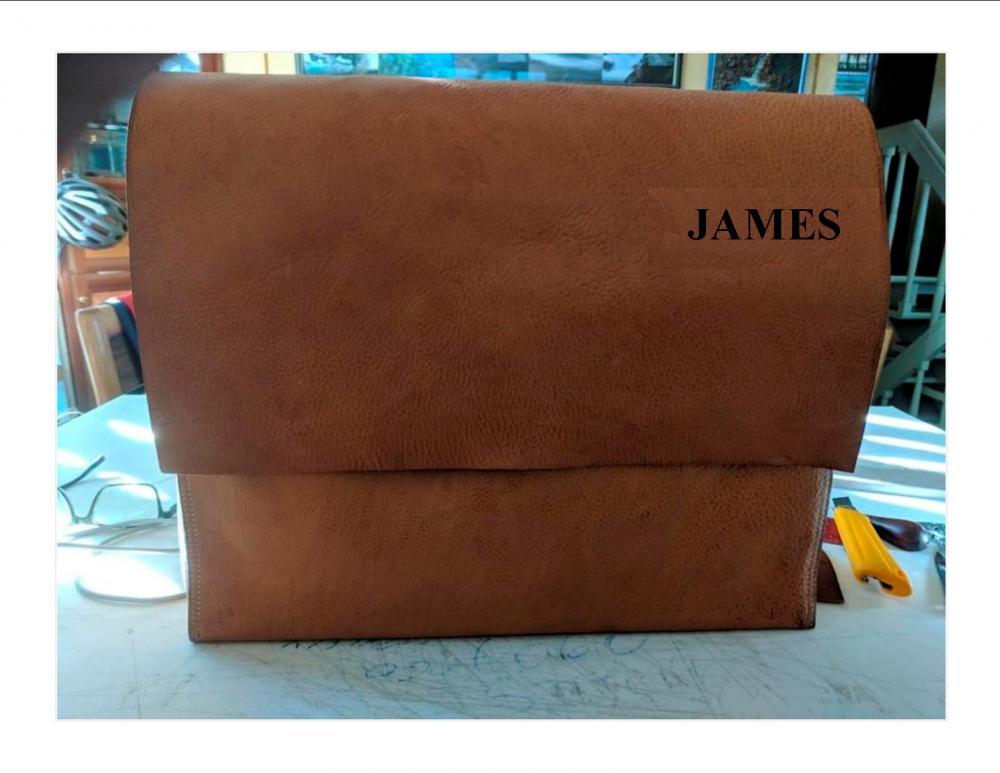
I think I would just personalize the thing, . . . cut a piece of matching leather, . . . stamp your name into it, . . . attach it, covering the blemish. Only you would then know the circumstances. May God bless, Dwight