RockyAussie
-
Posts
3,265 -
Joined
-
Last visited
Content Type
Profiles
Forums
Events
Blogs
Gallery
Everything posted by RockyAussie
-

Help! Bell skiver problem: scrap deflector malfunction
RockyAussie replied to AlainaZ's topic in Leather Machinery
A wire brush is not likely going to clean out any stick stuff that may be on your feed stone. Try rubbing a good bit of talcum powder onto some scrap leather and feed it through so that the powder beds into the stone pores. I find that it is common that dumb retailers and sometimes tanneries will stick hide size information on paper that is then sticky taped onto the back of the hide. Even when you are splitting hides it can stick and come back up and around and !!!!#### is the result. I cant help you as to whether the deflector is set up alright still as both mine have suction and don't need them things. Hope that helps. -
My you tube stuff should show up in my signature as a link here on L.W.as far as I know but none the less this should take you to one of them - With the exhaust system there is no scrap deflector thingy, just the deflector that sits inside the bell knife. It should be maintained at around 15mm back from the edge. The vacuum pulls the leather in and down into a collection box which rarely gives any problems with stocking to the feed stone or feed rubber or steel. Check out the circular skiving video and you can quickly appreciate that it shows no problem even on the soft upholstery type being used there.
-
New patterning techniques + advantages
RockyAussie replied to RockyAussie's topic in Patterns and Templates
I thought about that with the one that I was doing in that post but the knifing cost with all of those holes and slots would be way up more than I would like to commit to. I thought about doing it on the laser but I didn't like the look of all the burn holes to clean up after. I have been tossing up whether to get the knives done just for the outside cut then print a pattern with enough thickness to hold all the tubes and slits and do it as a second cut. I'm thinking off using some stainless seamless tube and just sharpening the end like I do my hole punches. Whack them in a drill and spin them sharp off the side of my belt sander and polish up. Might be worth seeing how much I can get the hole punches from some dye making supplies first though. I have seen them set into acrylic before and I think they would work better in the pla+ print myself. Regards Brian -
Different leather becomes wrong tension?
RockyAussie replied to unionattic's topic in Leather Sewing Machines
From what I can see you are getting too much top tension. This may be because I believe you have the thread at position 5 in the wrong place. Your thread return spring can not operate with the thread going through behind where you have it. It should go from the spring straight up to the thread lifting arm at 6. In your first position it dos not show your thread path back to the cone. I would have expected to see it raising up to stand behind to a thread loop and down to the cone. Serafil is a very slippery thread and tis possible that your bobbin may need to be tighten a 1/4 turn as well. -
New patterning techniques + advantages
RockyAussie replied to RockyAussie's topic in Patterns and Templates
The link I intended to put in above when I said this was this one - Sorry about that........I'm gettin old or would ya believe more stupid -
New patterning techniques + advantages
RockyAussie replied to RockyAussie's topic in Patterns and Templates
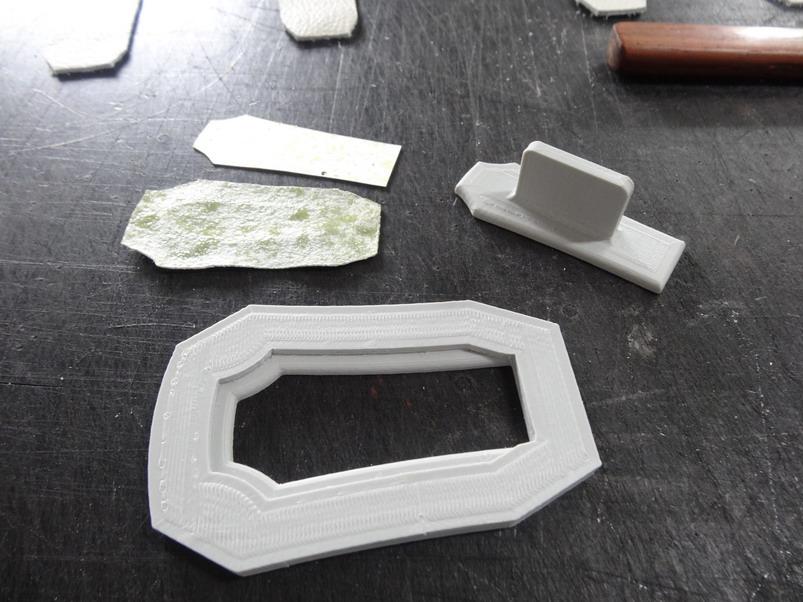
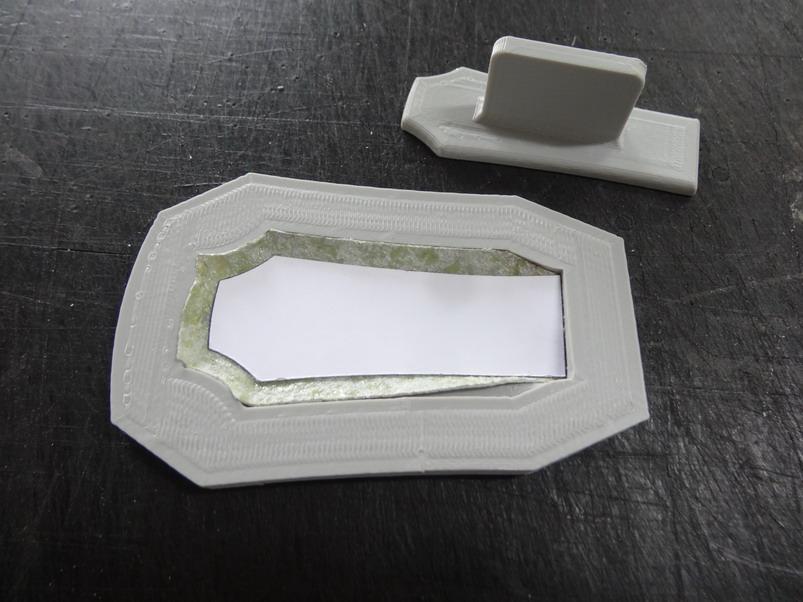
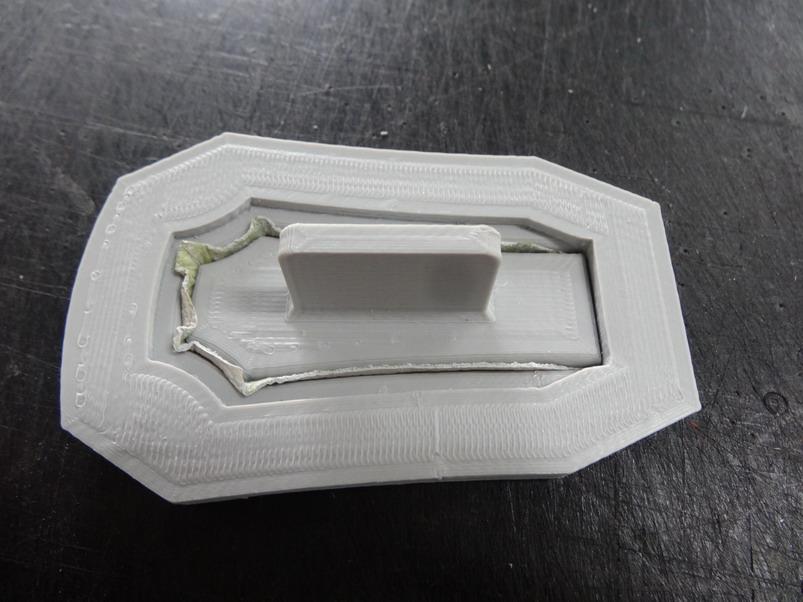
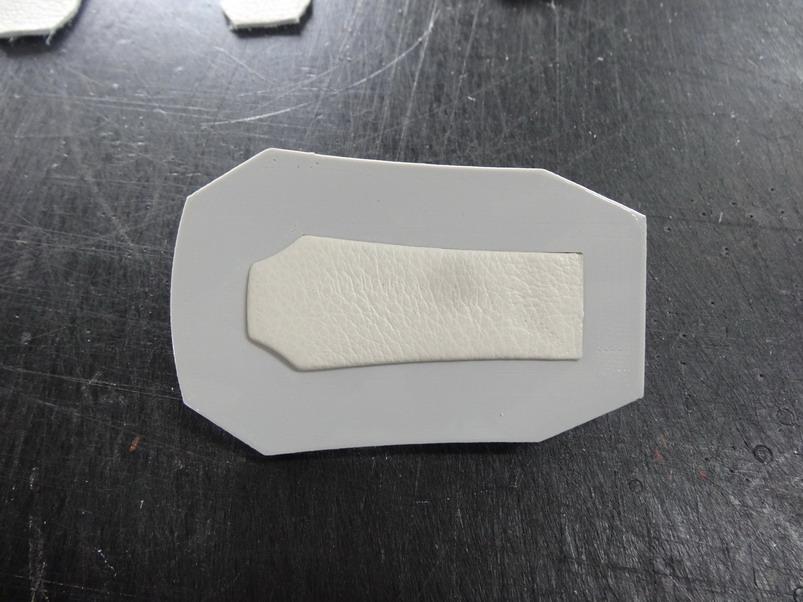
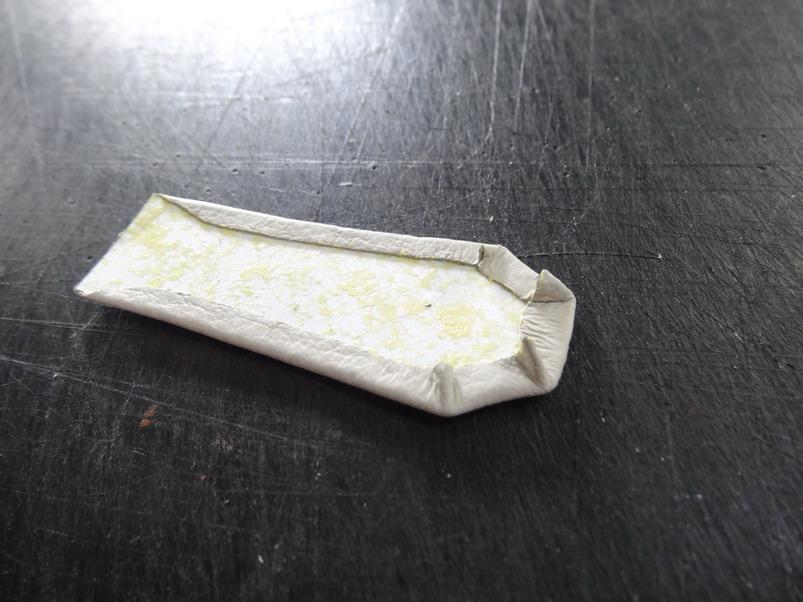
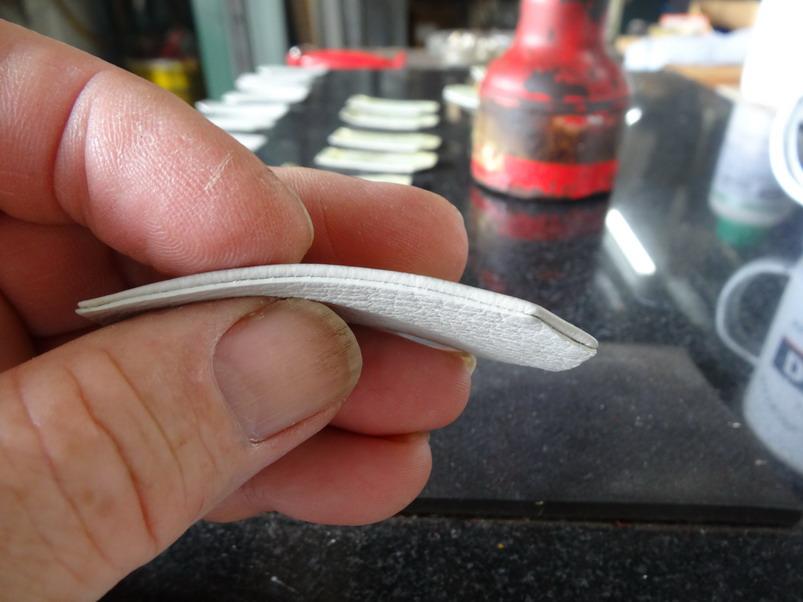
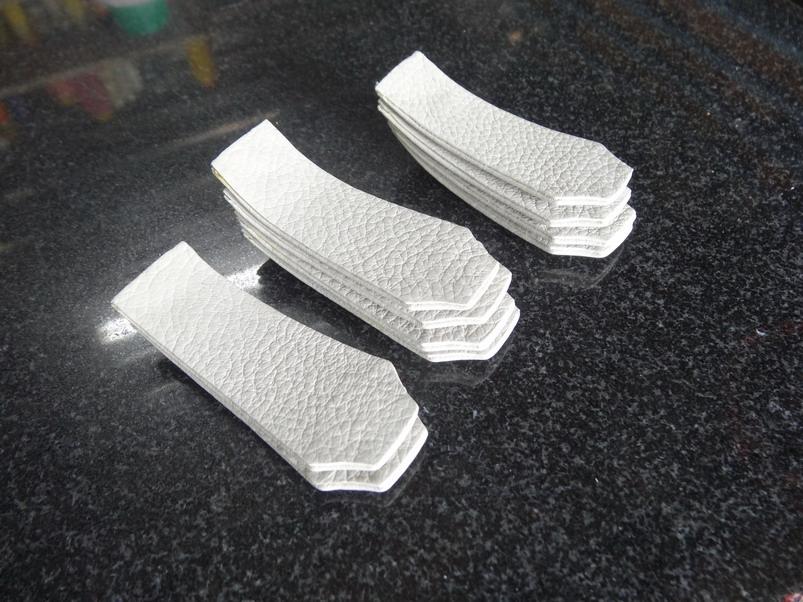
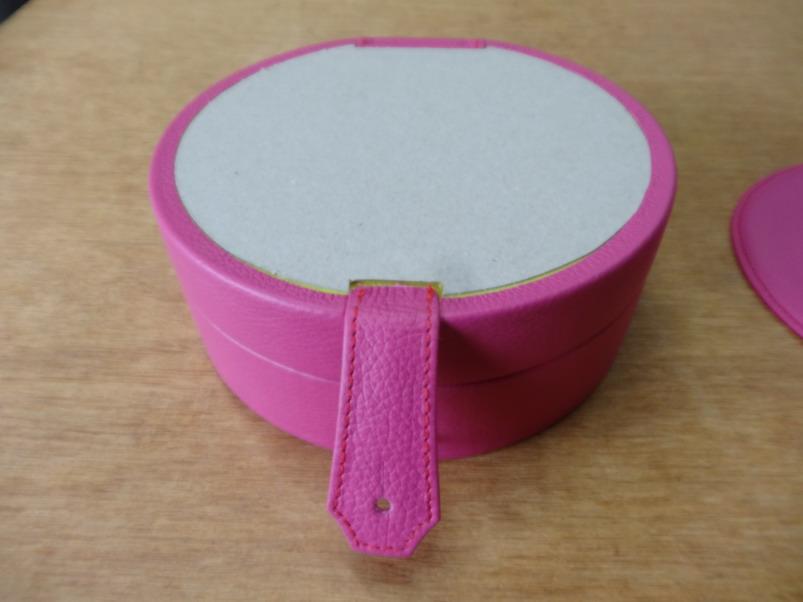
The other little advantage I found is that as the cutting pattern pieces are done it is really quite simple to do an offset on the drawing and print jigs and moulds etc to expedite the folding and forming and such. This is one example below which is for the tab on the box. I was able to print both pieces together in this case. Top leather piece and stiffener glued and ready Leather into the recess with stiffener located The guide for cutting the backing leather is used to push down into the cavity push out the other side Fold down and clip excess of the corners Glue on the backing which has been colour edged 10 now ready to be stitched. To finish off a lot of these pieces could be done on a laser with a bit of gluing and such here and there and on larger pattern pieces over 8" square (my printer bed max size) I would have to go that way. With my little 2.5watt diode laser I would be limited to 3mm black or red acrylic sheeting . Could always glue 2 bit together if I wanted more strength I suppose. The cost would likely end up more though. That's all and I hope that is of some help in some way for you in the future if not now.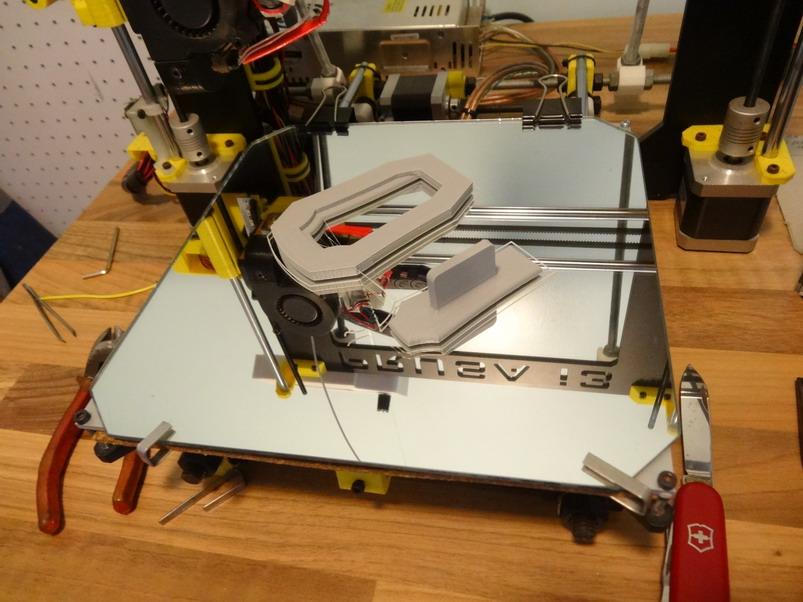
-
New patterning techniques + advantages
RockyAussie replied to RockyAussie's topic in Patterns and Templates
True and and after a few runs with the pressure of the knife on the edge it hardens up more and gets more slippery. I really was surprised how much quicker it made the cutting compared to carefully cutting around the edge of cardboard/cardstock. -
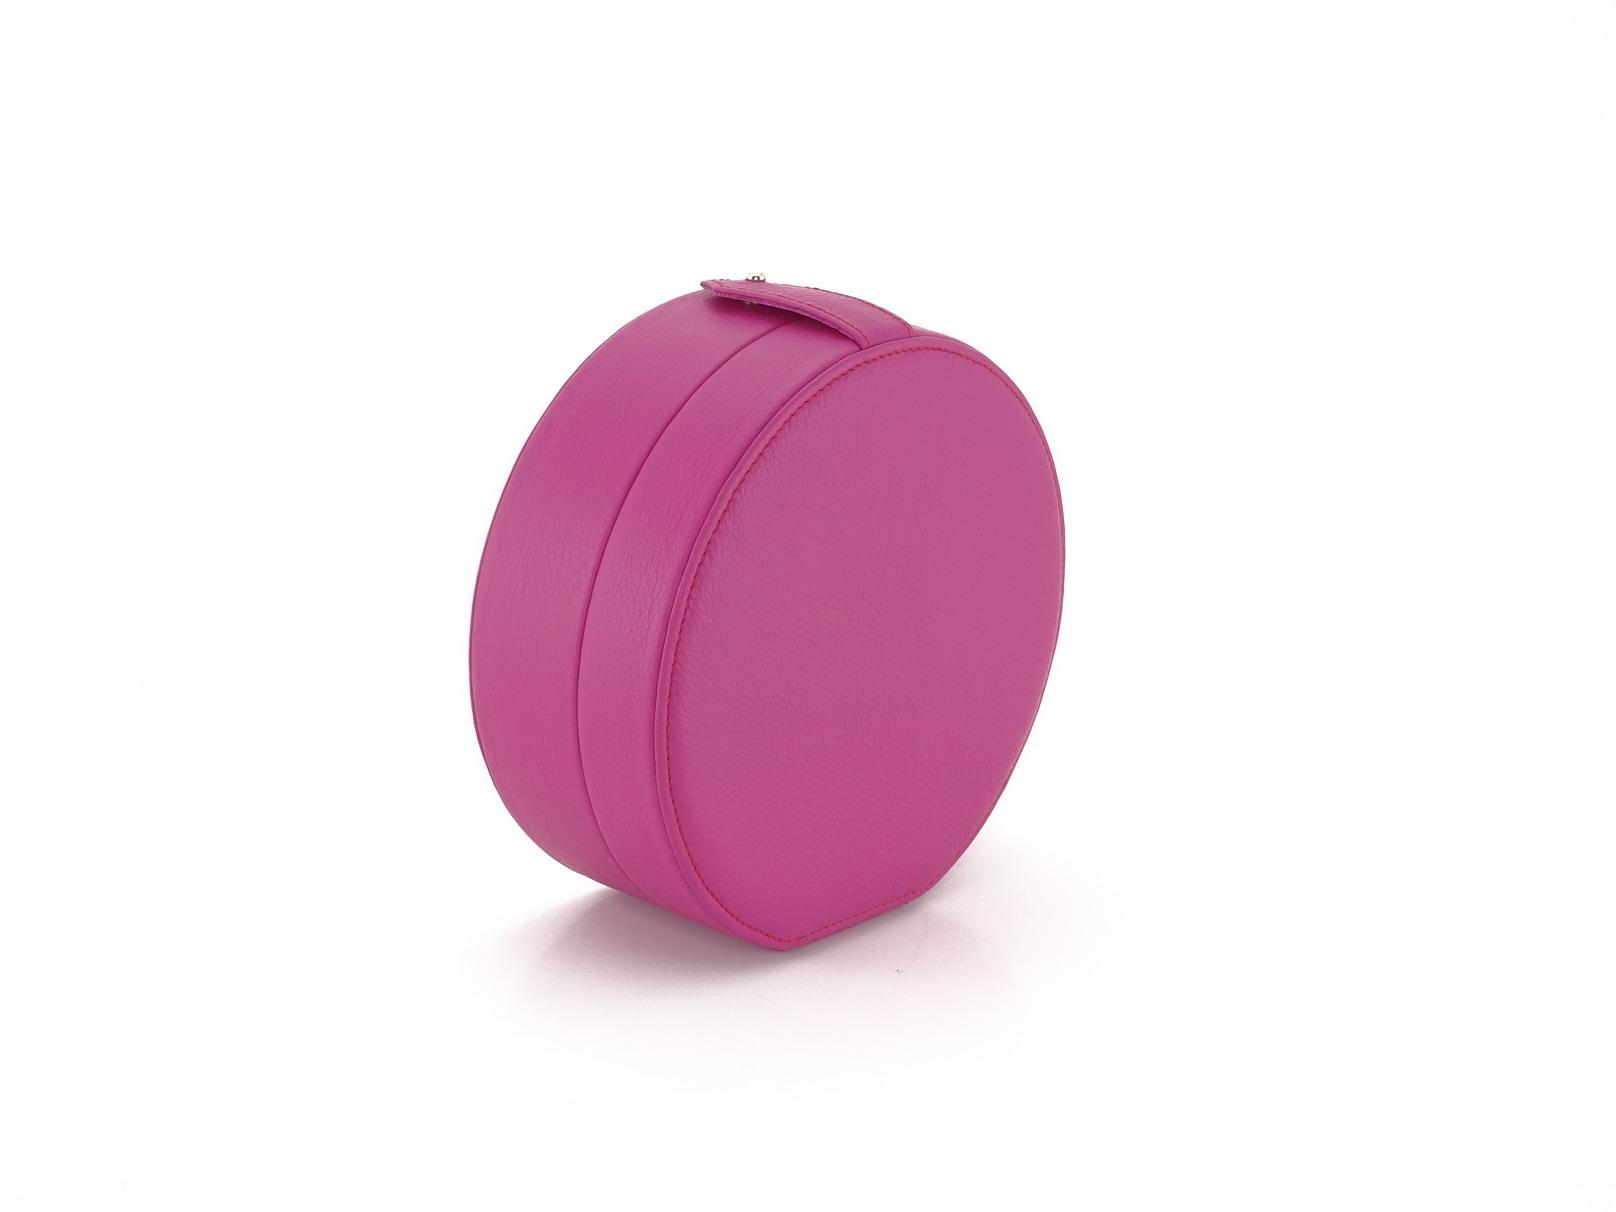
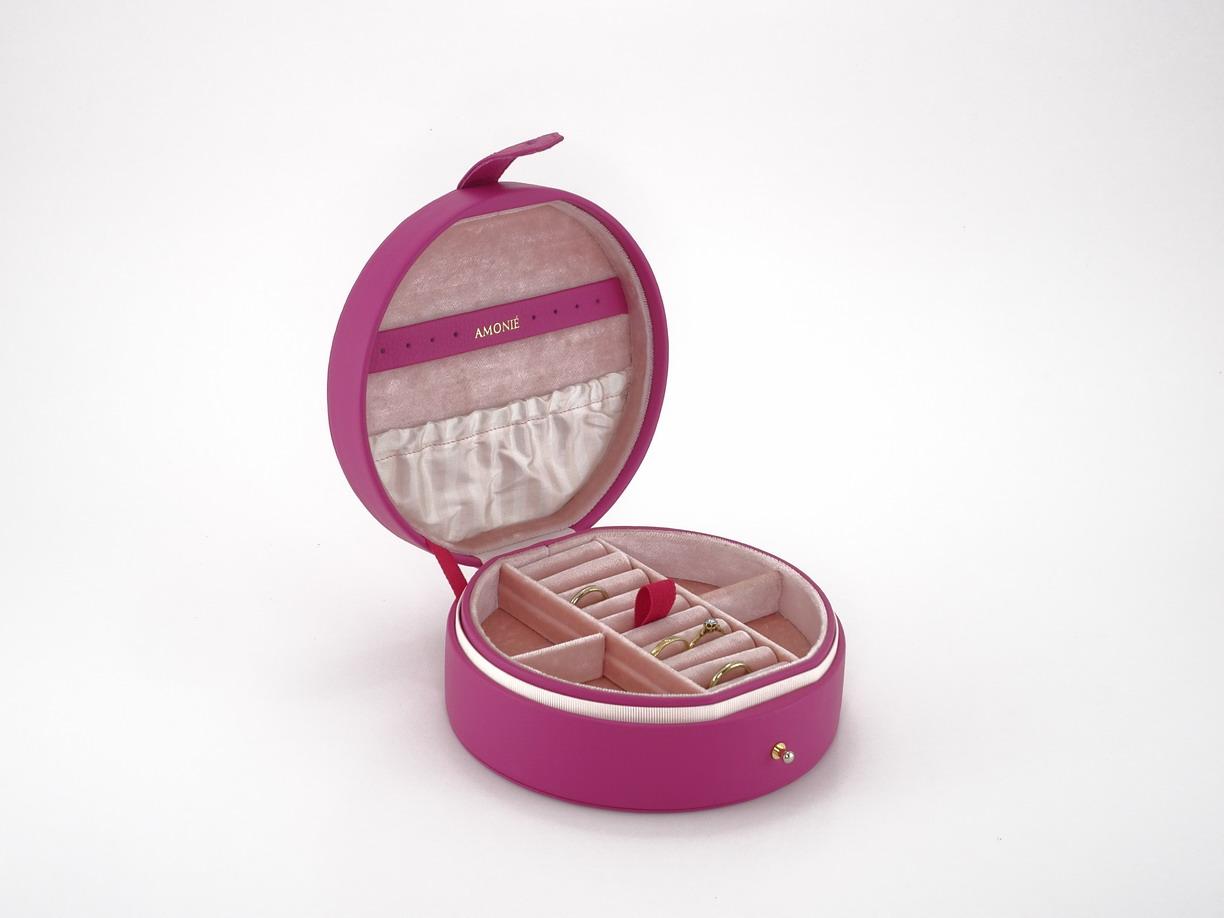
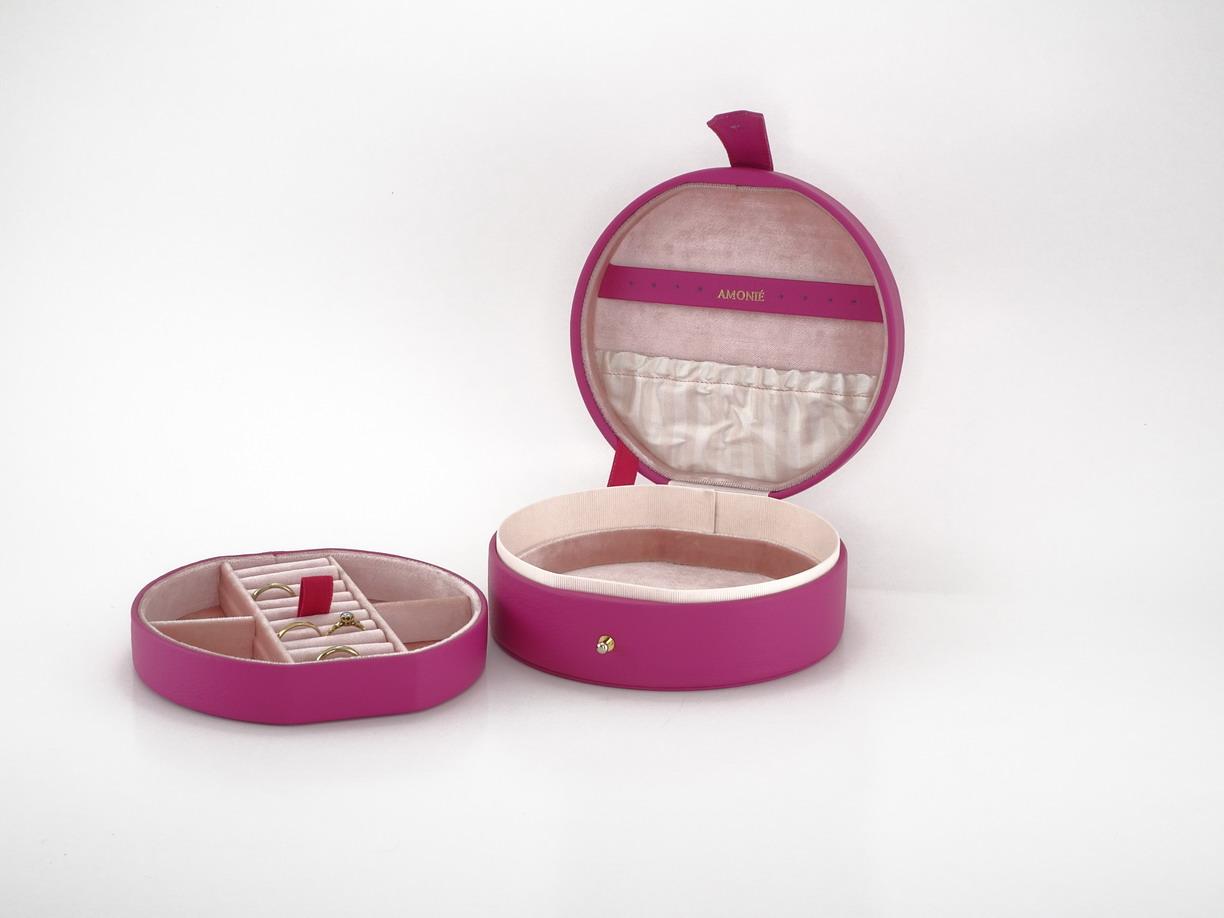
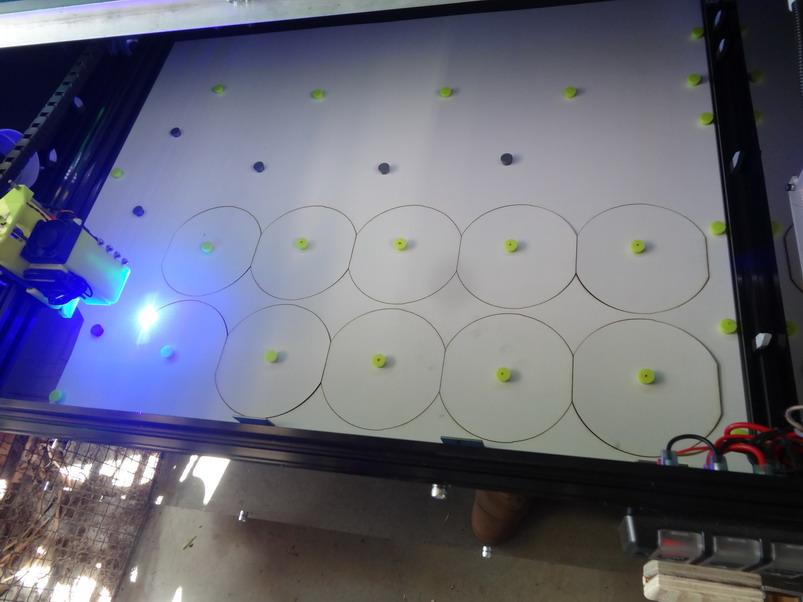
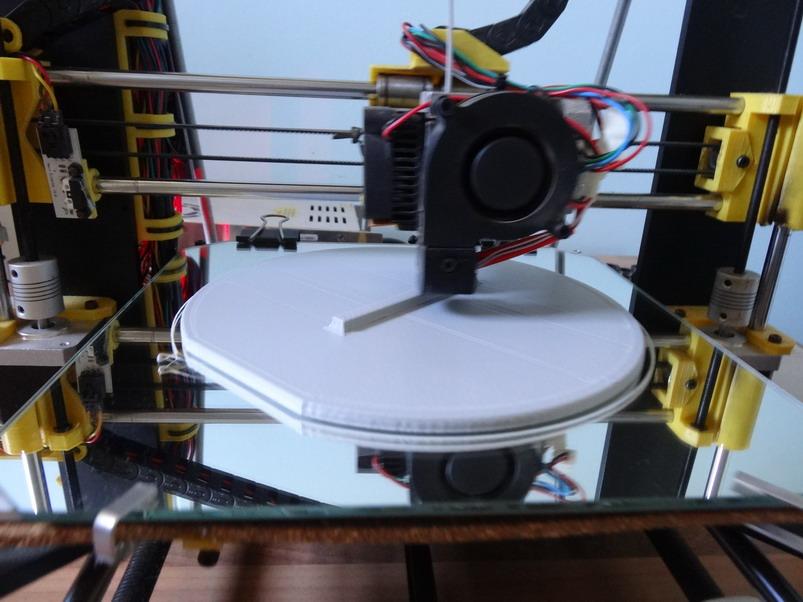
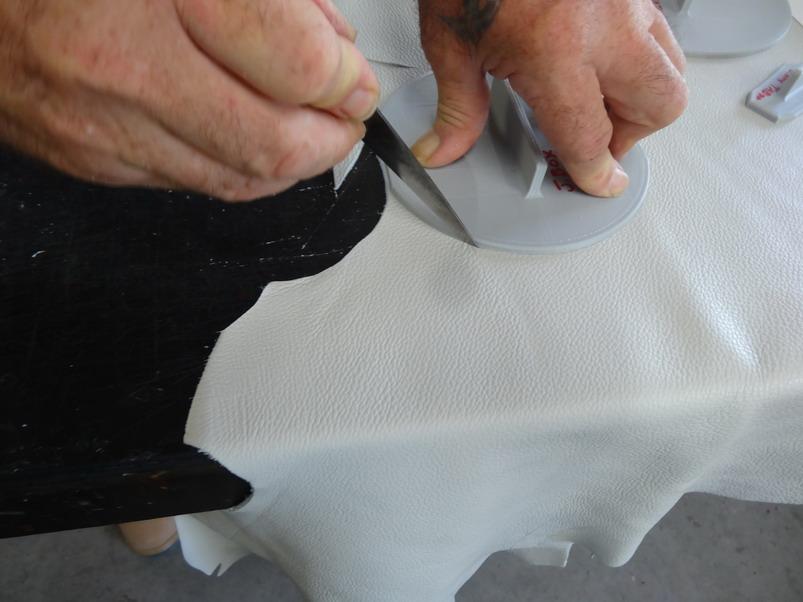
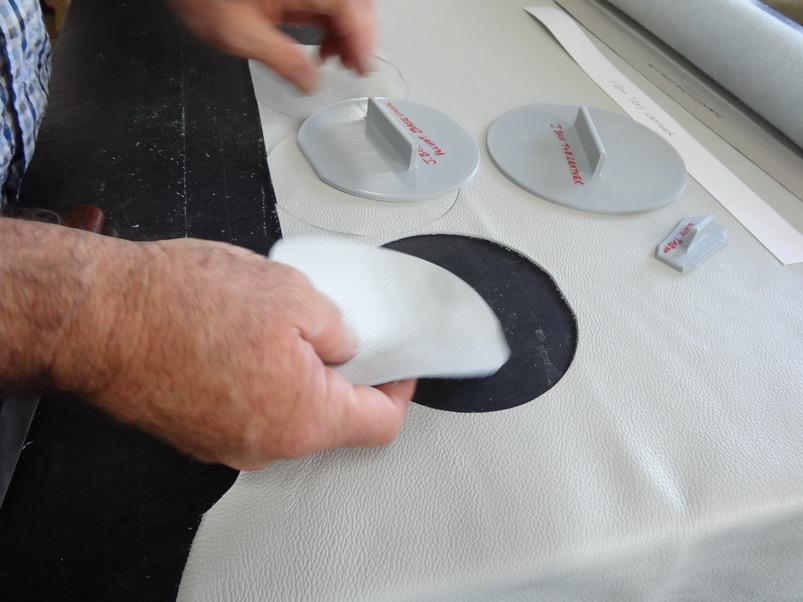
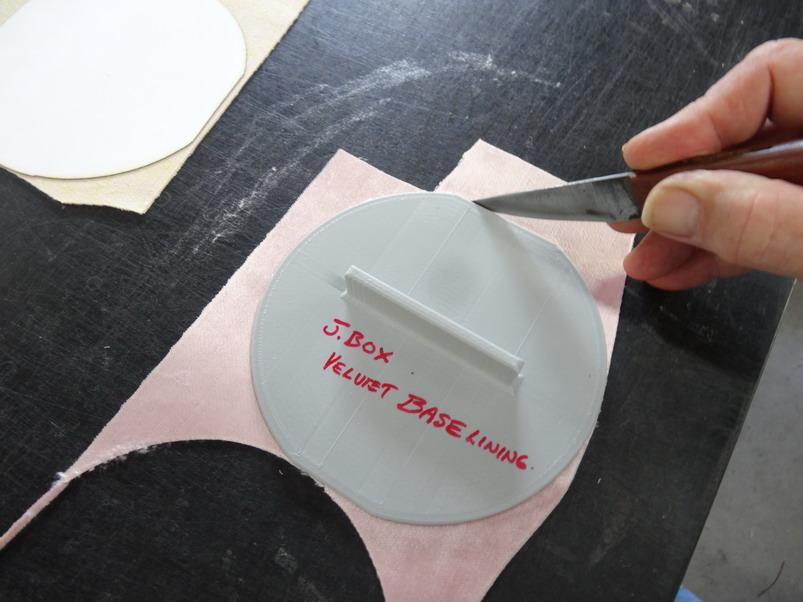
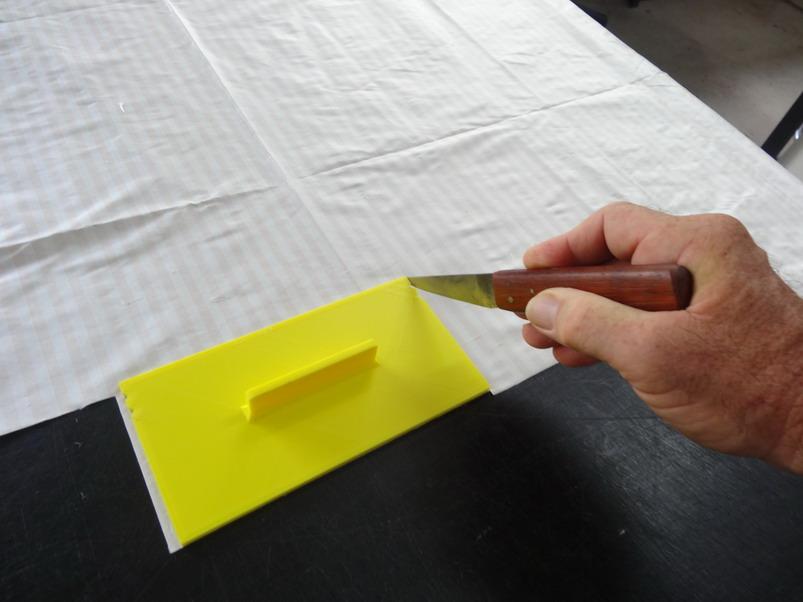
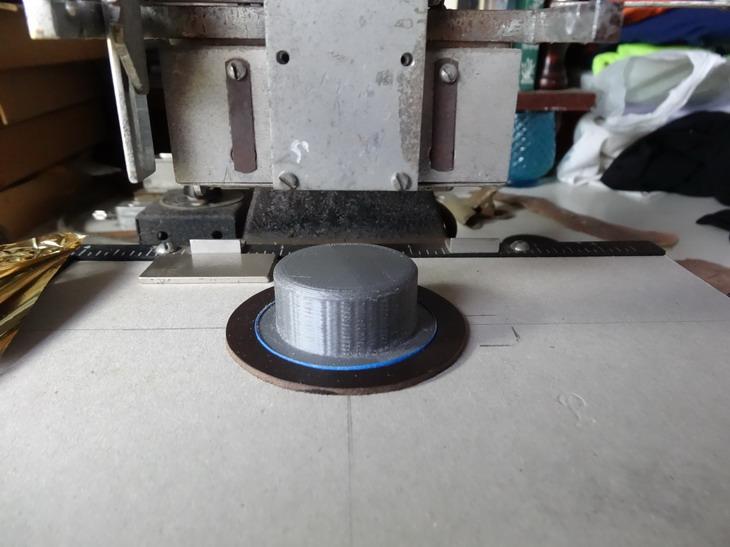
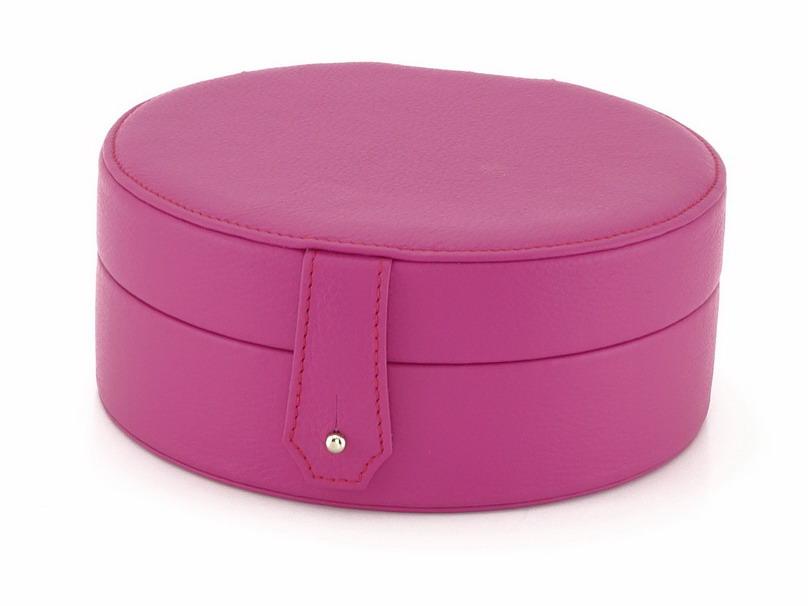
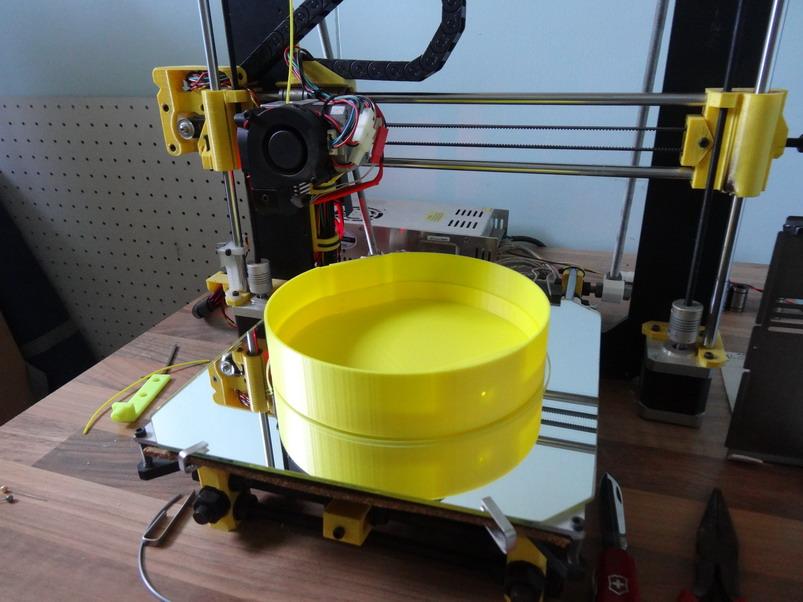
In the long ago past, I did a lot of my patterning by hand down onto card stock normally something along the lines of a manila folder that gave the advantage of having a fold line down the middle when open up. This worked out that often a piece only needed to be drawn and cut on one side then folded to get the other side the same. Next thing that came along was drawing programs like AutoCAD which I still use today a lot. Along with this an A3 printer gave a huge improvement in the time it took to produce a workable pattern. Being able to go back to a drawing and make subtle changes and corrections without redrawing the whole pattern again was a fantastic improvement. A few tricks with the card stock like applying a coat of spray glue and letting it tack off before using it to cut out the component pieces works good but only until the card stock gets too many knife nicks/slips into the edges. Then the pattern has to be reprinted and cut out again. In the making of this key case you can see this method being used if you like Normally in running a production type leather goods business you have to take a best guess as to when be the time to take these patterns to the knife making stage. This can and often is a fairly large investment and initial sales and interest can prompt a premature investment that can sometimes take years to recoup. In the last few years a few new fangled things have come in handy to help me overcome some of this problem and have in themselves been a very useful production tools to have as well. Both the following have the advantage of being able to work from the same pattern drawings done in the AutoCad program. My big/little laser – It has a large poster board size cutting area and is a small 2.5 watt laser diode. It started off as an A3 Elksmaker bought from Bangood for around $300. It worked well enough and I spent another $600 making it larger and safer with fume extraction, better cooling for longer runs etc. Some more on this can be seen here – Just recently the making up of a jewellery box prototype and a small production run on it has made me rethink on ways that I can now improve on previous methods used in both the pattern cutting and small run testing. The full cost of the knives to be made for this job in the past would have been around $1000. With the strawboard/stiffener pieces I have been able to nest the pieces together and do multiple cuts with a labour time frame that ends up similar to clicking out on the clicking press thus saving around $400 in knives. The actual cutting is slower than the clicker press but while the laser is cutting I am able to keep working on other things. No wasted time and no need to have hard copy patterns to store and use. Cardboard and knives both chew up a lot of storage room. For illustration purposes I will now show how in this jewellery box some of these new techniques are employed. This first pic is just to show the jewellery box This picture shows how the little laser can cut out enough strawboard stiffener pieces to do 5 of the jewellery boxes in one cutting. This is 7 different patterns that would normally be made up into knives in the past. This next pic shows another stiffer board that gets used in the top lid section and here I am cutting enough for 10 boxes in the one cutting. Another knife saved. This pic shows my latest idea of using a 3D pla+ printed pattern/template for the cutting out of components. The pla+ is a little like teflon and gives a hard wearing surface that I have found to be VERY good for this application. Here is one part way through the printing process. This one shows a bit of an array of the patterns about to go into use. At the back is the 3D printed jewellery box parts along with a finish box. The ones with handles on top are for the cutting of pieces. here I am cutting out some of the leather tops/bottoms for the boxes. With a little bit of practice I was able to get the cutting time down to around 30 seconds per piece which is not all that much longer than I allow for clicking them out on the clicker press. Works for cutting the velvet fabric quite well as well and fabric There is one more little thing that I found very useful with this type of template/ pattern system but I will have to post more on that tomorrow as dinner is now ready.


-
New accessories for my Juki 1541S and sewing Table, #2
RockyAussie replied to kgg's topic in Hardware and Accessories
I will look forward to seeing them when you get them done. The bias folder just made me think how easy it would be to print up an adjustable guide for strap folding. Might just have a play with that .....if I ever get the time. -
New accessories for my Juki 1541S and sewing Table, #2
RockyAussie replied to kgg's topic in Hardware and Accessories
Sounds like you are working it out pretty well. I am still running an old Prusa i3 but with a few good mods to keep out the vibration. I think I prefer the glass plate bed or I should say mirror now as that is what was handy here when I needed to do a quick replacement. So far that's been holding up better than the original. Also sounds like you using a later version of Curra than me. I tried out the latest and still get better results from my old 15.04.2 version. Re the turning the job on the plate it is amazing to see that it often cuts back the time as well as improve the quality. Interesting stuff. I will do a post on some 3D pattern cutting stuff later today which you might like to see. Cheers Brian -
Fortuna band-knife splitter trips internal breaker
RockyAussie replied to Matt S's topic in Leather Machinery
Neither of mine ( Albeko and Komoga) have ever tripped off but on a very wide and hard split i have had the splitting stop due to the belts slipping. That is a super rare occurrence but may just help you some here perhaps. -
New accessories for my Juki 1541S and sewing Table, #2
RockyAussie replied to kgg's topic in Hardware and Accessories
Are you using a heated bed and if so at what temperature? I use pla+ on near everything these days and only ever clean up between prints with IPA isopropyl alcohol. A bit of a squirt from the bottle and a quick wipe over with some toilet paper and she's right to go again. Run your first coat about 1/3 slower than your main speed and very close to the plate. Bed temp on mine is normally set at 65 degrees C. Another little suggestion as I found it helpful is after your stl file is put into Cura, rotate the print on the base 45degrees and you will find that it (generally) travels smoother and gives a better print. -
I was speechless to start but I had to say...... you have an incredible gift to share with the world. That is not to say that a LOT of dedicated attention and study is not also more than apparent.
-
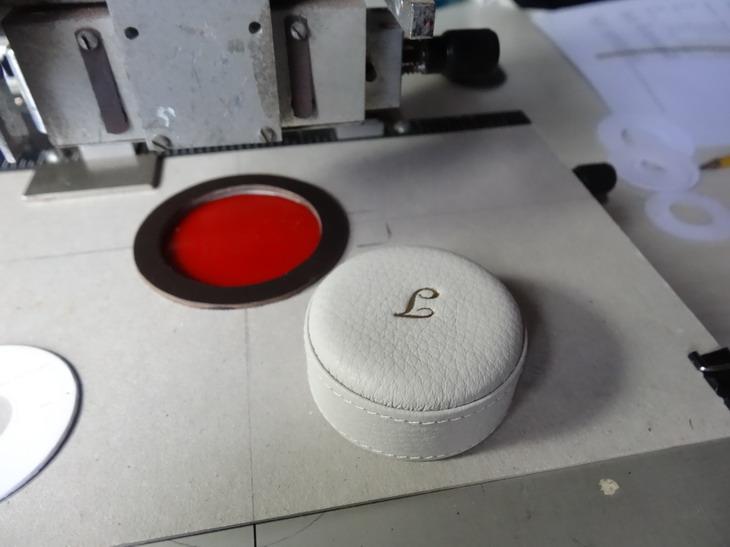
Yes I do. I have one little Kingsley machine that is just about set up permanently for doing them. As they get monogrammed after they are made, I had to print/make a special locating block that allows me to get the pressure down correctly. Here's a couple pics show what I mean -


-
Sigma style line 16 belt snaps.
RockyAussie replied to RockyAussie's topic in Hardware and Accessories
Thanks my friend. I will have a look and get back to you. -
Sigma style line 16 belt snaps.
RockyAussie replied to RockyAussie's topic in Hardware and Accessories
Thanks jimi. Could I trouble you for any links to them? Thanks blue duck, I will let you know how it goes. -
Thanks @noobleather I sorta like that colour myself. Wouldn't wear it though if ya know what I mean The customer"s ordered colour is a pale grey leather with the pale pink lining. The grey matches up with the ring boxes I make for her.- https://www.amonie.com.au/products/light-grey-leather
-
Sigma style line 16 belt snaps.
RockyAussie replied to RockyAussie's topic in Hardware and Accessories
Thanks for that @blue duck. From their website they may be the answer. Have you used their snaps? I would like to see and try a couple of them before ordering in a big heap. -
From memory I think it is referred to normally as stitchless construction. I had a play with it awhile back and called it the holy poke method At any rate here's a couple of pictures that might just help a bit. I do not recommend doing the bottom as I did as it makes it very difficult to weave together without stitching inside along the bottom to hold it together. have fun and remember to post some pics when you got it beat.


-
Sigma style line 16 belt snaps.
RockyAussie replied to RockyAussie's topic in Hardware and Accessories
Thanks @jimi the ones I am chasing have capped ends top and bottom. The ones you mention are not capped on the both ends. Another question....do you have a supplier there for Kenda Farben product? If so do they have the Orly SL edge paints? -
I am trying to find a good supplier for the capped style of sigma snaps. The Tandy ones I have tried to use in Australia several times over the last few years don't come together well nor hold together well when done up. I have searched online and can find only other suppliers that appear to have the same looking snap going by their pictures. The problem is that the piece that goes down into the cap has different length slots and this makes the thing twist when pressed down into the cap. If you look around it you can see the holes do not all line up. Does anybody use this style of cap that works as it should and could let me know where to get them from.
-
Thanks dikman, My customer thankfully was also amazed ...enough to pay and order a stack more anyways. Thanks for the compliment but I believe you are more than worthy myself. Thought about that but I thought...tooo common and the stud will stand the test of time as well I think. Thanks @Scoutmom103 I can only say ....That's what they pay me to do. Thanks mate, I just checked your insta and have to say you got some pretty good looking stuff yourself now days.
-
Thanks HaloJones ...always trying. If the leather for the job ever gets here I will. So far its gone from NSW past me to Mackay and back down to Brisbane and at present....???? No I do all of the printing here on my old Prusa i3. I have not yet heard of anybody around Rockhampton doing any 3d production yet. I think I may have a go at building something along the line of a larger Ultimaker style printer one of these days if I can find the time. Makes more sense that the bed does not have to shuffle around doing the x and y with all of the weight and inertia etc. Thanks jimi. Will do asap. Mostly it helps to have a patient wife. I forgot to make a mention in the last picture I posted of my big/little laser above pointing out that that it has cut all the strawboard for 5 of these boxes. The little yellow button things are things I printed to hold 9x2mm circular magnets. They make it a lot easier to grab off of the job and collect and distribute around over the metal bed. It would be a large advantage to also have a vacuum bed set up to hold the work but that's just another project waiting to happen. This picture below shows one of the spots where the strawboard gets used to keep things level with the leather and another for covering with leather as in the top and bottom.
-
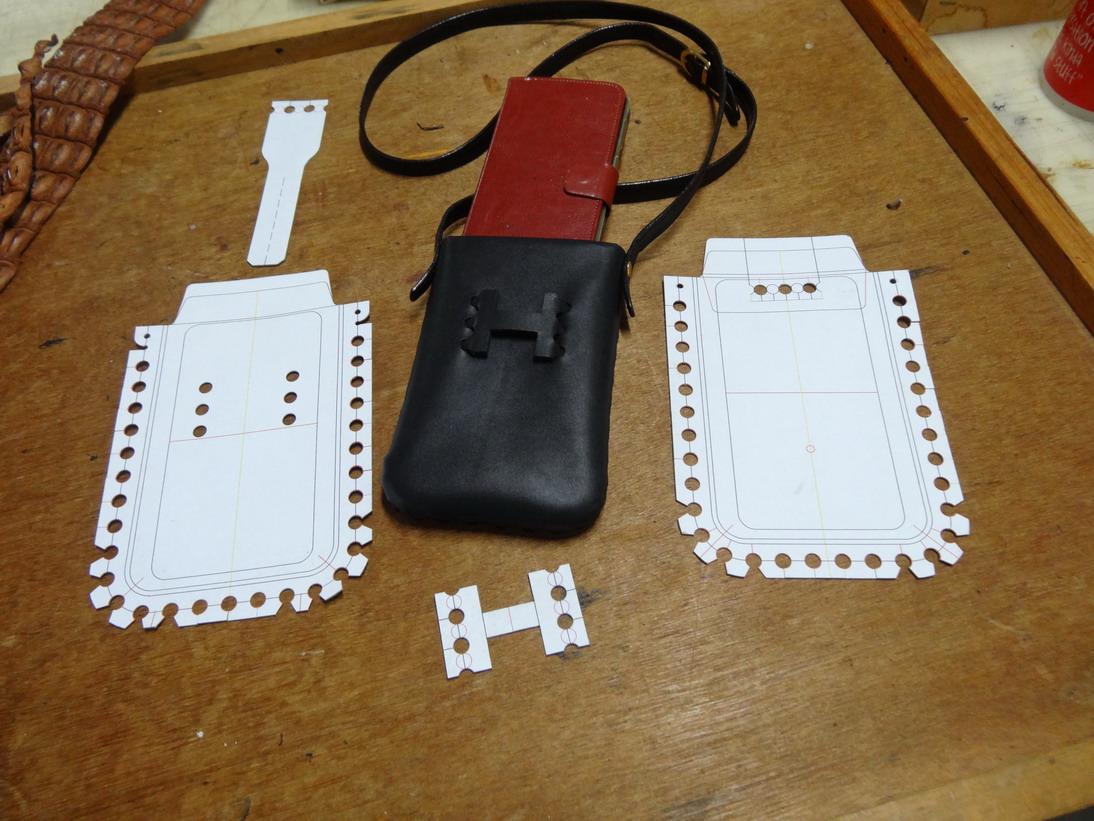
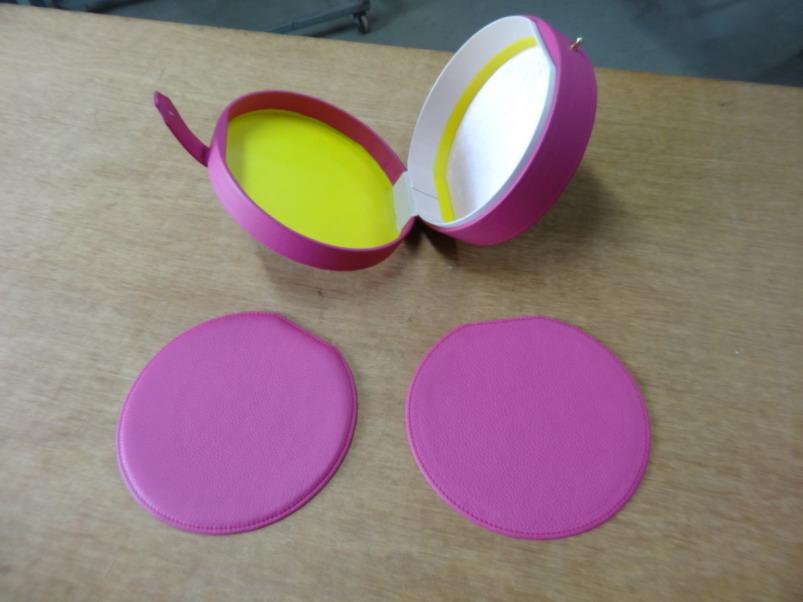
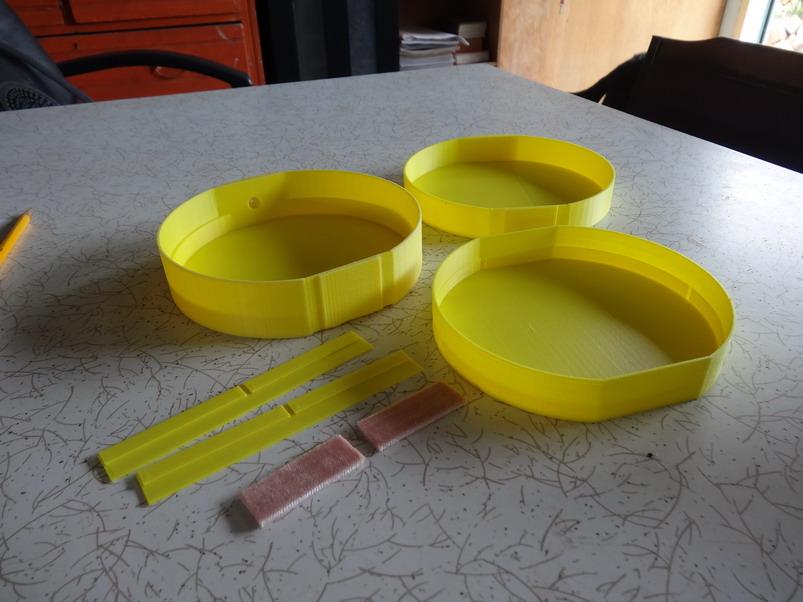
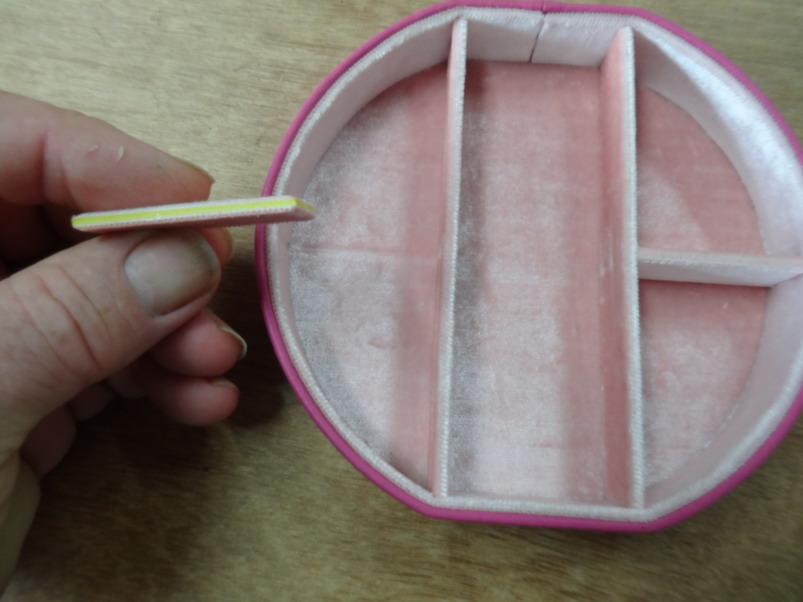
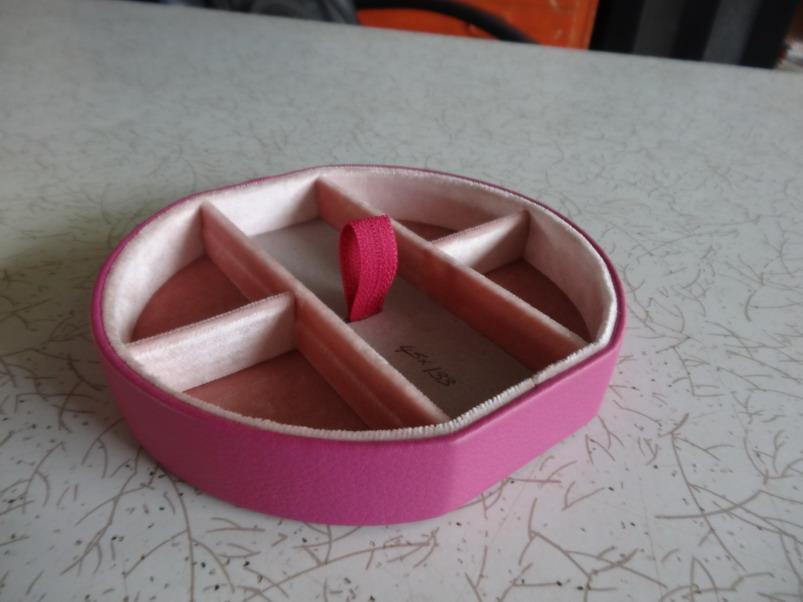
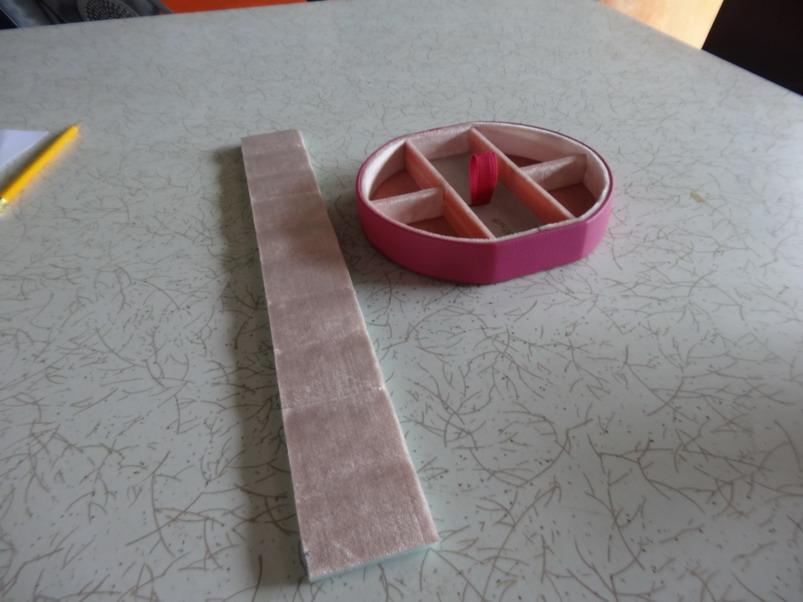
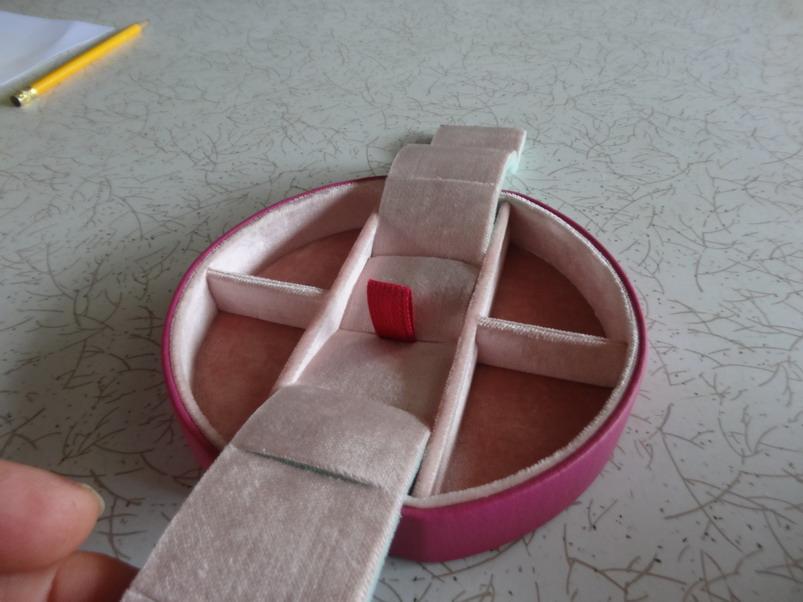
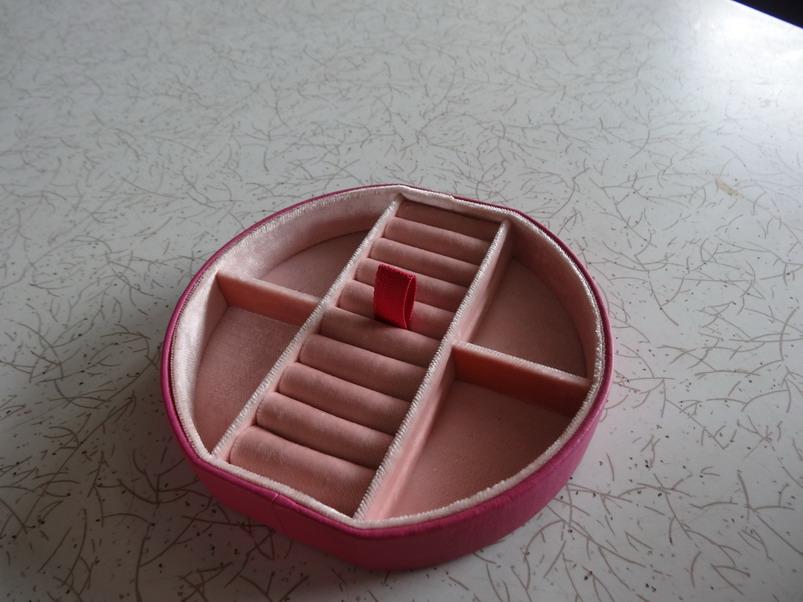
This is the latest design I have come up with for the same customer I do the wedding ring boxes for. These are just a few pictures of some steps involved in making this one. I have now got an order for a run which I will take some more detailed pictures as I go along. There is a bit of 3d printing for the shell parts and tray dividers and a bit of laser work for cutting out the strawboard filler pieces and cutting knives still to be made. Note the pouch stud for closure and tab Might make an interesting bag design yet. This pic below shows the base shell just printed with the hole for pouch stud later addition. Here all of the pla parts are shown after printing. Sorry I covered the 2 little dividers before remembering to take the picture. The shell closest on the bottom right is for the tray and note that there is holding slots incorporated for the dividers. Here the tray has been leather covered and velvet base and sides installed. I am here only sliding the dividers in dry. Note there is a small gap in the velvet wall join I need to get better. Showing velvet and foam joined and sliced to make good curves The foam and dividers will be removed and glued in later after final measurements are taken. If you would be interested to see a more complete breakdown on how its made here let me know.


-
Ohhhh I like this one. I wish I was not 1/2 a world away. Monogramming a tote bag after being made up would be easy with this one. The extra height adjustment also makes it highly versatile.