


RockyAussie
-
Posts
3,265 -
Joined
-
Last visited
Content Type
Profiles
Forums
Events
Blogs
Gallery
Store
Everything posted by RockyAussie
-
Should be able to print something like that ......re the rubber washers you may need smooth leather backing to reduce friction where it touches. With gold embossing foil on the automatic feed they often use a spring as well to set the friction just lightly.
-

Need help from the leather community...
RockyAussie replied to hatrabbit's topic in How Do I Do That?
It would help to know where you are located. If in Australia I could send you a few pieces and likewise some others in other parts of the globe may do so as well. -
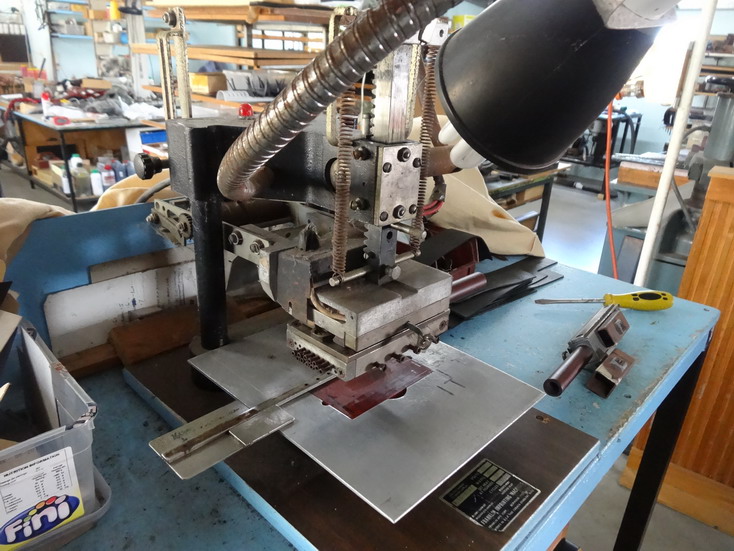
Looks like a fairly good robust machine. I need to know what distance the heating element is away from the edge. You did not show any picture from that angle. The elements normally go right through the block but due to the hole in the middle for attaching the stamp it does not in this case. Is there 2 short elements? Please show a picture from that end. I checked the WUTA site and they have several letter set types and it would be best to know what height the particular letter blocks are in the one you have ordered. I can still go ahead somewhat with a drawing but that height is important to know. Other than that, are you able to tap threads into metal alright and if so do you have a metric set or ....? Would you prefer steel or aluminium construction mostly? The other thing is if you would prefer to have drawings for an engineering shop to do the work? One last thing ...is this for occasional work or every day quick change heavy duty work????
-
Is this stitching weakening the belt loop?
RockyAussie replied to GeneH's topic in Leatherwork Conversation
Structurally and aesthetically that looks very good to me as is. The stitching and the finishing all look way more than most would do for this purpose as well IMHO. Congratulations. -
How I now straighten leather for strap cutting
RockyAussie replied to RockyAussie's topic in How Do I Do That?
Excellent @bikermutt07 . Where there is a will there is a way I always say. Just saying.... -
Youtube link to LW post allowed?
RockyAussie replied to RockyAussie's topic in Leatherwork Conversation
Thanks for that Mike. The sort of thing I am thinking of doing for instance is doing a new video showing some of my zip guides in use and putting in a link in the description to the topic in L.W. where they can see discussion and find out some more if they are interested. Let me know if you can see any issues from any direction that I should be aware of firstly if you know or can think of any. -
Is this stitching weakening the belt loop?
RockyAussie replied to GeneH's topic in Leatherwork Conversation
That looks good to go and I am happy to hear your keen to get started again. Keep in mind to check the length of the belt loop section. If it can shorten some it could make the interlocking cutting reduce the waste to near nix. Do you have a clicker press or a method for using cutting dies? That knife shape here in the 19mm ht 3/4" would cost about $70.00au I think and about $20.00 for the other. A clicker press would enable the cut at around 30 secs per if that helps. -
Is this stitching weakening the belt loop?
RockyAussie replied to GeneH's topic in Leatherwork Conversation
I think you quite rightly feel a reservation in the design construction. An axe falling from a failed construction could be at the cost of a toe or worse. Sometimes when you get a construction idea in your head it is difficult to think on ways that are necessary to make it work and still be economically affordable to manufacture. In my opinion stress points are the areas to be concentrated on and I would think about a complete change of design. For instance an upside down T shape cut with a single line external stitch down the front and the other piece folding back over the belt and down to the bottom edge with 2 rivets attaching at the bottom could be worth looking at. For cutting purposes it should be able to interlock each piece and save waste. The stress on the rivets at the back is reduced by the main pressure being supported by the belt firstly. The stitch at the front has little pressure as the forces are on the side and more to the back. Any stitching except at the front join would be only decorative. Hope that makes some sense. -
40W Chinese Laser - Engrave and Cut Leather - Discuss
RockyAussie replied to Billy Hell's topic in 3D Printers and Lasers
Are we still talking lasers? Exceptin proctology of course.^ Hey where is the Aussie emogie? This will do I guess. -
Very excellent work.
-
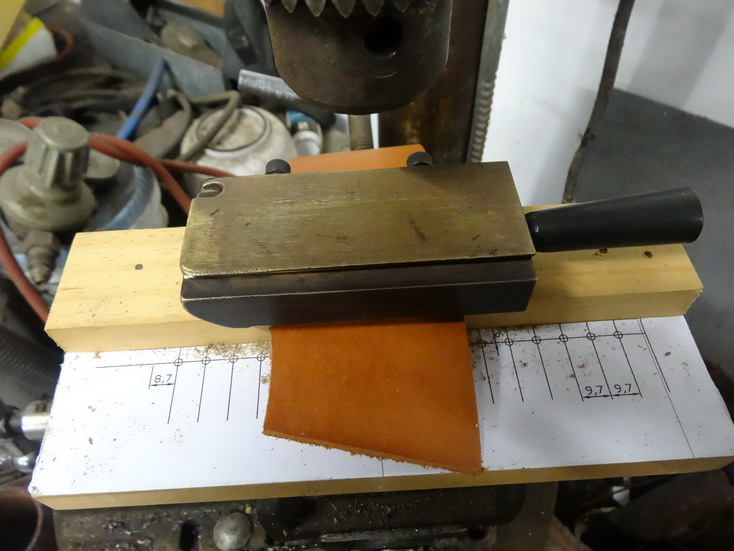
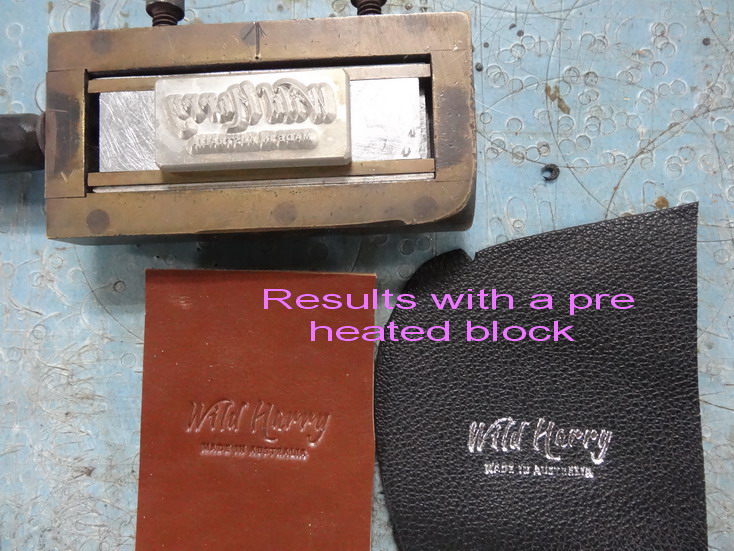
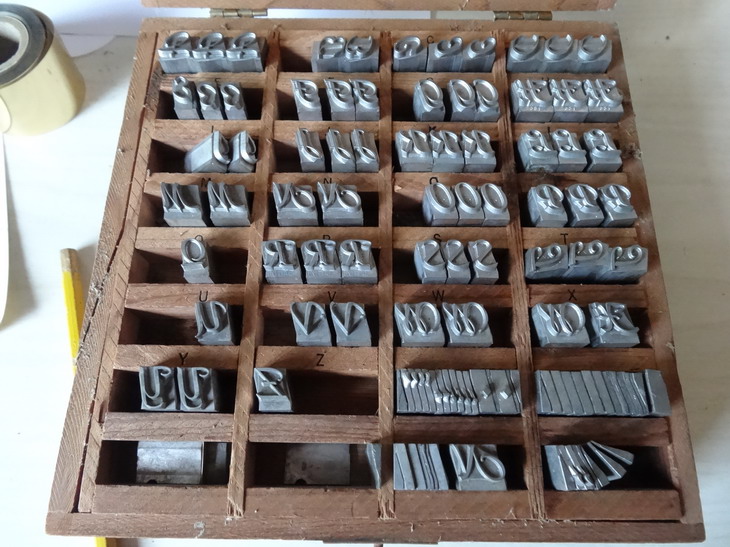
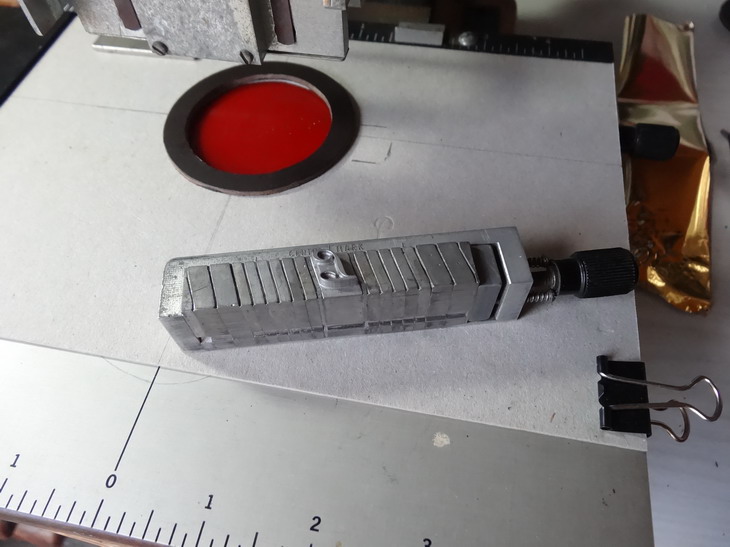
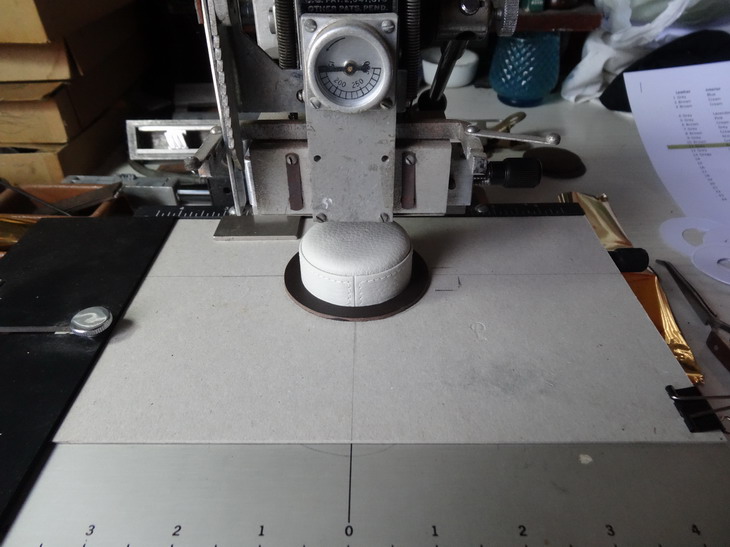
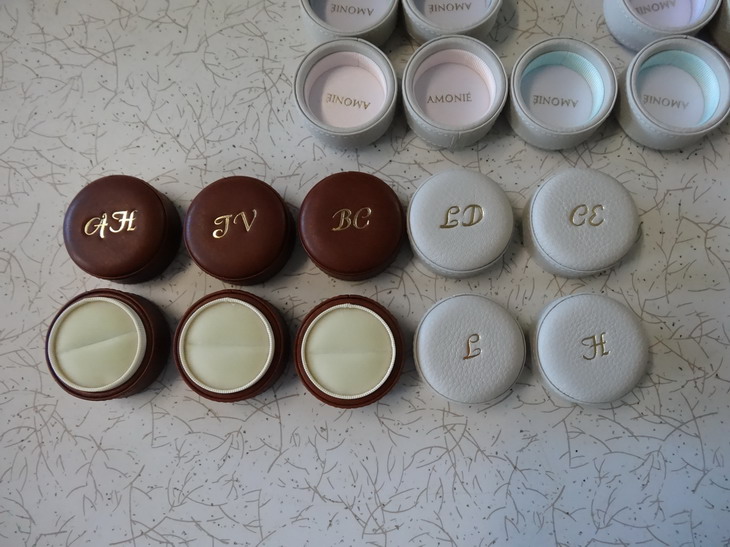
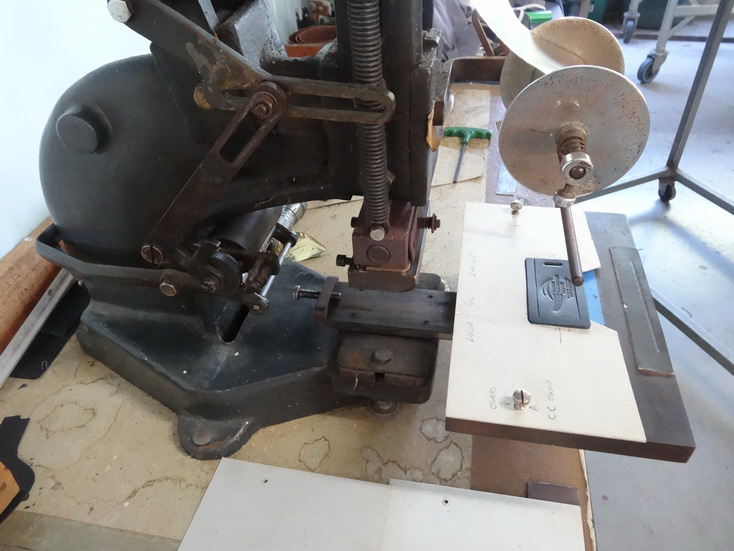
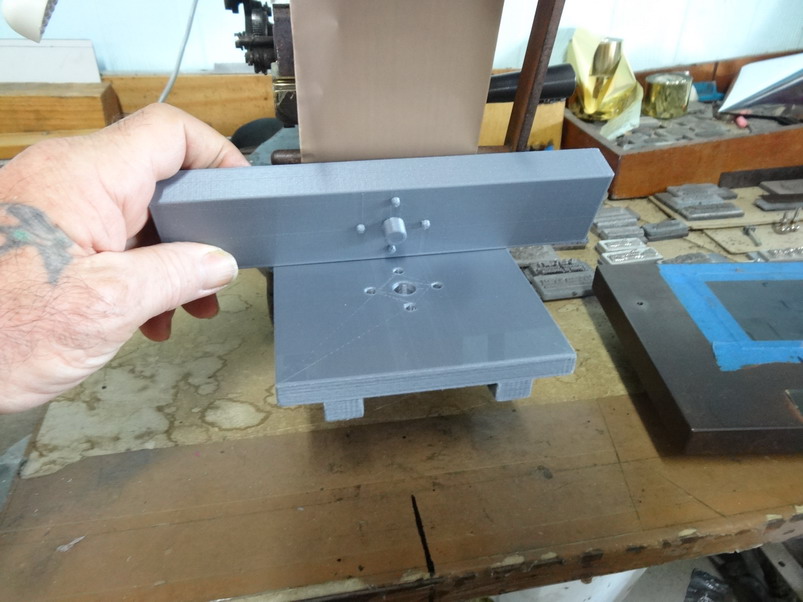
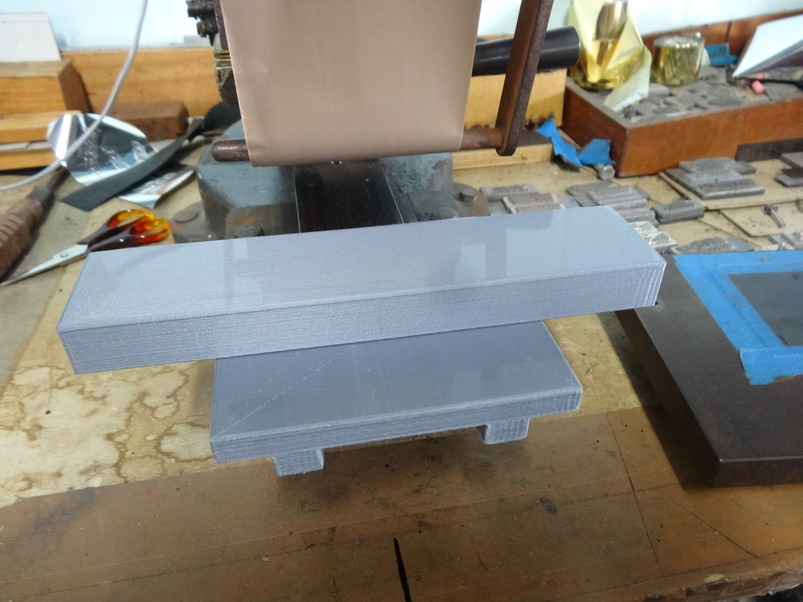
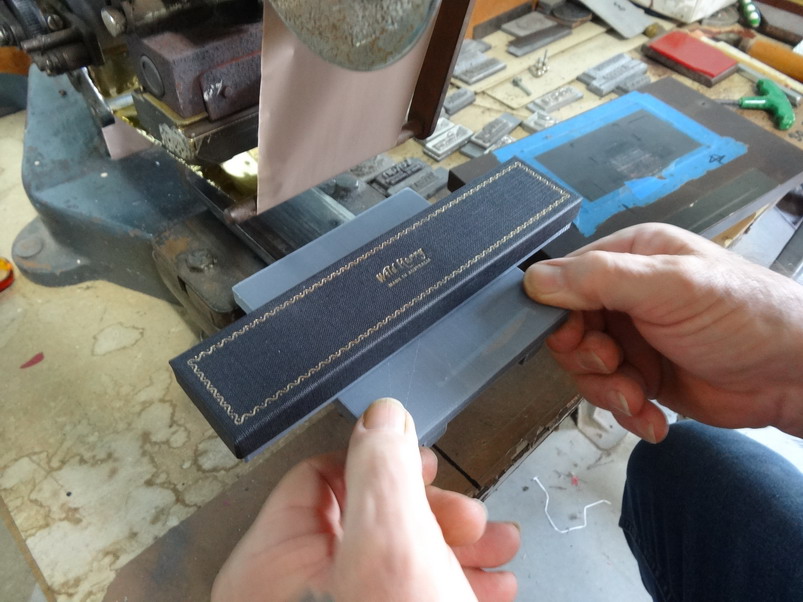
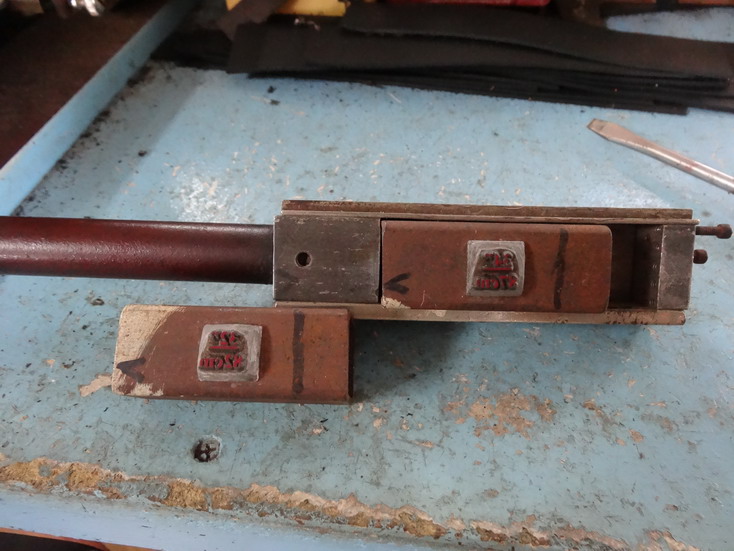
Do you have the same machine as this? I doubt it could be bought but some like myself could make it fairly easily and an engineering shop could do it for sure. Design wise it depends on the machine and what type of stamps you want to use as well. My favourite stamp holder is shown in these first 2 pictures and you can see that it uses a dovetail to fit into the spring grabber. This one allows me to use spacers and a couple of 1/4" bolts to tighten up onto the stamp or letter set whichever the case. Back of the holding block showing the dovetail- ront of the holder shown holding a heat tape attached stamp- Another embossing machine I use has a similar dovetail but it gets tighten up with a bolt and is actually a little more trouble to make. If you are using a Kingsley letter set like in this pic below their machines have a wide variety of holders and they are also held in place but a couple of tension springs and a guide strip. This is a single line holder that I use a lot for embossing initials onto the ring boxes I make a lot of. If you want to give me some pictures of your machine and an idea of the variety and type of stamps you want to do I could Cad up a drawing perhaps that may help you better.
-
40W Chinese Laser - Engrave and Cut Leather - Discuss
RockyAussie replied to Billy Hell's topic in 3D Printers and Lasers
Just thought I might show a bit on that subject that you may consider @dikman. On the one I just built I did not want to have too much overkill on the suction as I am doing a lot of thin cardboard cutting so I went with this 130cfm bilge air blower fan and can confirm it works well for me. Note that I have surrounded 3 sides of the box with some 1/4" foam to assist the air to move in the direction I wanted.Not bad at all for around $30.00au https://www.ebay.com.au/itm/381970877031 Here is a picture of it and a couple more that show the plumbing fittings I used. The blower is screwed in under the table and then with some 4" aluminium ducting run outside. I have taken a good video of the suction with a mosquito coil in action and I will try and get the editing done on it some time soon.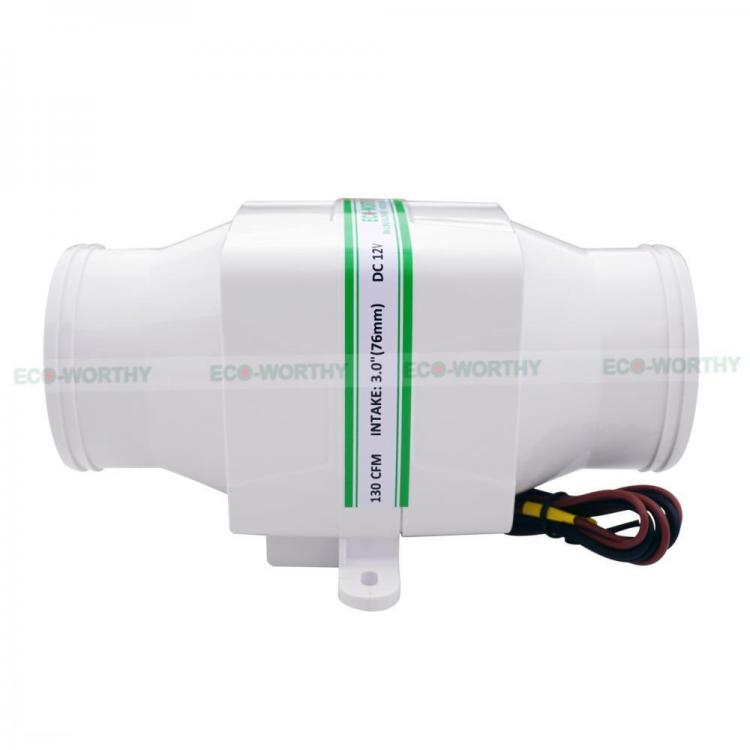

-
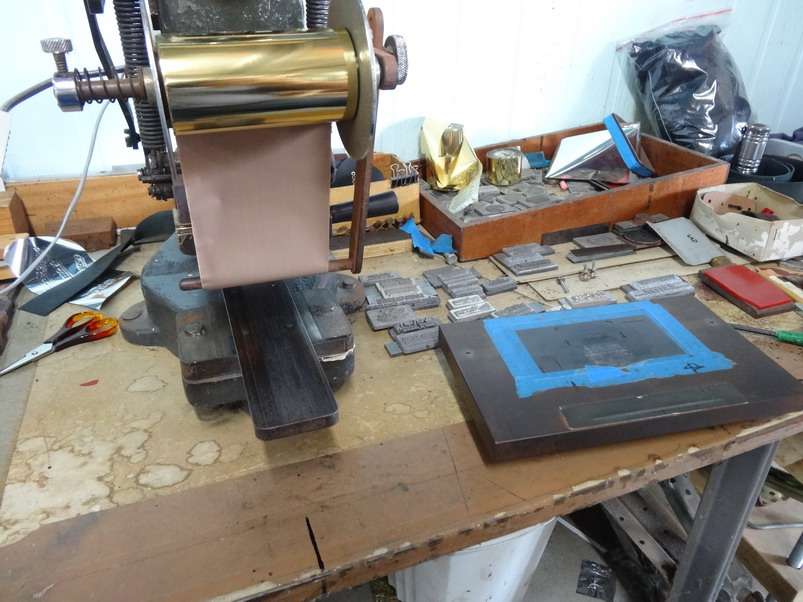
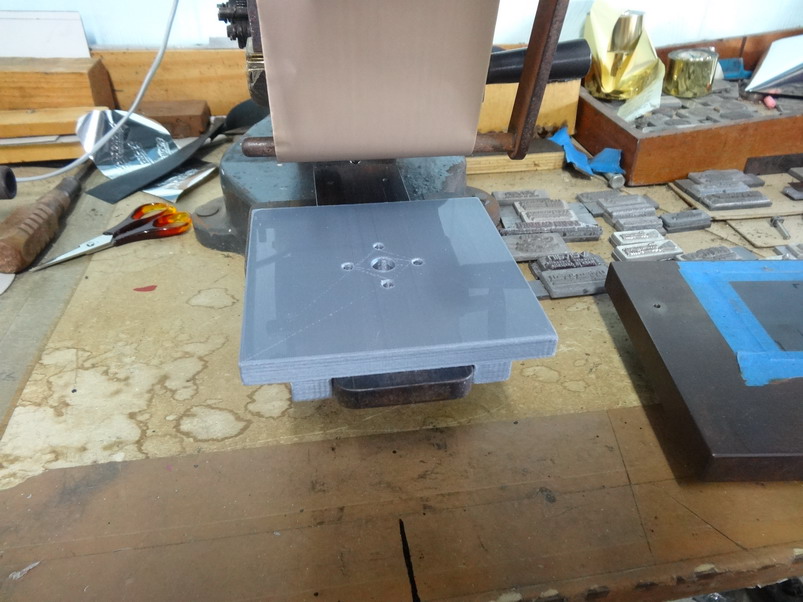
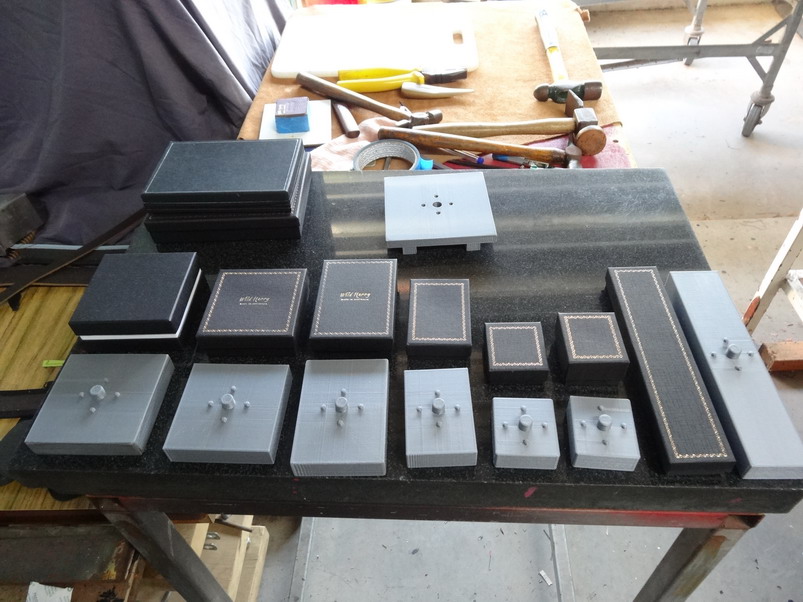
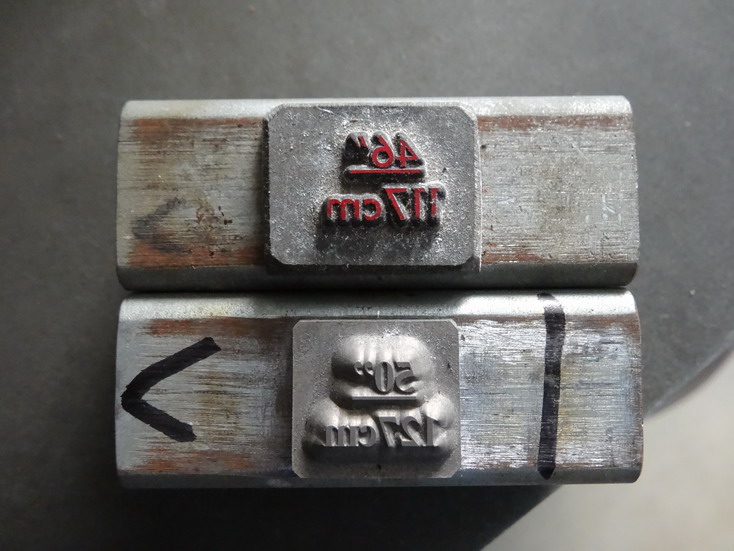
@Treesner if you are not fairly mechanically minded I am going to be honest and tell you you got the wrong press I think!! Here in the sellers video you can see one with a slide in one which would be a lot quicker and easier than bolting your stamps in individually. That said... I don't know what stamps you are wanting to use and whether they are all the same size etc. I have a lot of different embossing machines and a lot of different types of stamps etc and although any one of them could do most of what the others do, none of them have all of the best features in the one machine. If I had the machine you have there I would start by using that bolt hole to attach a slide grabber that I could then remove the stamp holding block from easily. The machine with the best grabber is this one in the first picture and the reason I like it best is that the spring piece at the front allows me to slide the stamp block in without having to loosen or tighten any screws. (Screws often get over tightened and get stripped all to often.)Notice that on this one the bottom piece is able to slide in and out if required and can be taken off as well as shown in the next picture. Also note that this bottom plate I have put in 2 screws to enable me to put in whatever cardboard jig to hold the product piece in place that I want. That is one way of getting stamps to be repeatedly in the right place and the next time as well. This picture shows that the bottom plate can be removed and this enables me to use other systems for where I may need more depth for instance. Here I have 3D printed a block that allows me to do a wide variety of embossing s on our product box lids. Another one of my favourite embossing methods I came up with is what I use for stamping my belt lengths. This method uses the heat tape to attach your stamp but I have put the sizes all onto same length steel boxing. With the holding block for it I have placed within it a 1/8" long magnet that holds the size boxes in tightly and with the aid of a pair of pliers I can rip them out hot between sizes and change to the next. SO.....I would think about making a holder that that is easy to slide in and out and encase a magnet. When you get any new stamps attach them to a steel backing and you can just then click them in to place.Remember to allow room to lever the stamp out though. I think that should get you some ideas that could help.
-
Youtube link to LW post allowed?
RockyAussie replied to RockyAussie's topic in Leatherwork Conversation
Anyone know? -
Am I allowed to post a Leatherworker.net post link into a youtube posting?
-
Review TD-801D The king leather skiving machine
RockyAussie replied to shantiandd's topic in Leather Machinery
You can wrap a teflon strip around the foot and that can help but I prefer to use a roller because I do a lot off glazed crocodile and that you really don't want to scratch. Here are a couple of links that show what difference a roller can make - -
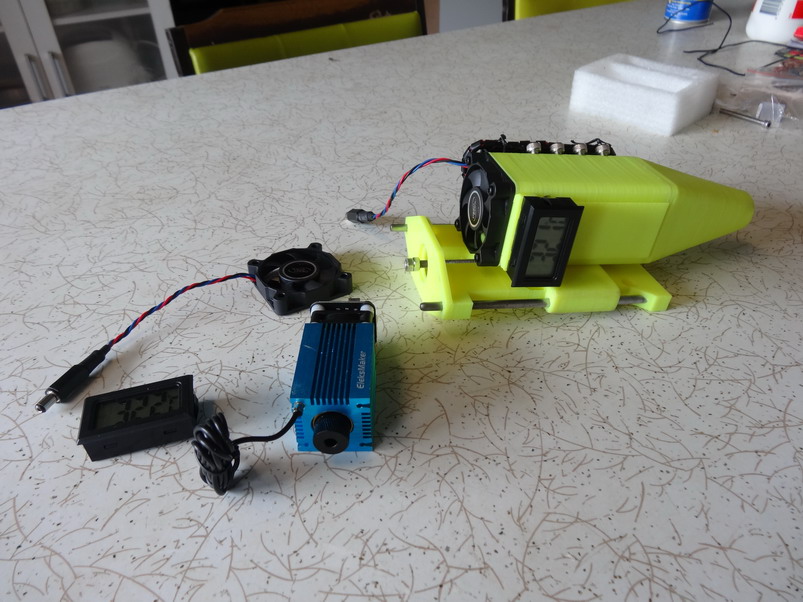
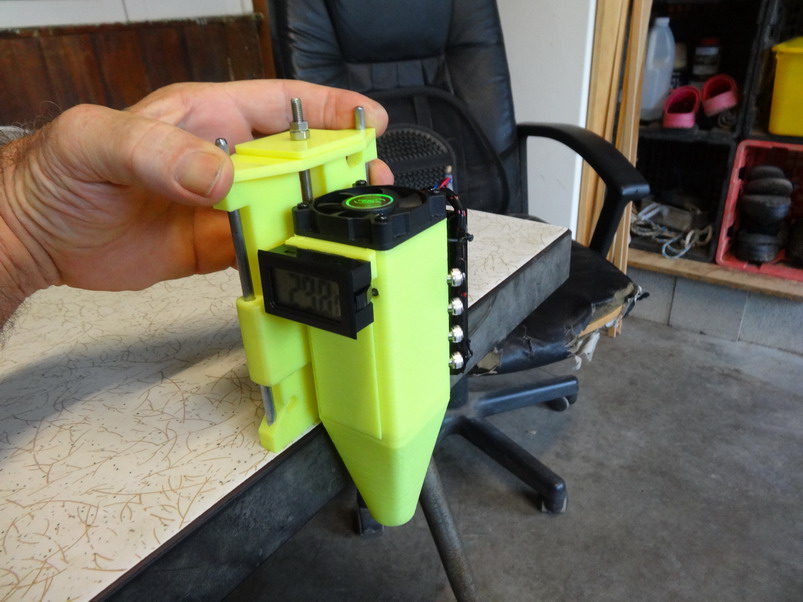
That is the temperature gauge. I got 4 of them out of China for about $3.00 each and they all look to be very accurate. I did a 15 minute test yesterday at full power in the standard without shroud mode and to my surprise it went from 30.7 degrees C up to 45.7 Degrees. I am hoping to see some results with the shroud and top fan sometime later this week. After I see how it all performs I will consider whether to make any up for sale I guess. Great thing about the printer is it keeps working while I carry on doing other work.
-
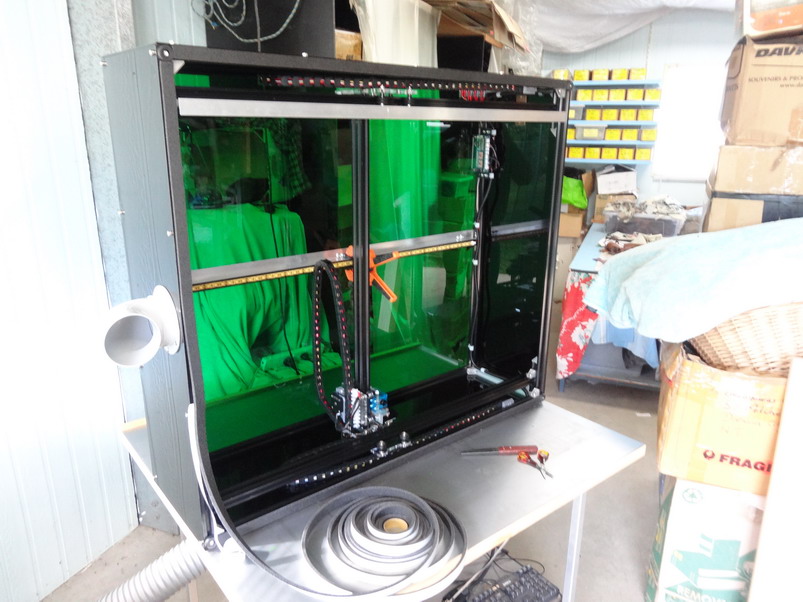
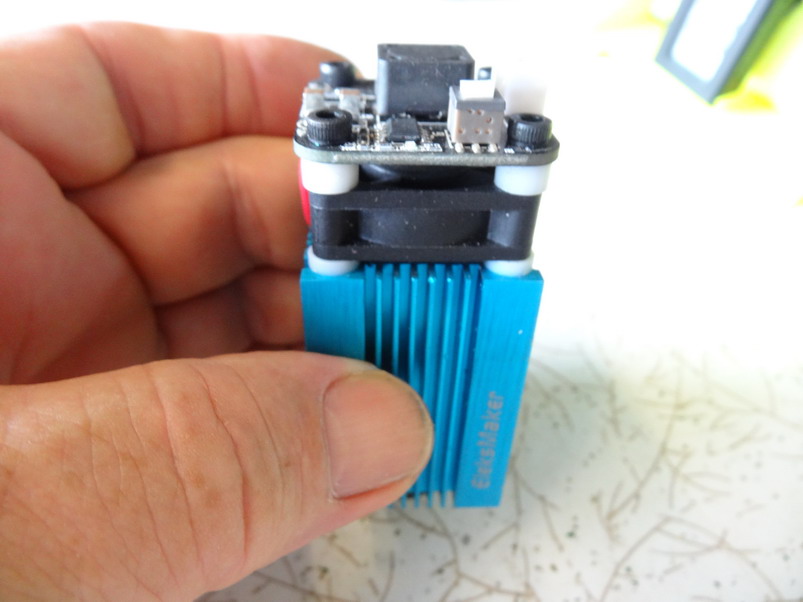
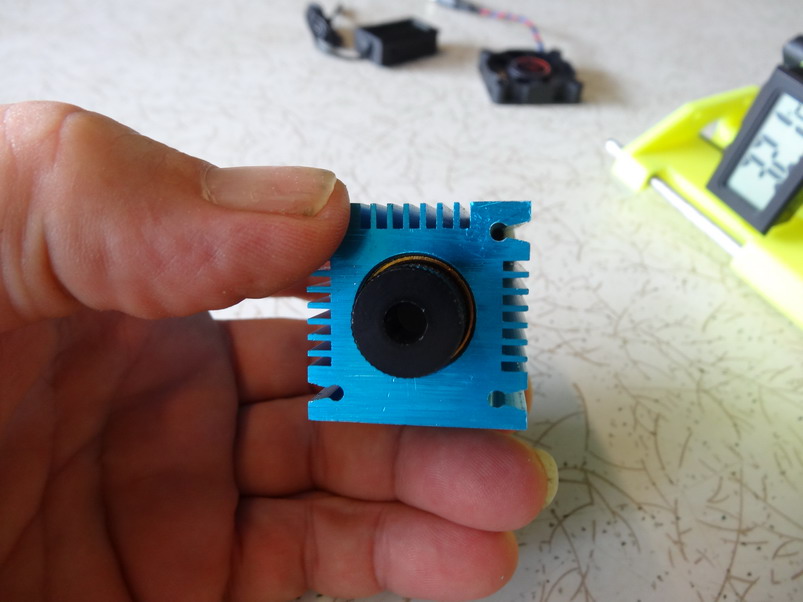
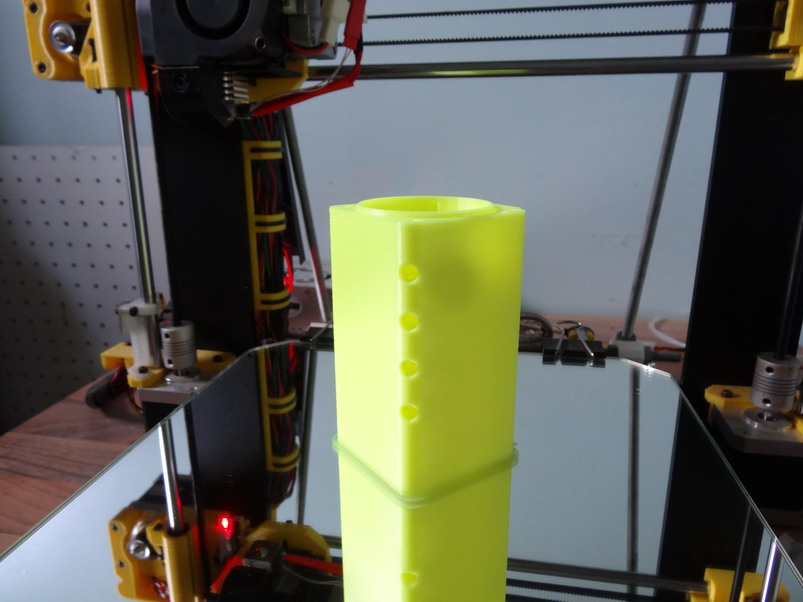
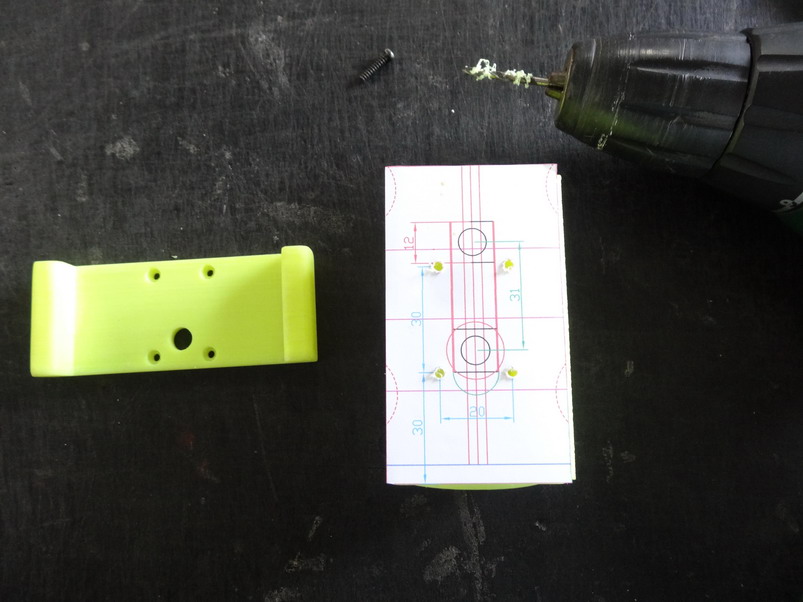
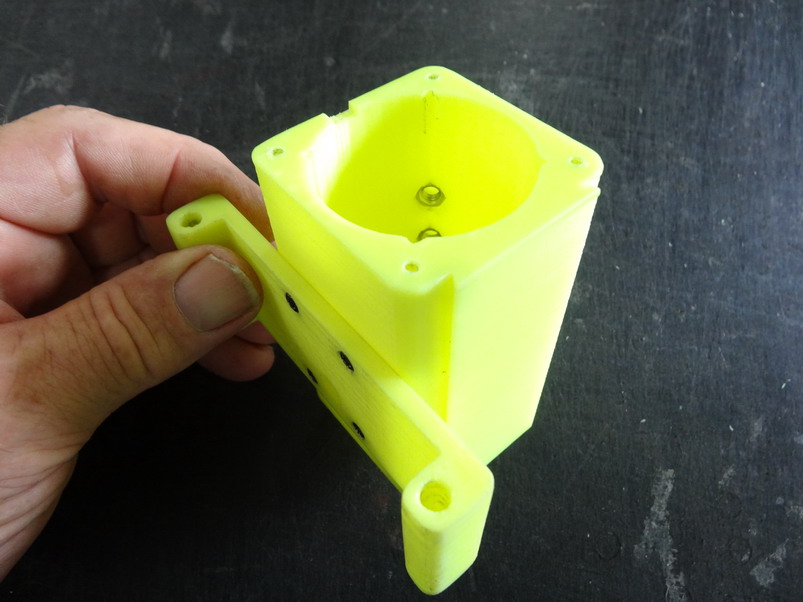
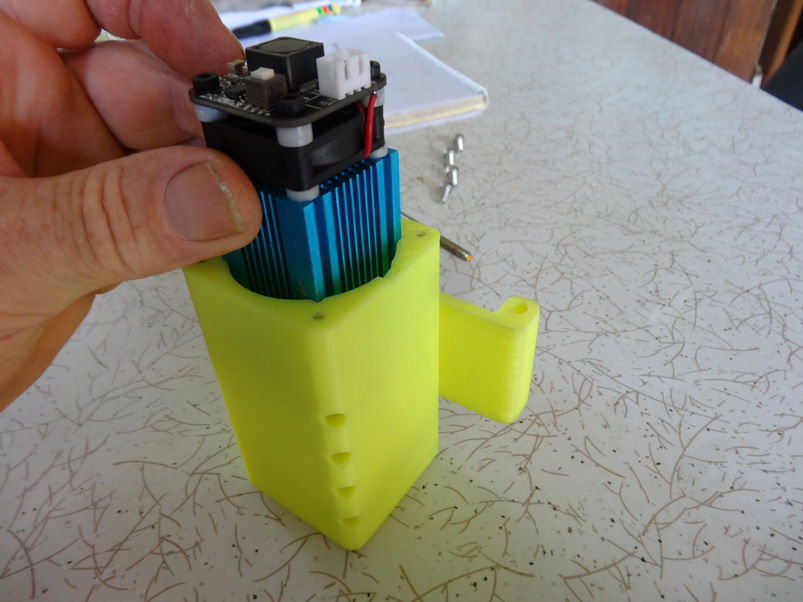
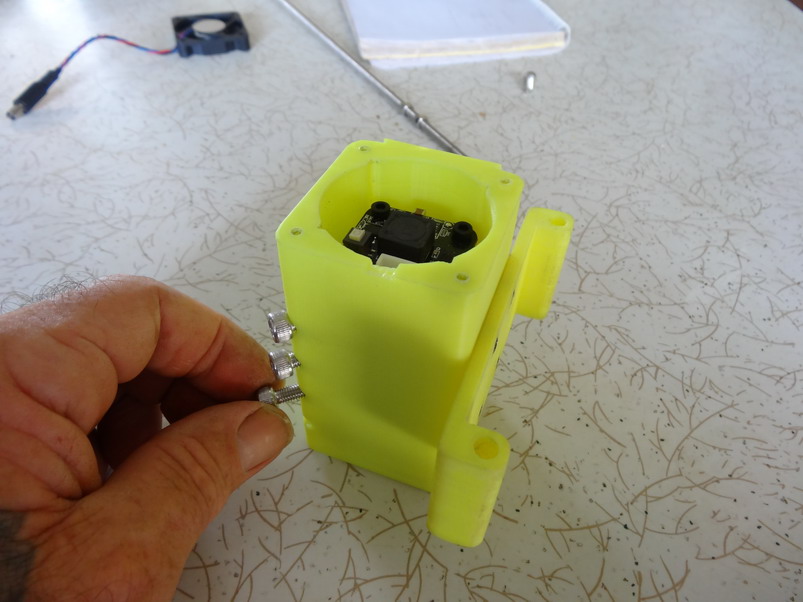
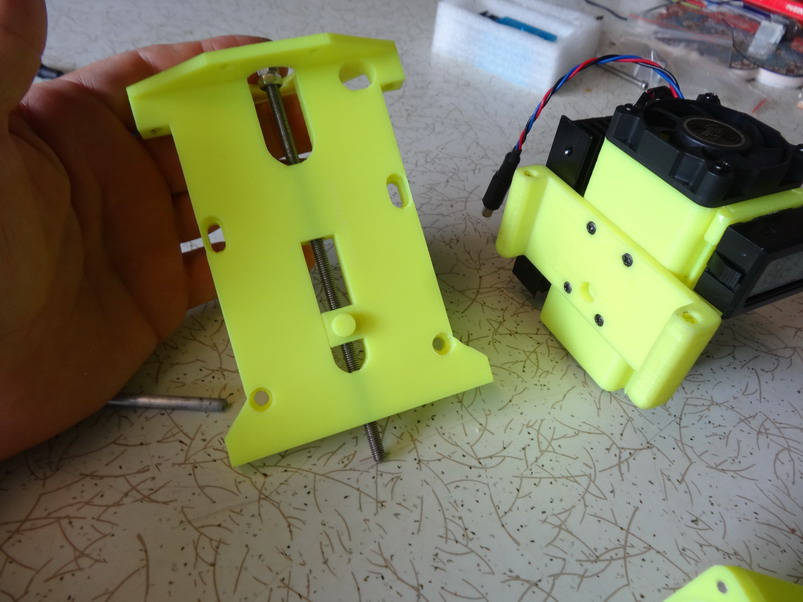
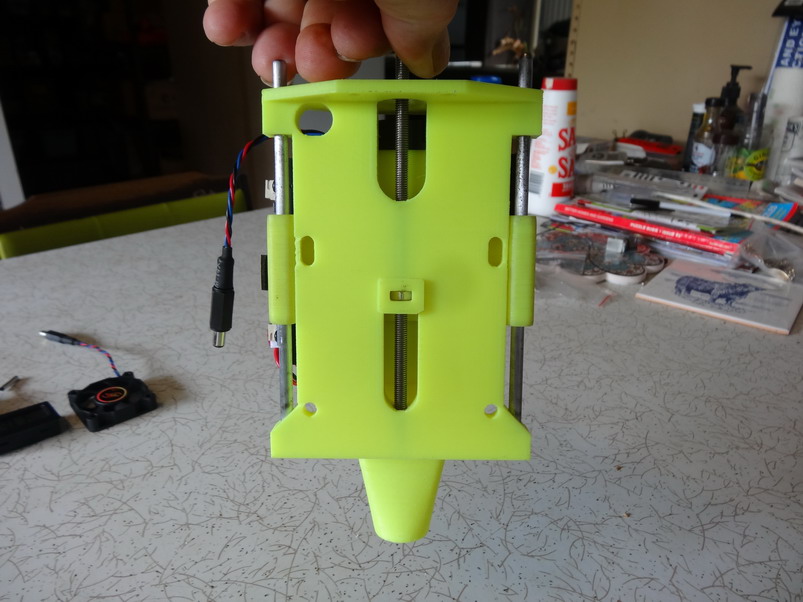
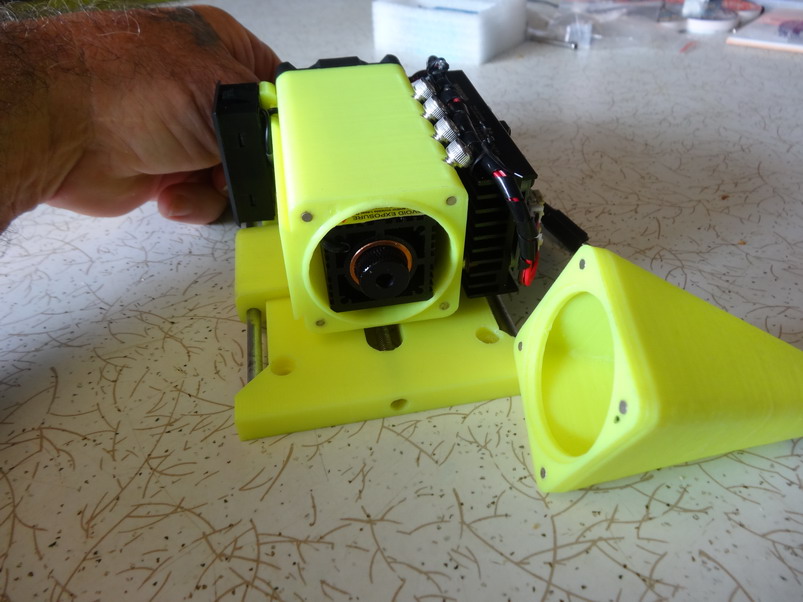
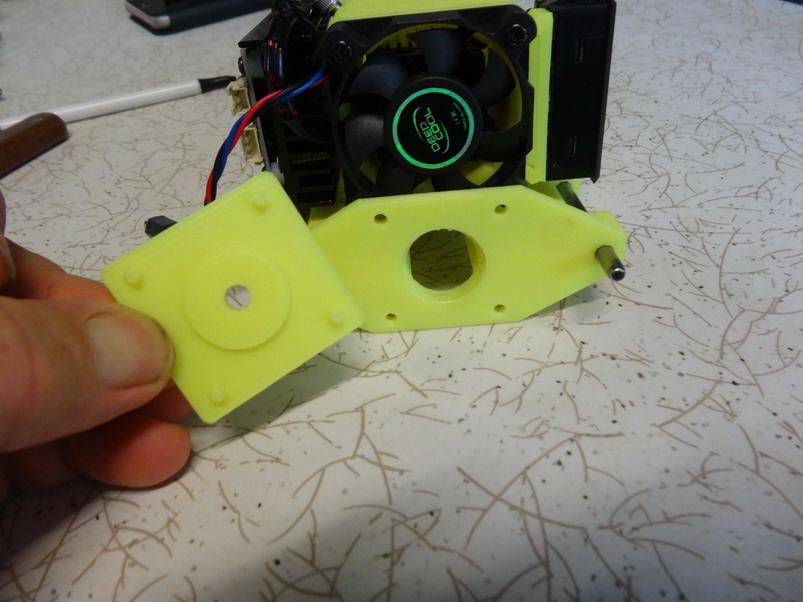
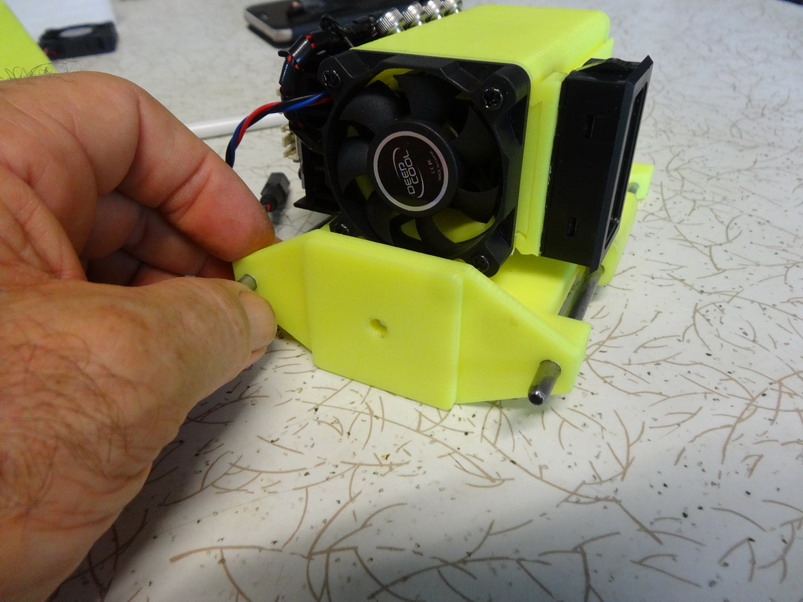
Yeah I been starting to worry bout that a bit . In my defence I have to say this really has been one of the simplest and fun projects that I have ever done. I've been trying to rush through a couple of improvements to free up the 3D printer for some other jobs that are waiting. Since getting the laser I have found I need it to be running nearly non stop and the original design is only intended for hobby use and should not be run at full power for longer than 20 minutes or so. This has to be done by allowing the laser to cool for 5 to 10 minutes before starting again. I am guilty of going past this time way too much. Keeping the laser running cool is a big thing in how long that diode will last. Another factor is air assisted cutting will make it cut more efficiently and quicker. Keeping the smoke off of the diode lens is another big point to remember ass well. For cutting thick leathers requires multiple passes or you gets a lot of burning /cindering on the edges. Being able to drop the laser down on these passes at say a1mm at a time is also a great advantage. I have been able to just do a few passes around without a drop down adjustment but I am sure that is a pretty inefficient way to go. Following is my answer to these problems and is what I am working on at the moment. The first thing to improve was the diode cooling and I noticed that the 2.5 Watt Eleksmakers fan can not really get any air to blow down the sides of the cooling fins and the centre of the holding block is solid . See pictures - I concluded a larger cooling fan on the top was needed and therefore why not encase the block in a shroud and force the air down over the fins and then funnel that air to get some air assistance at the same time. Your only trying to burn stuff down there anyway!!! Here is the shroud part with some recesses for nuts to locate the laser block into place. I decided to make the funnel part connect with magnets and forgot to take a separate picture of the print so I will show some a bit later. The next thing is to design a Z lift mechanism that does not takes up any of the cutting area. The only Z lift I could get come with the cost of a lot of the cutting area. This next part stays with shroud and has the holes for the guide rails. Next shows the fit is good Bolts screwed in and they work great This pic shows the main body of the Z lift which will replace the acrylic piece that presently holds the laser body. Note I have mounted the fan and also a temperature gauge to the shroud section. Also note the button section that moves up and down on the thread is a tight fit into the hole on the slider attached now to the shroud. This back picture shows the button has a recess to receive a nut that allows the Z movement. This one shows the magnet attaching funnel. This is needed to allow ease of focussing if needed. With the Z lift that should be fairly rare I think. This also shows that the 5 Watt laser fits in to the shroud as well and the big bunch of heat sink and electrical looking stuff on the right is actually for the 5 watt laser.I am doing 2 shrouds to allow for quick change over whenever that may be required. Although I have designed this to have a Z lift motor at the top which will allow manual movement with it, I have for now also made another piece that can clip into the top for manual adjustment. I have not ordered in the 3 axis power board thing yet and I am still waiting for the Nema 17 motor to come in as well. So far everything seems to be testing alright and I hope to do some in place testing later on this week. Thanks to all of you who come in with experience and advise and help to contribute. Brian
-
How I now straighten leather for strap cutting
RockyAussie replied to RockyAussie's topic in How Do I Do That?
Hey Treesner, I can not say whether it would work or not as what I have done I know works for me quite well enough. Each persons requirements will differ of course but for myself I need to be able to get back to a bench without any permanent obstructions and it must happen quickly and easily as well. The HDPE cutting board is good for cutting in any direction which is good but allows the leather to slip around on it easily which is not so good sometimes. The 1/4" back strip is good for leather that is say between 3 and 6mm or 1/8 to 1/4" but if you were doing thinner leather it would need to be a bit closer. It helps to stop it sliding back by the leather being forced down when the end of the steel gets pushed under the screw. If the leather were under the steel it would need to have a stronger angle or box steel that could have more pressure applied and would then need a more serious clamping system. For now it works fine for me as is.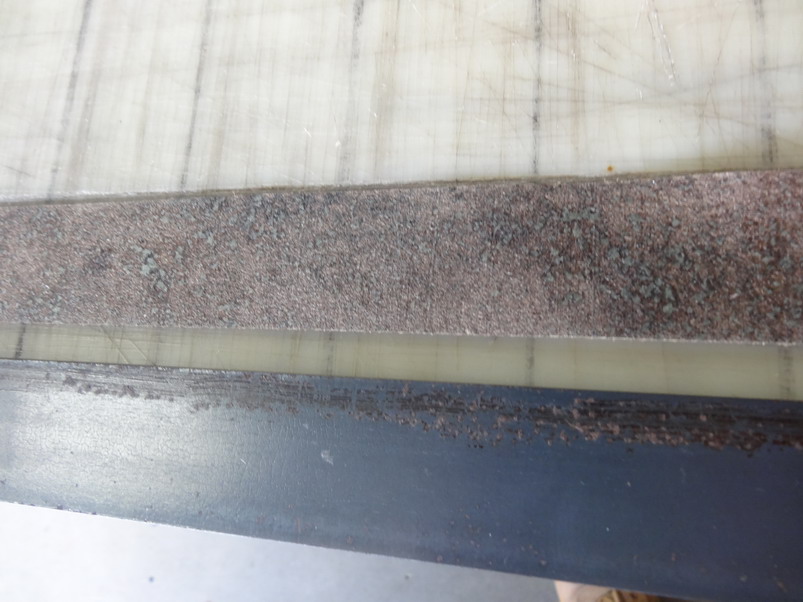
-
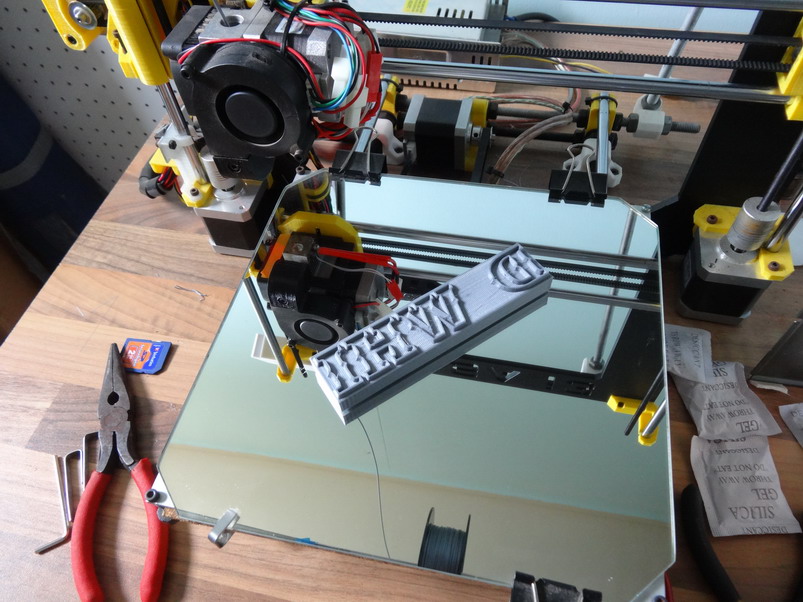
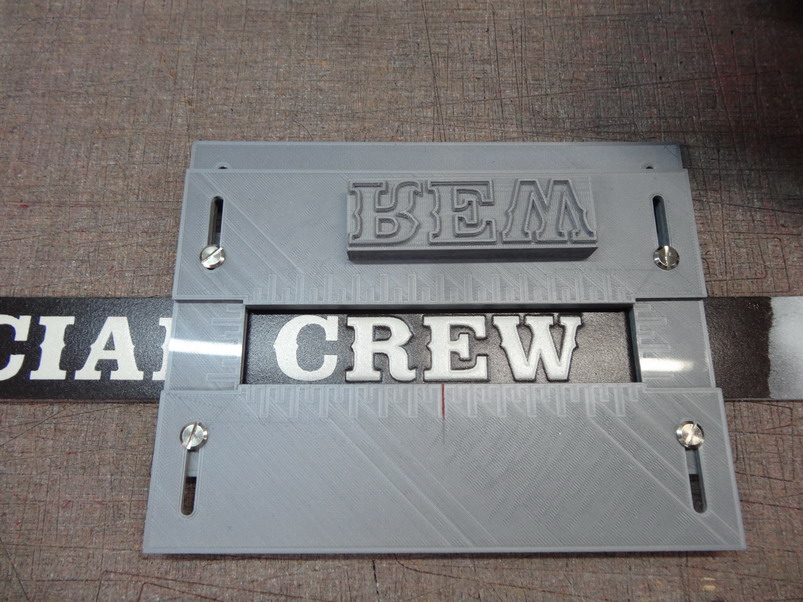
I meant to say Curra platform. You can angle the job in all sorts of ways on the platform and if you rotate it to 45 degrees you will find that the print lines will travel along straight with the job and I have found that this tends to give a smoother end result. See the angle in picture below. I can not open the curaprofile you have put in above. Could you just copy and paste them here ?
-
Also try angling the job at 45 degrees on the curry platform and slow down the speed. If you are running a heated bed on glass you may be able to put the letters face down on the glass for a while with a little weight on top. I think the sanding works pretty quick and easy though. Each block only takes about 2 minutes.
-
You would probably do a bit better with PLA. As to the Curra settings possibly could be better but what are your settings?You may be able to copy and paste. Although I would normally get a better print result I have found that some sanding with a fine sandpaper, that white stuff helps and when it is smoothish finish it off with some firm rubbing flat down on paper. I normally use the back of the sandpaper. It can get pretty shiny.
-
Zipper installation multipurpose guide
RockyAussie replied to RockyAussie's topic in 3D Printers and Lasers
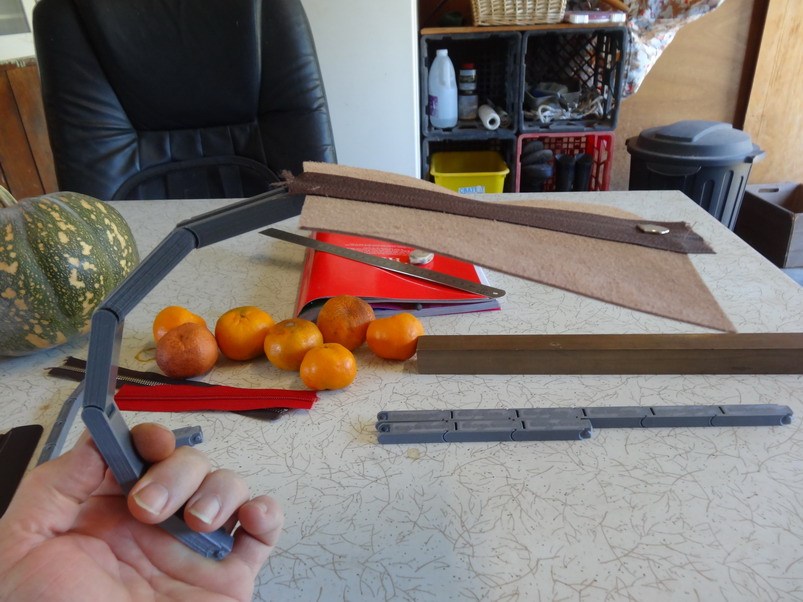
Hi Tom, I have already loaded the files for people to use right at the start in this post. As Uwe found it takes a while to get a printer to print out a file the way that you want and he did not actually trial the product by doing any zips with it. The curve he was worried about though a lot more than how mine printed out would not have mattered in practice anyway as once it is applied onto the zip it straightens up anyway. The redesign version he did shown earlier in this post would resist folding down which would be undesirable when feeding over a sewing machine like a cylinder machine you want it to flow along with the rest of the job as it goes through. Note in the pictures below how the links straighten out but can still flex if needed. What I am hoping to do is make available at an affordable price well made pieces for those that do not have printers or could not be bothered to print them for themselves.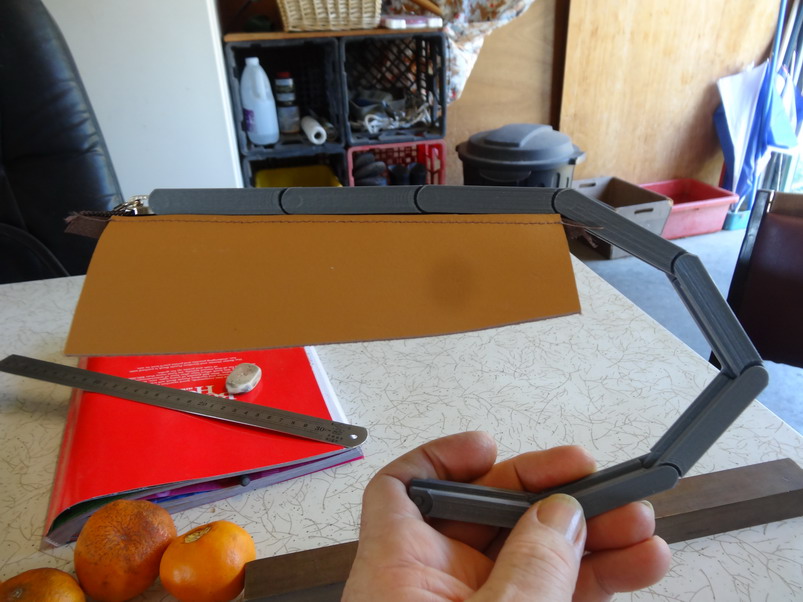
-
Zipper installation multipurpose guide
RockyAussie replied to RockyAussie's topic in 3D Printers and Lasers
Thanks @YinTx I will keep it in mind. -
Zipper installation multipurpose guide
RockyAussie replied to RockyAussie's topic in 3D Printers and Lasers
Thanks @koreric75 for the offer. I just checked your location and it looks to be fairly much middling on the map. I have no idea location wise if that is good or bad for distribution. I have not had much in the way of feed back nor lots of orders either as yet so I doubt it would be much trouble to start with. I have not really done much to show off how they can be used in various ways to suit the applications either yet though. I have been playing around improving this laser I have been building and that has taken up a lot of my spare time lately. One good thing is I found it laser prints well on the pla which means I would not have to get the printer to print in the Made in Australia part on the run and that would save a lot of the printing time. At any rate think about it and give me some idea what $ you think it would be worth to pack a little box and address it to the buyer and post it if you could. I will have a look into the postage costs here and work out some recommended size and numbers of pieces for people to purchase in a kit so to speak. Just very roughly I am thinking about $2.00 to $2.50 au a piece which would probably make up into average kit of about $20.00 to $30.00 plus postage and costs. What are your thoughts?
