RockyAussie
-
Posts
3,265 -
Joined
-
Last visited
Content Type
Profiles
Forums
Events
Blogs
Gallery
Store
Everything posted by RockyAussie
-

Help choosing my first industrial machine
RockyAussie replied to MStone's topic in Leather Sewing Machines
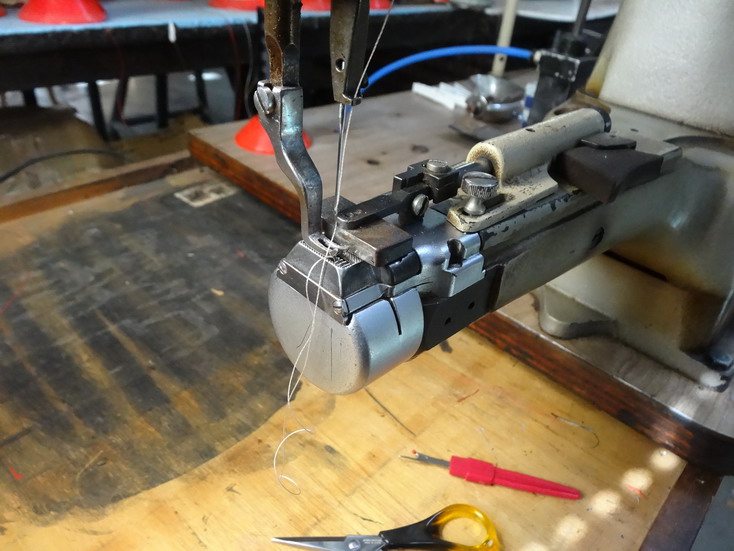
Yes that is correct. No it is a walking foot but does come with extra punching power/thread thickness etc. I would have them both if I could but as to which is more suitable would depend on the type of products that you mostly make and what sort of weight/thickness those are. I have been trying to find a similar machine without walking foot and this Consew model 223R may be of interest- And another link - http://www.consew.com/View/Consew-Model-223R-2 They do look a little large at 65mm dia on the end but still a lot smaller than many others as well.Keep in mind that the foot can be a lot narrower for fine jobs as well.The one in the picture of mine above is one that I made to suit much of my work finer work jobs.The dog foot was smoothed as well. -
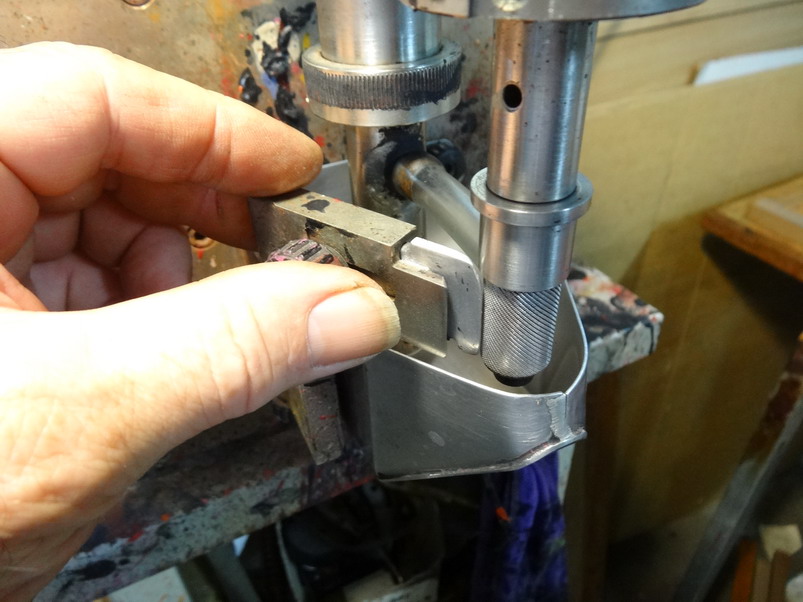
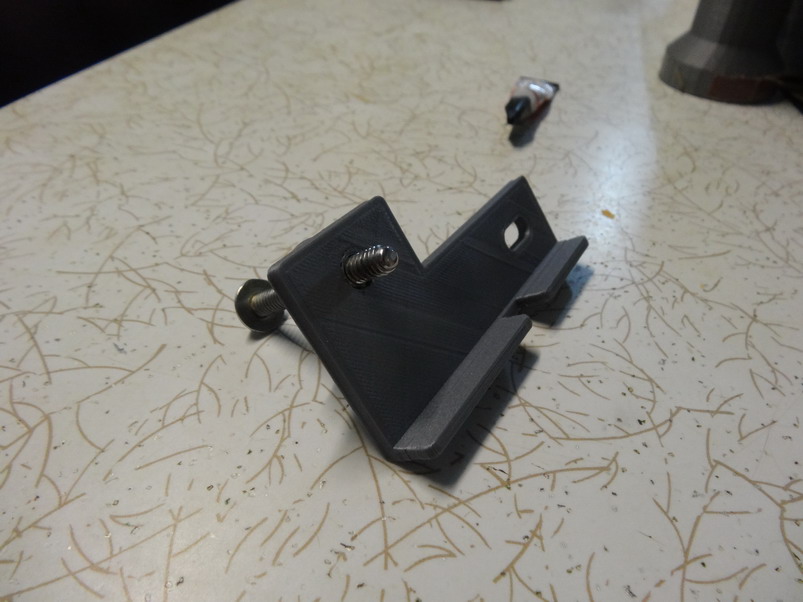
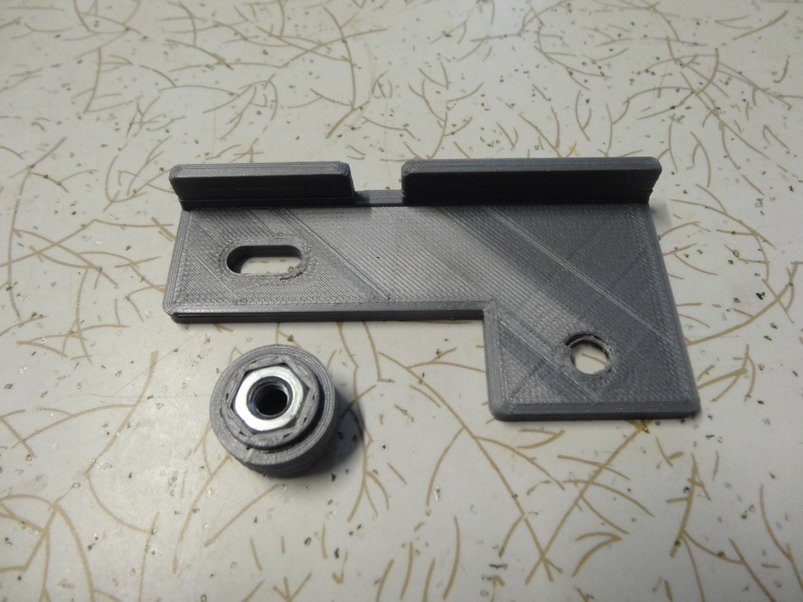
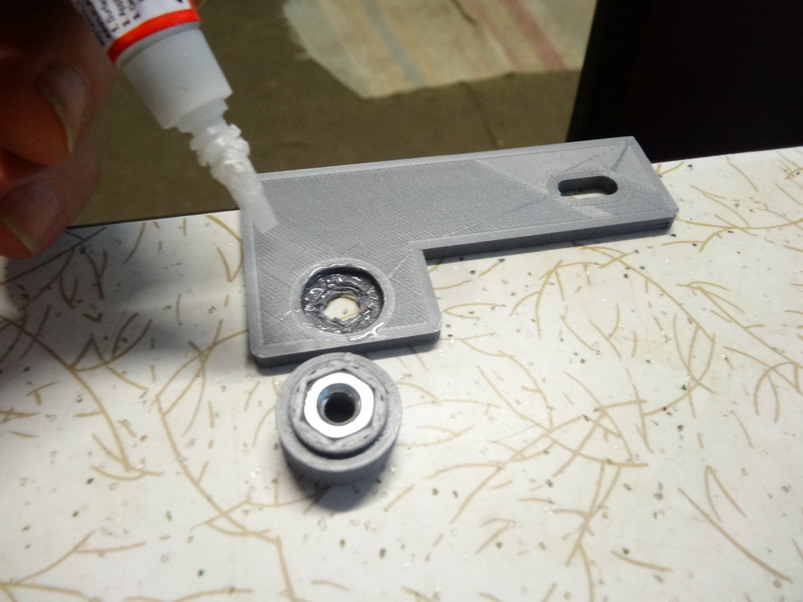
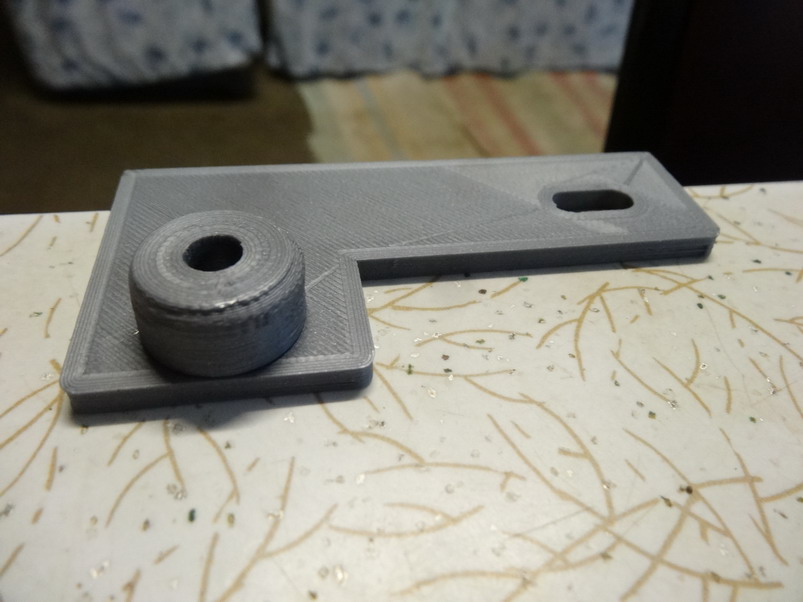
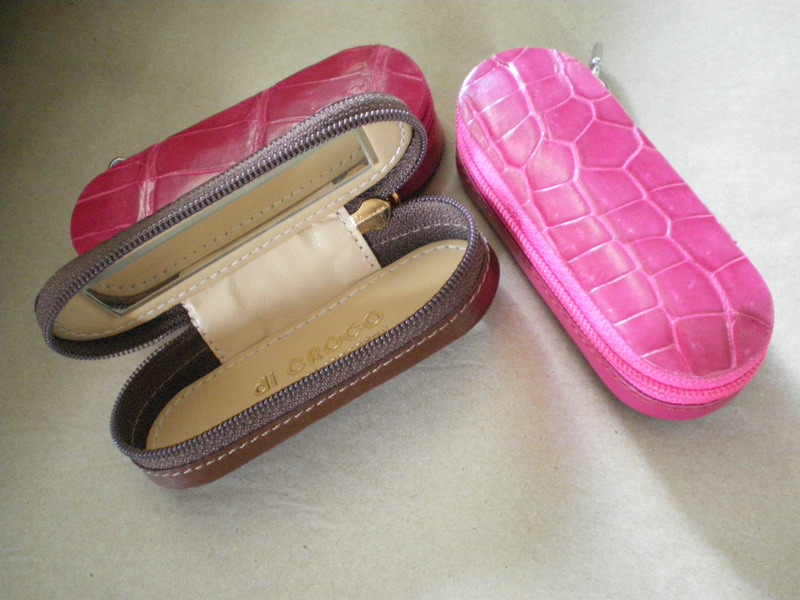
The possibilities are endless. I make ring boxes from pla which I cover in leather and printed the tools to help me assemble them as well. There is room for a lot of different shape boxes and such, bangles to cover, pouch covers to mould and endless tool improvements.Just need imagination........ My latest tool improvement is to give one of my edging machines a way of adjusting the edging thickness in a more incremental way. 1st pic shows how the thickness adjustment was done previously.This is done by pulling in and out from the knurled roller by hand. Note that the silly brush wiper it came with is now an aluminium piece now. That was an earlier improvement. This second pic shows what I printed to allow me to adjust the thickness now by even a mm fraction. After drawing the parts(about 20 minutes after some measurements) I decided to print it in 2 parts but so that it could all be done at the same time. Nut gets inserted into the part with the help of a little heat. A bit of super glue ...it works great on pla. Presto she is now as one Bolt fitted I can only say that I wish I had one of these 20 years ago as the amount of molds and jigs and so on would have saved me a fortune in time. Where I once spent hours making moulds out of wood on my bandsaw and sander for say my lipstick cases I can now print as many as I want whenever I need more and still keep working. That is the same now for many of my products as shown in a couple below . This week if time allows a local MC club want a stack of belts with 1" letters stamped in a long string of words so.... A block will need to be printed to saddle a 1+1/2" belt with spacings for the letter set and I will bet a few here would like something like that. I repeat..." The possibilities are endless"


-
What @immiketoo said is true but on the other hand many tools and machines I use every day I have been told would or could not work. That is what I love to hear caus it often means if I can make it work I am one step ahead of the rest, until I share it here of course. That is the question of course. I would start by making the lines higher than normal and allow that the lines may need to be smoothed out. You can smooth pla with a warm iron and it can be painted to smooth as well. Also consider the raised shapes possible that can be done in the moulding as well from the back side. Do you have a 3D printer yet?
-
Well done. Thanks for sharing.
-
That does it ....I am definitely not showing off pics in my shop now. Where is the drool emotion?????.
-
Help choosing my first industrial machine
RockyAussie replied to MStone's topic in Leather Sewing Machines
I believe so. I don't think that will be any problem ...You can see one in this video on a Juki but not in use unfortunately - This video is also worth a look - They are nearly impossible to find but what I use A LOT is a Pfaff 331-33/1B L. This is a needle and dog feed setup and means I don't have the problem with the back walking foot holding the bag gussets further out amongst other advantages. I have seen another brand similar machine recently but cant seem to find it at the moment. If I do I will get back and let you know.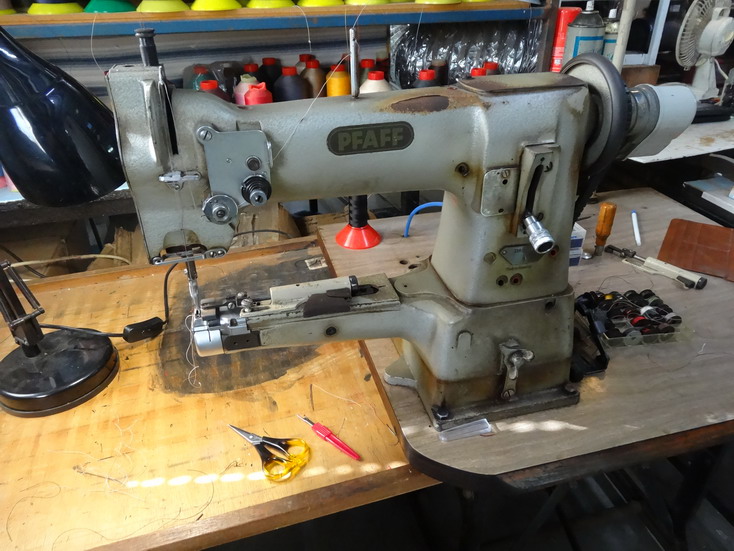
-
Feedback on our Leathergoods website
RockyAussie replied to NickPol's topic in Marketing and Advertising
The website is good as are the pictures. The products for the price is mostly good sometimes a little high and sometimes quite low. I do suspect that you do not have a good cylinder machine as the wallet and the bag with the brass ring through the front have the bobbin side thread showing on the top. It is obvious and looks terrible. I am curious in your about you section where it says "The more we researched about how everyday products (we) made the more we thought "We have to change this!" Where you say (we) made, did you mean (are) made or perhaps (other makers made)? As to the marketing I go with what Alexander from Solar Leather Machines said so well above. Think I will have to try a bit more of that advise myself, trouble is I cant model and be such a great maker as well.. Seriously though if you are offering custom work (which I avoid and even moved 20 minutes out of town to escape from) how can you give good service without an address/phone number? Unlike Lobo I can talk way faster than I can type and follow up with an email if I need to. I do have a phone plan that allows me to phone anywhere in Australia for the same cost every month and if I am busy I just call them back when I am not so. That is in no way any disrespect for Lobo I must say either, it just depends on how the differences in the marketing is set up I think. Best of luck and hope you find some good answers. Brian -
First handbag
RockyAussie replied to Marietje's topic in Purses, Wallets, Belts and Miscellaneous Pocket Items
Very nice work you should be proud, I know I would be. -
Orders to ship
RockyAussie replied to Mattsbagger's topic in Purses, Wallets, Belts and Miscellaneous Pocket Items
For someone who shows they could learn a lot from this site you sure have a weird way of doing it if that is why you come here. I have thought to answer some of your questions here at times and have concluded after seeing your responses to others offering advise, that my time would just be wasted but......this time you've got me. The article above is mostly used in the top pocket and sometimes the back but if you'd care to go to an engineering shop or any sort of machinist type business you will see that they among other things carry a small steel ruler about 6" long for quick referencing. They would certainly wreck pockets quickly with out such protection. The finishing of these pocket protectors for the purpose they are used is excellent. -
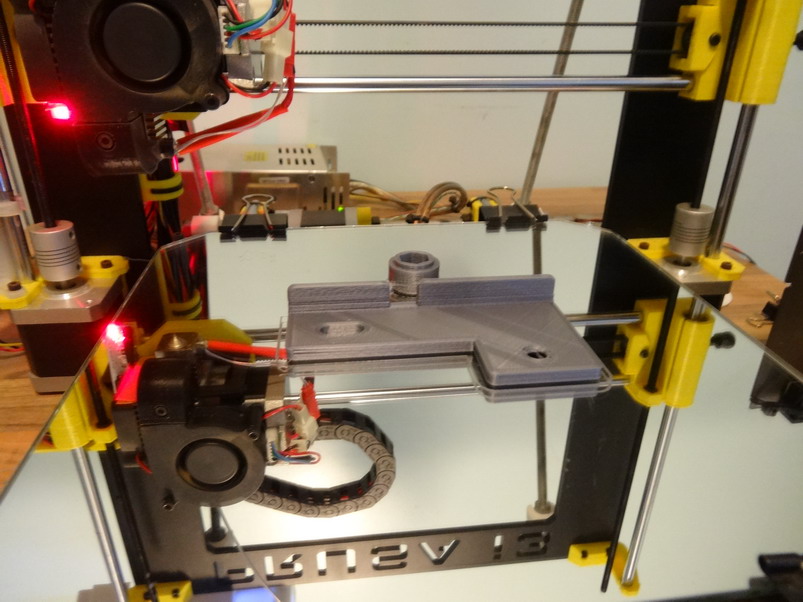
In case it is of help the bearing is a B623ZZ axial ball bearing ( normally about 1$ cost) and the outer pla printed piece is for the X as well as Y axis pullys that the bearing sits between 2 pieces normally. This is the stl file if you want to print it - belt-guide.stl
-
Zipper installation multipurpose guide
RockyAussie replied to RockyAussie's topic in 3D Printers and Lasers
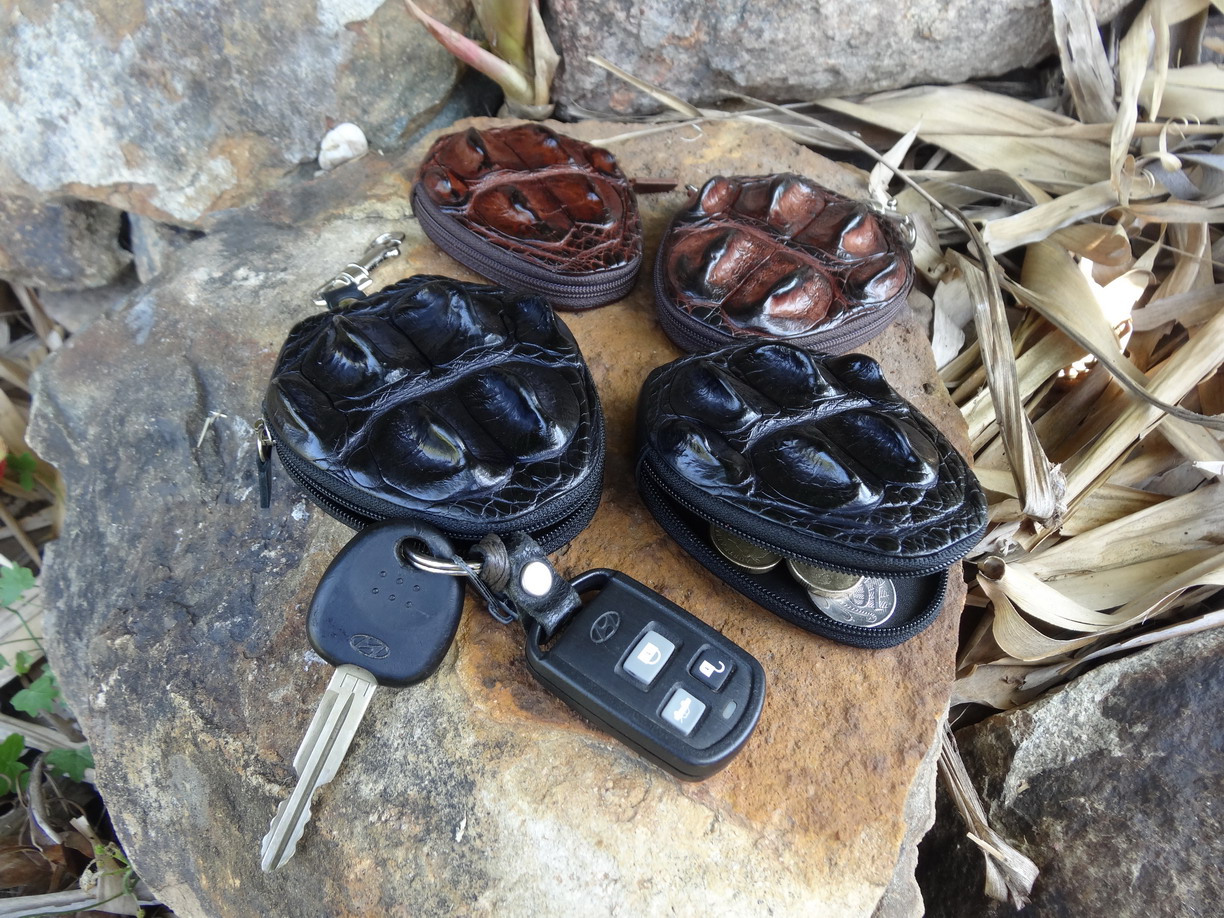
Here is a link to a video I just finished showing one method by my very talented wife using the zipper guide for making up care bags for crocodile bags I just completed. For those that have been patiently waiting for some of these ...I have finally got them done to a reasonable quality and have have checked with the postage costs. I will endeavour to get them out this week. The postage to UK and USA is around $25AU and should take about 10 business days although inter country postage may take a bit longer. Forgot to mention within Australia cost is about $11 express and they will go as well. -
A clicker press, a good skiver with suction, and some machines and methods for applying contact cement. A clicker press and a good knife/dye maker are just about the first importance other than sewing machinery.
-
Thanks Jimi ,I did think about making some for attaching to my thumb and fingers initially but a this was the quicker solution and as you say my shovel size hands shore do make it a challenge at times. The plastic discs attach to the bearings tightly and they normally face each other over a bearing to give a track for the belt to roll in. My printer was designed to have many of the parts replaced or replicated by printing and I will have to dig out the relevant stl file and load here when I find it. I've had a new computer since I bought it and finding my old files takes some doing at times The fence would be easy to make but I pinched it off of my other brand skiver which is a FAV. Some jobs I need the other pointy one but mostly this one gets used. Glad you like em Gary ...I quite like making them when I can get the time. Rule of thumb is if I can make it in the time that it will save me the next time I should do it now. That is why they are normally a bit rough and from parts laying around. Nowdays when I hack up a pair of pliers she gets me a new pair of cheapies the following week.
-
Now that looks like a good idea @dikman and thanks for sharing. Could be good in the sewing machine section
-
This is just another tool I've made to help make skiving easier. I have another order for the ring boxes I make and I needed to do a large number of skives on the circular leather parts of the job and this is what I came up with. The end result is I can now do the job about 5 times quicker and a whole lot less painfully. For any of you interested to see more of how these ring boxes are made (if you have not already) you can see that from this earlier post I've done here - I hope to load some videos showing many of the steps involved in making these ring boxes sometime soon.
-
Attn: Drop in liner makers
RockyAussie replied to venator's topic in Purses, Wallets, Belts and Miscellaneous Pocket Items
There are tricks in some cases depending on the construction of the bag design. If you would show us a picture of the design I or others could try and answer. -
WOW.....mate ...if your still in that cleaning up mood I got a few here could use a bit of that TLC. We only 6 maybe 7 hours up ya know.
-
Adhesive Question
RockyAussie replied to Russ498's topic in Dyes, Antiques, Stains, Glues, Waxes, Finishes and Conditioners.
I am not quite sure of the problem with gluing the lining up and having it oversize to trim after. If I were to do the patterning for this the lining would be 1/8" bigger than the the outer cover all around. The glue then on the lining would be glued in about 1/4 " which would be around a 1/8 over lap against the outside leaving a 1/8" to trim around. The application can be done in several ways quite easily depending on what tools you have for it. A machine like in this picture below is ideal but a glue gun can be fairly fast as well. To see the machine in action check about 1 minute in on this video - I doubt you will find any glue other than contact to set well on the pigskin in the method you want to do without a lot of time waste at least. Happy if you can prove me wrong and if you do please share here.

-
SLC.. why have thou opened this can of worms
RockyAussie replied to JerseyFirefighter's topic in Leather Tools
OK now I am hooked. Please give me a thought when the cutting device is a goer and let me know. Do you work with any agents/suppliers in Australia? -
Adhesive Question
RockyAussie replied to Russ498's topic in Dyes, Antiques, Stains, Glues, Waxes, Finishes and Conditioners.
I don't understand why with the contact glue on the pig skin you don't leave it oversize as you are saying you want to do. Once the glue is dry it is no problem to cut/trim afterwards. I do that method for a lot of my one off pattern jobs. Mostly though for production jobs I put top and lining together oversize and then second cut them both together. If applying the contact is slowing you down too much how are you applying it? I only ask as there are a lot of very quick methods depending on what you have to work with. -
SLC.. why have thou opened this can of worms
RockyAussie replied to JerseyFirefighter's topic in Leather Tools
Thanks for the answer Tony. Its a shame to have to get the whole contraption for some with low table space room and like myself 1/2 a world away in distance. The cutting device alone I am sure would be a big seller without the need to have a lot of storage room your selves I think. Either way I hope to see you get it going sometime soon. -
SLC.. why have thou opened this can of worms
RockyAussie replied to JerseyFirefighter's topic in Leather Tools
Yes it would be magic in comparison as long as the blade sharpening does not need special equipment or the blades are cheap enough to replace. I just love good ideas like that but I guess in reality it would only save me 2 or 3 hours a month. Not really worth designing my own for that. -
Yea @billybopp I would kida like one for myself as well. It was at least a lot more interesting to make than the bags I have been making the last couple of weeks.Trouble is they sell to well, soon as they go out more orders pour in again. At least the next 50 have have a more interesting style shape. Keep your eye open for a video I hope to load this week showing the missus making the care bags for these using my new zipper guide tool. Turns out they saved her a lot of time and helped keep them neater as well. She now loves them and I have to print like a hundred more so she doesn't need to attach them on the run


-
ZONESUN26x12cm Double Wheel Hand leather cutting machine
RockyAussie replied to Tinkerton's topic in Leather Machinery
I think in some ways if you have a lot of small cutting requirements these presses would be quicker to use than the hydraulic bearing press and give good feel to the force application when doing embossing type of operations but in either case having to cut the leather down to fit in the machine is something to consider well before purchase. One reason I decided to say anything here is that the video shows a large knife being moved along twice to get the long cut. I do NOT find this is a good nor practical method as it does bow the knife in the centre and the cost of having the knives made is considerable. I know this from experience well as even with my large hydraulic clicker presses a poorly positioned or oversized knife gets quickly to the stage that it has to be repeatably moved around to get the cut done and soon is next to useless. -
Looking forward to hearing more about it.