


RockyAussie
-
Posts
3,265 -
Joined
-
Last visited
Content Type
Profiles
Forums
Events
Blogs
Gallery
Store
Everything posted by RockyAussie
-

How I now straighten leather for strap cutting
RockyAussie replied to RockyAussie's topic in How Do I Do That?
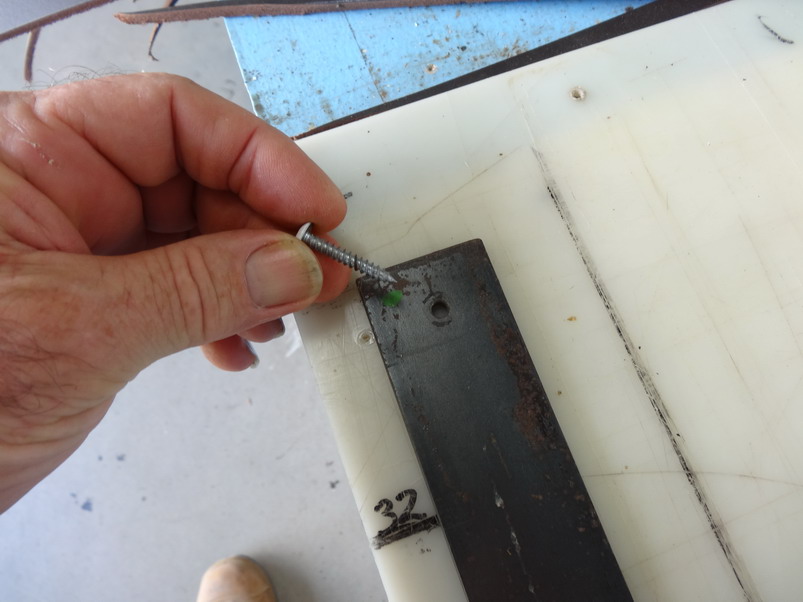
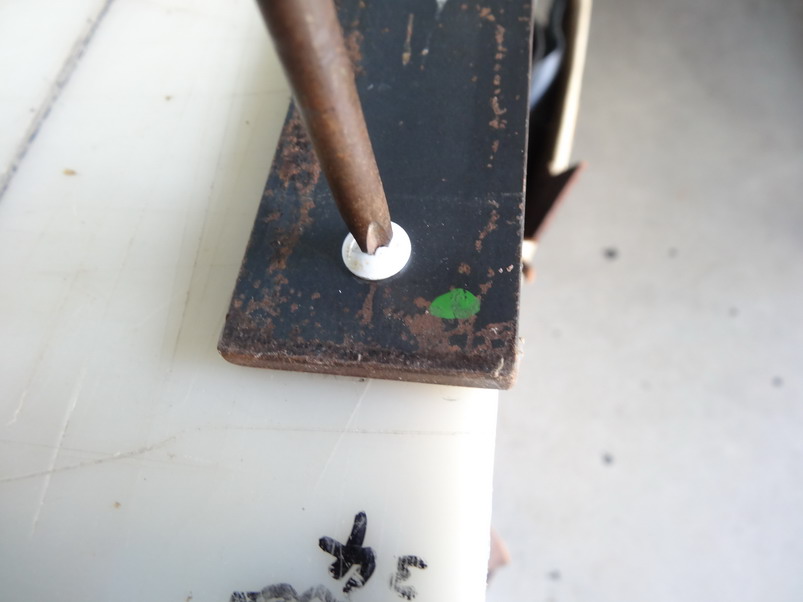
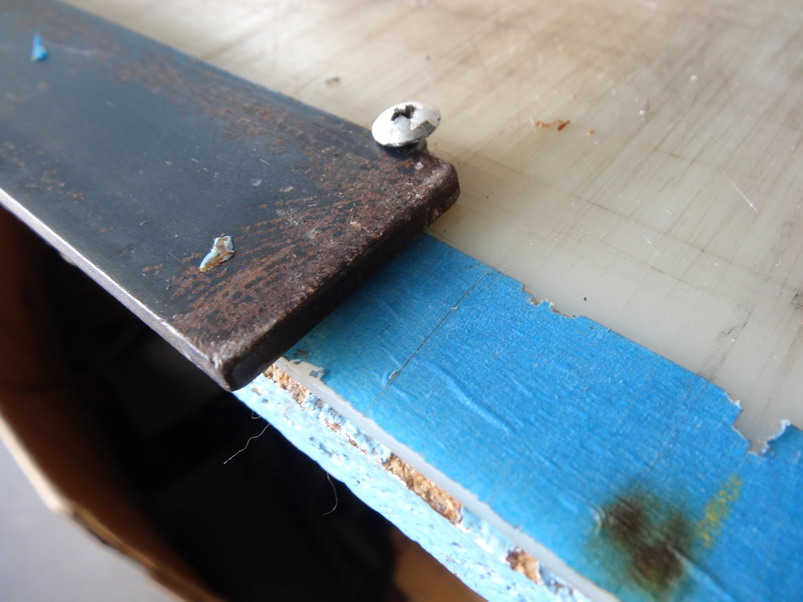
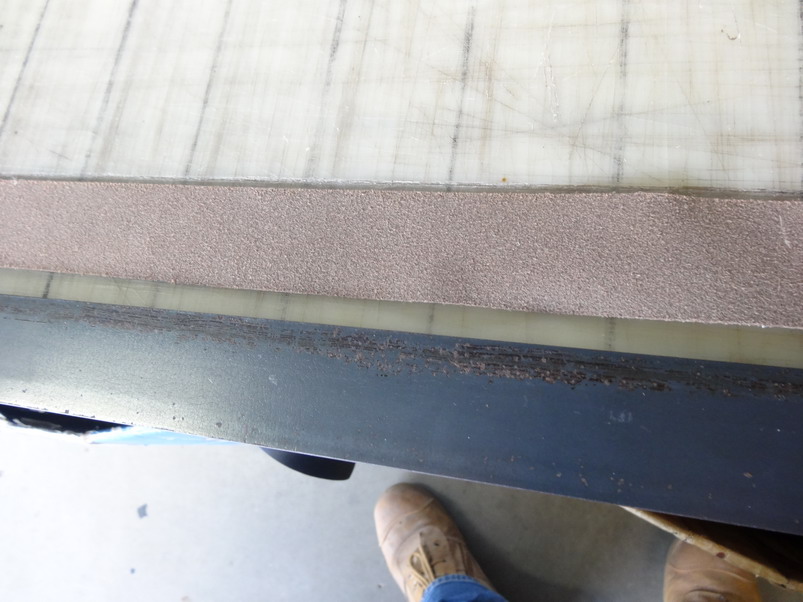
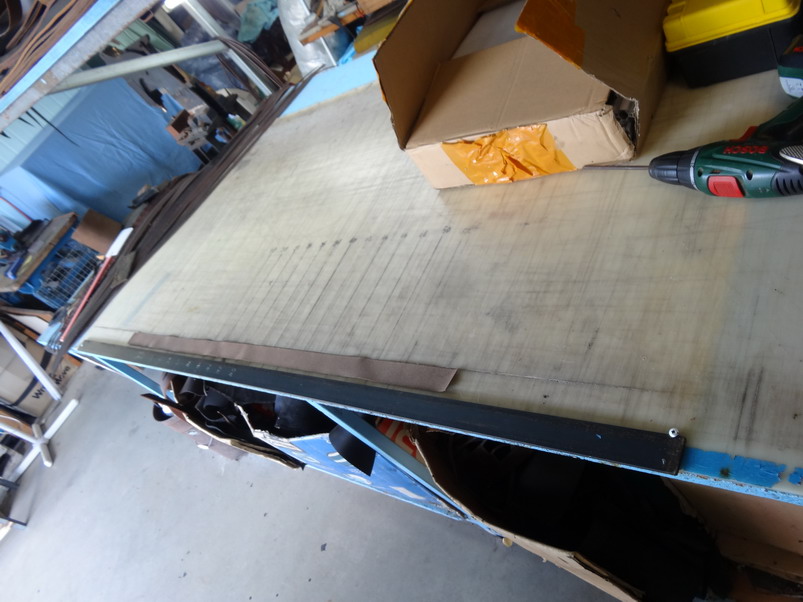
Happy to help @Big Sioux Saddlery. Note that the steel is just mild steel and with a less than level top surface it will flex up and down with the table curves a bit. This end gets done up tight but can still swivel a bit Note that it hangs over the edge a little maybe 1/8" The other end just buts up to a screw and depending on the leather thickness may want adjusting up or down a bit. The leather split at the back I just glue down temporary and it is an important part to stop the hide from sliding around. Around a 1/4" back from the steel should work alright The table is just an 8x4' chipboard with a bit of HDPE sheet on top. The rest is just 1+1/4" boxing I welded up.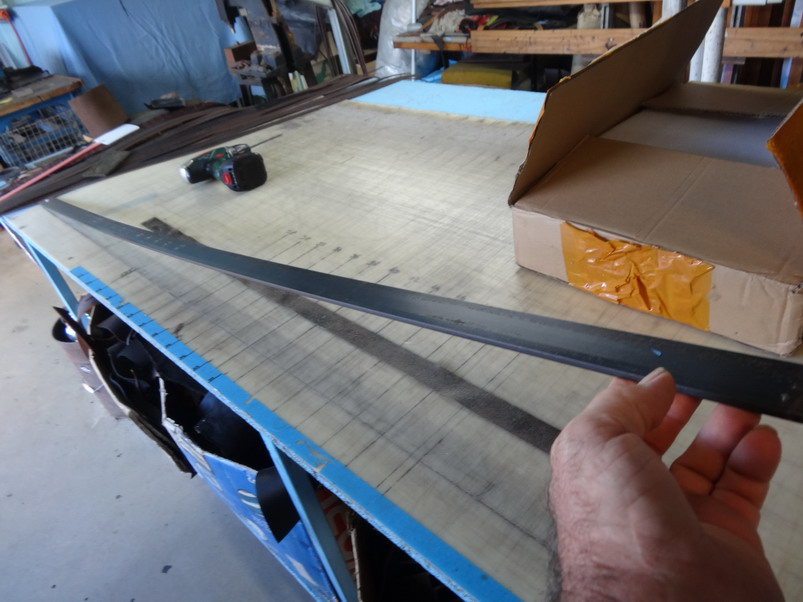

-
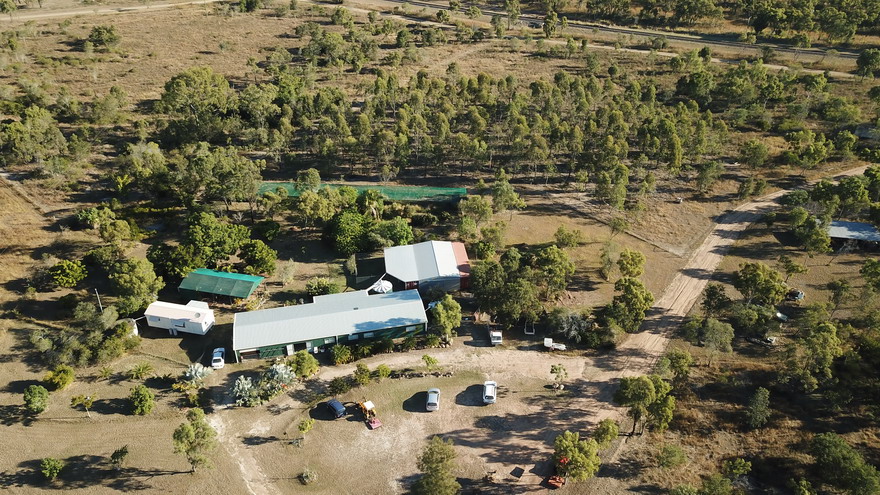
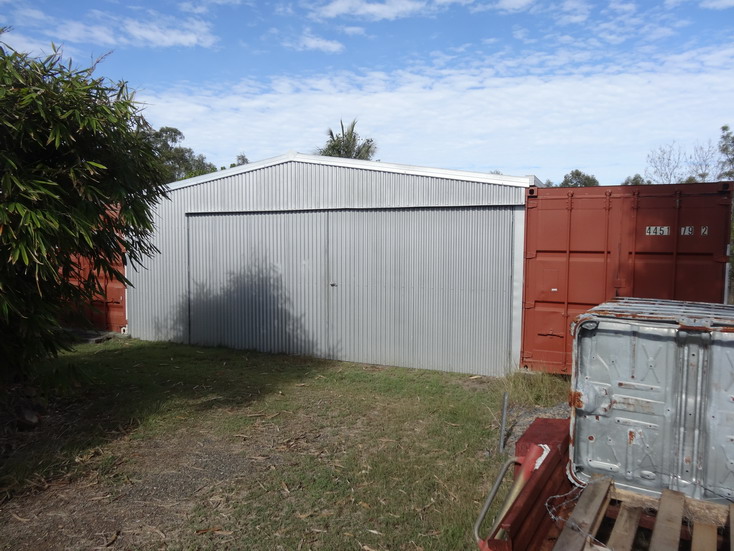
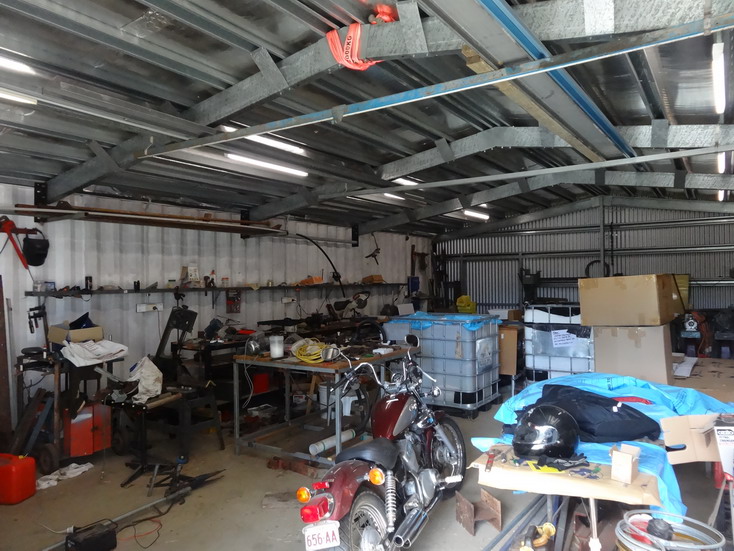
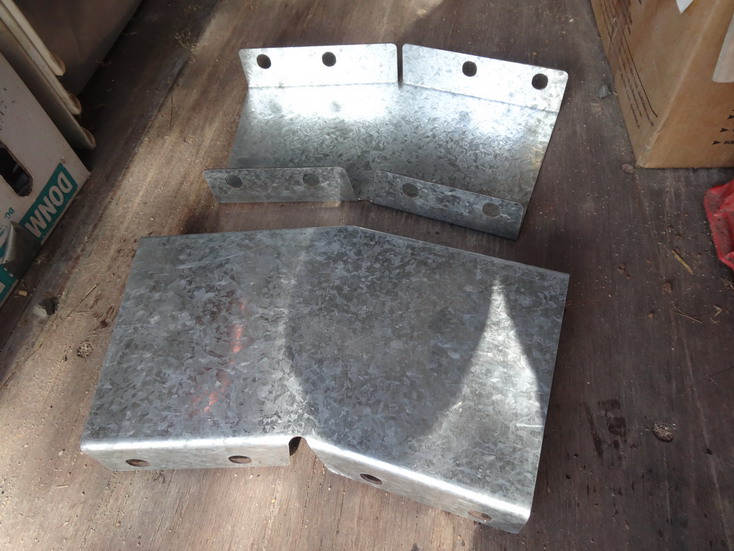
Hey Murray, I have a few shipping containers that I have found quite useful for storage. I cant say about your weather over there but over here they get pretty hot at times and in particular are prone to rust out in the corners where other shipping containers have been placed on top. If you can see on the inside they are dented down get a jack a push them up as they hold water and will rust eventually.The best thing for insulation and weather proofing is to put roof sheeting over the top.That keeps it cooler than anything else I've tried. In the following photo you can see a brown roof I have not as yet sheeted and sure enough it leaks. If you want some more workspace... here's a few more pics of a shed I made to go between 2 of the 40' containers. Took me about 2 weeks mostly by myself. Note in this following picture the apex connector I had laser cut out and folded so that they interlock over the C channel I used 4" angle iron about 3/8" thick where I bolted to the container walls. I am happy to say a couple of years back it went through a category 4 cyclone with no harm. It did crack and break nearly every tree in the front paddock you see in the first picture though. I planted all of them some years back amongst other things to help make my business as carbon neutral as possible.

-
How I now straighten leather for strap cutting
RockyAussie replied to RockyAussie's topic in How Do I Do That?
Nothin more than you can see here theraputic ?? comes later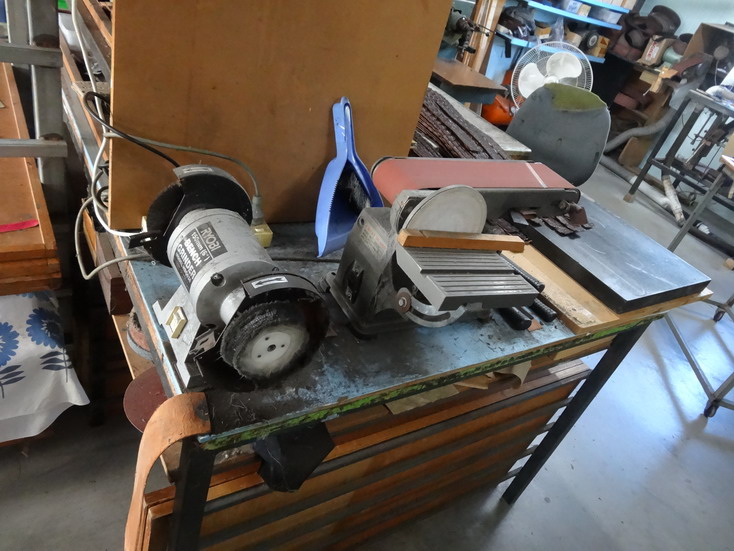
-
How I now straighten leather for strap cutting
RockyAussie replied to RockyAussie's topic in How Do I Do That?
People on this here forum would chuck me off if they see how I sharpen it ...but it does take less than a minute and doing a hundred at a time I only need to polish it on the rag wheel maybe 2 sometimes 3 times. -
How I now straighten leather for strap cutting
RockyAussie replied to RockyAussie's topic in How Do I Do That?
Your welcome -
Is that how they make them dreadlocks?
-
No, I believe as you do that there is an unacceptable risk with it being open as it is and is one of the reasons that I have made the big one in the box shape I have. I had ordered before Christmas black acrylic sheeting cut to size for it but unfortunately they did not get it done and I will have to wait a couple of more weeks now before they get back to work. This will also act to keep the structure more square and rigid. Fans,extractors, Z axis lifters, bigger diode lasers are all on the drawing board yet to do.
-
Pretty low and depends on the leather type ...mostly I go at about 1/2mm at a time but I have accidental cut through about 2mm in about a second before I realised it was not moving. If you turn it on without the safety button on, it starts at full power if it is not being controlled by from the computer program.You can set it in the program to do how ever many passes you like. I am playing around with a 5 watt one at the moment that cost me just over a hundred and it burnt a hole in a 3 ply cardboard box about 12" away before I even realised it. That was a shock and a fast learning lesson.
-
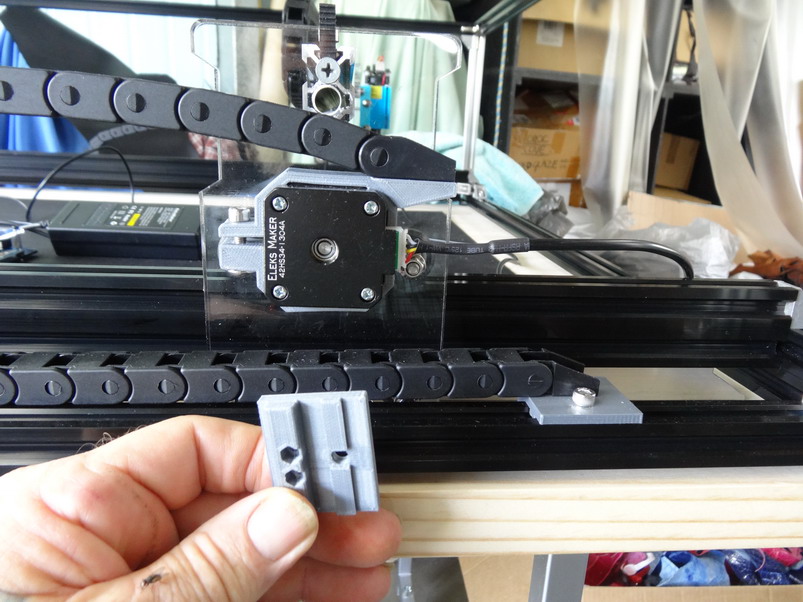
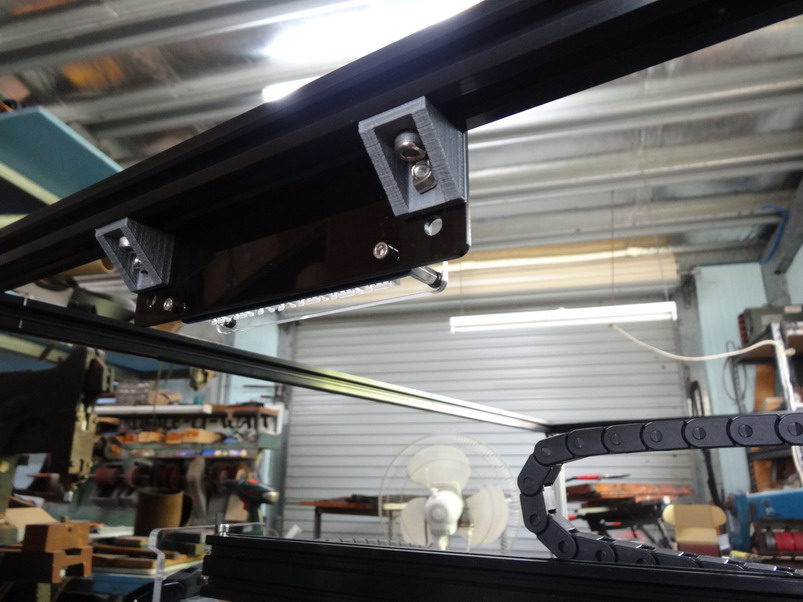
Here's a couple of pictures of the prints...note: the mounting block around the motor to the cable chain and the piece that alows you to slide along the channel to get the chain positioned perfectly. e Below a couple of simple little corner block holders that allow the control board to be held and slide positioned into place.
-
Keep a look out as I already discovered way more uses than I every thought to start with and that new printer of yours would come in handy on making one for yourself. I printed up several pieces in the big one I am making like the cable chain holders and some corner fittings and that helps keep the cost way down. I am hoping to try it out on cutting some 3mm black acrylic soon as I believe that is possible.
-
After finding out as much as I could about lasers and their practical uses with leather I decided to go with a small diode laser. This video is the first in a series I hope to share with you as I go in finding ways and developing methods and improvements related to leather working and laser. Many reasons along with cost led me to go with the small diode laser to start with and I can honestly say I have been surprised and delighted on my findings so far. The CO2 lasers that at first looked so tempting lost their gleam when I discovered that the tubes that they come with will often fail within 6 months or less and a good quality honestly branded Reci tube will likely cost around a $1000 or more. Another finding is that the small dot of a 2500mw laser gives excellent detail for fine engraving (burning in) and along with a program called 2T Laser it is possible to get a dxf file once done in a decent Cad program to cut with different power and time settings all in the one file. I have had some success with cutting leather be that it takes several passes but for my prototyping work that is now a major time saver. Even the little one shown here can be moved around over the top of a whole hide if you wanted to do it in sections or as can be seen later a very large version I am working on can do larger than poster size and all for a few hundred dollars. (So far). Watch it and comment and follow if your interested to see more.
-
How I now straighten leather for strap cutting
RockyAussie replied to RockyAussie's topic in How Do I Do That?
Your welcome. I wish I had thought of it several thousand straps back though My wife agrees on the simple part at least .....as far as I go anyways -
How I now straighten leather for strap cutting
RockyAussie replied to RockyAussie's topic in How Do I Do That?
@BlakesBlades No, I have not had any slipping problems that have allowed the leather to scratch. A light layer of latex glue on the underside might be a further improvement though. -
Recently I came up with an improved method for straightening up leather before being cut into strap lengths. This is a short video that I hope some of you may find useful until something better comes along.
-
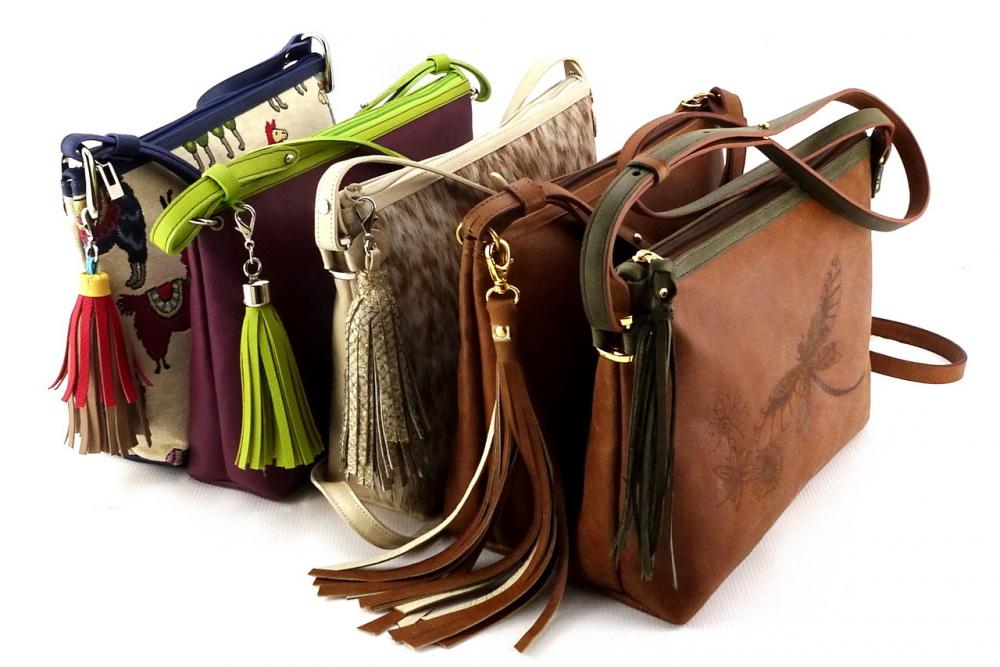
Pictures and notes being taken as I go and still a ways to go ho ho. The Al Paker one is again one of the staffs ideas who is into them. She actually go me to do an AlPaker onto a stubby cooler(drink cosy) with the laser for her son. The wife was lucky to pick up some heavy drill type fabric with that design on it and the rest you can now see. The next one in from the left is for another staffs girlfriend who is a .........vegan so it is vinyl.
-
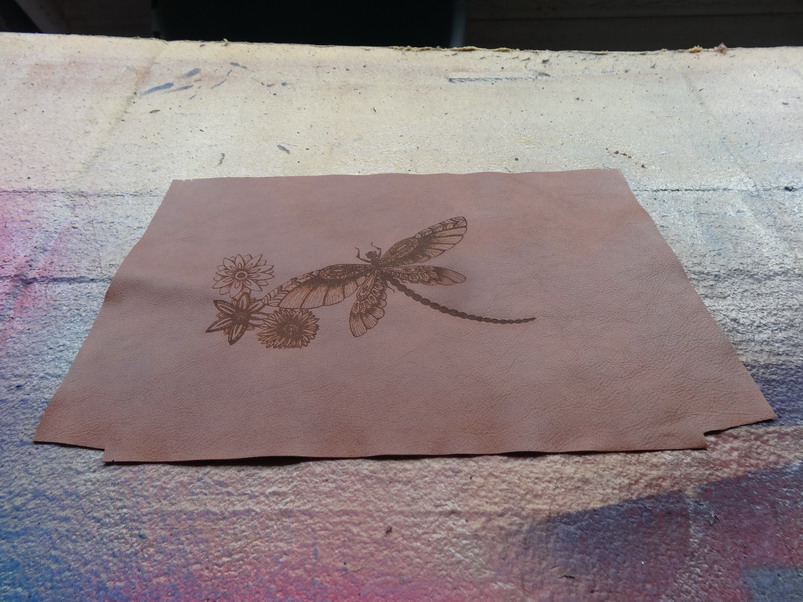
Dragonfly, and not my drawing design just cleaned up for the laser work. It is for a bag made up for one of my staff along with a few others for Christmas. She provided the drawing she wanted and was happy with the result.
-
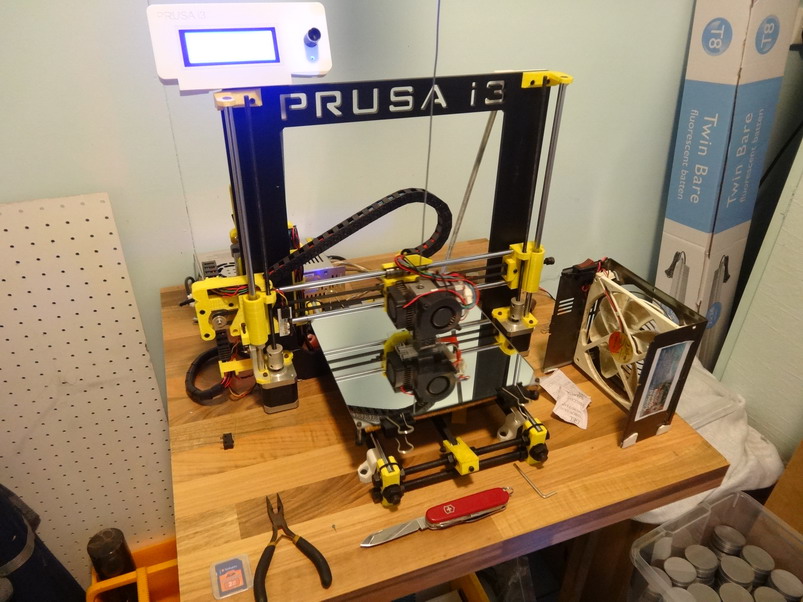
Here for what its worth is my trusty old prusa i3. Main mods I can think of are Saddles at the base to help keep steady....Threaded rods at back to keep gantry from the vibration movements.......Heavy wooden base to dampen vibration.....cork under the heated plate to keep better heat distribution. Fan at the side is just to cool off the job quicker when the job is finished to help get the job off the glass faster. The original glass got tooo scratched so I replaced it with a piece of mirror I cut to shape and it been in use for over a year and is still fine. I have another one slowly being made but I am working on a large 2.5watt laser project at the moment which I hope to get going this week sometime. Pic below ...will do a separate post showing how it can be used for making my product boxing with fold lines among other things like cutting leather etc. Merry Christmas
-
Making a belt out of upholstery leather?
RockyAussie replied to benlilly1's topic in How Do I Do That?
I tend to agree with @Dwight with regards to longevity. All of the bikes I've had that I can remember had a rubber strap to keep the battery snug in place and if I had too I would go with the upholstery leather doubled back to a seam in the middle fully contact glued and probably not stitched along the length. This would at least allow some elasticity to the strap to hold the battery tight. -
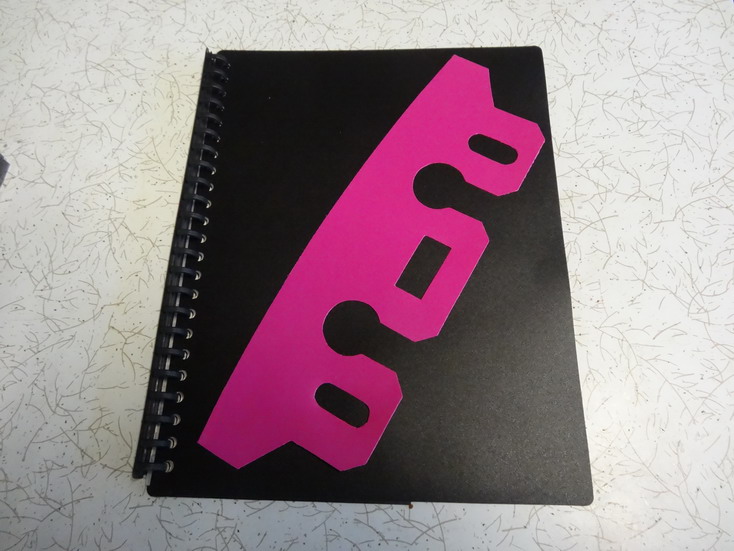
I am not sure if this is of use but here are some pictures of some flexible plastic that has an excellent memory for springing back into shape. I just buy the binders from an office supply place when I occasionally need them. As you can see they work well for holding the shape and they last for ever. Merry Christmas to you and family. Regards Brian


-
First attempt at a belt
RockyAussie replied to Rockoboy's topic in Purses, Wallets, Belts and Miscellaneous Pocket Items
Nice effort and the colouring looks good as well. Merry Christmas to you all. -
Needle close to foot, Needle Bar Bad? Adler 69
RockyAussie replied to arz's topic in Leather Sewing Machines
I did not like the look of the movement of the needle once located in the shaft so I would check that the needle is pretty close to 2mm dia at the top first. I just checked a needle in my old 69 and that takes 2mm fairly snug. As for the line up forget the feet and line up the needle in the centre of your dog foot which in your first picture looks about right.The KH foot is off set I think and you may want to open the hole right through at the left side of the front foot and consider that it will be easier and quicker to thread up as your old one was from the other side. May need to shave a little of the right side while your at it to allow more clearance from the back foot on the right. -
I think it sould work fine. I have been using a light dimmer switch housed into a wooden box and a cresent soldering iron with various self shaped tips for over 20 years now and way before I ever heard about these fancy regad heat creases. These Robotemp boxes look nicer though.
-
Is there a font for Ivan Alphabet stamp set 8132-00
RockyAussie replied to RockyAussie's topic in How Do I Do That?
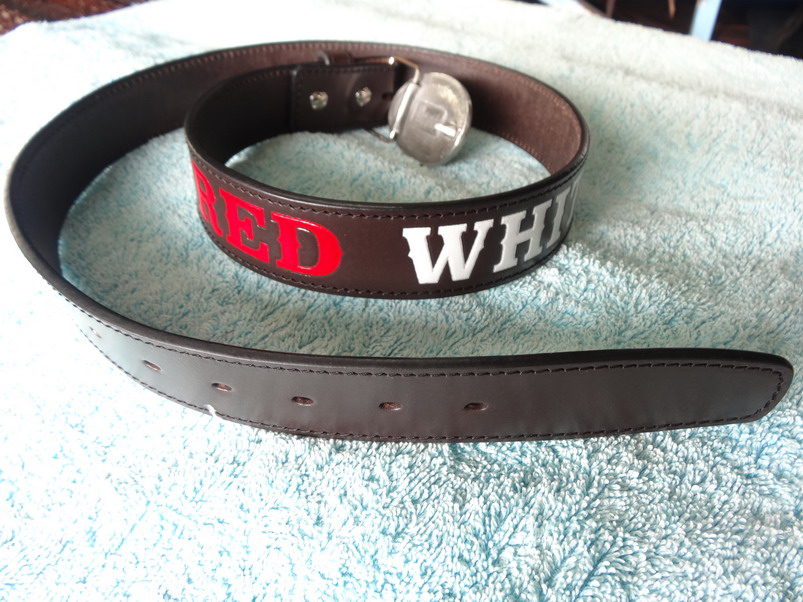
Thanks @noobleather I used some overpriced spray paint for shoes at first but the clear finish wrinkled it up so I then resorted to using my old edging colours. They are a little exotic I guess because I sort of make them myself from a mixture of clear Ares AR 6350 ( you can get it from Texon in Melbourne) and many in the other countries will have it branded Fenice AR 6350. I use 90% clear AR6350 to 10% liquid pigments that I have previously bought from Clarient. You may have to replace that with the Stahl waterbase pigments that can be bought in smaller quantities. As to the guide ...its a bitch to adjust when you are adjusting the back and the top at the same time and you are looking for less than a 1/2mm line up. I decided to super glue the back to be a permanent 38mm(1 1/2") and that leaves me free to adjust the top only. If your not concerned about double line ups its good. Price I think would be $30.00 plus post ($11.00 express in Australia). If you want the stl file to print it let me know in a PM or I can print it for you. Regards Brain -
Is there a font for Ivan Alphabet stamp set 8132-00
RockyAussie replied to RockyAussie's topic in How Do I Do That?
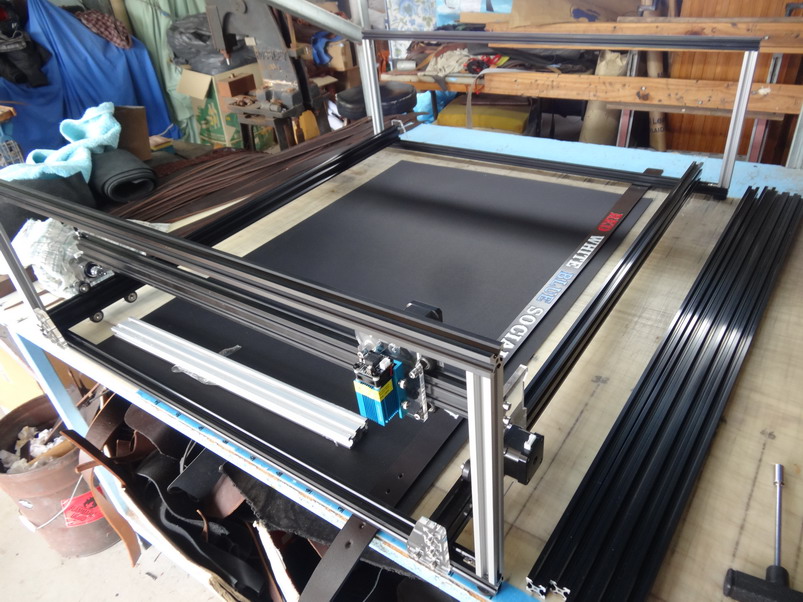
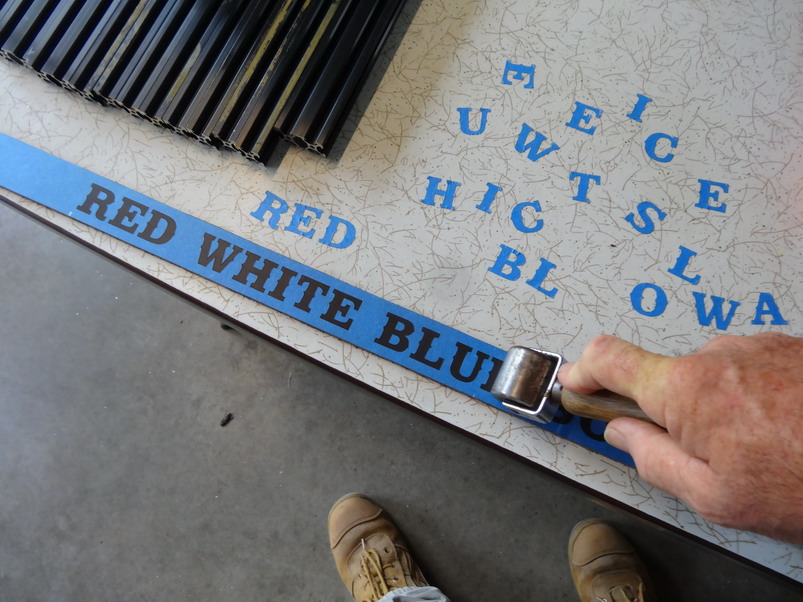
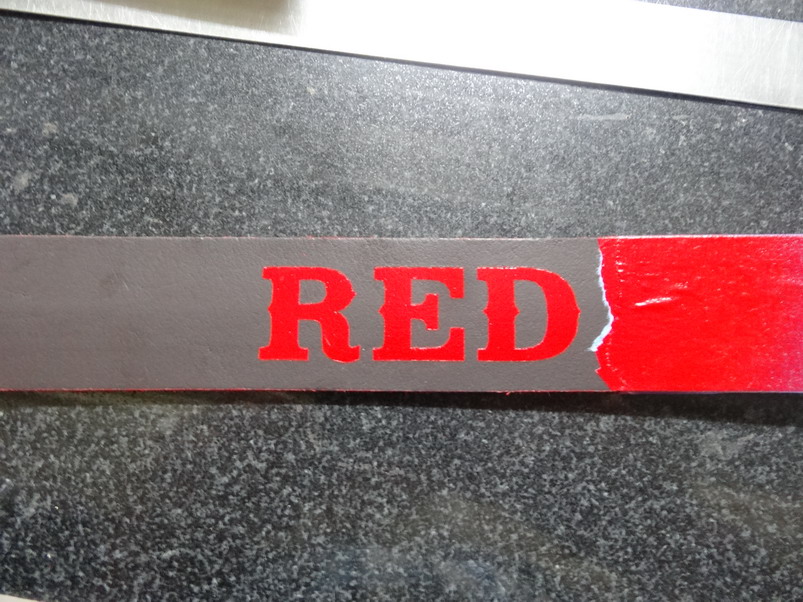
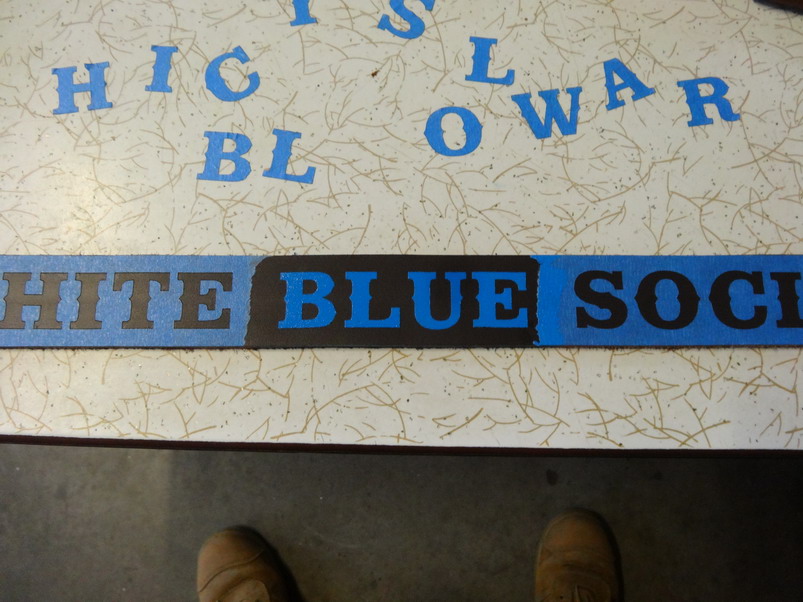
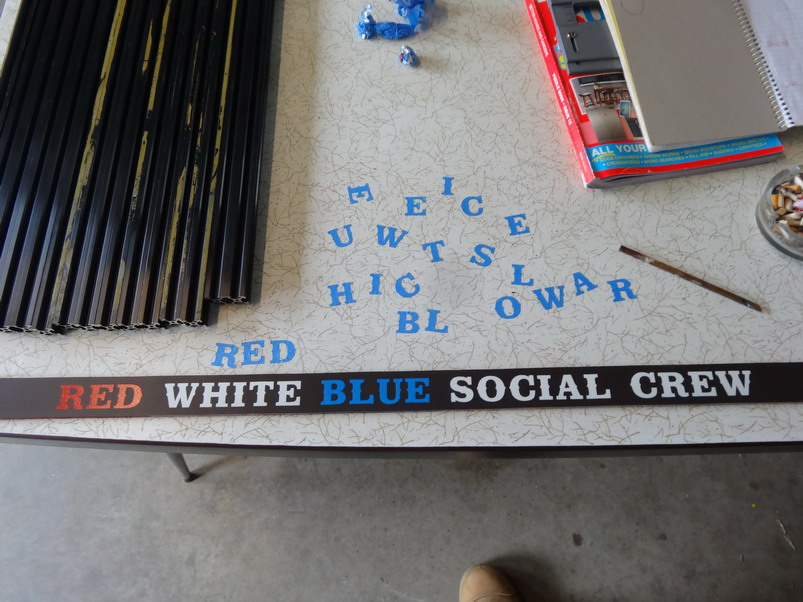
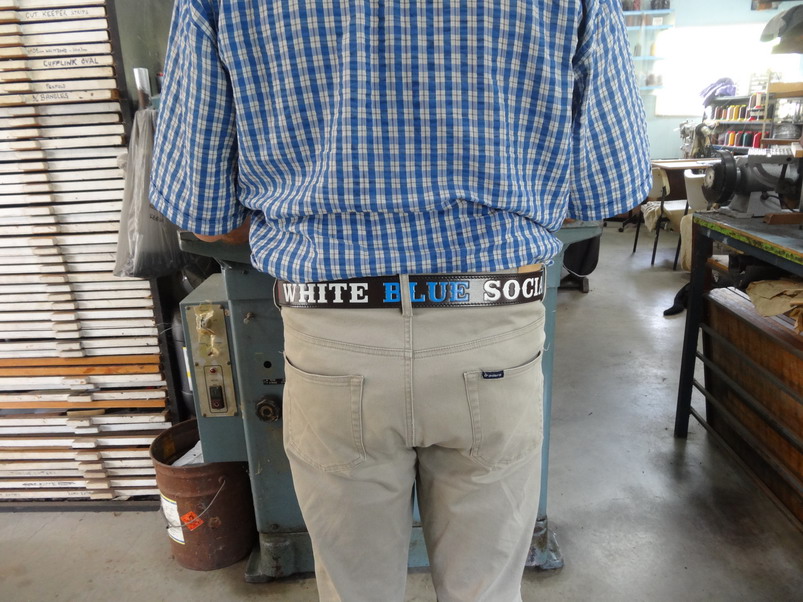
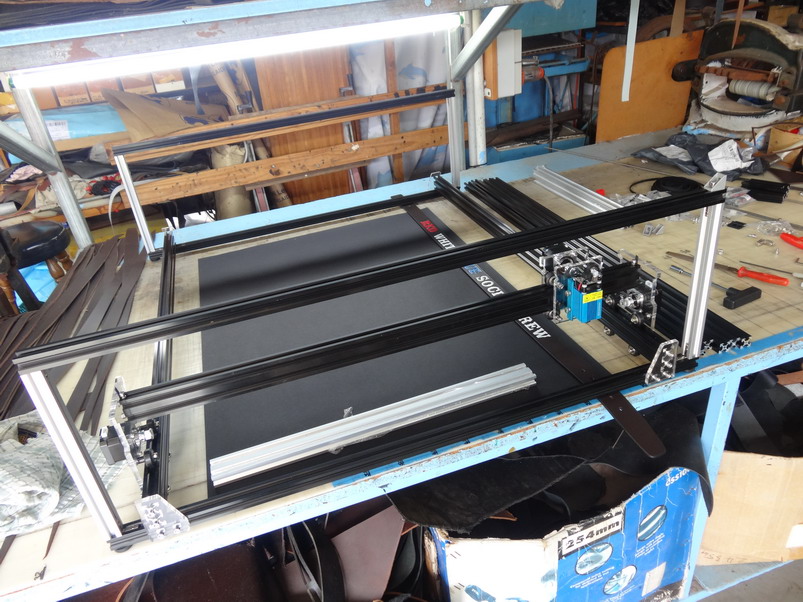
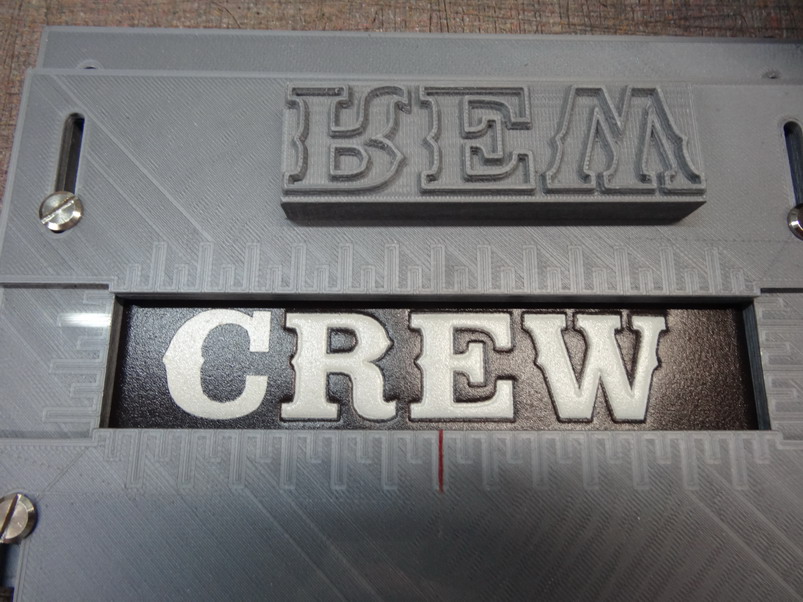
Mike is dead right on that I reckon but although the end result is not really to my taste .....The pics show a pretty professional finish I think. Tape peels out nice A bit of a roll to make sure no edgesare sticking up Yeah it looks like shi...t oh so blue Painting is done A bit of pressure And its looks a lot better.....? The $300 2.5 watt Eleksmaker laser getting another $200+ resize with bigger rails. This will allow me to do a full belt in one go and is wide enough to do a large poster size which means I can now cut out my product boxing from full size sheets and I can get several boxes cutting at the same time. More to come on that later.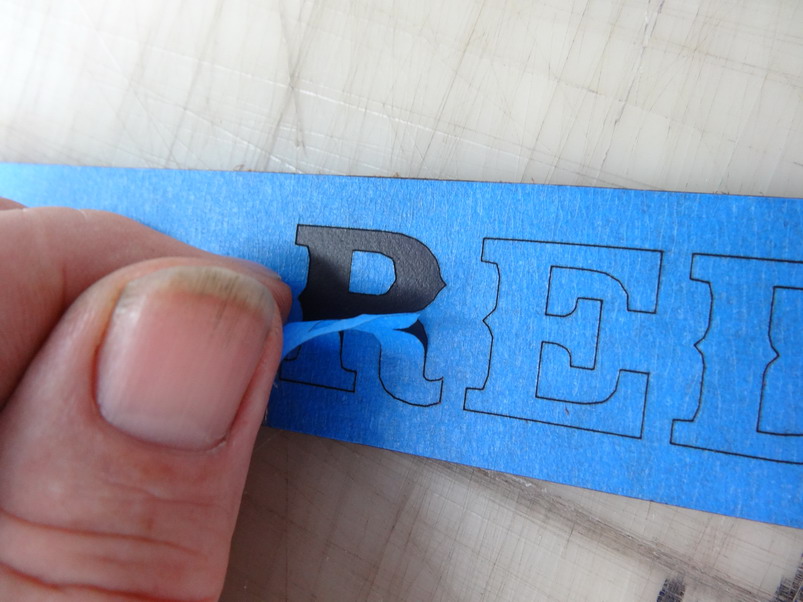
-
I thought about that but there is a lot of steps like making my own font for it and then the doing the font file for the outside 3d print and files for the laser cutting and settings and I just thought I would test the interest levels before I spent more hours trying to explain it all. So far very little interest I have seen so I will think about some more. I will dig back and find an earlier post where I started this project as it shows a few more of the steps involved -
