-
Posts
557 -
Joined
-
Last visited
Content Type
Profiles
Forums
Events
Blogs
Gallery
Store
Everything posted by koreric75
-

Question about lining a leather bag
koreric75 replied to panchoskywalker's topic in How Do I Do That?
This...unless you want to make it harder. I've disassembled quite a few handbags and everyone of them that had screw/post hardware had to remove the stitching from the lining before i could get to the back of the screw, and most were sealed with a sort of hot glue from what i can tell...kept them from turning but peeled off fairly easily once i got to them...a couple of them were superglued, maybe jb welded...lol -
https://www.google.com/intl/es419/insidesearch/features/images/searchbyimage.html i tried a google image search (<--- video example, basically go to google images search and drag/drop the picture in the search bar) and couldn't find anything like that, I'd call it a "drop lock closure" based off design, but couldn't find it with that cylindar?
-

Advice for cylinder arm machine for sewing saddlebags
koreric75 replied to sam000lee's topic in Leather Sewing Machines
This was my choice...glad i did it! However i still want a 206rb5 or similar to do flat work like wallets etc... -

Can this be saved, money belt western belt
koreric75 replied to koreric75's topic in How Do I Do That?
I like the tapered both sides look for a ranger belt, i think i will use lighter veg for the core next time as that created a lot of bulk, compared to the original which is said to be a pigskin rough side out, or a calf skin rough side out, ( lots of research led to lots of differing opinions and references) this way they can overlap without being over an inch thick...and I'll make the billets longer but still line up the sweet spot hole for just enough to make the wide parts over lap a bit. I do think clipping the corners on both ends would be a good idea and would match the buckle style, and i could match the billets to that. P.S. If anyone would like this in .svg format for editing you own, just holler... -

Can this be saved, money belt western belt
koreric75 replied to koreric75's topic in How Do I Do That?
I considered that, but i wanted to keep the money pocket full size, and considered using that slot as the keeper but would've had to been longer. I understand what you're saying, I just can't let something like that slide. Starting out he asked for a similar to hondo john wayne holster rig, (didn't have that in my o.p.) it's easy to tell looking at a pic of that and a pic of mine something's different, http://hondorig.blogspot.com/2012/08/john-wayne-hondo-original-holster.html other wise i wouldn't have mentioned anything. I also differed in using a separate billet for the bullet loops, it just seemed easier and looks better imho, but i let him know ahead and cleared it with a prototype drawing and made sure that would be kosher. I did figure a way to keep the taper on one end and still have it meet up square, the belt keeper is wider than normal and not permanently attached to the belt. When you buckle the billet the taper slides in behind in the keeper loop, for him almost to the 4th hole, then the keeper loop slides and butts up against where the taper ends...it actually looks pretty nice, and cut way down on the bulk behind the buckle area. (i'll get pics eventually, he's going to put ammo in all the bullet loops and his .357 magnum in the holster to get some photos of the complete deal...I think the real area I didn't consider was the # of bullet loops he wanted, 30 ea .357 mag, and 6 ea .45-70 centered between them in the back, that limited the lengths of the billets and still have room for the holster....good lesson for next time. ;-) -
Good idea! I was wondering looking through the manual with the different model year parts if different pieces would still fit and function properly, just the newer models had been improved upon... So you want to see what it looks like when a 40lb sewing machine gets thrown across the garage...lol
-
awesome, thanks! I thought about something like this but kept getting hung up on trying to get the presser foot impressions out as well...those really aren't a problem after stitching and tapping, it's the outside/inside line of the walking foot toe that really leaves a glaring blemish. Now to see how many practice runs it'll take for me to try it on a piece, and how many pieces become scrap pieces after sewing them to 'em...lol. I sew pretty slow anyway except on long straight runs like belts...
-
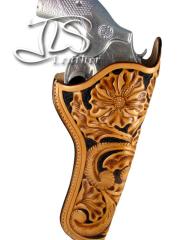
Ok, i'll bite, looking at it, I'd say no? I haven't seen you put a retention strap on a pistol, but I haven't seen any of your pistol holsters tooled to that extent either, so maybe, hard to tell from the pics, but it appears to have a good curve on the back panel, and the stitch lines look to be tight to the shape of the gun (something i "learnt" from watching you)...lol so i dunno...sure is a nice bit of carving though. The impressions along the stitch line...were they form or function, I have been trying to think of a way to make the impressions of the presser foot less apparent after stitching, so far I've been relying on trying to press them down when tapping the stitch lines.
-
Mine is pinned as well, at first I thought it was a tiny screw until I cleaned it lol....
-
Now to just send this to the wife... Lol
-

Card wallet
koreric75 replied to LeatherLegion's topic in Purses, Wallets, Belts and Miscellaneous Pocket Items
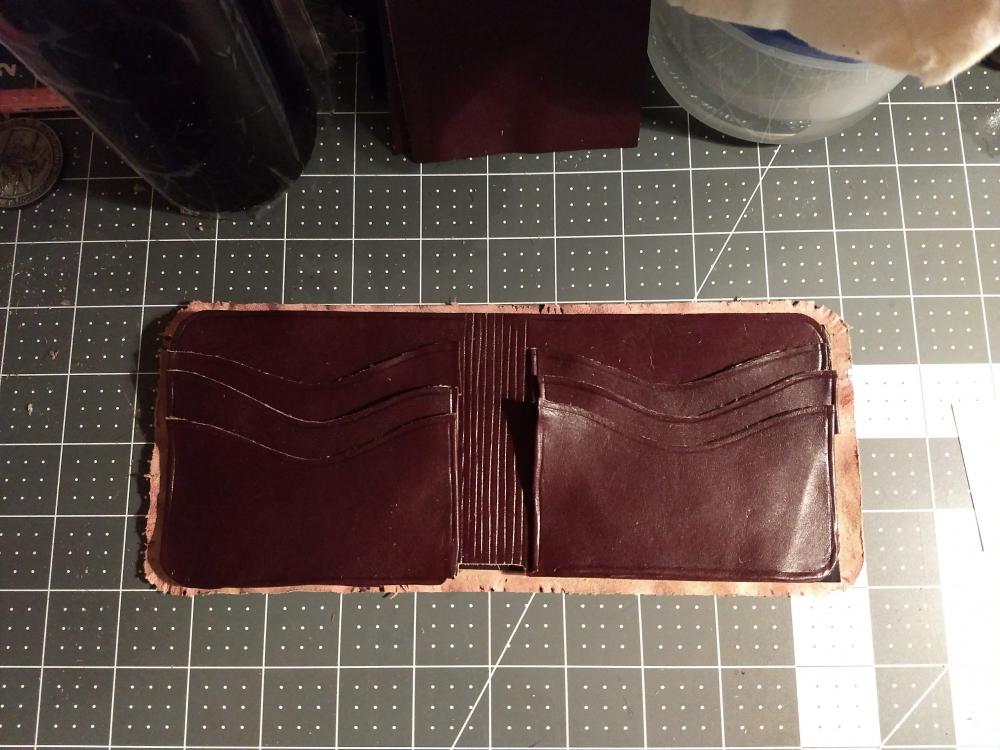
as evident in my pic....lol, the curves really got me and a couple straight sections... -

Card wallet
koreric75 replied to LeatherLegion's topic in Purses, Wallets, Belts and Miscellaneous Pocket Items
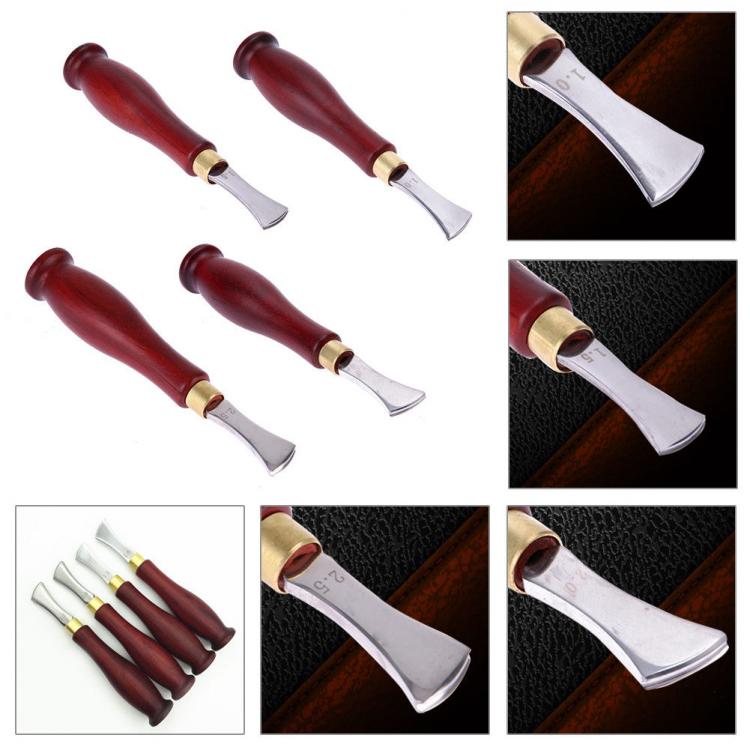
Heyyyyy, i have one of those, but never really use it much...haven't tried heating it first tho...i also have one of the 2.0mm creasers that works pretty well like this, i used it to make the fold lines and edge creases on the wallet below...maybe if i heat it a little first it will give a better result on the rolled edges? -

Card wallet
koreric75 replied to LeatherLegion's topic in Purses, Wallets, Belts and Miscellaneous Pocket Items
Very nice! I like the hand stitch look as well, but some pieces really look better with a neat straight stitch line like yours, it lets your eyes focus on other details, I like the colors and texture, but my favorite part is the top edges on the pockets... That can take some time to nail down perfect like that. -
-

Can this be saved, money belt western belt
koreric75 replied to koreric75's topic in How Do I Do That?
Just a quick bump for inputs...I sent pics to the customer, i didn't say what i think about the look, he thinks it looks awesome. I'm going to take it to him today and see how it fits/rides, etc, and I'll tell him where I think i messed up and offer fix/redo it if he wants. If he likes the taper then I'll finish by added a keeper, smooth out the shape of the taper and recover the tapered portion to match and finish stitching the rest of the top. -
@leecopp you forgot cursing...lots and lots of it...lol, once it was apparent that it wasn't going to move with tapping, and oiling i removed the whole assembly. There is also a screw on the rear of the part that slides (#1), The walking foot bar was also stuck, and the presser foot bar screw (#2) has yet to yield, I am tempted to leave it be to avoid damaging, but am worried if i don't get it out and clean it up, i'll need to adjust it at some point and will have to do this all over again. (#3) in pic, this thing...not sure what it is, but doesn't look to serve a purpose unless it's for bobbin winding maybe? broke off so now there is an empty hole with the threaded end sticking out... @CowboyBobWhen i finally got things freed up and oiled well, I tried checking with the 16x100 i ordered to see how it looked, the needle would not pick up the bobbin thread (p.s. the eye on that needle is super tiny...wish i would've posted here before ordering) I took the needle plate back off and removed the bobbin and the eye of the needle didn't come close to the hook so wondering if it has been adjusted previously. A quick needle bar adjustment became a weekend project as detailed above...lol. Are the flat feet you have the same as these? This is what came with mine, minus the binder of course...
-
I agree, the wife and i played with this Sat at Tandy's memorial day sale. I will say that for a home machine, it does stitch very nicely through garment leather compared to my singer 4423. I plan on taking a few samples of my own when I go back in this upcoming sat (the wife wants to do the vest making class at our store), One of the main bonuses compared to my old singer 15-91 is the stitch settings. I have quite a few attachments that were in the box when i got the old 15-91, but still haven't been able to get the button holer to make a good looking product (i'm sure this is mostly my fault...lol) I saw JoAnn's had their Singer HD 4255? i think on sale for $199, I haven't had a chance to mess with it to compare to the Janome though. When you go in, they should jump at the chance to let you sit down and really run it through it's paces...if not then there is something wrong there. I've watched one of the fellers in our store demo that Tipman Boss at least once or twice every time i go in there...
-

Ranger belt measurement
koreric75 replied to khill's topic in Purses, Wallets, Belts and Miscellaneous Pocket Items
ok, took a bit of googling but found it again, Ranger_Belt_Instructions 1&2 pattern & instructions in .pdf format... -
So I think I have a new suede outer money belt to hang in the workshop... Everything was going great then I decided a taper on the tie side would cut down the bulk and be easier to put a keeper on the buckle side... This whole time the middle hole is meant to be the sweet spot at 44"hips, but I started my taper closer to the 5th hole...###!@! I don't know what possessed me to do this, I had my template and notes right next to me and still cut it. The problem now is when in the third hole the front of the belt doesn't match up... Trying to think of a way to offset this. Worst case I only have to redo the main body since I used a separate billet for the bullet loops. Any advice is welcome.
-

Ranger belt measurement
koreric75 replied to khill's topic in Purses, Wallets, Belts and Miscellaneous Pocket Items
There's a pinned post here somewhere for this, I just saw it a couple weeks ago try Google search with site:leatherworker.net then your search words like ranger belt sizing. -
you should just junk it, I'll take it and even pay shipping...lol , I've been a believer in jb weld for along time. I had an old chevy monza that i swapped the small 283 for a 350...didn't realize the oil pan on the original motor had a space for the driver side tie rod...long story short, I had a 1/4" grease fitting sized hole in the side of it after one sharp right turn...i drained it, cleaned the oil off, and rounded/smoothed the hole, stuck a short flange bolt in and jb welded it...held up for a few years until the underside frame got so rusted it wasn't safe to drive
-

Second Holster
koreric75 replied to Rolandranch's topic in Gun Holsters, Rifle Slings and Knife Sheathes
Very awesome, I've slacked on my tooling lately, picked up my swivel knife the other night and remembered how much I enjoyed it...lol. -

Singer 45K25- treadle talk me into it or out of it!
koreric75 replied to Kabob's topic in Leather Sewing Machines
I love my cb3200, it has more clearance under the foot and bigger thread size capability, but I think for belts and sheaths you'd be gtg with the 2500, holsters depends, I did a western style with welts that ended up close to 1/2". For purses it would depend, i use my cowboy to stitch the corner seams of the shave kits, some of the softer leather can get pushed down into the feed dog opening. There is a needle plate that is flat and the bottom feed dog is not a factor... For the price point I think you'd be set with the cowboy and there are tons of raves here about Toledo and their customer service... Which doesn't come with the singer. That's my 2 cents that turned into a buck 25 lol... Not sure where you're located but that is always a factor. -
@ray123 Ok, i got it, you will get a better result posting in the classifieds/for sale area for used sewing machines...I'm pretty sure you'll need to put in the info, pics and price...an @Admin /moderator may come by and move this post for you as well. http://leatherworker.net/forum/forum/84-used/ I can assure you there should be plenty of interest, esp in the 97-10...also, good to know if you are going to entertain shipping etc. Good luck V/r Eric


