Hildebrand
-
Posts
421 -
Joined
-
Last visited
Content Type
Profiles
Forums
Events
Blogs
Gallery
Store
Everything posted by Hildebrand
-
Please see new add under used equipment as a couple of the details have changed.
-
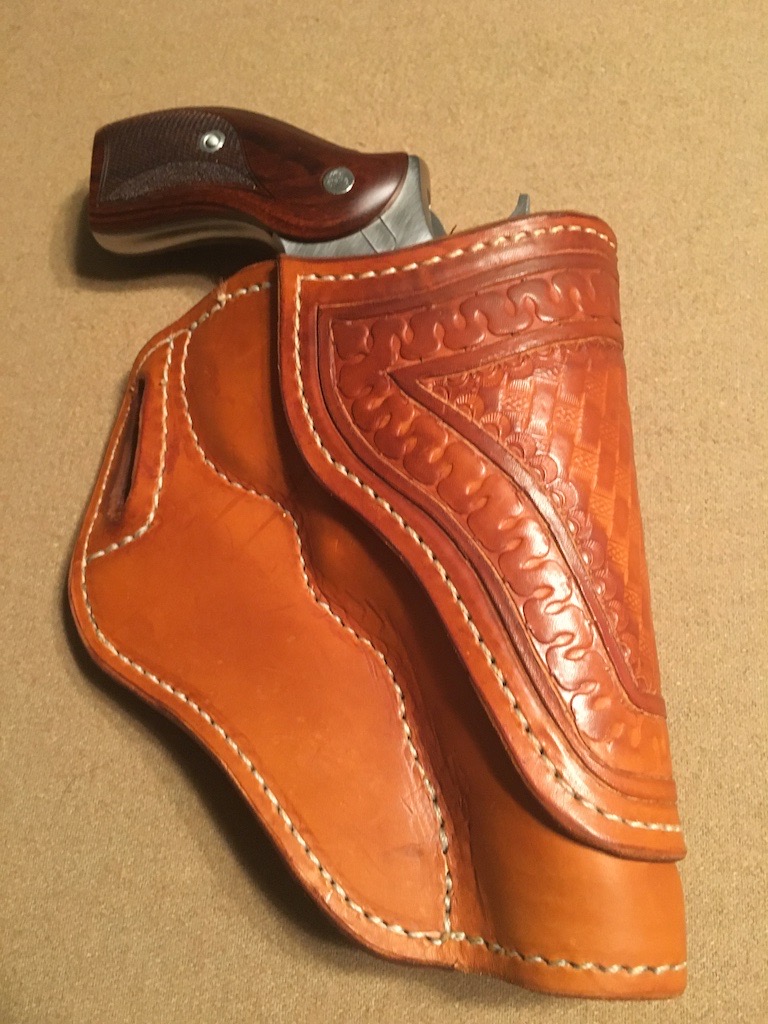
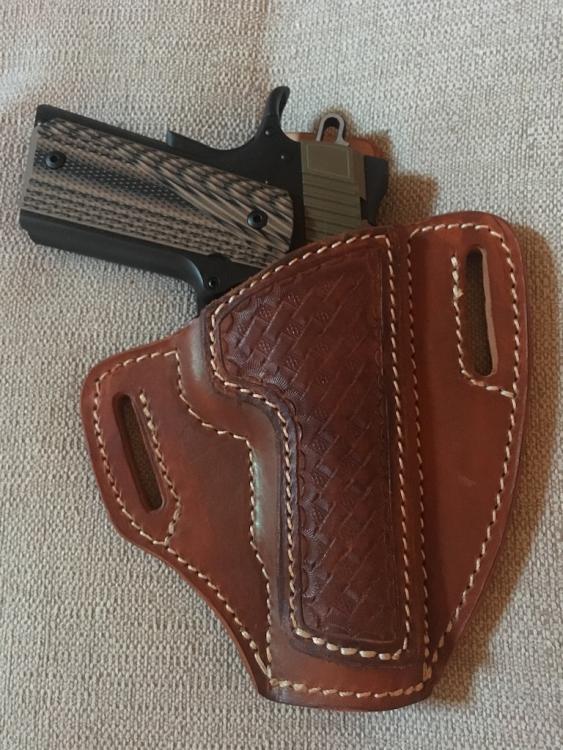
I have a used Tippmann Boss for sale. It is the old cast iron version, serial number 130. I bought this used and it has been sewing well for me the past year. I upgraded to a CB 4500 so I no longer need this. It comes with small cones of 277 white and black and a small cone of 207 white, a new pack of #200 needles from Tippmann with 1 or 2 used( some old needles I received with it), 6+ bobbins, a screwdriver and a handful of allen wrenches and the original owners manual and bobbin winder for drill. Also has the center pressor foot along with the double toe foot, the material edge guide and the led light. There are also a box with a couple spare parts that will go with it. I will ship as long as the machine is paid for and the shipping is pre paid. There are pictures of sewing examples and the machine, on the holster that is not a skipped stitch by the machine it is one I missed as that is where the two stitching segments joined and I stopped one to soon. Price is $700. Message me if you want more information. Thanks Todd


-

Avenger Style Holster Sewing
Hildebrand replied to Hildebrand's topic in Gun Holsters, Rifle Slings and Knife Sheathes
I don't have any pictures, I usually sew around the outside starting at the bottom then sew from the top down the stitch line. I am going to try sewing from the bottom to the top along the stitch line on the next one. Thanks, Todd -
I was wondering if anyone has any tips for sewing avenger style holsters, when you fold them over they want to round out and it makes it tough to get the pressor foot in on the stitch line? Do you get it really wet then push it almost completely flat, or do you just try to hold it down as much as possible and sew around it? On a second note do most of you use just the left pressor foot? I am learning the ropes on my CB 4500 and I love it but there is a difference between the walking foot mechanism and the center pressor foot I have on my old Tippmann Boss. Thanks and Happy Thanksgiving. Todd
-
Veg Tanned Leather Holster questions
Hildebrand replied to ABB's topic in Gun Holsters, Rifle Slings and Knife Sheathes
Well "that guy"s patterns are the best I have seen. If you do your part and follow the stitch lines you will end up with a holster that is a great fit to your gun. -
You have 2 terrific Tandy stores in your area. I have been to both the north and south ones. I have not been to the one just off I-70 but the one in Westminster is great, they have been more than willing to help me and answer questions.
-
JLS, Where do you find the LL needles? Thanks, Todd
-
I'd have to look at the package but pretty sure its a #25. Its what came with the machine.
-
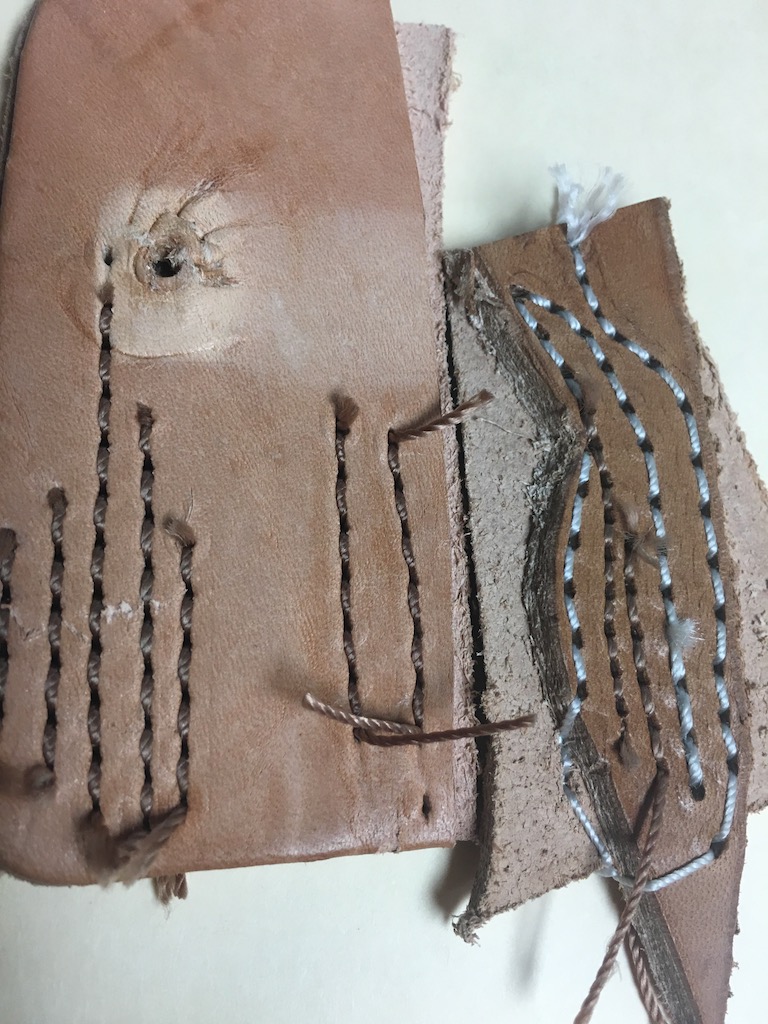
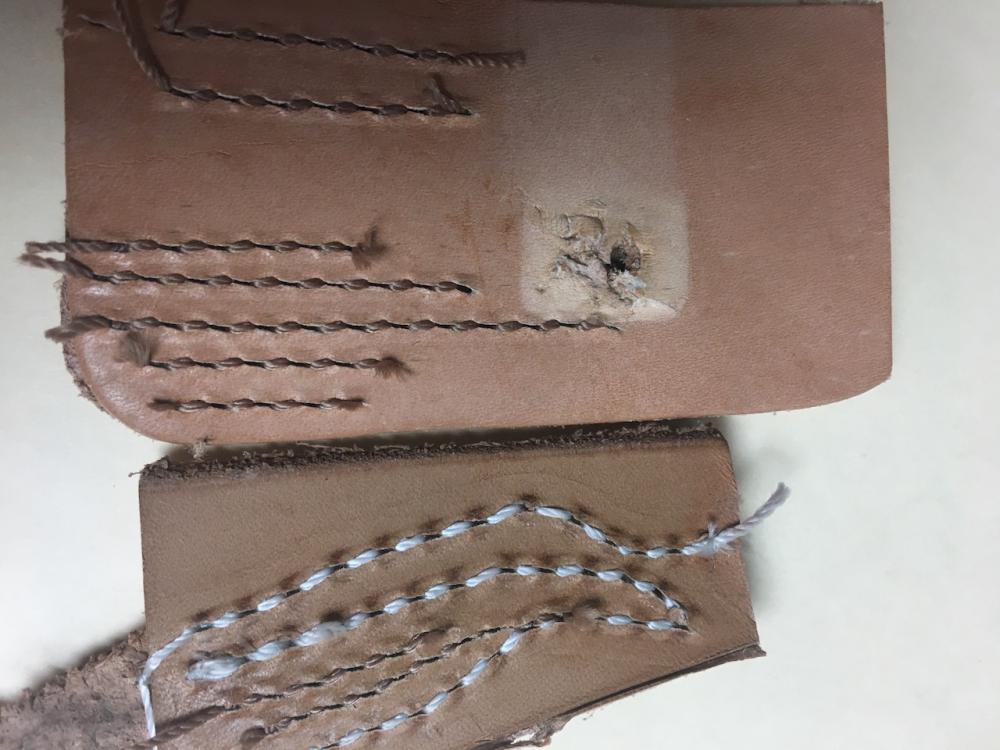
I appreciate the replies. I spent last evening doing battle and still lost. Confirmed thread path was correct, started backing off primary and secondary tension(upper) as in the utube video in 2:1 ratio primary to secondary. I got to the point where there is no primary tension and minimal secondary and you can see from the pictures there is essentially no change. Am I wanting too much or am I just missing something. Confirmed white and brown are both 277 size. First picture is the front, second is the back. weight of both test pieces is about 14 oz. Thanks, Todd

-
I have a new CB 4500, thanks Cowboy Bob, it came set up with white thread and it sews great with it. I changed over to brown thread and it seems to be pulled further into the leather than the white. 277 thread in both colors and top and bottom. My question is, do you normally have to adjust tension with the different color threads. I am going to double check and make sure I have it threaded correctly tonight when I get home. Thanks, Todd
-
I have a strip that is the same as what I make loops with and use the caliper method mentioned above. I go one more step, I keep scraps around and I will cut 2-4 slots after I figure out what I think the spacing is and try it. This lets me make the errors on scrap and not mess up good leather.
-
Bob, It looks like about $78.00 to ship, I estimated #50 as the machine is still bolted down and the cast aluminum one is listed at #21. Todd
-
I can take some measurements tonight and see what shipping would be. I only accept postal money orders for things I sell. Thank you, Todd
-
It is still for sale.
-
I will ship as long as the machine and shipping are prepaid.
-
Still looks great. Second vote for picture without the ruler.
-
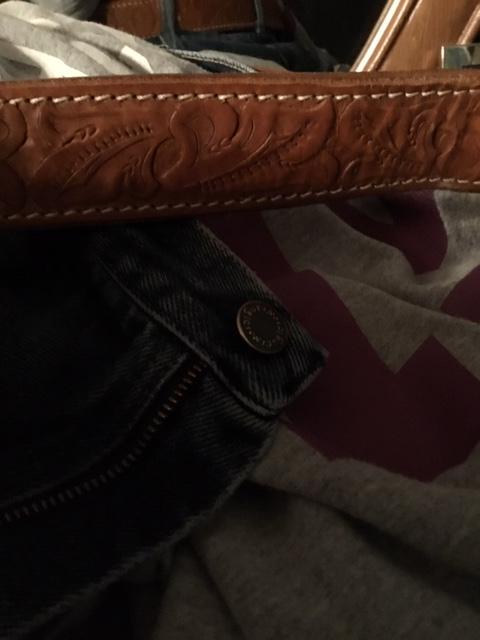
It looks great but looking at it I don’t think it’s going to line up, the angles it appears are slightly different. I try to put as long a straight line as possible, in this case maybe put a straight edge down about the middle of the brand and mark lines above ithe brand and below it to work off of. I would love to see the finished product, I have a soft spot for brands. Todd
-
What blue guns do you have left? Thanks Todd
-
Here is a picture of the Boss and the only belt I sewed with it.

-
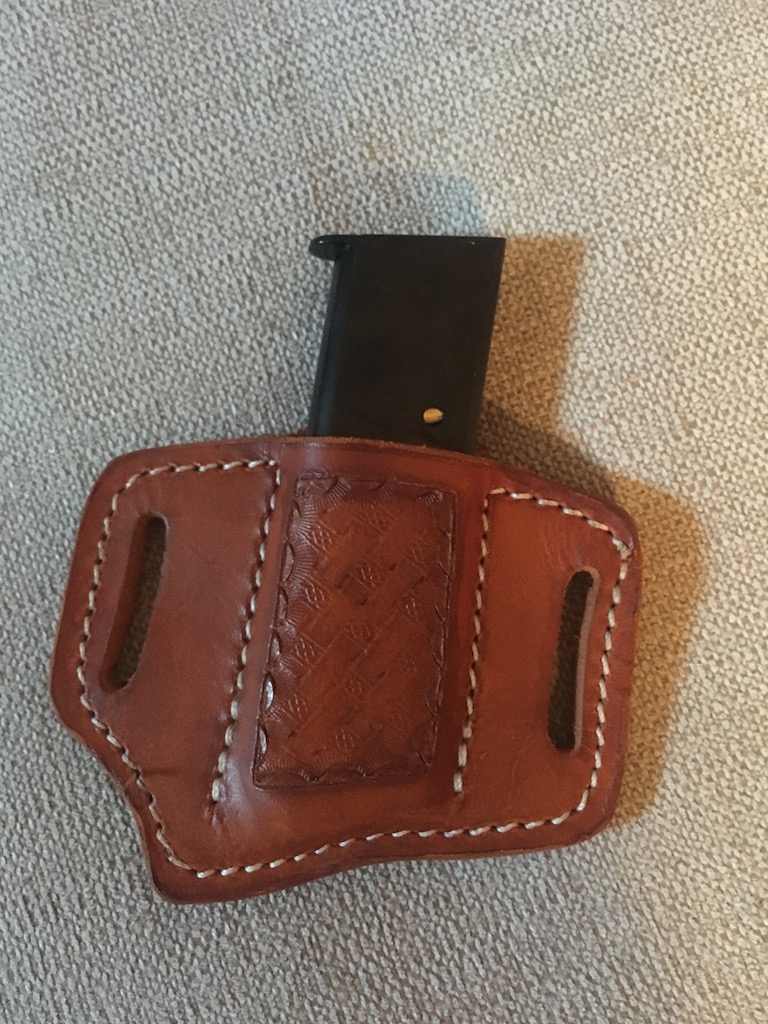
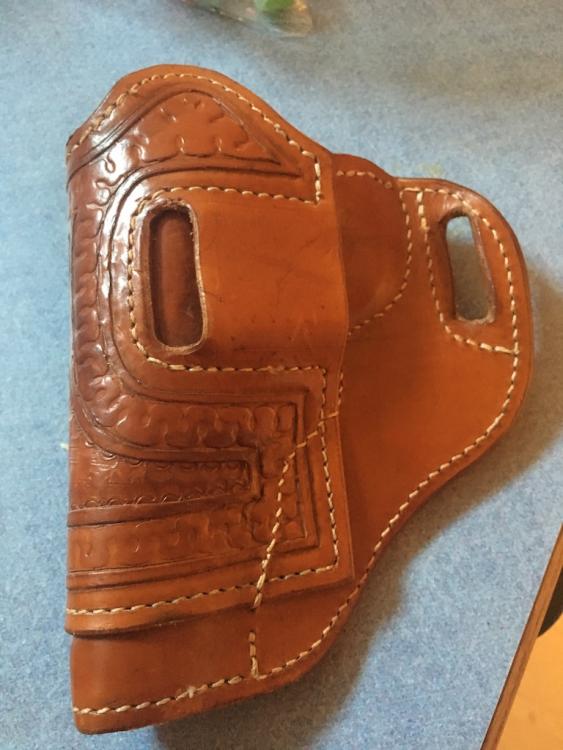
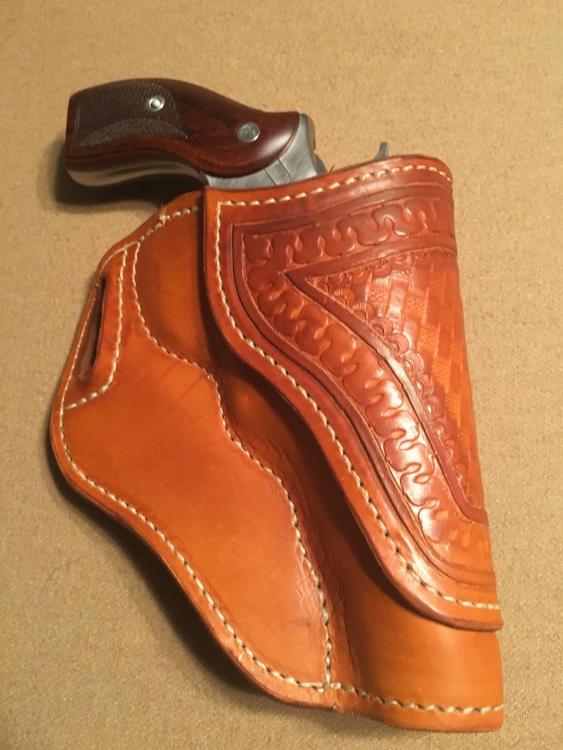
Here are some example pictures of sewing with the Boss.


-
It is still for sale. It is very old it appears the serial number is 130. It currently works great. I can add pictures tomorrow of what I have been sewing with it. I am upgrading to a Cowboy 4500 is why it’s for sale.
-
Jwyrick Are you looking for a Boss? I have one for sale. It is the cast iron one and has a low serial number. I have added the material guide, light, center presser foot, a package of needles and it has a bunch of extra bobbins. There is a large and small spool of 277 white, a small spool 207 white, small spool 277 Black, small spool 277 brown. I am asking $700 obo plus shipping. Comes with the original manual and Allen wrenches and bobbin winder.
-
I just placed my order with Bob for a Cowboy 4500. I have watched most of the YouTube videos. One thing I haven’t seen addressed is do you have to back stitch to lock it when you start sewing? Everyone just holds the threads and starts sewing. Back stitching to lock to finish is shown often but never to start. Thank you for your help. Todd
-
No expert here but you need to just cut the basic lines then do the stamping with the bevelers, shaders, seeders, etc before you add the decorative cuts to the flower petals.
-
Sand Belt Edges After Bevel & Before Burnish
Hildebrand replied to superpacker's topic in How Do I Do That?
Same as Dwight. I make sure the edges are sanded and dead even before I bevel and burnish.