Hildebrand
-
Posts
421 -
Joined
-
Last visited
Content Type
Profiles
Forums
Events
Blogs
Gallery
Store
Everything posted by Hildebrand
-
Looks good, like Bob said that stitching is a challenge and looks great. Todd
-
I am very much just a hobbyist. I have looked around my area and we have a couple leather professionals. Any holsters or other things I sell I make sure not to undercut them as long as my quality is where it should be. If I do sell something for a little less, I make sure the individual knows that is a one time price and point out whatever flaw I was not happy with. Todd
-
This is out of what I normally do but it looks like it is a completely different stitch. Yours angles through the and out the top theirs is only visible from the side not the top. Is it possible the leather top folds down to be sewn on the inside? Todd
-

Civil war 1860 Colt army holster patterns
Hildebrand replied to Tommy765's topic in Historical Reenactment
You are probably going to have a hard time finding a pattern exactly what you need. If you have the Stohlman book it tells you exactly what to do to create your own. Basically you fold a piece of heavy paper in the middle, put the gun on it on the barrel, sights down. then roll it to the left, for a right hand gun, and trace around the gun. Add about an inch to the tracing rounding out the curves, cut that out and fold it over and trace around it now you have the pouch. For the belt loop you need to refer to the book, I don't have it right in front of me but it will walk you through the process. -
For that particular gun, I would download the How to Make Holsters book from Tandy and make my own pattern. Western style patterns for revolvers are a great starting point and some of the easiest to make yourself. Todd
-
S&W Bodyguard .380 AIWB
Hildebrand replied to chiefjason's topic in Gun Holsters, Rifle Slings and Knife Sheathes
Thank you. That makes sense. Todd -
I have been back and forth between the creaser and groover, I think I like the groover better. May be my eyes but I have a harder time following the creaser line than I do the groove.
-
S&W Bodyguard .380 AIWB
Hildebrand replied to chiefjason's topic in Gun Holsters, Rifle Slings and Knife Sheathes
What does the arm on the left do? Is it kind of a support piece? Todd -
You can’t fix stupid but sometimes stupid needs fixed so they cannot pass the stupid gene along.
-
Just tossing out a suggestion, maybe need just a touch more pressor foot tension. Stitches look excellent on the double layer so I wonder if the single layer follows the needle up a bit if that messes with the stitches. Todd
-
No no terpentine, I got this recipe off this forum.
-
I like 50:50 beeswax:neatsfoot oil by weight melted together. Todd
-
I bought a bag of 1" paint brushes, there must be 20 or 30 in the bag. I only paid a couple bucks, I have started using the water based contact cement and rubber cement so the brushes can be washed out a time or two then tossed. I also have some of the plastic paintbrush looking sticks I picked up a Tandy, they are good for small areas but get tedious on large areas like lining a holster. Todd
-
Use the pattern offered by Jeff. If you cut it right and follow his stitch lines it will fit. Todd
-
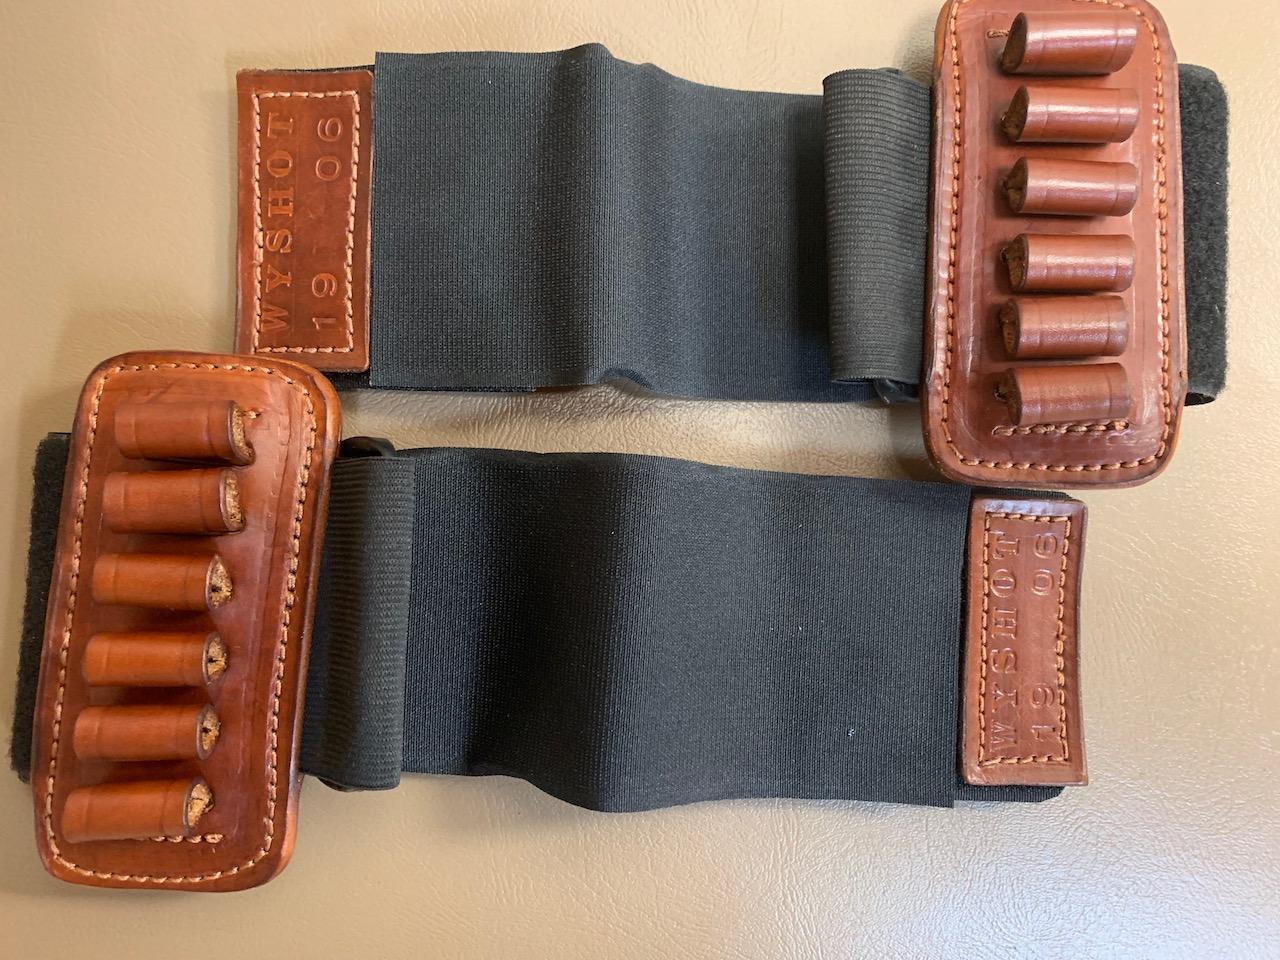
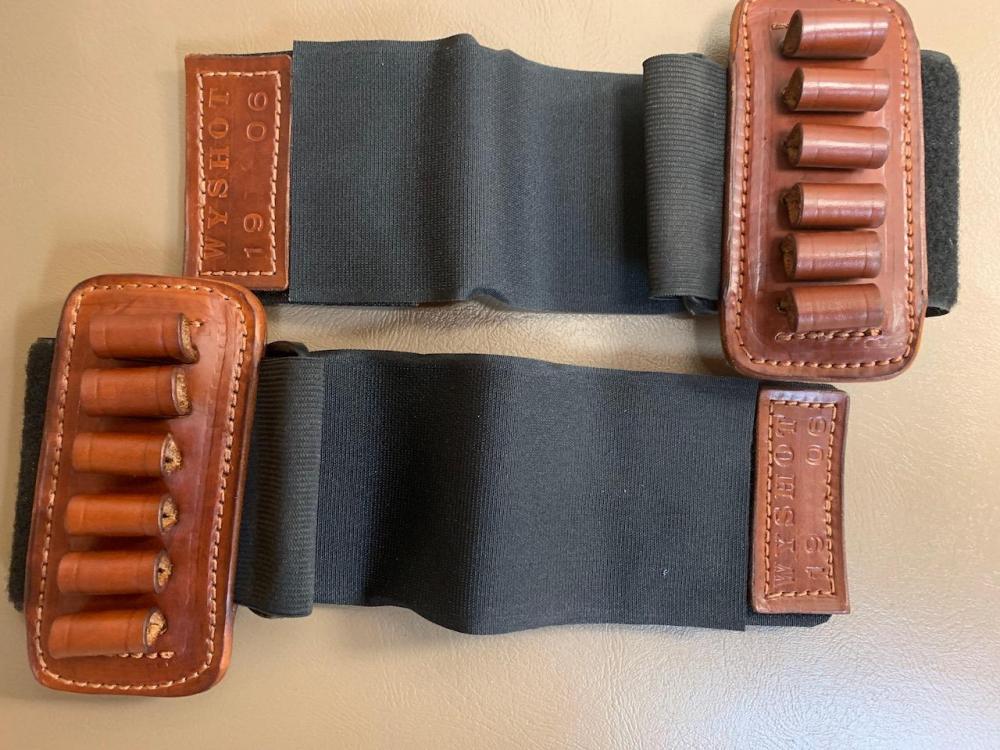
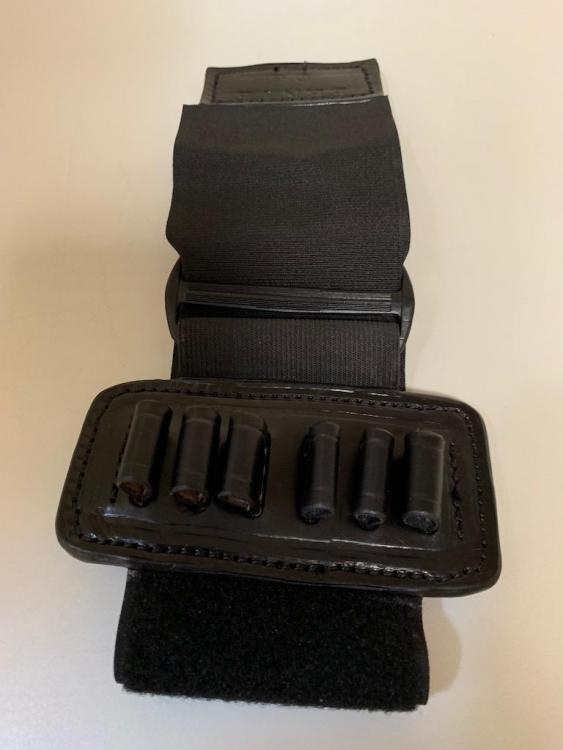
@MarkCdub I just finished a product like yours except it has 6 loops across it to hold extra ammo when hunting. I would abandon the leather for your straps, I tried it and there was no way to keep it tight. There is more slope in your forearm than you think. I ended up using 3" elastic with velcro sewn on the ends for closure. I will add a picture of what I did.
-
Right now I would go to Tandys Leathercraft Library and download Al Stohlmans How to Make Holsters book. It is free right now. It will teach you how to make a holster patterns especially revolver holsters. Todd
-
Thank you for the replies. I tried it last night with the feed dog in place like @Ken Nelson suggested. Mine clears so I know it works that way I just need to fine tune things and get used to not having the lower feed help pull the leather through. Thanks, Todd
-
I have a couple projects that it looks like the holster or stirrup plate would help get the sewing done without things getting caught on the cylinder arm. I am curious as to how difficult it is to get the lower feed dog adjusted after you put it back in. I am hesitant to take things apart since it is sewing so nice right now but if its not real bad to reset I would try it. Thanks in advance for any tips. Todd
-
1911 holster
Hildebrand replied to Mattsbagger's topic in Gun Holsters, Rifle Slings and Knife Sheathes
Looks really nice. -
Generally that is a 2 layer belt. You cut around the letters on the top layer then die the contrasting color on the back layer and glue it and sew it together. Todd
-
Same here Tom. I figure they don't want anyone downloading them then reposting them somewhere else for free once this ends. Todd
-
Dangler
Hildebrand replied to Simplejack1985's topic in Purses, Wallets, Belts and Miscellaneous Pocket Items
Just curious why you would put the snow seal on before wet molding? Won't the snow seal reduce the amount of water the leather can take in. Todd -
My most consistent die jobs have come when I use what are sold as stain applicators at Home Depot. They are a sponge with a fabric cover, they give a very nice even distribution. I gave up on the daubers, I am not sure if it was me or the daubers but things looked terrible. The neatsfoot oil does really help. Todd
-
Tape measure clip? What is this called & where can I find them?
Hildebrand replied to GaryNunn's topic in Suppliers
The threads I have seen as well as my own searches all come up empty for a supplier of these clips. I resorted to buying a tape measure holder and cutting the clip off. Todd -
I would put it on a belt sander until it was back to a flat surface. No guesses as to how it got so out of shape. Todd