-
Posts
1,299 -
Joined
-
Last visited
Content Type
Profiles
Forums
Events
Blogs
Gallery
Store
Everything posted by TomE
-
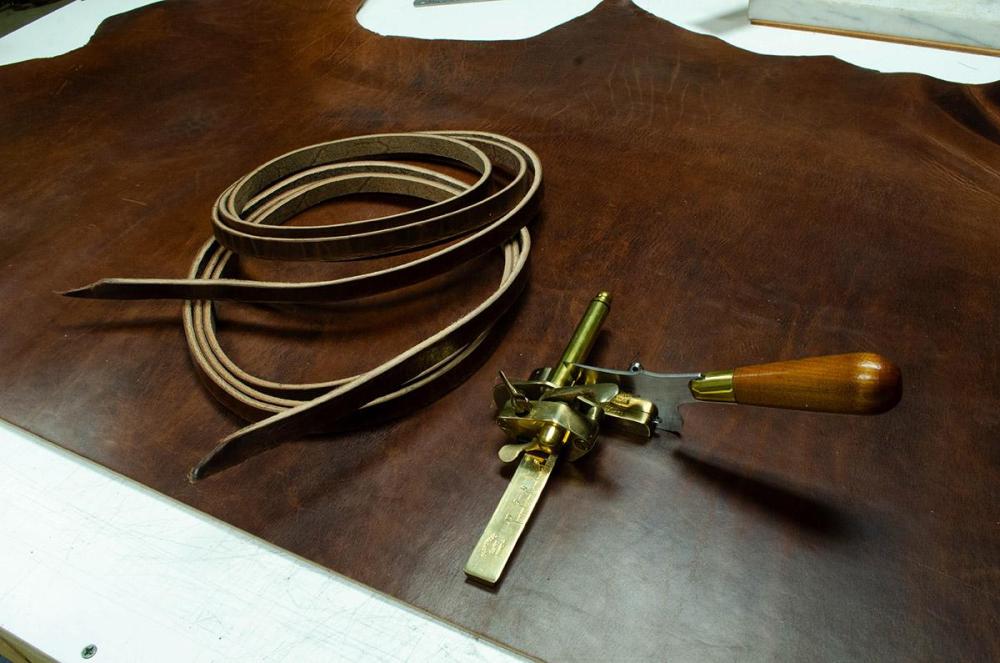
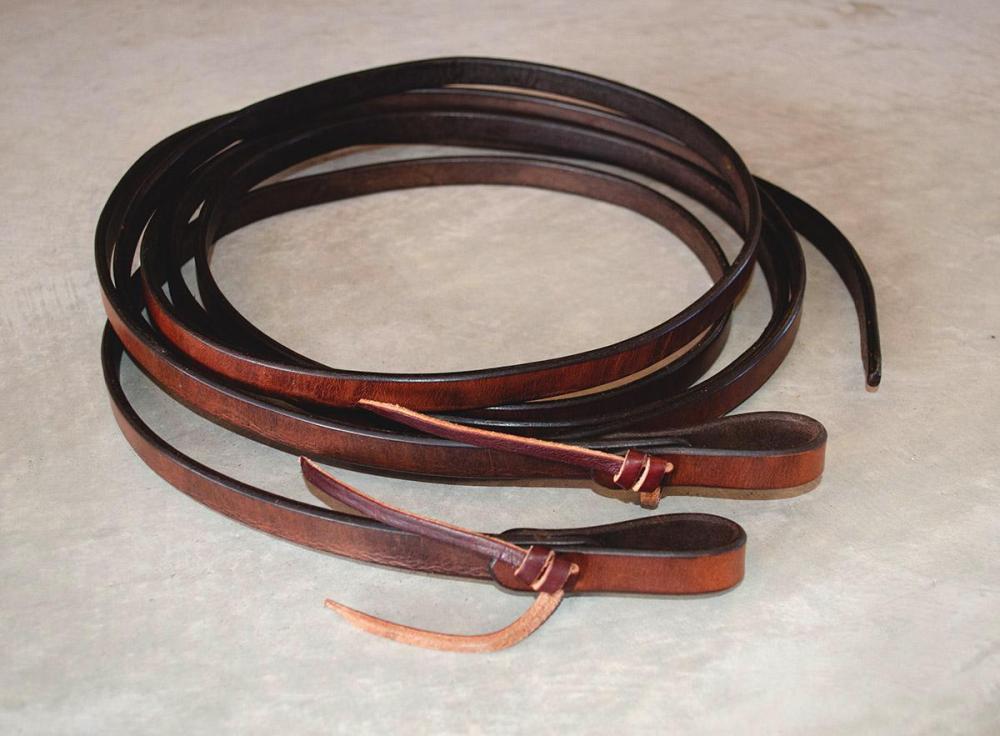
Not everything I make is black, it only seems like it. After making 3 black halters in the past month, I treated myself to some brown leather. These split reins are made from 12/13 oz Hermann Oak chocolate harness leather. 5/8" x 8 ft long. I dyed the edges and back with Fiebings Show Brown. The strings on the water loops are cut from HO latigo and beveled with a nice Ron's edger that I bought from @bruce johnson. Learned a lot about split reins by reading old posts on this forum. Think I will try making reins from latigo vs harness leather, sewn reins, and weighted reins. I welcome your ideas and feedback.
-
A Google search of this site (syntax: site leatherworker.net filligree) returns lots of results.
-
Wishing you well. Learned a lot from Stohlman's books on case making and leather tools. I use it as a foundation to judge advice from the experts on Youtube.
-
I buy most of my brass hardware for tack from Beiler's Manufacturing and Supply, and Batz Corp. Beiler's has good prices and service, and volume discounts, but no website. Call them for a catalog. Good quality from both vendors.
-
Bob Klenda wrote a series of articles about shaping a ground seat, published in the Leather Crafters and Saddlers Journal. You can order back issues from the Journal or contact Bob with your specific questions. https://www.klendasaddlery.com/
-

Does a decorative stitchline reduce durability?
TomE replied to LMullins's topic in Leatherwork Conversation
I agree with @Handstitched that stitching is usually not the weak link. Most horse tack that I’ve repaired has broken where the leather wraps around hardware, or cheap hardware breaks. The stitching is in tact. That said, I don’t stitch across the width of a strap. -

Hand sewing boots with saddle stitching
TomE replied to Larryvaan's topic in Shoes, Boots, Sandals and Moccassins
I don't know much about shoe making but I enjoyed reading this book by Harry Rogers https://www.amazon.com/MAKING-HANDMADE-SHOES-STEP-STEP/dp/B0BM57TF35. -
As a retired biochemist, I think of chemicals as the molecules of life. Saw a Viktor George video recommending these acrylic-polyurethane topcoats as being more durable than resolene for a waterproof finish. https://lktopcoats.com/collections/lk-top-coats I know what you mean about dye rub off and beeswax. I sometimes seal edges with hot beeswax using a heated edge iron. When I buff the edges with canvas the dye rubs off on the canvas. It does seem that the hot wax solubilizes some of the dye. I usually go over the waxed edges with Tokonole to add a bit more shine and that seems to stop the rub off.
-
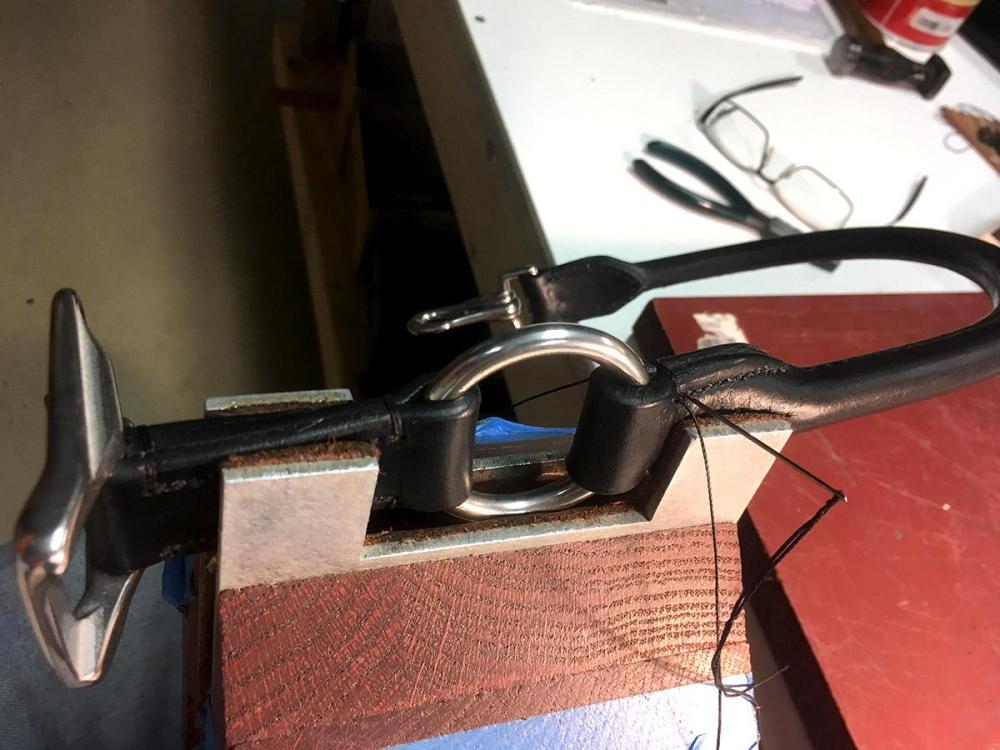
Not my idea. In his hand sewing book Stohlman shows notched plates made of plywood for stitching rounded leather. This has worked well for me. Can use the space inside the notch as a regular stitching horse clamp.
-
I do have pricking irons for marking holes at 7 SPI and 9 SPI. I use overstitch wheels for other stitch lengths. Most of my work is 1-3 layers of 9-10 oz leather. I rarely sew leather more than 1/2" thick but a sharp awl works well for this. I use different sized awls for different weights of leather, depending on the thread size. As you sharpen the awls they get smaller, so you end up with a range of sizes. I like a pegging awl haft for larger awls/thicker projects, and a palm haft for most of the rest. A key to making tidy stitch lines with an awl is to have the work clamped securely/consistently throughout the project so your angle of approach with the awl stays constant. I use a Weaver stitching horse. I modified the jaws with notched aluminum plates (leather lined) that are handy for the odd shaped parts of a bridle and a halter.
-

Hand sewing boots with saddle stitching
TomE replied to Larryvaan's topic in Shoes, Boots, Sandals and Moccassins
I have trouble using a saddle stitch inside boots when replacing a zipper on a riding boot (I don't have a patcher machine to stitch inside the heel). When access to the backside of the stitching is limited you can use a lockstitch like a sewing machine. Some folks use a speedy stitcher. I use a jerk needle (American Straight needle #5; https://sorrellnotionsandfindings.com/product/machine-needles/) mounted in a pegging type haft (leather ring pegging haft; https://sorrellnotionsandfindings.com/product/awl-hafts/). You hook the needle with the bottom thread by feel, pull it through the hole, and complete the stitch on the topside. There are some Youtube videos on sewing with a jerk needle, and it was a discussion topic here. -
Lots of opinions about this. My opinion is that if you learn to use a sewing awl you'll be faster and more versatile than when pre-punching holes. You can do a lot of good work with an inexpensive awl (I use Osborne awls and hafts) and an overstitch wheel to mark the holes. The holes always line up because you punch them after the project is assembled, and the hole size will match the thread. It is particularly good for fine sewing and for sewing irregular shapes. For example, I sew a lot of loops (keepers) and buckles on horse tack, and by angling the awl you can sew underneath the loop. With an awl you can make small adjustments on the fly for stitch length and the path of the stitch line to make things work out. Most of the time in hand sewing is spent pulling up the stitches and using the awl only takes a couple of seconds per stitch. The one time I pre-punch holes is when sewing leather on woven fabric, so that I'm not cutting the threads of the fabric/webbing with an awl. I think the reverse stitching punches are designed to complement the forward direction when sewing 2 layers back-to-back. Use the reverse punch on the backside then the slanted holes will align when you assemble the layers back to back.
-
Thanks for this information, @TackCollector. I really enjoy learning about how English saddles are made and repaired, and would welcome any suggestions for references. The old books (printed in the 1960s-1970s) on saddlemaking that I've collected don't cover the newer construction methods.
- 33 replies
-
- panel
- jumping saddle
-
(and 2 more)
Tagged with:
-

My latest binge on belts
TomE replied to Dwight's topic in Purses, Wallets, Belts and Miscellaneous Pocket Items
Wow! That's a lot of edges to finish. Looks good. You've been busy. -
I bought a used Techsew SK-4 with the vacuum cabinet. It is well made, although my impression is that all these bottom feed bell skivers are about the same. Campbell-Randall sells additional feet and drive rollers (FAV brand) that fit these machines. I posted about some accessories that I find useful in tack making.
-
That is an impressive modification. Could make high quality latigo saddle strings with that rig and a beveler.
-
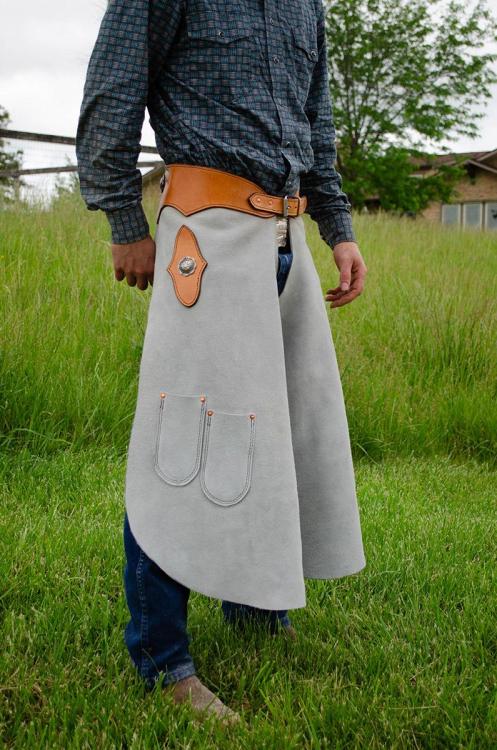
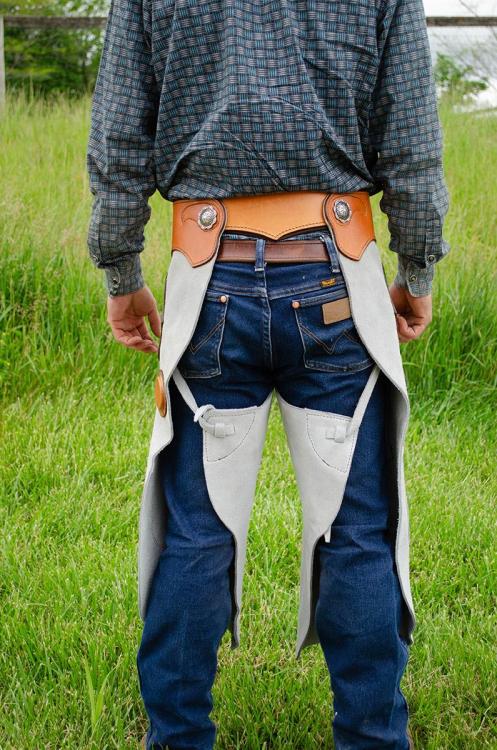
This shoeing apron is made from 7/8 oz apron split from Beiler's. This is a heavy apron but the client is happy with it.
-
I found one on Craigslist in my area following the post-COVID spending spree. It appeared to be in like new condition. It is easy to use and handy for working in tight spaces.
-
Check that the needle is installed correctly/completely with the scarf pointed to the right. Rethread the machine. Sounds like your top thread is binding on something.
-

Please HELP!!! What is this hardware!?!?
TomE replied to ruffwerkz's topic in Hardware and Accessories
Appearance is similar to a saddlery spot, except spots are secured with 2 prongs instead of a tack. I would sew the handle on the bag rather than relying on these decorations. Beilers Manufacturing and Supply sells brass, nickel brass, and chrome plated spots, hand held and machine setters, etc. Call them for a catalog. -
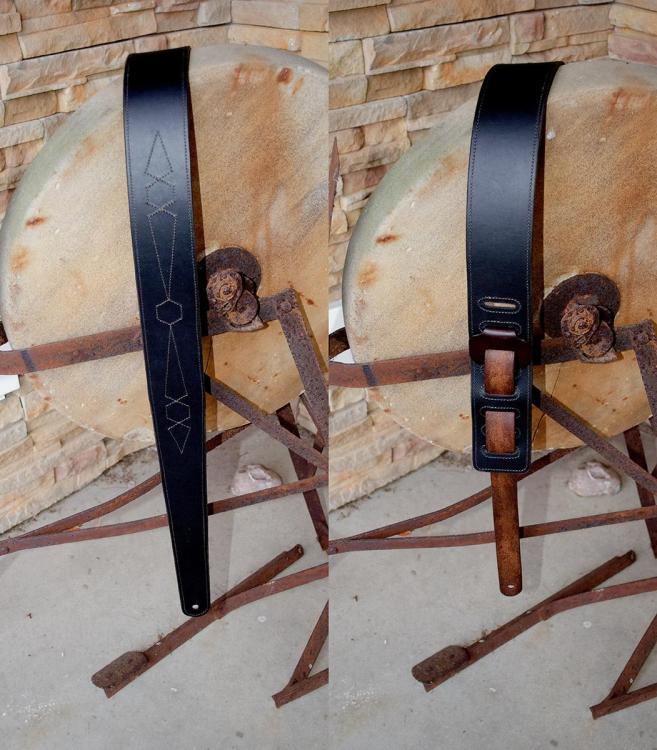
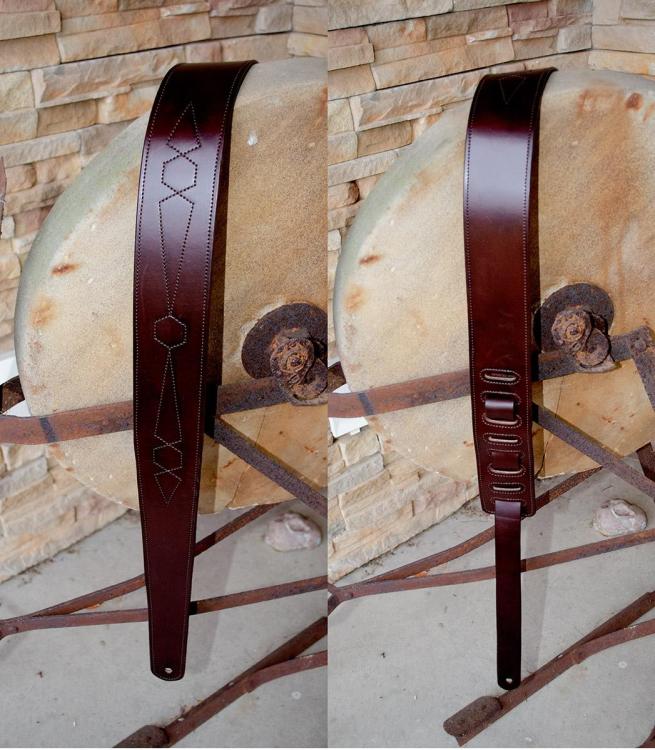
Hello. I can make the strap as shown above, except that it wouldn't be tooled. I would use bridle leather and can add decorative stitching. Below is an example of a simple guitar strap in bridle leather. My business contact information and other examples of my work are on my FB page for Bridle-Wise Leatherworks if you would like to discuss price and options for color, hardware, adjustability, etc.
-
Can you give us more information about your machine, the particular narrow plate you're using (holster plate?), thread and needle sizes, thickness of your project, etc.? A picture of the stitch spacing (good and bad) would also help.
-
Bruce Johnson sells new Osborne awls that are sharp and ready for use. He will have expert advice to match the tool to your project.
-
That's a press-on haft, like an Osborne #144. I do most of my sewing with that type. Can put a dab of expoxy on the awl to secure it when press fit. Use a pair of soft coins in the vise to prevent damage to the awl. Some awls don't fit the chuck-type hafts and you have to fiddle with them to secure the awl. How much of the tip is sharpened depends on the thickness of the leather you're sewing and your preference. I typically keep 1/4" to 3/8" of the tip sharp and the rest of the awl is polished with rounded edges to stretch the holes without cutting them larger. As you sharpen the awl it gets smaller and you will eventually have a collection of different sizes for different thread thicknesses. Good for you that you're learning to use an awl. It is a dying art but very useful for sewing irregular shapes and fine stitching.
-
I have a Techsew SK-4 bell skiver with a vacuum cabinet. There is a retangular cutout in the table underneath the bell knife and a large, sloped metal chute that connects to the cabinet. The cabinet has a fan mounted on the back that pulls a vacuum. The vacuum is powerful enough to pull the skived bits out of the knife and deposit them in a rubbish bin in the cabinet. Most of the noise is the sound of air rushing through the cabinet. Quieter than the shop vacs I own. There are some pictures here. https://www.techsew.com/us/techsew-sk-4-leather-skiving-machine-with-vacuum-suction-device.html


