


PastorBob
-
Posts
1,447 -
Joined
-
Last visited
Content Type
Profiles
Forums
Events
Blogs
Gallery
Store
Everything posted by PastorBob
-

First Leather Project worth showing
PastorBob replied to MtlBiker's topic in Leatherwork Conversation
Thanks for sharing the LOOONG process of learning with us. It can be frustrating, especially as you get started. Been there, done that. Still have quite a few projects going to the scrap pile from time to time. Great work. As Dwight mentioned, the edges and stitching lines are what most folks notice. I will take the top piece of a project and make sure the edges are good and straight and that all corners have the proper radius on them and the bottom piece it attaches to is larger (cut it a little bigger). At that moment, I will punch through the top layer with my stitching forks. I then glue it together, punch the holes in the bottom layer using the holes punched in the top layer as a guide. Then I will cut/sand the bottom piece edges to match the top. When done sanding the edges, it looks like one piece of thick leather. You can't see the seams between them. Then I do the slicking. Hope this helps. Wish I could afford a pair of Ipod Pros, if so, i would have you make me a case for them. Great work!!!! -
Welcome to the forum! Typically the imported natural veg-tan leather is much lighter in color. They add additional chemicals during the tanning process to speed it up. It is typically less expensive than, say, the US tanned leather. You will find that tanneries such as Hermann Oak and Wickett / Craig leather has a tannish color to it and appears to be much richer. The imports are normally very slick on their hide surface, where the others will have a little more texture. In my early days, I purchased the imports to save a little money. It is fine for small projects and you can make it work for carving and stamping. When I took the plunge into the better leather, it was truly obvious in how it worked when carving/ stamping vs. the import. In a nut shell, color really doesn't determine the quality, it is more about the tanning process. Also, if leather is stored where UV rays can get to it, that will darken the leather as well. Hope this helps.
-
Beaver tail cigarette case
PastorBob replied to Thescandall's topic in Purses, Wallets, Belts and Miscellaneous Pocket Items
That's awesome. I am sure mama loved it. Was it any more difficult to stitch than veg tan? -
Work Boots and Belt
PastorBob replied to Tim Schroeder's topic in Shoes, Boots, Sandals and Moccassins
Awesome to see that level of talent and skill. Just amazing! Quite the tool selection as well. Those boots will last 2 lifetimes. -
Go to this link. It is the section of the forum for listing equipment. Good luck with sale. https://leatherworker.net/forum/forum/79-machinery-cuttingleatherworking/
-
Wow. That's is a piece of art all by itself. Love the contrasting colors of the walnut and maple. Nicely done.
-
Welcome from SW Missouri. You will find much useful information here.
-
Another one to add to the to-do list. Some impressive results. Thanks for sharing!
-
1911 lower back double holster.
PastorBob replied to hashtagartz's topic in Gun Holsters, Rifle Slings and Knife Sheathes
Beautiful! nice attention to detail. Now I need to by another 1911 before making my own double holster. Decisions, decisions... -
Makes sense. Thanks for the explanation.
-
I always wet mold mine. Haven't tried it without.
-
Cell phone case clip
PastorBob replied to DirtyDusty's topic in Purses, Wallets, Belts and Miscellaneous Pocket Items
Love the clean design. Nice tool work too! -
Just looked up distance from house...Sheridan is closer by 100 miles, coming in at a 15 hour drive and 1100 miles. Sounds like a bit more than a long weekend. Would love to go someday. Glad you had a good time and were able to meet some of the legends in the field.
-
Thanks @Tugadude. I am familiar with that one, just not the one he described. This one is useful too. I just don't do much letter stamping...I normally carve the letters.
-
This is one of my favorites...typically less than $10 each Alec Bradley Prensado - Robusto size
-
Got any pics of the setup? I can't visualize it. Sounds like a wonderful invention and is extremely useful. thanks.
-
That is really nice work. Would like to make the show one of these days. Never been to one. Is this one of the larger gatherings?
-
First Time Tooling A Flower
PastorBob replied to AzShooter's topic in Gun Holsters, Rifle Slings and Knife Sheathes
Very nice tooling. Great start at it. Stitching looks nice and even too. Great job. -
Welcome from SW Missouri! Looking forward to seeing some of your work.
-
That is crazy. All of the impressions should be much darker than the rest. I would try another application of the antique...but this time, really rub it into every nook and cranny, then let it sit for a spell. If that doesn't work, and you want the impressions darker, you may have to get out a tiny paint brush and apply a darker dye. That will be a lot of work, but you will be able to salvage the piece. Good luck.
-
Tooling is awesome. I really like the pattern you put on the spine, incorporating a different pattern with the basket weave stamp. Stunning. As for price, double your material cost and add your labor rate.
-
WOW! Nice work! Really like the tooling/ carving. Great job.
-
Apple AirPods Pro case
PastorBob replied to benfanman's topic in Purses, Wallets, Belts and Miscellaneous Pocket Items
Thanks for sharing your work! Always great to see another artisan's work. That closure is referred to as "ball and post" or "Sam Brown". Something you might add to allow it to open a little easier is a tiny slit on the edge of the hole. Place the slit on the opposite side of the direction where there is natural tension when the case is closed (I would guess on the side of the hole farthest away from the edge. Great work!! Not that you have to purchase a tool for the hole, you can use a blade to slit it, but here is a picture of a tool used to make the Sam Brown hole. This will give you an idea of what I described above.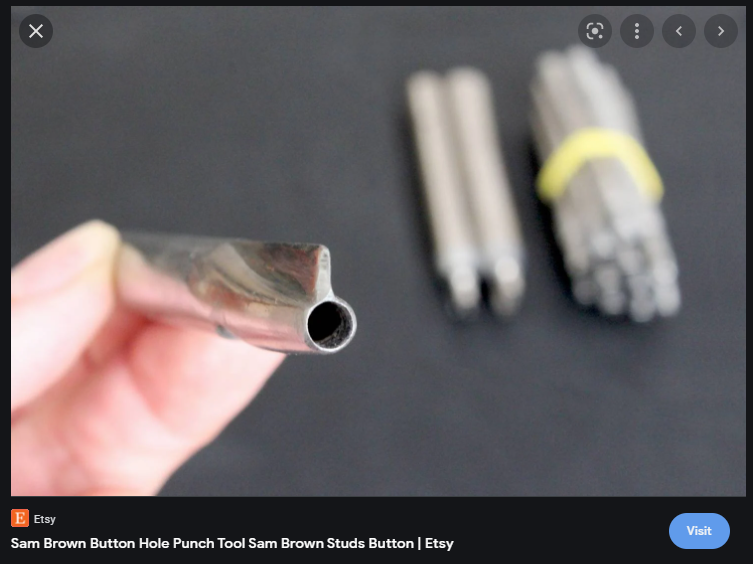
-
As mentioned above, a cheap arbor press from HF would work great, but you can also sandwich your stamp and leather between a table top and a piece of wood and slowly crank down some C-clamps...leave it for about 15 seconds or so, depending on how wet and thick your leather piece is.
-
I would not glue it. When you tension it in order to staple, it may pull either the glue off the board, or fibers from the leather causing imperfections in the surface. Chrome tan is normally pretty stretchy and would do better with just the stretch and staple method. IMO. Make sure to post pics when done.