JLSleather
-
Posts
7,378 -
Joined
Content Type
Profiles
Forums
Events
Blogs
Gallery
Store
Everything posted by JLSleather
-
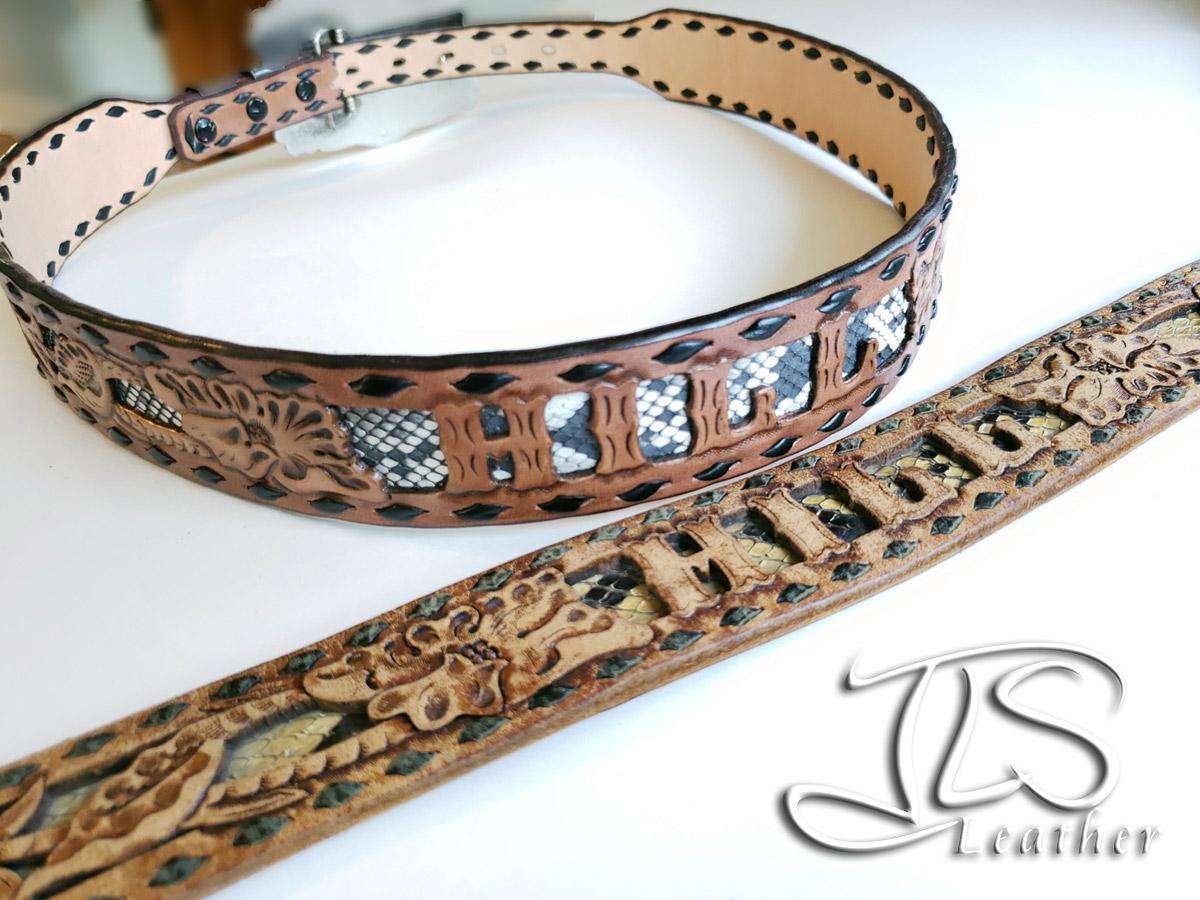
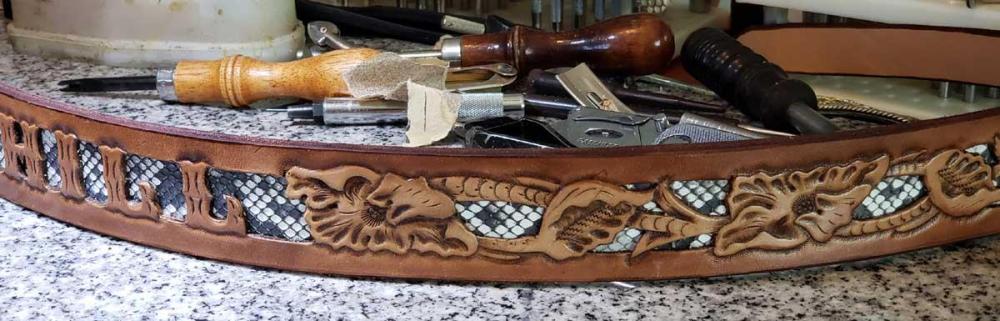
Dont take much. Even if you cut out a "lattice" look in some 4 oz (ish) cowhide, over the snake, you can leave a LOT of snake showin without the flaking and scraping
-

Looking for a holster pattern suggestion
JLSleather replied to DwightT's topic in Leatherwork Conversation
If you're talking about the little 5-shot revolver, about any pattern for a "j-frame" will work (the taurus is just a smidge smaller). This one includes a belt loop, tooling area, and thumb break retention strap, ... aimed to be a tad looser than some for the m85 Leather Gun Holster PATTERN Smith Wesson J-frame Taurus 85 - Etsy -
card stock. Gitcha some 80lb or so. Available everywhre, basically. Print right on your home printer. Cut out, and done. Pattern gits worn out.. print another one. For belts, I just have patterns of the width and the tip end. The "holes" are just poked with a stylus or pencil... then poke the leather same way through the holes for punch position. Great for holsters, too.
-
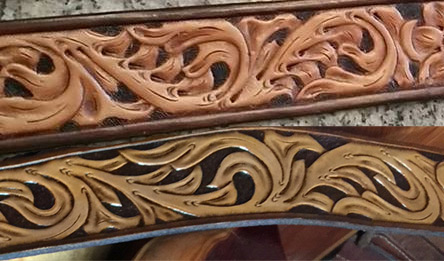
I ONLY do snake as an inlay, and the scaling is the reason for it. Incidentally, there are better places to get snake anyway (ROJE has some stuff ). Dry is not good, and "flaky" worse. But snakes do have scales. So I don't do 'full snake' goods. Did a python belt ONCE, for a fella wanted to match his boots. I agreed to do it, with the understanding that I double-loop laced the edges (yeah, took as long as you'd think) to "recess" the scales a bit.
-
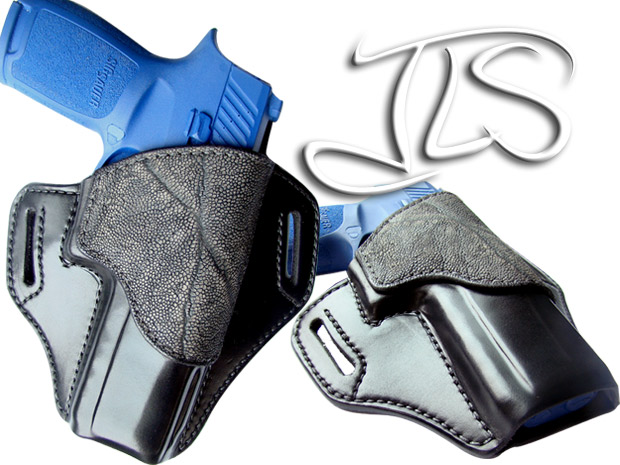
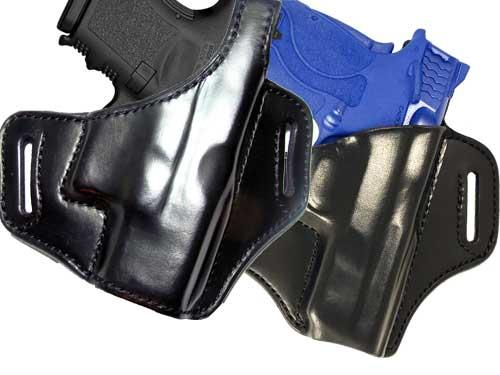
Really? Nobody doing holsters any more? These are 60% off the price at the store, folks ... and I have others, if you need different models.
-
Retention on railed guns
JLSleather replied to fortenberryshel's topic in Gun Holsters, Rifle Slings and Knife Sheathes
DONT mold the leather down into the rails... you are correct that these will abrade the leather. And its not necessary anyway. Create your "retention" somewhere else - NOT on the rails. As a rule, I like most of the 'retention' to be in the lower part of a holster (so you don't have to "fight" it all the way out). Which is usually right where the rail is So, this has to be the exception to the rule on "bottom" retention. But then, it might already BE an exception, since you're making a holster for a gun with a rail that doesn't carry anything. I mean, seems like a guy with a railed pistol might also have a light or a laser ... but not always the case. These Sig P320's have pretty aggressive rails. So I "block" the rails before molding the holster. You can do this with about anything -- including tape as long as you have tape that wont leave any residue. This creates CLEARANCE for the rails (the holster isn't actually down on them when you remove the tape (or whatever you used). And in these cases, the slide is pretty tall and more than enough to create retention on the holster.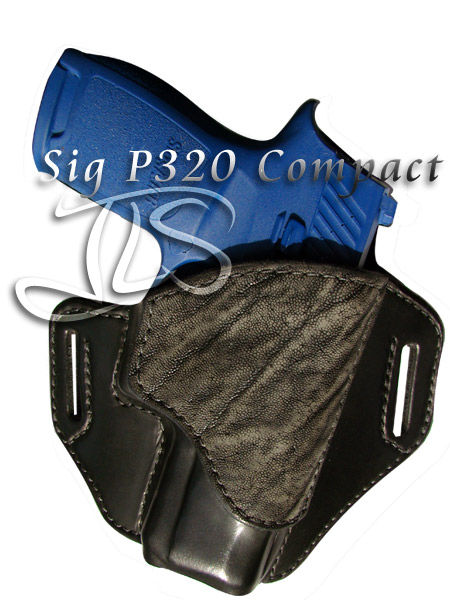
-
Question about lining a holster
JLSleather replied to DJole's topic in Gun Holsters, Rifle Slings and Knife Sheathes
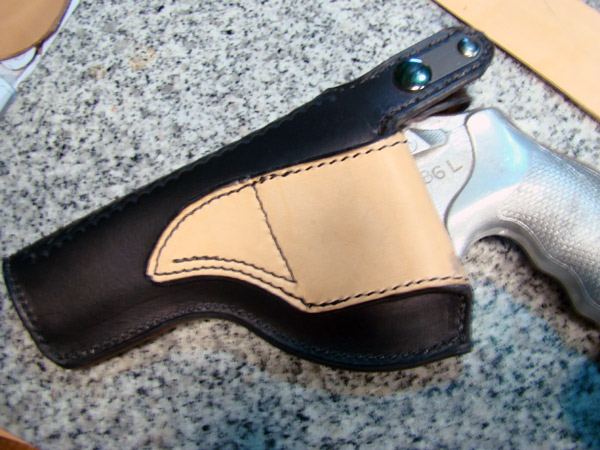
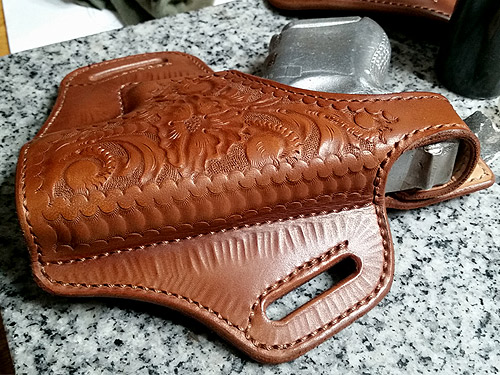
Use FIRM leather, cowhide works, or I really like veg tanned goat (which is very tight grained and firm). That said, here's a bit longer discussion on that ... "back in the day", chrome tanned leather was avoided because of the reaction of chemicals used in the tanning and the finishes on guns (specifically blued guns). Both of those have changed over a couple of decades, so maybe not such an issue. As for 'suede', the underside of leather - as in grain removed - is "suede" leather. So any unlined holster is "suede" on the inside (consider the term "rough out", and maybe clear that up for ya ). But again, at one point most "suede" sold was chrome-tanned, so... same as above. Only difference is that some STILL think that "suede" means chrome tanned. So there's a couple thoughts for food. To answer the specific question, I often use holster/tooling leather on both inside and out. Like if I wanted a 9/10 oz holster, I might well use 4/5 oz inside and out, from the same hide. This is sort of accepted weight for the type of holster you want to make - many of mine are a bit lighter... more like double 3/4 or 4/5 lined with 3/4. One thought (note) here -- it's fairly common to see people using the softer or less cosmetic parts of a hide for the inside. WHile this seems "economical", I do not recommend it. In fact, I generally don't use belly leather at all. Are you TOOLING this holster? Are you adding hardware to it? These might also affect the weight of leather(s) you choose. So then -- the first pics show a TOOLED holster (Ruger Redhawk in this case) which was a 7/8 cowhide outer, tooled, lined with a 2/3 goat ... maybe you can see the difference in the grain here. The second pic more acurately shows the finished color... seems the chrome finish made my camera adjust The black blue dummy was done with two layers of 4/5, since the design was not detailed and she wanted it black inside and out so I used drum dyed black cowhide (W/C skirting leather). The Glock holster done the same way, only using 4 oz leather for both leathers. This one, for a 686 S/W, got a 6/7 outer with a 2/3 lining since the only reason for the liner was to cover the inside of the metal snap to prevent marring the gun finish. And the Glock 27 holster was done with 4/5 for the carving, lined with 3 oz to end up right around 8 oz total (if I remember right, it was just under 8 oz). Again, this had thumb break hardware the gun wanted covered.
-
Still trying to learn carving.
JLSleather replied to gregintenn's topic in Gun Holsters, Rifle Slings and Knife Sheathes
Leather too wet is prolly the most common mistake made by new guys - maybe we jus in a hurry to git goin'? But I'll throw ONE MORE wrench in the mix here bout moisture content of the leather. I do it different ways, largely depending on the thickness of the leather. About 4 oz or less, I add water to the FLESH SIDE with a sponge, lay it on the marble (or granite, or whatever). Since the rock is impervious, the moisture must go THROUGH the leather to evaporate... which is all you need to tool. Works every time. Git up in the 7/8 oz range (or so, again, not a hard line rule), I add that same "back" water, but also wet the front (though not as heavily). As you can guess, this causes the water on the underside to go out more slowly, thus "soaking' a bit more. And it continues up as the thickness increases. Until you get to FORMING leather, and at that point I don't think there's such a thing as "too much" water. And SOMETIMES, leather needs to be formed BEFORE its tooled, so a guy might have to FORM the leather, then let it dry out some to do the tooling. SOME POINTS HERE: I use water. Not soap. Not dishwasher. Not saddle soap. Not super glue. WATER. In the 'early days', I read Stohlman's book on belts, said to put a belt strip in the sink until it stops making bubbles. SO I did. I got tired and went to bed and that thing still was nowhere near "return to original color" "Cool to the touch" means ABSOLUTELY NOTHING. My shop is like 65° mostly. The guy with the 80° shop with think MY leather is "cool to the touch" at ALL TIMES and therefore "ready" to tool, even when it is not. In fact, if his shop is 15° warmer than mine, HE should git bizy, cuz his leather gonna dry BEFORE mine does. All leather is NOT created equal. Git GOOD leather. If your leather isn't right, then how you "case" it won't fix it. This is THE #1 issue at all times. If you dn't know good leather yet, ASK somebody who does. You can usually tell who that is,.... they're showing you well-made leather but not trying to sell you some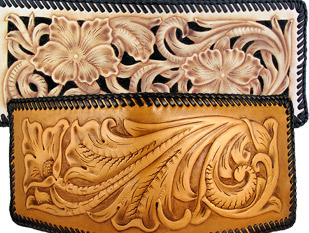


-
Honestly... crease, not groove

-
I use machine thread, even when hand sewing. ANd I like the LOOK of size 277, though 207 or even 138 would well work. Just depends on the look you want. I don't like a groove.. just a crease. Sets the thread down a bit without marring the leather surface.
-
1911 holster
JLSleather replied to bladegrinder's topic in Gun Holsters, Rifle Slings and Knife Sheathes
I like it fine. Only change I'd make is some dye inside the slots (or even just a black sharpie would work here). I like the color scheme -- and oh, since you have an 'overlay' elephant, I'd prolly sew across the top n bottom (before assembly, obviously). -
Let the leather dry out some more before beginnin', Boss
-
YIKES... this thread got old And like any other old thread, sometimes gotta just take it out and re-sew with some new. SO THERE'S SOME NEW holster patterns in the cutesy store... starting with the Sig P320. This is not a NEW pattern, but one that somebody rubbed my nose in it that I hadnt uploaded. Sig P320 Full & Compact Leather Gun Holster PATTERN 2-slot - Etsy Sig P320 Full & Compact Leather Gun Holster PATTERN Avenger - Etsy [NOTE] As many of you know, it's a 'short hop' from the 2-slot version to the "avenger" style holster, and you certainly DO NOT need to buy the avenger if you already have the 2-slot version. Still, there's a bit of altering involved so for those who don't have the time, the means, or the desire to do it, the "avenger" version is available with the "mods" already done to it. Getting 'em both? Send me a message with an email address to get the 2-slot mag carrier for the P320 FREE
-
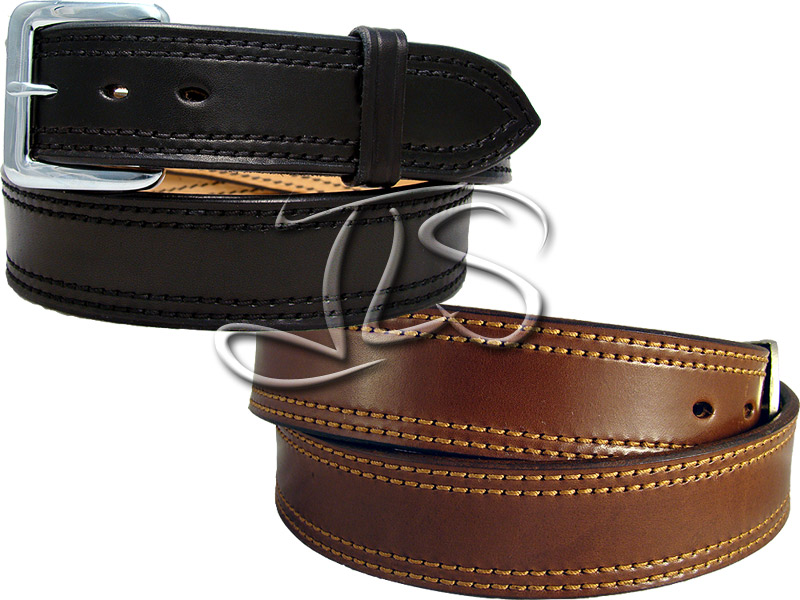
OOOOPS... change plans already (darn @!#~!@ customers!) 78 oz LINED WITH 3/4 as in NOT two layers 7/8 SO... 1 1/2" wide, Black, 7/8 lined with 3/4 I will supply the leather, just need it sewn 277 black or blue thread. , edge n slick Basically, he wants this, though black thread would work.
-
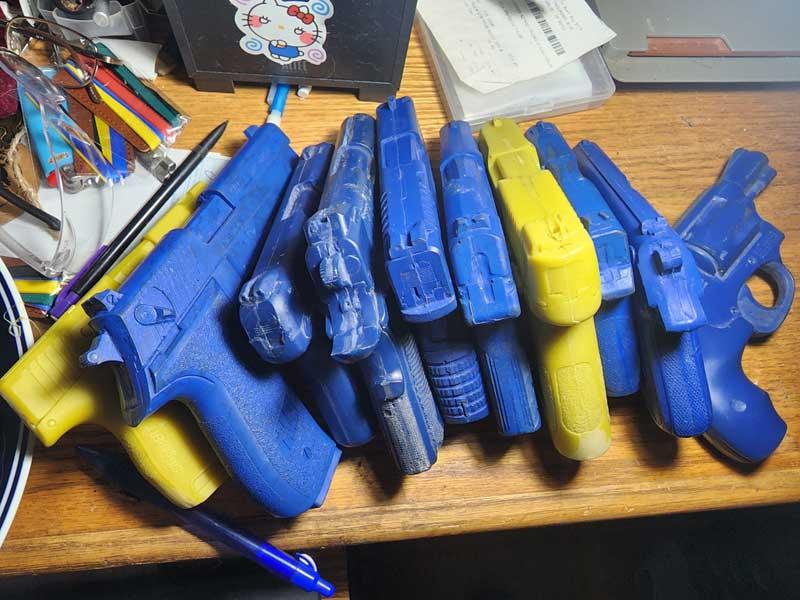
One belt, double 7/8 0z, black, 42" to middle hole, edges sewn (black is fine, blue would be nice as well), ability to change buckles. Advise time frame and price ... and we'll see how it goes. I have blue "dummy guns" for sale I will barter, or I'll buy the belt outright. Not for me, but I'm paying...
-
absolutely stunning and easy to follow instructions... this book is a MUST https://www.ebay.com/itm/155341333872?hash=item242b10a570:g:CvgAAOSwZLBjZ~B4&amdata=enc%3AAQAHAAAAoME5x6lwT%2FFz2bHNFX72t8LXfG9YwOPPWc%2Br6KyZy3mykd6Hgrao6wK9q7ifVPiv4rpYyDQZf7KUXyenFS%2F%2BNOTJz3sIu4uaojCIdhKF%2BLrEqOdKhsrndrCq5VNuSXDqrAG3mjm%2BOR9FCD9bIOMRIdx8KiGs4pHOfXmSl4r0yxoYRmYq0gpwPpXoLjp931Px7apGoIBJnRjvlt4DujGv46s%3D|tkp%3ABk9SR-jQmvCxYQ
-
Yup - each his own That's why I recommend seeing Don G's videos... he's a very 'by the numbers' step-by-step guy, so you can see how he does it (and his carving is nice mostly) and you can decide at each "step" if you like what's happening. I personally think that when he gets to the ant-streak step all goes south, but some people like it
-
I've been saying for YEARS that ant-streak stuff is low-rent crap. Looks like the dirt left behind when puddles dry up after a rain. Some folks have made it look less abhorent than others, but it NEVER looks good. And I've seen it do real damage to otherwise very nice carving. As one example, look up Don Gonzalez. Nice tooling. Seems like a decent fella (though he's a bit heavy on the marketing spiel for me). Then he puts that ant-streak refuse on it, and sometimes even - UGHHHH - acrylic "dye" (translation: PAINT). End result being its still not HIDEOUS, but fact is it looked WAY better BEFORE he pooped that paste on it. I'd show you some carvings I did where I used that paste (same as others, I did it because some said you were "supposed to" use it) but I TOSSED THEM OUT. I tried it maybe a dozen times over the years - never did care for the look. NO WAIT ... I DID ship out a project using that stuff, because one gal wrote a really nice check and SPECIFICALLY ASKED for it. I made a belt to replace an old family heirloom.... and she wanted it done the same way with the same carving. Lemme see kin I find those pics ... Yeah, here's the belts. To be fair the one lying flat is pretty old with significant wear, so maybe not a fair "comparison". You can see the "muddy" look of the ant-streak in the impressions of my new tooling (copied the design from the old belt).\ And here are some projects done WITHOUT ant-streak. The one with the two straps (saddle billets, not belts) is ANOTHER one I was asked to replace. Bottom one I received from a customer, ant-streak long gone. Top is the new and improved - DYED, not 'antiqued'

-
SO busy lately, but
JLSleather replied to JLSleather's topic in Gun Holsters, Rifle Slings and Knife Sheathes
SHOOT.. that shoulda said 'message THERE'. And there is JLSbydesign - Etsy -
Yeah, THAS the one I mean. Here's a quik pik of purdymuch same thing....
-
First Formed Holster
JLSleather replied to rktaylor's topic in Gun Holsters, Rifle Slings and Knife Sheathes
You are - as some would say - now spitting the big drops Tha's a nice color yer gittin' there, too. Unless you got skinny fingers, might clear the area under the grip just a little more (I usually aim at about 5/8" between the grip and the leather at the top of the grip area, but give er take). Fer a site channel, I use a wooden dowel just a tad higer than the front site, and then I whittle it down ta nuthin just before the port (so it ramps down to the slide by the front of the port). Here's a couple pics might show ya the site channel thing. HIGHER than the front site, all this "channel" does it keep your front site from becoming a GOUGE to your holster and a BRAKE to your pull. Oh, and I think you'll find you don't want to be too aggressive on molding in the eject port. If you like the LOOK of that, then just mold it deep and then push it back up part of the way. When it hardens good, you'll see what I mean.
-
First Formed Holster
JLSleather replied to rktaylor's topic in Gun Holsters, Rifle Slings and Knife Sheathes
Well, ... okay - I like the stitchin', and the clean leather. And the way the muzzle is covered/protected. Thumbs up all that. That said, I like to see the stitch lines come in closer, as that WILL loosen up over time, basically back to the stitching. So, no thumbs up there. Just a tip fer later, when you closer-in the sttich lines, you'll want to create a site channel for the front site to clear easily. Glocks are quite box-y shaped, square corners and sharp turns, so I'm including a pic of a Glock holster might show what I mean with less words. This is a 19, so not exactly same model but basically same gun but shorter. Yer sewing foot pressure is a bit heavy, leaving a footprint from the presser foot. This is easily avoided.. I coverd that in other articles on this site. And I'm not following the idea on the slots - why those angles? Does that make it sit on your belt the way you like it?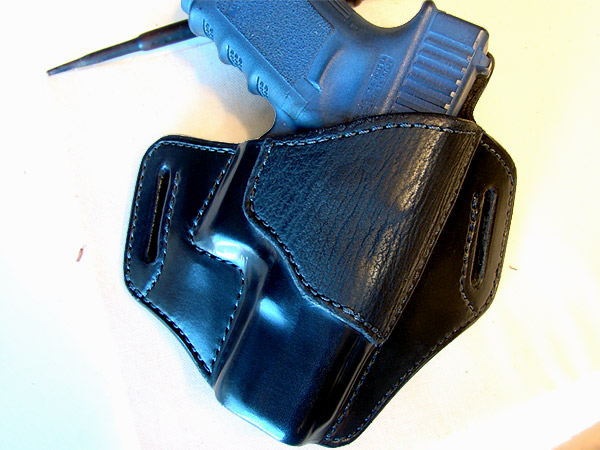
-
The "Three Amigos" scabbards
JLSleather replied to CowboyCurry's topic in Gun Holsters, Rifle Slings and Knife Sheathes
I like 'em. Be nice to see how they look 6 years later... prolly got a NICE rich color now. -
Oh, I meant take an OWB glock pattern and add either loops or clips. Basically the only difference - loops instead of slots. SOMEWHERE there's a file with instructions how to quickly and easily do that. PROBABLY on the hard drives here too, just have to find it.
-
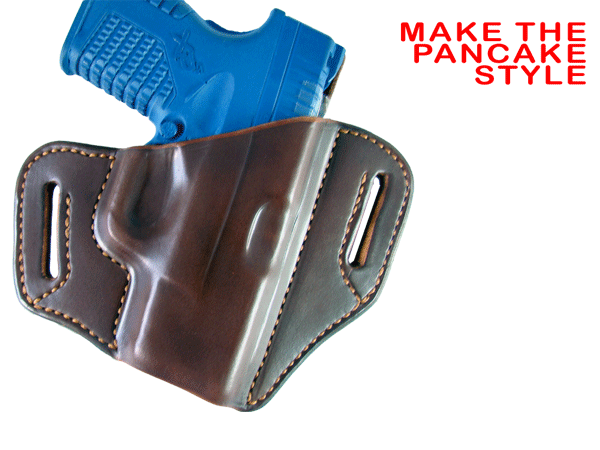
you could fairly easily create one from an existing pattern from the intructions I dumped around here somewhere, change an already ready pancake holster pattern into an inny quickly. Not sure .. maybe somebody can tell you how to easily find that (and a G17 is the same gun, on the outside, so a 17 pattern will work)