


JLSleather
-
Posts
7,378 -
Joined
Content Type
Profiles
Forums
Events
Blogs
Gallery
Store
Everything posted by JLSleather
-
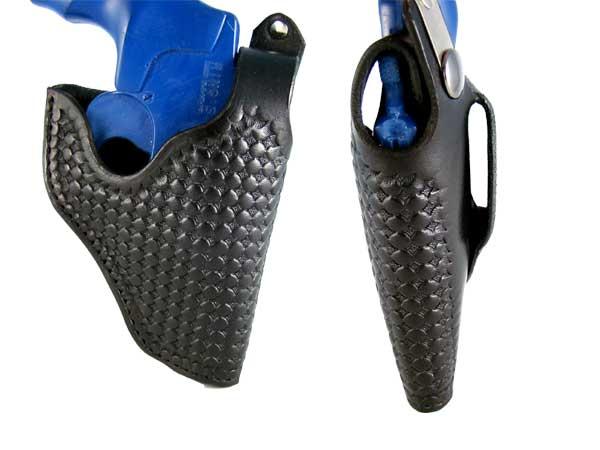
I DO use Wickett-Craig drum dyed skirting leather in black and chestnut. Stamps the very same way as "natural" tooling leather. Only thing to check is that whatever leather you get doesn't have a FINISH on it - many types of finish won't let water penetrate and may crack when stamped. W/C leather has never had that, and can be stamped, tooled, embossed, formed, ... whatever. ALL of these were done with leather that came frm W/C already dyed black

-

Adding a safety Strap
JLSleather replied to Bert03241's topic in Gun Holsters, Rifle Slings and Knife Sheathes
Guy might be able to use a hand awl and a curved (or short) needle to add on, but I found that 'clunky' and tedious. A guy could RIVET a strap to the holster, but I don't like rivet construction. Generally, I either cut the holster apart, add the add-on, then resew the holster... or if that's not possible, I just don't take on the task. -
Not sure why this TWO YEAR OLD question popped up again, but two years later, I STILL think that Weaver press (and similar) is vastly overpriced. Not worth the money. If you're doing 10 pieces, cut them out with a knife. If you're doing hundreds, get a REAL clicker.
-
Some have moved to using a PLATE IN A PRESS for belts, instead of the rollers, for exactly that No matter. Certainly we'd all agree that your coloring is quite nice
-
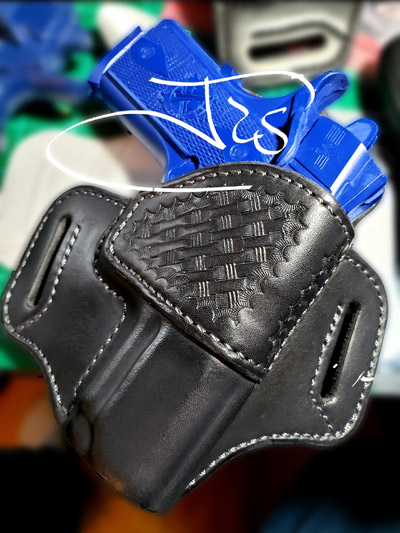
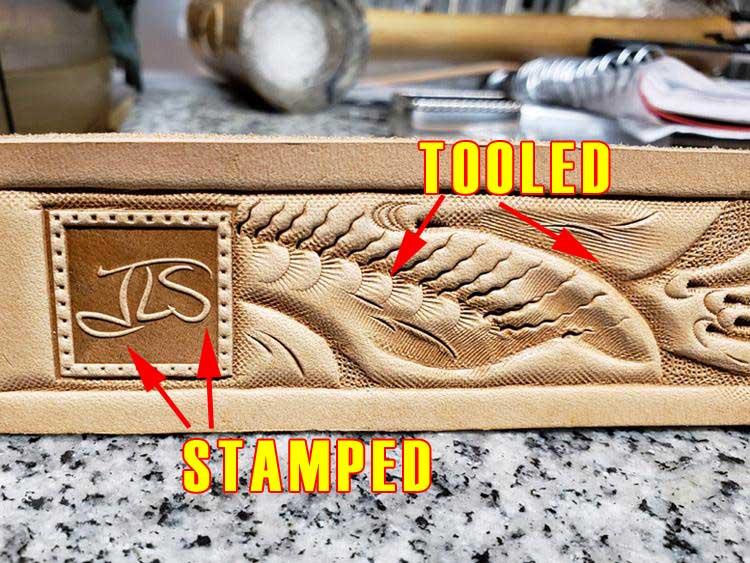
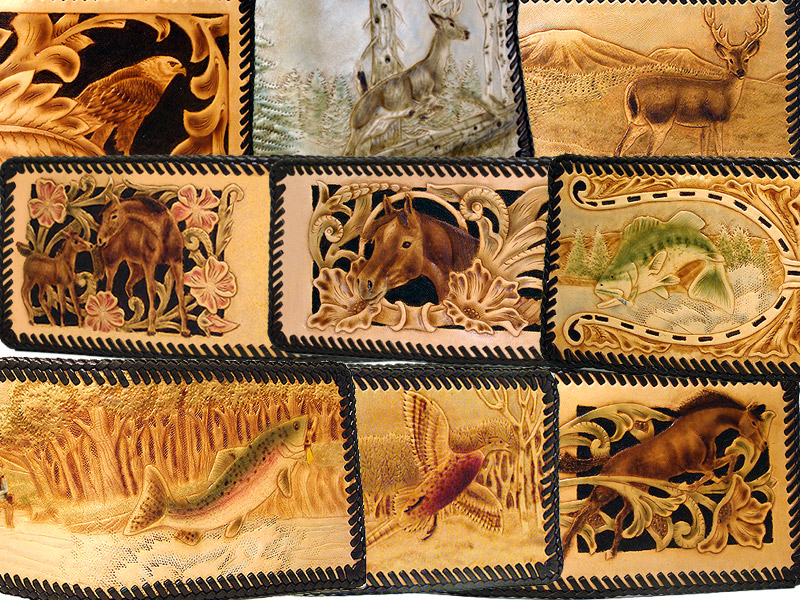
Most of the stuff I make tends to be tooled to some degree, though not always and I often get asked for plain things too. As a process I really enjoy it but the look isn't for everyone. Yeah, I think no answer IS an answer "Tooled to some degree" is no answer. I could machine press a design, put a couple of knife cuts here n there, bob a couple o mulefoots in it, and call it "hand tooled" leather. It's not new - all been done before. SOMETIMES if you git wonderin' what's actually tooled, ask for something mirror image. Not rotated around by spinning the die in the press, but actually REVERSED. Or better yet, ask them to quote and do YOUR design you will provide... That said, "stamped" or "embossed" is fine - nothin' "wrong" with that. I just like to see it called what it is. Here's one that includes both...
-
How much of it is embossed? All of it?
-
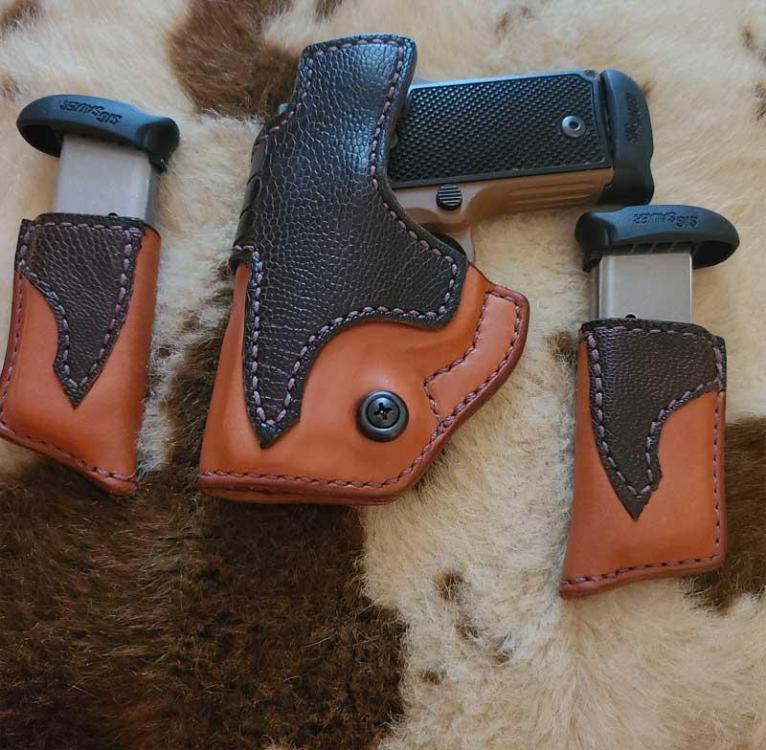
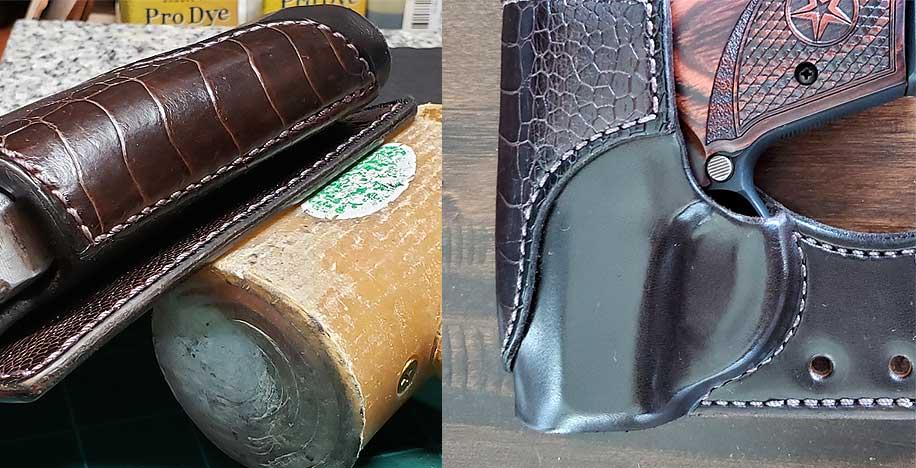
Definitely cut your ostrich leg the other way, or at an angle. I know it's less efficient cutting, but when you cut lengthwise - like this - you get separation of the 'scales' - like this. When using ostrich leg (which is fine to use, BTW), always plan the layout of the cut so the 'scales' are not in line with a bend or contour, "flexing' them apart. They can bend AROUND the contour side to side (on the bird) jus' fine.
-
Hybrid avenger holster- horsehide
JLSleather replied to Jc911rsa's topic in Gun Holsters, Rifle Slings and Knife Sheathes
still looking at 3 layers of leather plus the gun... not seeing how that's "thinner than pancake" ... and the stiffener is kinda negated by the design, not gonna get a lot of "stiffener" from a flat piece on the front. -
Poly vs. Nylon ? Same size, different adjustments
JLSleather replied to Wyowally's topic in Leather Sewing Machines
This has been my experience too, enough so that I try NOT to switch back and forth. Wasn't always possible due to color availability, but turns out it was for the best.... a guy should learn how to make thes minor adjustments -
HF sells - or did sell, assume they stil do - a 6-ton model for pretty CHEAP. Table top size. Use a piece of steel behind a plastic stamp that size.
-
this is likely true. this is likely not.
-
I haven't done them lately, but I do base price on complexity. Some of those patterns - from STohlman's 'Top 20' book - I sold at $150-250 depending on 'stuff', such as custom coloring, etc.
-
Splicing double loop stitch
JLSleather replied to Pappys Leather's topic in Leatherwork Conversation
this ole boy takes a bit ta git ta the point, but he does show it around the 19 minute mark of the video .. https://www.youtube.com/watch?v=HIpanSwuy4o -
that looks NICE .. and no doubt a double treasure since its from Grandpa
-
How to make a USGI M1916 leather holster?
JLSleather replied to Tango99's topic in How Do I Do That?
print shop prolly do it for a dollar er two. -
Close 277 and #24 needle (LL point - it matters). I've hand sewn quite a few belts, and many other items. Still do sometimes... as the situation calls. But its NEAR IMPOSSIBLE to find a GOOD sewing awl/haft these days. Everything is basically JUNK or JUNK. Yeah, yeah.. somebody will pop in to say you have to spend for the "good" ones, but I'm not one who buys into that garbage that more expensive = better. So the machines do a good bit of the work
-
Two tone holster...
JLSleather replied to bladegrinder's topic in Gun Holsters, Rifle Slings and Knife Sheathes
Looks purdy good. Still, I'd sew it right along there ...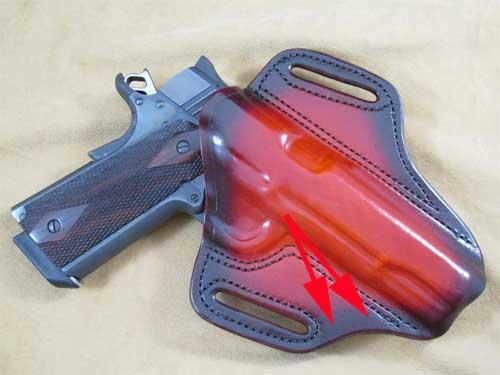
-
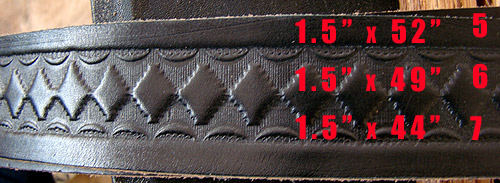
Honestly, some nice lookin' bridle I think. Or harness, thpough that may be a bit of an extreme. Bridle will tend to shed some water, if a guy got into some weather er sumthin, or sweat. And it's TOUGH ... Available in colors too
-
Not really “showing off” just show’n
JLSleather replied to Frodo's topic in Gun Holsters, Rifle Slings and Knife Sheathes
I LIKE IT Wouldn't even color it, personally, or maybe just dauber the edge dark. OIL that critter 'n'' go. -
Holster #2 - for a CZ52.
JLSleather replied to Littlef's topic in Gun Holsters, Rifle Slings and Knife Sheathes
TIP: Gitcha a machine needle... like a size 25 er 26 diamond point. Put it in yer drill press, and "poke" the holes with that, through all layers - easy if ya got a 123 block er sumthin to make the holed perpendicler But agin.... the way ya got it "pinned" there is something I use m'self timeta time. -
It's clear that divorce law is written both BY and FOR divorce lawyers. Much like a shady mechanic, a government office, or any other con man -- the longer they keep the case going, the more they get paid.
-
Holster #2 - for a CZ52.
JLSleather replied to Littlef's topic in Gun Holsters, Rifle Slings and Knife Sheathes
Overall, I like it. Specially for a 2nd timer Watch yer stitchin' (and groove), and maybe polish that edge a bit. Pull the stitches with consistent depth / uniformity will make a huge (bigger than ya might think) difference in the finished look. Burnish the bottom before assembly (between the holes used for the bottom needle which, by the way, is the same way I sometimes hold stuff together temporarily). In other news... what's the 123 block fer -
Looking for a holster pattern suggestion
JLSleather replied to DwightT's topic in Leatherwork Conversation
Chuck... show us the 'back' o that un. Sewed on loop? -
Looking for a holster pattern suggestion
JLSleather replied to DwightT's topic in Leatherwork Conversation
thassa good point -
Local (Oklahoma City) Tandy Leather Store
JLSleather replied to Brokenolmarine's topic in Leatherwork Conversation
The one in Des Moines IA had a girl in there (maybe 30?) who was very good, and a little girl (maybe 20?) who didn't know leather, really, but was learning from the other one very quickly. But they got a manager in who was such a jerk it just wasnt' worth it and she and i both left
