JLSleather
-
Posts
7,386 -
Joined
Content Type
Profiles
Forums
Events
Blogs
Gallery
Store
Everything posted by JLSleather
-
Yup, indeed. OR send the wrong product. or the right product but substandard. or missing parts. Folks around here actually ENCOURAGE this type of behavior, I think. I once posted here about a company (advertises here) I wasn't happy with at all, and I asked why so many seem to like the place. A SWARM of people who know little about leather and even less about business flooded on to tell me how happy they were with that place .. .so I ASKED what it was that caused them to think that. One poor guy said he was pretty new, and had only ordered there 4 times... one they sent partial order, one they sent the wrong items, one had some things backordered... etc... SO THEN I said.. wait.. you ordered FOUR times, they messed up EVERY order, and because they "made it right" he would continue to shop there. Which doesn't matter to me - not up to me where OTHERS shop. I just don't "get" why people would order something, get the WRONG thing (or a cheap IMITATION of the right thing), or get it LATE, and continue to shop there. A flat tire could happen to anybody. You could be late for work, even though that's not your style. When it happens consistently, I'd be letting you go and hiring somebody who will do what I'm paying for.
-
fair enough - each his own. Personally, when I buy a car, I don't want to "tune" it, I want to DRIVE it. I have no objection to REPAIRING a car, though I would EXPECT that if it needs repair it's because it's USED, and it should have a corresponding price tag. I don't pay NEW price, AND fix it. OH WAIT>. you bring up a GOOD point. Now that you've made the machine do what it was SUPPOSED TO (but didn't) DO when you bought it. is it worth MORE, or LESS? I mean, is it now ADJUSTED CORRECTLY, or is it USED?
-
"serviced by A AND B, and you had to work with it before using it. I was gonna put a guy holding his belly from laughing, but having said it I realize tha's not at all funny
-
that maple looks NICE
-
those are fat wrinkles. and that's EXCESSIVE. Yeah, they'd get that back. With a note asking if this is what I should expect from them all the time, so I can save it next time and just call Cheryl in the first place. Oh, BTW ... this is natural (undyed), but this is how veg tanned cow SHOULD look ...
-
I own a cobra machine, and I STILL don't call them out there. I ordered a new machine. DIdn't see some of the bolts, so I called and asked. Got somebody who told me "it's in that box in the packing. But there WAS NO BOX in there. Oh, sorry, they said, we'll get that right out to you. They DID get that out quickly, I'll give em that. But that box was like 50 POUNDS... so not sure how you send a dozen pallets at a time, one ways 50 POUNDS light, and nobody catches that?@#! But I DID get those parts (all the feet were supposed to be in that box too) a few days later, so.. one problem solved. But A BRAND NEW machine wouldn't sew back into the same holes it JUST MADE, which is why I ordered it in the first place, because they ADVERTISED TO NO END that the machine back-sews in to the same holes. When I called (again) I eventually got "cobra steve", who wanted to verify that the machine is plugged in and that the needle is facing the right direction and is "all the way up" in the needle bar. Yeah, it's powered on (that's how it made the holes) and yeah, the needle is in the way the picture shows (which shouldn't matter, since it was in the SAME WAY it was in before I put it in reverse). So I'm getting pretty irritated at that point, since a brand new machine hasn't made a single part out the door in about a week and I have orders to fill. I had completed a few by sewing around the project, pulling it out the machine, and "back tacking" BY HAND, which I didn't want to do, and didn't think i should HAVE TO do since I just spent several thousand dollars. I complained at some length, and "cobra steve" sent another machine and offered to pay the return shipping on that one. Said if I don't like the replacement, just let him know and he'd refund my money. So a couple weeks later, after bolting the replacement down and getting the same thing.. I called again. Steve never available, but "we'll have him call you". Except nobody ever did. I learned how to adjust that, which is good ... but I still think that a check for several thousand dollars SHOULD mean I DONT HAVE TO "figure it out" - it should arrive ALREADY working like you advertised. I told other people about this, and some of them did the SAME TEST I was doing on THEIR machines, only to find out that theirs doesn't stitch back in same holes either. One guy had his machine for THREE YEARS and insisted his DID work. Got a bit upset, but he was my buddy so he offered to video "prove" it. Came back on line half an hour later to say HIS DIDN"T WORK that way either. SO.. I gotta ask right? HOW did you use that machine FOR THREE YEARS and never catch that? He said he's a holster maker (and a GOOD one) and when he sews a holster and gets to the end he just SPINS THE HOLSTER and sews FORWARD into the same holes - NEVER USES reverse! The POINT? I'm thinking it's POSSIBLE that you perceive you got less than stellar service from FIVE other places, but I personally think it's RIDICULOUS to think that "cobra" would be an improvement over ANY of them. Got an entire morning, I could tell you some of the issues I've had with Springfield Leather (yeah, the one advertising here). But they've got NOTHING on the people at "leather machine" - not even close. SLC issues seemed to be mostly untrained and UNLEARNED employees who simply didn't understand the leather - think checker at the fast food drive thru. Just one ... I once ordered a meter-long piece of python that they told me would be 8" wide. What i received was 17" x 6" - so NOT going to work for that belt inlay. This is NOT helpful, but they quickly sent out the RIGHT piece, which was the correct piece and actually QUITE NICE. THe disruption was minimal - I had to bump back a couple OTHER orders to get the project out in time for that belt ANNIVERSARY PRESENT to be completed and delivered on time, so everybody was good in the end. But that's not even in the same league as somebody (LMC) who shows outright CONTEMPT after the sale, and appears to think that they can simply distract from your complaint with remedial "instructions" which have NOTHING to do with the problem. If you get decent service there, congratulations - maybe something got improved since i was there But I get needles, thread, bobbins, and common sense tips from BOB.
-
I'm up the road from you in Iowa - got a cobra 4 I'm selling. Not sure if it fits your needs or not BUT... Bob knows stuff Call Bob Kovar at Toledo Industrial Sewing (Ohio). Bob's a good one, and will point you to what you ACTUALLY need, not a salesman looking to bump his commission. https://www.tolindsewmach.com/
-
without airbrush -- I haven't watched the whole thing, so no endorsement here .. just FYI https://www.youtube.com/watch?v=3t4E2ciGg30 OR you can use a pre-fabbed "preval" sprayer attached right to a 4 oz bottle of dye I've never tried these, but they've been around a LONG time https://www.youtube.com/watch?v=kcrhorxYhmI WITH airbrush - This one I have watched ... and semi- approve. https://www.youtube.com/watch?v=OMVHrTPf1AQ&t=14s
-

3 knife sheaths...2 big ones
JLSleather replied to Rossr's topic in Gun Holsters, Rifle Slings and Knife Sheathes
Scales that small and that "tight", I would have guessed some type of lizard (which I consider a PLUS, it doesn't "flake" like most snake does). -
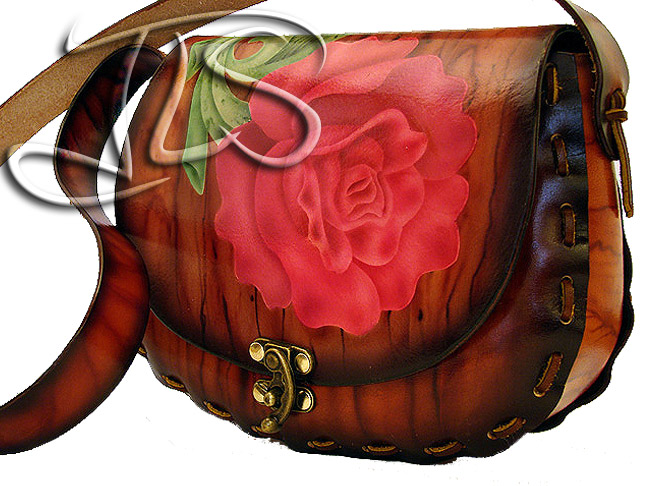
Purse finish
JLSleather replied to Dwight's topic in Purses, Wallets, Belts and Miscellaneous Pocket Items
what's the question -- what finish to use? I use tan-kote on most carved bags - have for years. there's a "bag-kote" as well, though I have not personally used it and don't know just what the difference is (if any). These "bags" were done with tan-kote (after dyes and a light neatsfoot). Satin finish, little to no glare and remains flexible. The pics aren't to scale... the binders were actually a bit larger than the handbag. This bag was DYED ONLY (no tooling) with an old STohlman design, and the binders were FULL TOOLED, dyed (Fiebings), buffed, then tan-kote. But you shouldn't be getting stain "rubbing off", and I wouldn't be trying to prevent it with any finish. BUFF the color until it's no longer "rubbing off" BEFORE applying any finish. WOrth mentioning, you might want to go pick up some tan-kote if you decide to use it. If it sits on a UPS truck today it will FREEZE and be RUINED - no good once it freezes.
-
I'm not a travel guy. Been on both coasts, the gulf, and canada -- and don't really know WHY I went to any of that
-
yeah, local pick up is preferred - I want a guy to RUN the machine so he / she knows there's NOTHING wrong with it before buying. Much of it - including the table - has NEVER BEEN USED. Located in Iowa (sorry, I thought location was already on here)
-
This is TRUE.. if you're using resist/antique, do the oil BEFORE that. I didn't include it because i don't use antique but maybe once every other year when somebody SPECIFICALLY WANTS it and writes a big check
-
This is what I do - always. If you forgot, and stitched it already, adding oil later is not a problem, but I would keep it off the thread (not hard as it sounds). Light or dark, my tooled belts don't get out without being oiled. If the oil is darkening your leather, I assume you're applying it too heavy, using too much. But it may discolor thread, depending on the thread used. By way of disclaimer, I've never used the dye you're referring to, so I have no idea what that stuff does. I use Fiebing's spirit dyes most all the time, an infrequently Angelus dyes. To be clear, my tooled belts are tooled, dyed, oiled, treated with whatever "top coat" used (I use tan-kote, resolene, saddle-lac, and one other... though not together - pick one per project) lined (including inlays if used), and sewn together T

-
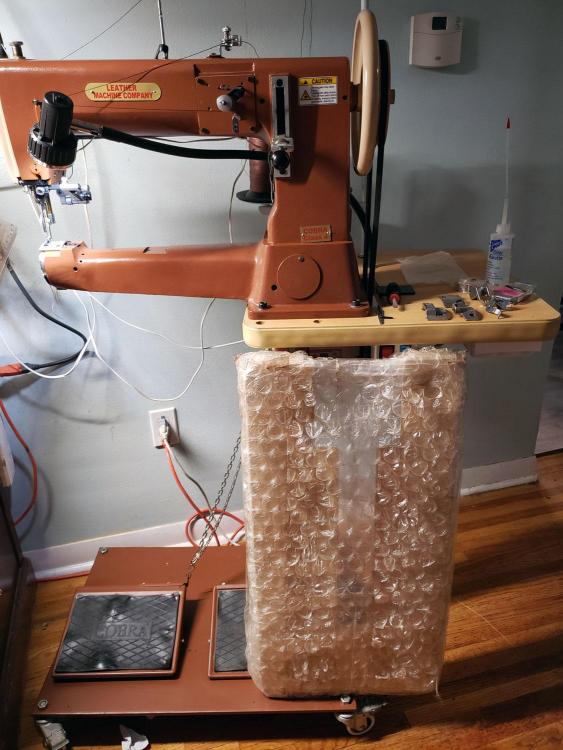
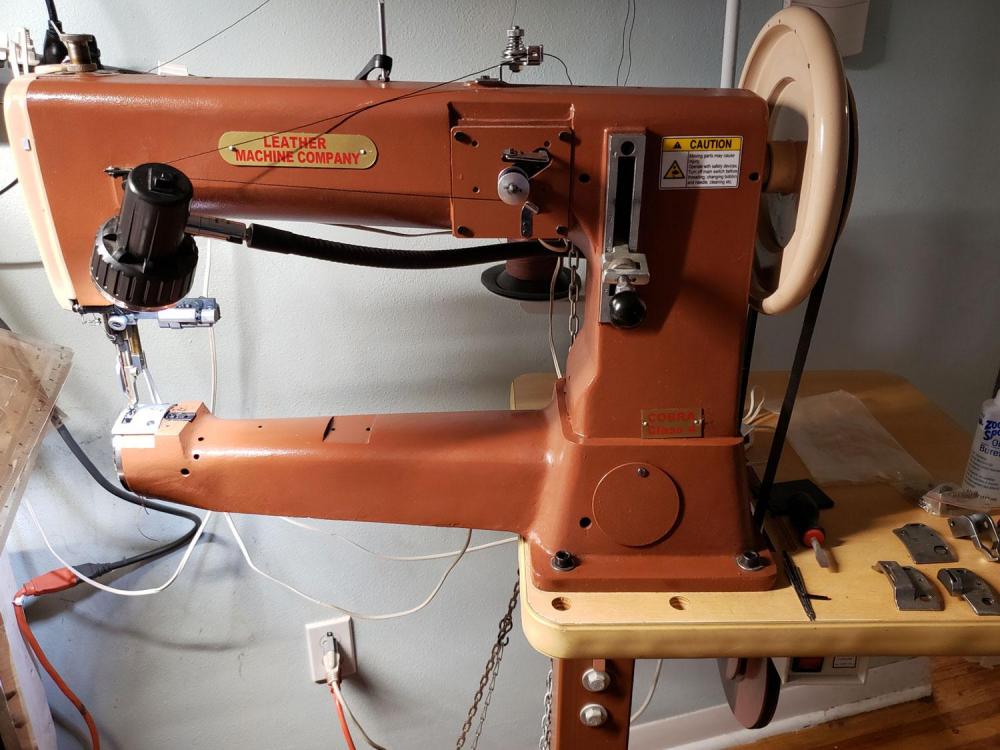
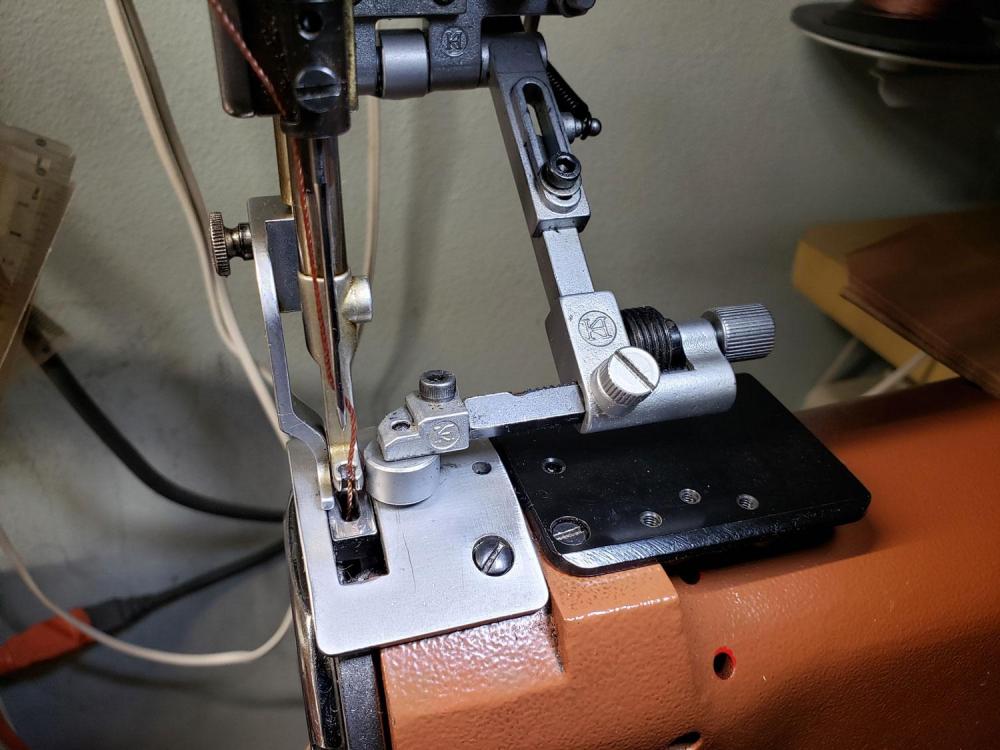
Cobra 4 premium plus I upgraded to "drop down" edge guide. All attachments, and still have the original packaging and the flat top add-on table has never been out of the bubble wrap. Try it before you buy it. Retails at $3500 plus shipping - this one you can test and buy -- for $3000 I'll throw in the matching burnisher! https://leathermachineco.com/product/cobra-mp-burnisher/ Package retails today at about $4100. Bring LOTS of cash -- I have a good bit of veg tanned leather you could pick up VERY reasonable More pics available,
-
this is SOLD (but see my other dies 'n' stuff available)
-
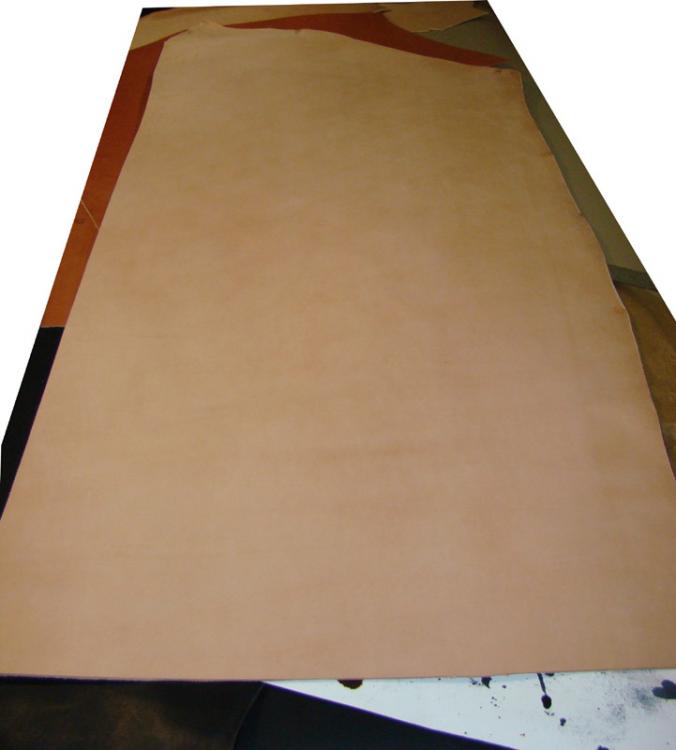
oh, sorry -- this is EIGHT oz cowhide.
-
Single die. I used multiple "stiffener panels" on this, so no die for that. This quickly cuts the main body of the holster. Makes holster shown (for example only and not included). $100 INCLUDES shipping and pattern.
-
These dies make the holsters shown for SW shield 9/40 and the Glock 43 (with different stitch patterns).
-
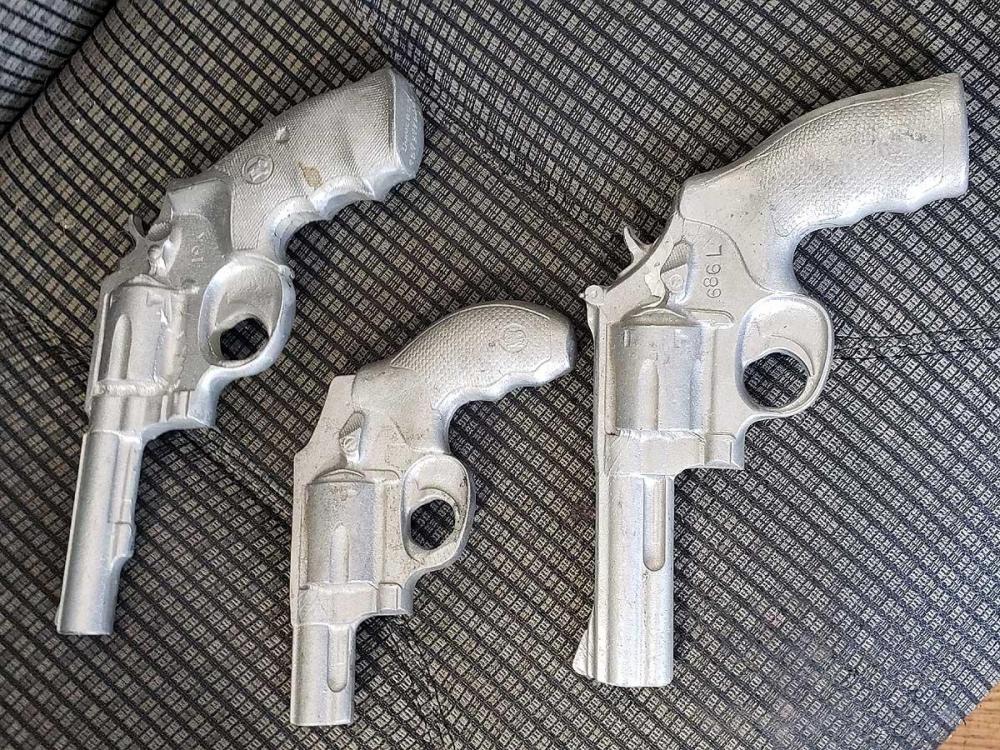
These guns are SOLD.
-
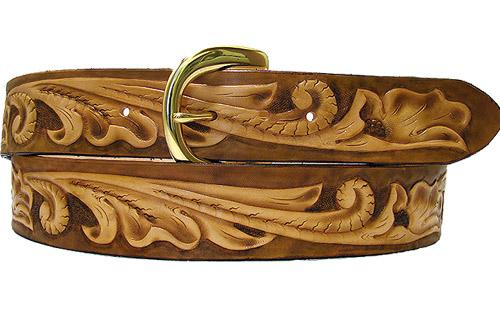
S/W Model 19 (K frame) S/W Hammerless J frame S/W 686 L Frame (4" barrel) $165 INCLUDES shipping in the US. Buy them with the tooling leather belts straps and save $15
-
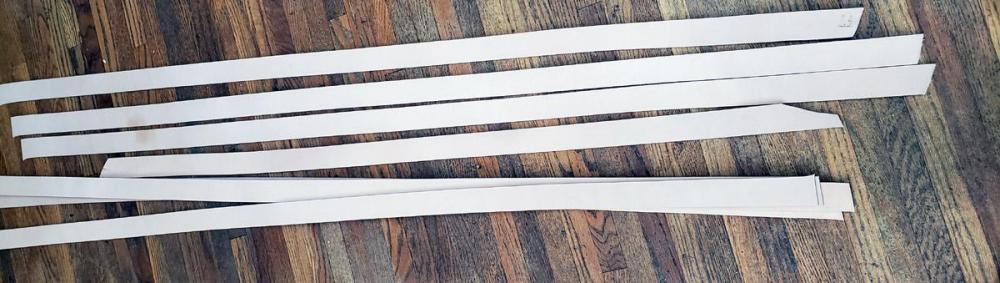
In case somebody else missed it, these are INCH AND A HALF wide
-
I have SEVEN of these, very light natural color. 6 are over 60", one is just over 50". You'll see theres a spot on two (seee #2,3) of them, which I THINK is neatsfoot (dye should cover easily, or cut off at just over 50"). ALL for one low price -- $65 INCLUDES shipping within the US
-
sold
-
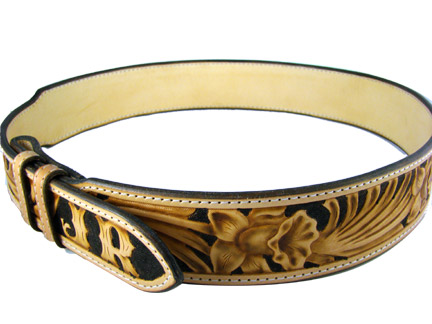
Ranger Belt
JLSleather replied to Tim Schroeder's topic in Purses, Wallets, Belts and Miscellaneous Pocket Items
Looks NICE (as usual)