TomG
-
Posts
1,025 -
Joined
-
Last visited
Content Type
Profiles
Forums
Events
Blogs
Gallery
Store
Everything posted by TomG
-
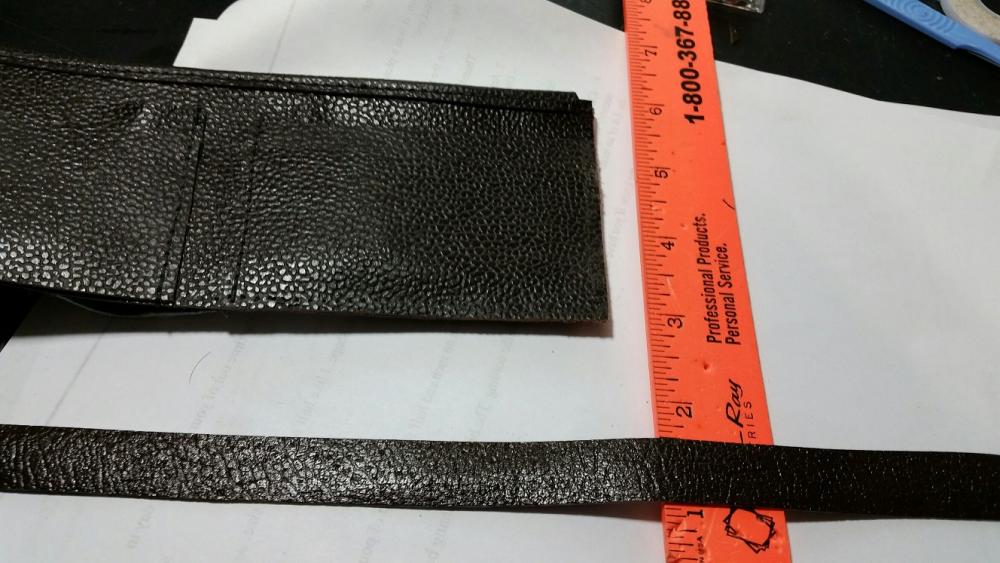
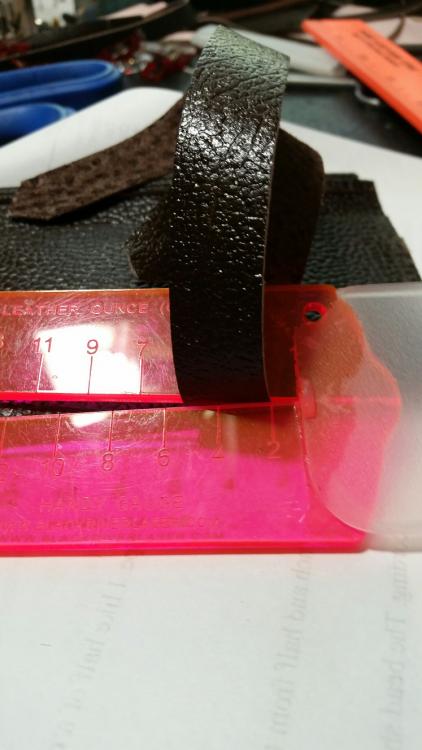
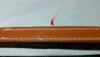
Here's the wallet I am working on now. I'm having to use a double-sided tape to hold the strip in place and then sew. The leather strip is 5/16th (17mm) wide and is a tad under 2 oz. The edge of the wallet is about 9 oz at its thickest.
-
Binding material will be a light leather, probably 3/4" or 1" strap to get a 3/8 to 1/2 inch edge. Raw edge is fine. I'm getting into wallets, bags, purses, etc and looking for a starting point. I'm really not sure of the difference in a swinbg and a stationary binder as to uses and functions. I'm also not sure that the differences are (usage-wise) between straight, 30 degree and right angle ones. Thanks
-
Is there a binding attachment that will fit a Consew 227R-2? I know I can have a custom one made but I just need something to put light binding on wallets, bags, etc. Thanks
-
I had the same problem when posting my Singer yesterday. I had to close my browser and go back in, starting over making the ad. Then I uploaded 1 small photo - 58K. After that, I could drag and drop the others in. The site limits us to 1.46 MB of photo uploads. I use a free program to make "email" size copies of my photos to post online. Called Fotosizer. Fast and allows you to automatically create a series of unique filenames for the new copies.
-
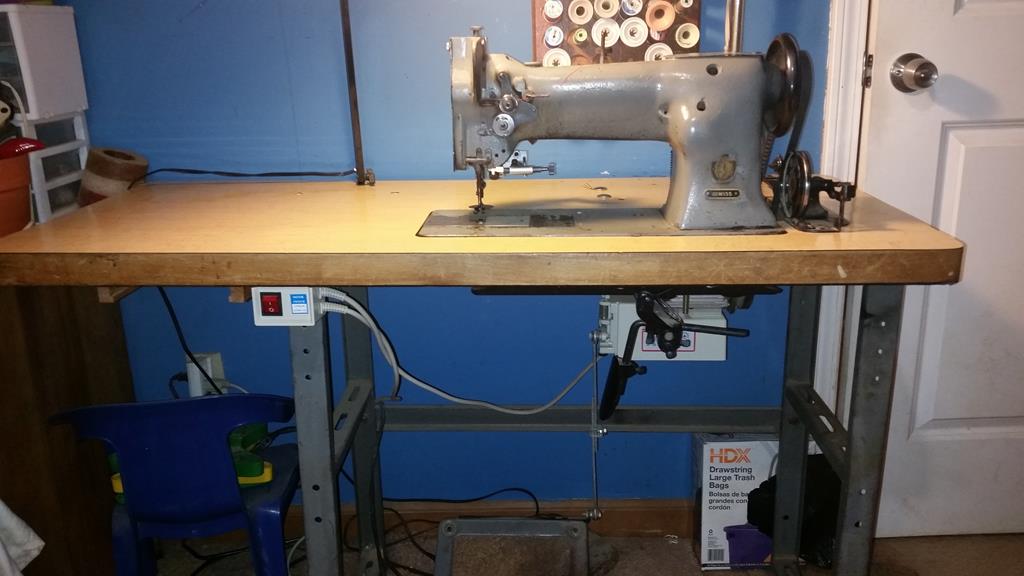
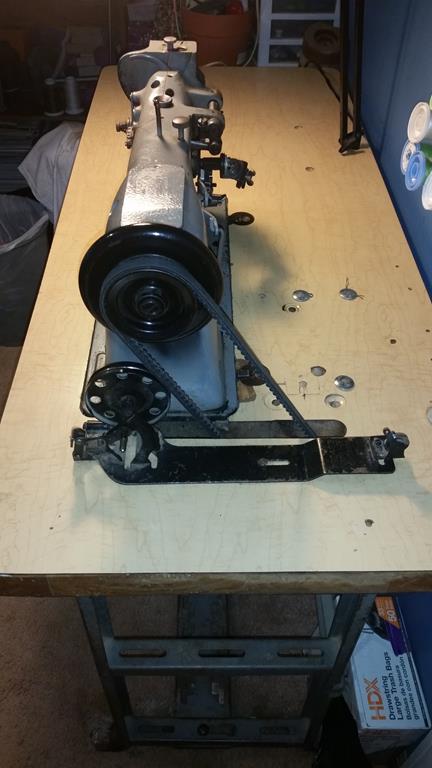
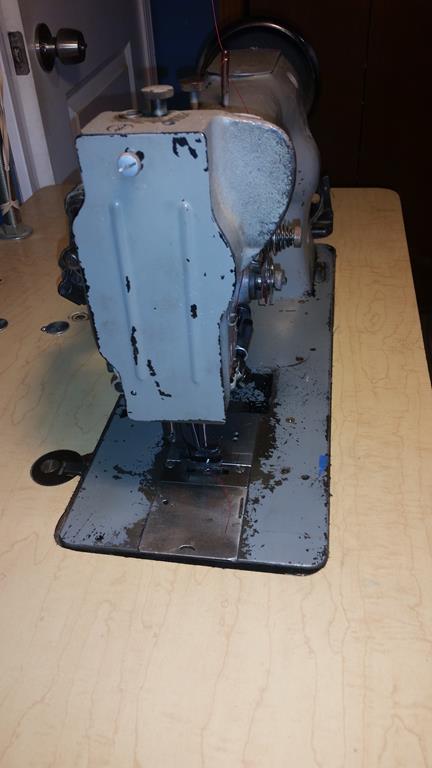
Walking foot in good working condition. Was serviced about 18 months ago and has light use since then. Has the Consew CM-1000 servo motor with small pulley.. Motor has the "Slow-Down" mod to allow better low speed control. Note: Edge guide and lamp seen in photos are not included. Local Pickup only unless buyer arranges packaging and shipping. $725 OBO


-

How Do I Use A Two Prong Hand Spot Setter?
TomG replied to jv leather crafts's topic in How Do I Do That?
This is what I use now. Have the set of 4. I use it almost exactly as shown in the Tandy video. 1st, make 4 lines with a fine sharpie on each side of the sleeve, 90 degrees apart. This gives you 2 lines to line up with the legs of the spot when you push it into the sleeve. The one of the other lines is used to point towards yourself, assuring the legs all go in the same line. You will likely have to spread the spot legs slightly to hold in the sleeve. Put the leather on a piece of scrap and hit the tool, driving the spot through the leather. It may curve the legs a bit, but you can straighten those out next. When you get all the spots driven through, flip it over, make all legs tilt inward and set them with the domed part od the anvil. Then you can flatten them with the flat side of the anvil. Done.. Really quite easy once you try it. -
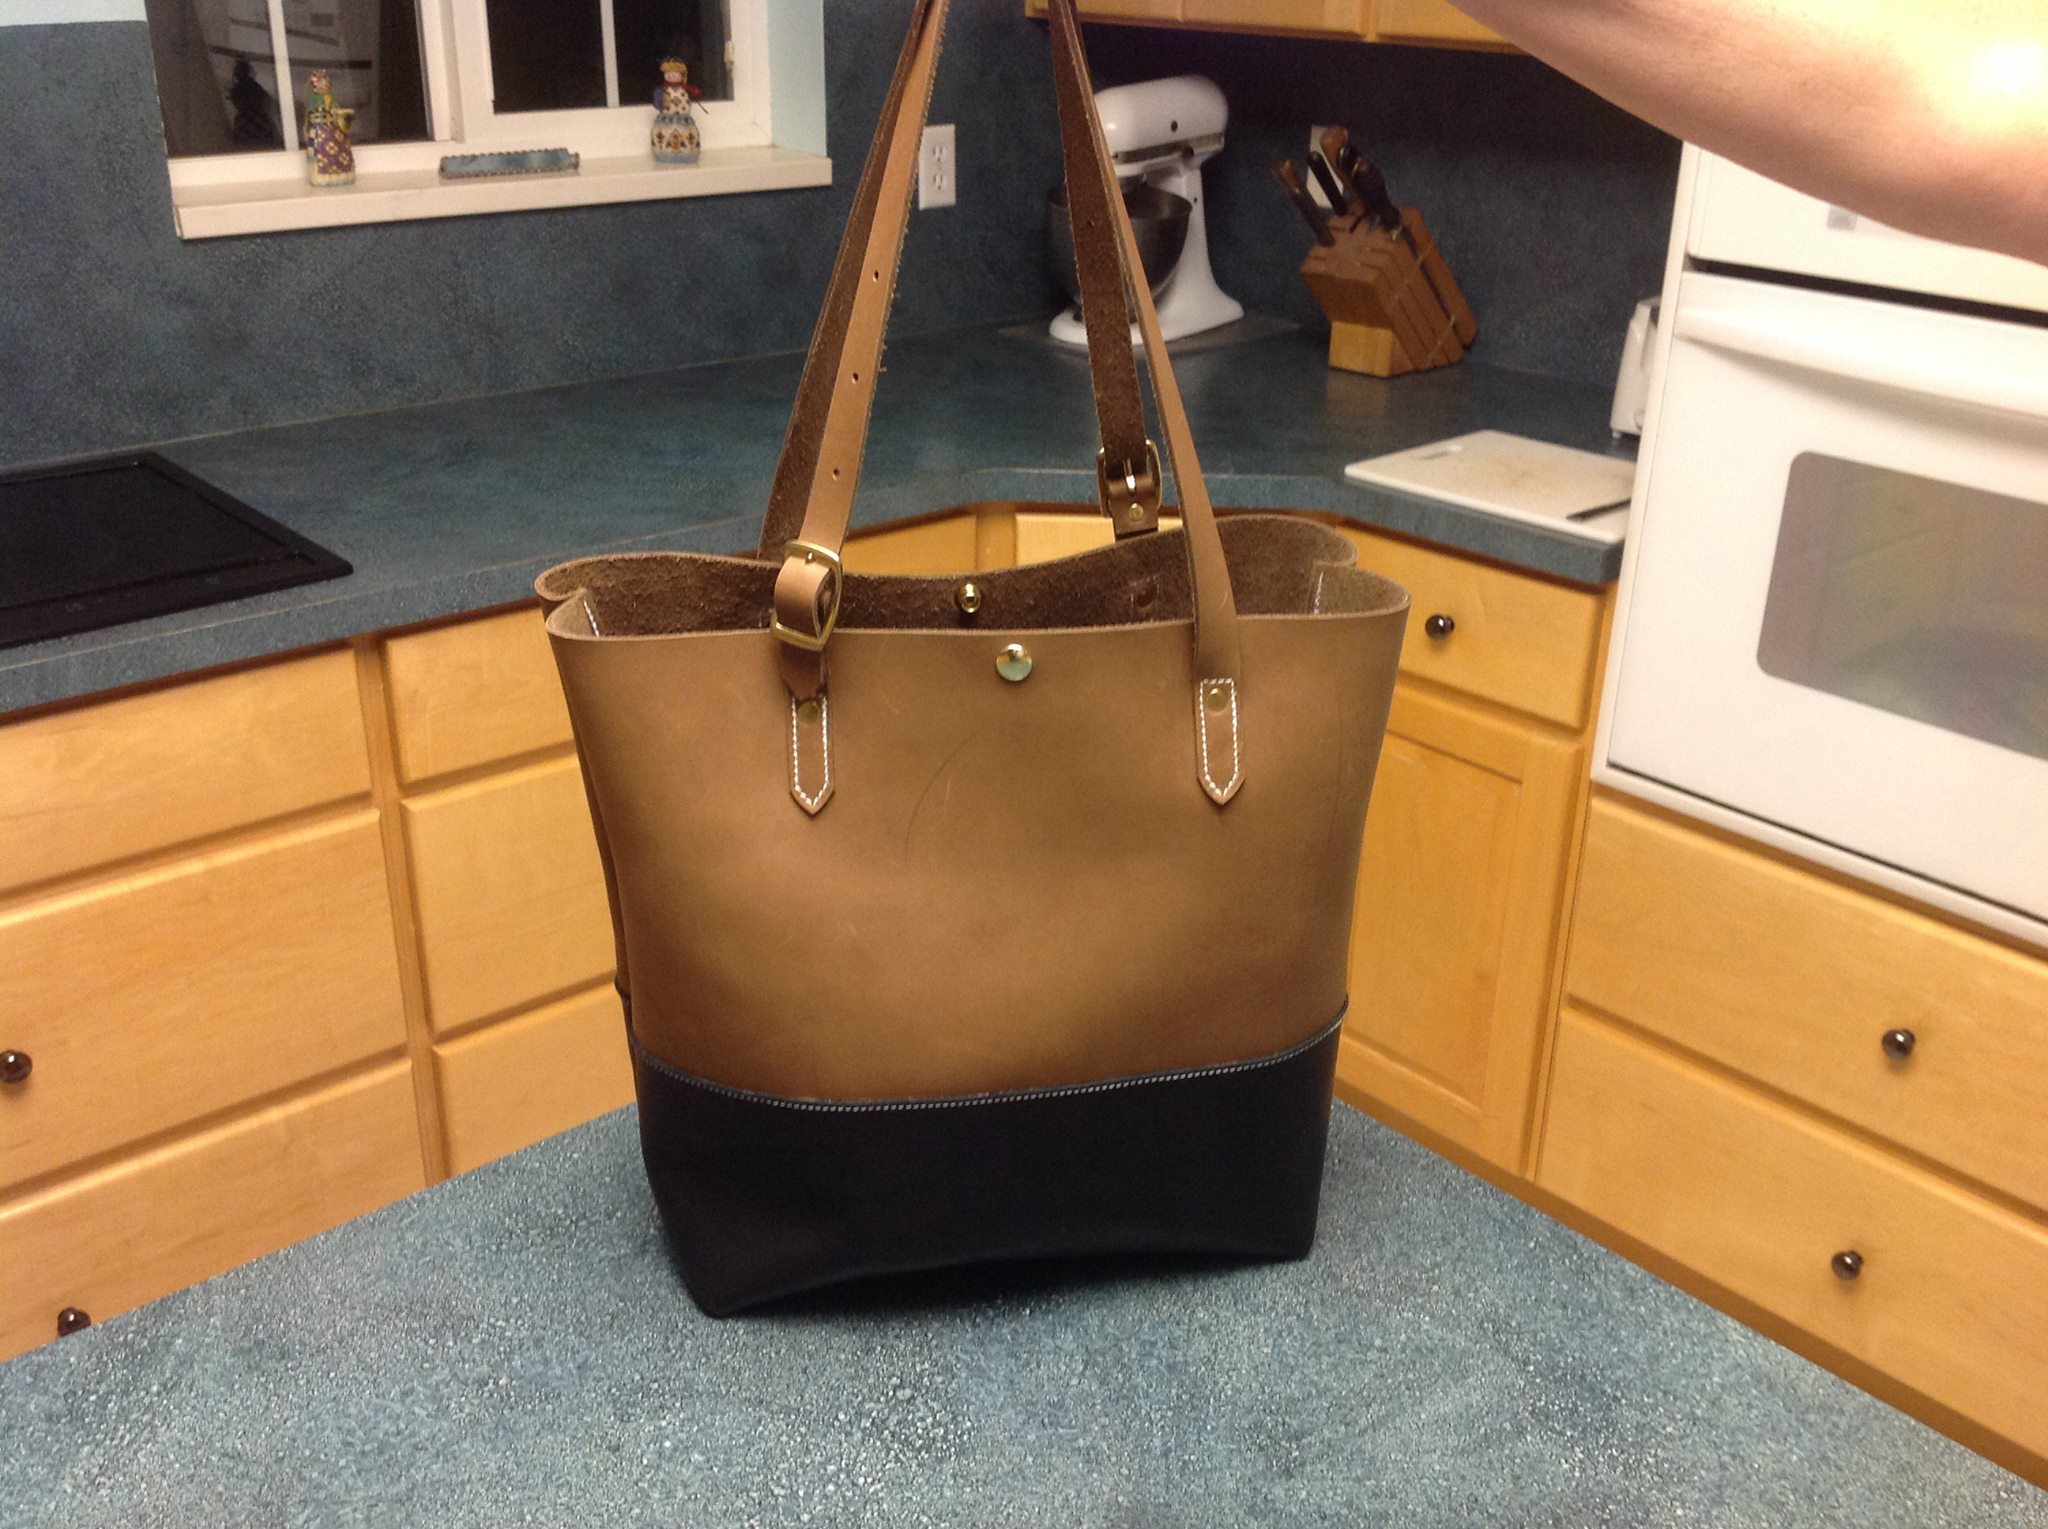
I'm moving this to the proper forum... I am making a tote bag like in the picture attached out of hair on leather. But the test piece I was playing with leads me to believe it will be a bit to floppy without some additional support. But I don't want it to be too visually intrusive, if that makes sense. Since this is my first try with hair on, and since it is the customers side, I only have 1 shot at this. Suggestions MORE than welcome Thanks

-
-
HELP! What is this edge called and how do I get it?
TomG replied to kozhanumbers's topic in How Do I Do That?
I may be wrong, but the top of the bag looks rolled. -
Thanks. Much appreciated...
-
This is the one I have/
-
This is the one I have/
-
I just got a new machine with the CSM-1000 but it did not have the instructions on adjusting the settings. Does anyone have a digital copy that they can email me? Thanks
-
Bad Girl
-
I did. I was launching from a bookmark..The bookmark is pointing to www.leatherworker.net/content. Delete the bookmark, and put www.leathertworker.net in the address bar. When it comes up, it will have replaced /content with /forum. Save this new bookmark and ti should work. At least that is what I had to do. Tom
-
Only if you put it on wrong. 50/50 mix with water. 2 or 3 light coats, allowing it to dry between coats. On straps, I flex them a little as they dry.. about 30 second or so.. just until they aren't "wet". Tom
-
PM'ing you <g>
-
Well, after reading for hours, I decided to go with a cylinder arm machine. I need it fairly quickly so I found a "new" one at the local sewing machine company. But I need some advice. I had gone in with the Consew in mind. But I have read so much I am over-saturated. They have a supposedly new Techsew 2800, "U"-table, lamp, etc. The owner was not in, but his tech people were not sure if it was new or used. It has oil stains on most of the edges of the covers. the weird part is that is it only on the front edges. It almost looks like it was laid with it's front down for a while and the oil seeped under the covers in the front. Other than that, it is pristine. So, we loaded up some 138 top and bottom and tried to sew a couple of layers of 7/8 oz veg-tan. I have to say, it sewed very smoothly. Techsew has done a good job on their motor mods for it to start out as slowly and smoothly as it did. The stitching at around 5 SPI was good and consistent. Until we hit reverse. Birds nest on the bottom. The tech fussed with the tension a bit and could not eliminate them. He changed the needle to a x16 (had an x17) and it still nested. They dropped to #92 thread in top and it was better but still tangled looking. He finally got another tech to look at it. He opened the bobbin area and said the fingers were adjusted wrong. Then he said the hook and plate needed to be adjusted. The other issue I am questioning is the binder. This machine has the binder attached. I spoke to Techsew and described the parts I saw in a drawer - some different feeders and a smooth plate - and he thought that was the set of parts needed to convert to non-binder use. But, I'm a worry-wart, so I'm looking for some second opinions. So.. at $1500, I only have 1 shot at making the right decision or I'll be sleeping on the couch for a while Should I look at something like the Consew 227 or the Techsew 2700, if he has them locally? Or jump on the 2800 if they get it reversing properly? Any other issues I should consider? Does Techsew take the standard Siger type feet, etc? Thanks all.
-
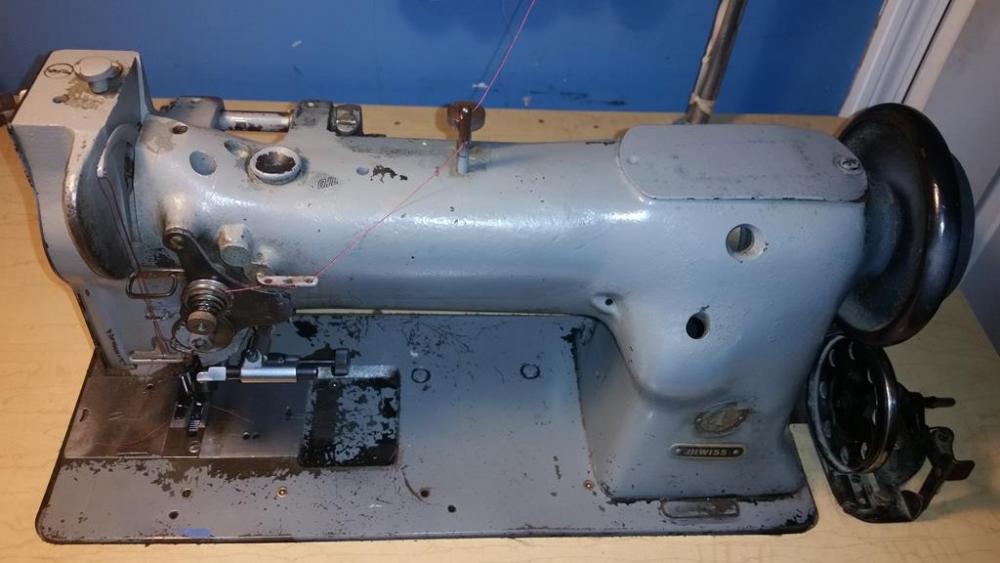
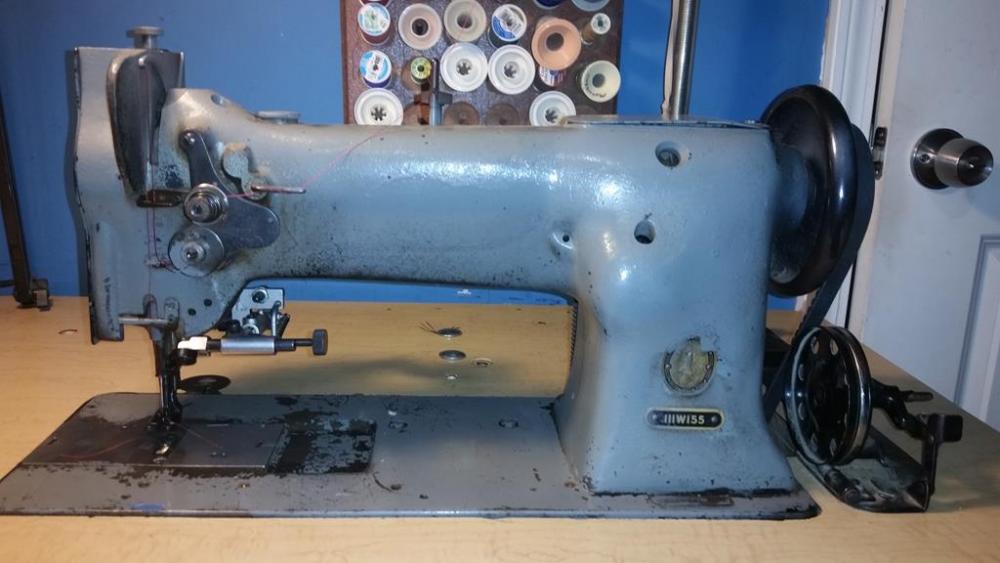
I'm going to probably sell my 111W155. Good mechanical condition. Consew servo motor with small pulley. Anyone have an idea of a fair asking price?
-
Roughen Or Loosening Flesh Side & Dyeing Questions
TomG replied to HondoMan's topic in How Do I Do That?
Tandy used to make a roughening brush. It was basically a cat grooming brush on a wirebrush handle. If you have the equivalent of our WalMart, or Dollar stores in Germany, check there. Or a pet store. I'd dye it first, then brush to roughen. As always, try a scrap piece first. http://www.petsmart.com/cat/brushes-combs/grreat-choice-soft-slicker-short-haired-cat-brush-zid36-11863/cat-36-catid-200088;pgid=C19a.f_V3SNSRpReCpJ8O0ID0000HTquanYw;sid=fcs3_7IyH8Ul_-Tv3Jx2-4A4shWlM9ub5LNI3EAe?var_id=36-11863&_t=pfm%3Dcategory -
Just Ruined My Project
TomG replied to Spaceblues's topic in Dyes, Antiques, Stains, Glues, Waxes, Finishes and Conditioners.
Yeah. I agree with Dwight.. But I think you said you wanted a dark brown with light highlights. I can only assume that you want the highest parts of the design lighter? First, understand that you are mixing acrylic sealers with water based antiquing and who knows what black dye. I never use Saddle Lac for a resist, which is what you are trying to do. If you want the tops lighter here's how I'd do it. I would use Neutral Leather Balm with Atom Wax and a block dye technique to quickly put a thin layer of LB on the peaks. Let it dry. Do it a second time. Again... Light coat applied quickly. Let it dry. Then I would use a sponge and medium brown oil dye and apply the dye in a single stroke as much as possible. Then quickly use a pad of old tee shirt the rub across the strap to knock off the excess. You don't want to flood it or it will dye those peaks from the bottom up. Let this dry. Then I'd use a brush to apply the black oil dye. Let it dry. NOW you can saddle lac it lightly. I'd forget the leather sheen. Hate the stuff, but lots of people use it.. Get you another strap and try again if Dwights cleaning tip doesn't fix it. -
Singer 111W-155 I Cant Get Any Bobbin Tension.
TomG replied to LoveToLearn's topic in Leather Sewing Machines
Why not just buy a new spring. Check with sewingmachines.com or one of the sponsors in the banners at the top of the page? Tom -
Thanks Wiz. I'll go research those needles now. I obviously didn't know that was "normal" for bottom stitches. I guess I expected them to look like the top stitches when all was in order. The total thickness was 16 oz, and is probably the thickest I've sewn. I was happy with how the machine performed. Just wish I had a machine like the 206Rx with reverse. If I get to the point where I'm sewing a lot, I'll invest in an upgrade at that time <g>. For now, I've got my eyes out for a speed reducer pulley for cheap. Probably won't find one, but I can hope. I've got it running pretty slow, but the initial takeoff could be slower. Anyway. Thanks for the help and advice.
-
Got a dupe image...
-
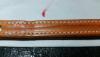
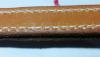
Hi All, I am pretty inexperienced at sewing, but learning. I have a Singer 111W155 with a Consew Servo motor that I have put the slowdown mod in. It seems to sew fine, but my bottom stitches look pretty bad. I'm not sure why. I'm attaching some photos here of the top and bottom. Tops look good, I think, but the bottoms are U-G-L-Y. I know I need to loosen the presser foot pressure, but what can I do about the little circle and "thin: look to them. I think the circle is the hole that the needle goes through. But is it a tension issue, presser foot issue or a combination of both? Using 138 thread, 23 leather point needle. Thanks