TomG
-
Posts
1,025 -
Joined
-
Last visited
Content Type
Profiles
Forums
Events
Blogs
Gallery
Store
Everything posted by TomG
-

Antiquing Over Stamps
TomG replied to retiredff's topic in Dyes, Antiques, Stains, Glues, Waxes, Finishes and Conditioners.
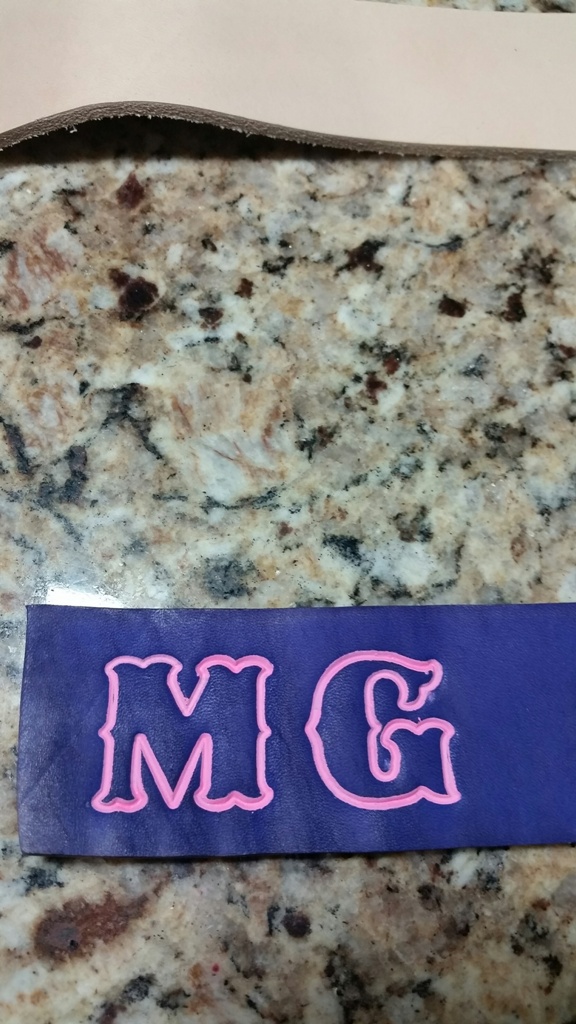
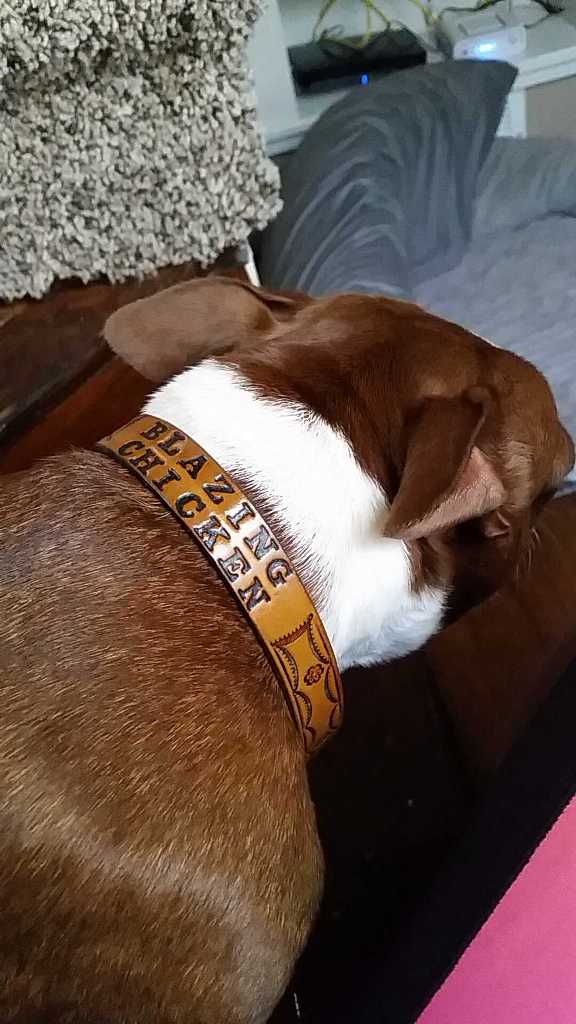
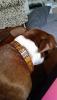
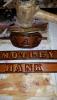
Here are a few that I've used the Molotow paint pens on for highlighting. If the letters are colored, then that is probably acrylic paint on top. Note: The "Chicken" collar is done with a black regular Sharpie.

-
Antiquing Over Stamps
TomG replied to retiredff's topic in Dyes, Antiques, Stains, Glues, Waxes, Finishes and Conditioners.
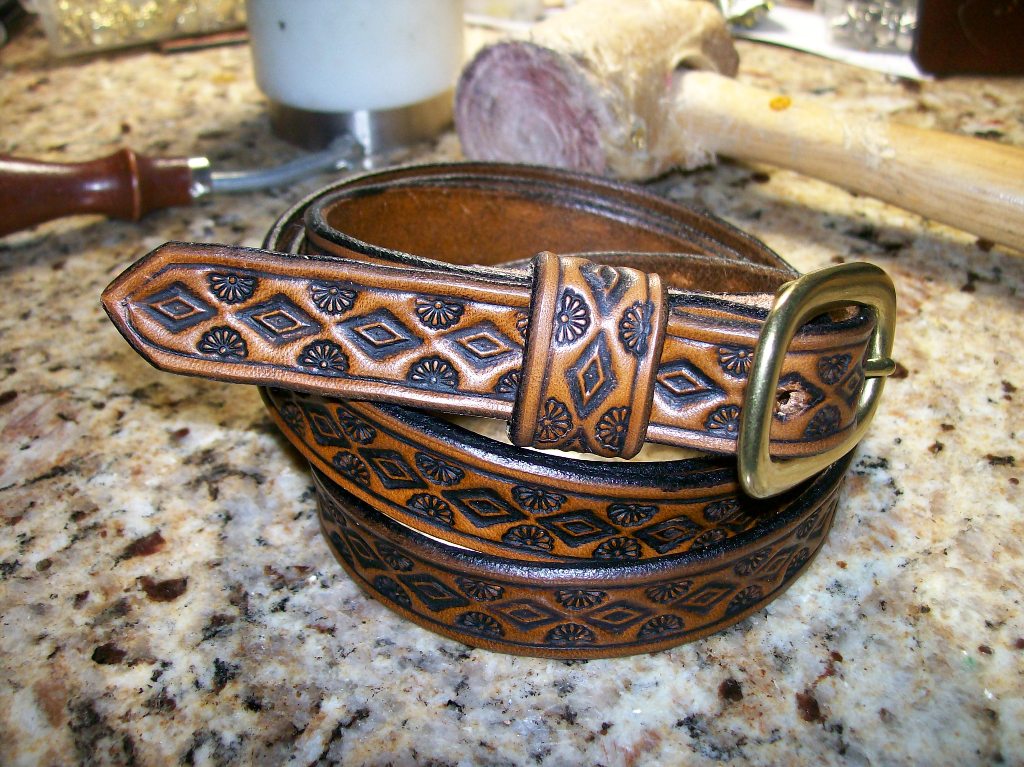
Pictures would help. But I do a ton of this. I stamp, resist the stamps surface with 100% Resolene or Mop 'n Glo, hand dye with a sponge, dry thoroughly. Then coat both sides with Leather Balm with Atom Wax. Dry and buff. Then I apply the Fiebings Antique Finish with a wool dauber. I let sit for about 1 minute. Then I use a scrap of old jean or other coarse material, folded into a firm pad. I hold it flat and rub all of the surface paste off. Then I turn up a clean side of the cloth, and buff the strap, getting the excess off but leaving the rest in the grooves. The Antiquing finish can not be used for large depressions. It becomes a cake that will flake off with flexing. I may be wrong, but I don't think it is meant as a filler but more of a highlighter. I have recently discovered Molotow paint markers. They come is a wide variety of colors, and tip sizes. They are also refillable and the tips/nibs are replacable. BTW, don't waste your time with the Sharpie Oil Paint pens. The leather fibers and stuff plug them up very quickly. Not worth the money. I'm attaching a photo or 2 of a couple of examples of the Antique finish versions.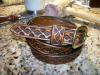
-
How To Finish The Underside Of A Leather Dog Leash
TomG replied to tterrapin's topic in How Do I Do That?
If they are too lomg, I use a sanding drum in my drill press and sand them down. You can also skove then off if you have a bench mounted skiver. Then I use leather balm with atom wax and rub that into both sides. Tom -
I've used the permanent a couple of times and it tended to gum up my needles. Tom
-
Does anyone know where I can find white veg tan leather? Thanks Tom
-
Pasted with what?
-
I normally use 10 oz Latigo for some of my dog collars and leashes. I need tot make a lighter version so I ran a piece through my splitter and dropped it to 8 oz. But the back side lost its smooth, waxed "finish". I rubbed Aussie Leather Conditioner in pretty liberally. Let it sit for about 30 minutes and then wiped it down witha clean rag. It's acceptable, I guess, but is still a bit waxy feeling. Hopefully it will absorb in overnight. Is they something better to use in the future when I have to do this again? Thanks
-
What Is This Twist Thing And How Do I Replicate It?
TomG replied to lcmattson's topic in How Do I Do That?
Here you go. 1 way to do it.. -
What Is This Twist Thing And How Do I Replicate It?
TomG replied to lcmattson's topic in How Do I Do That?
Yup. I was right. Here's a link to a blood knot leash. http://leatherworker.net/forum/index.php?showtopic=34597&hl=%2Btwist+%2Bknot Still lookng for that video -
What Is This Twist Thing And How Do I Replicate It?
TomG replied to lcmattson's topic in How Do I Do That?
Don't thhink it's called a bleed knot. Someone can correct me if I'm wrong, but that knot has a twist before it's woven. I know hop to do them, but can't remember the name. I beleive a bleed knot is just a couple of slits and interwoven without the twist. There was a thread on here a while back with a link to a Youtube video that showed a guy with shakey hands doing them. It wasn't the way I do them, but it worked and is probably easier the way he did. The difference is he used what looked like 6/7 oz leather and I'm using up to 10 oz Latigo. I'll see if I can find it. -
Oxalic Acid
TomG replied to Gump's topic in Dyes, Antiques, Stains, Glues, Waxes, Finishes and Conditioners.
Savogran makes 12 oz cans of powdered OA. Home Depot, Lowes and Ace hardware used to carry it but I didn't see it in a search. Try Sherman-Williams or other local paint store. Not sure what you guys have up northeast <g>. It's actually sold as Wood Bleach. I wonder why you are getting spots? that is usually caused my getting metal or iron filings or some other metal in contact with the leather. A ring or bracelet maybe? Good luck -
Dye Edges How To Avoid Getting Dye On The Grain Or Flesh Side?
TomG replied to DavidL's topic in How Do I Do That?
I've experimented with dozens of ways to apply the edge dye and sealers. I started out with a wool dauber that I torched and melted down to a hard "pellet". Worked OK, but the metal "stick" was hard to hold. Then I tried some felt. I used the felt pads that you stick to the bottom of furniture legs. I cut small squares. folded in half and held in a clothes pin to apply. I now use foam tipped makeup applicators I got from Sally's beauty supply. These work great, but I wish I could find the ones with the longer handles. I can use a paper towel to wick the excess liquid out when I finish and I can use a dauber 10 or 15 times on each end before they fail. That with the Fiebings edge lacquer. The spirit based dye seems to eat them up a little faster, but I seldom apply that anyway.. Here's a pic of what I use.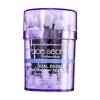
-
How Do I Use A Two Prong Hand Spot Setter?
TomG replied to jv leather crafts's topic in How Do I Do That?
It's called Leathercraft Tools and you can get it from Tandy. It's a wealth of information. http://www.tandyleather.com/en-usd/home/department/books-patterns/61960-00.aspx -
How Do I Use A Two Prong Hand Spot Setter?
TomG replied to jv leather crafts's topic in How Do I Do That?
Well, first, if you are punching for the small Tandy round spots, you will have to use the prongs on either side of center. The closest spacing across the middle is too wide. Second, you need to grind or file down the prongs so they are sharper and a bit thinner. Third, you need to heat treat/harden the prongs. Right now, they will bend. The Leathercraft Equipment book has details on how to make different size prongs. And.. you might want to call Weaver and see if they will send you some spare blades for the price of postage. IMHO, it's one of my least useful tools. Great idea, but horrible execution/construction -
Have any of you ever heard of anyone using baby wipes to clean upholstery? I would think absolutely not. But a friend is recommending them to her mother. I told her that I wouldn't recommend it, mainly since I seem to recall they have some form of alcohol in them.. As well as disinfectants and such. I've always used Lexol. What are you using?
-
I have the Safety Beveler, but never developed a good feel for it, although I can skive an belt or strap end if I need to. I've always wondered why the blade is curved? Any clues? Tandy just says it's to prevent gong too deep, but I can gouge the hell out of a strap if I take my eye off it for a second. For doing straps and some other stuff, use the HighTech leather splitter. Once the blade is stopped and adjusted, it is a lifesaver. But unless you have a proven need for it, it's a bit too expensive.
-
Their Craftool line is OK to kind of learn what you might or might now want. Or learn a technique in many cases. But don't expect a "tool for life". I've played with the Pro line and they seem to be a whole lot better. I can't compare them to other makers, but the ones I did mess with made nice, sharp impressions. I tested a #2 Pro Edger last week and it cut like butter right out of the package. I've had to sharpen every Craftool edger I've ever bought. The oblong slot cutters - High end is dull as a brick.. The cheap one is 10 times sharper.. but a crappy edge. One disease that seems to be a major affliction of new leatherworkers is Toolitis. You want one of everything. Doesn't matter if you can or will use them.. you WANT them <g>. If you are going to buy a good bit, the Gold membership can pay in the long run. Or a wholesale account. It's best to go see the stuff, but if you can't you can always return it for full credit. Oh, BTW, the only tool I've actually ever broken was a vintage Midas stamp. Go figure...
-
Yeah.. prices have gone up on everything. Look at leather prices! I've bought from them before and been more than satisfied. I like the fact that they have small spools and I'm not stuck with a 1 pound spool of some color that I'll have for the rest of my life.
-
Hey Dwight. Hmm.. I didn't think the upholstery thread would actually be strong enough, but rethinking it, I guess it would be close to the #69 thread. I did my first test sewing with 138, size 23 needle on a Singer 111W155. And still got a machine stall when I went over the bottom seam where 4 layers met (3oz ea). This is only my second bag, and I learned a lot so far. It's one of Arthur Porter's tutorial designs. It's the gusset-less one. First, I got stingy with the amount of selvege, and sewed too close to the edge. And because of this, I didn't flatten that side seam at the bottom, and had to sew the 4 layers instead of just 3. Made a big difference. I'll give the upholstery thread a test and see how it does in the small machine... BTW, have you ever used that clear poly "fishing line" thread on a machine?
-
When making purses from upholstery and garment weight leather, what size thread, needle and stitch length do you recommend for machine sewing the seams? How about 3/4 oz vegtan? Thanks
-
I haven't checked the nylon thread, but I can tell you that in the embroidery world, black thread is usually a bit thicker and rougher than any other color. I wish the 111W155 had bobbin cases, but they are drop-in bobbins. Oh well <g> Thanks for all the help and advice
-
Thanks Art. I went ahead and turned it down about 3/8 of a turn. I also found that my senior moment caused a couple of issues. The thread had gone behind that bottom tension disk and I had forgotten to put a larger needle in Was using a size 22. I took a piece of upholstery leather, folded it halfway down, then folded that halfway down. So I went from a single layer, to a quadruple layer. (Imitating the seam on a bag I am making) Now it sewed the length and only needed a slight bit of help to make the step up to the 4 layers. I did have a problem going down in that the back of the presser foot would still be on the 4 layers while the needle was sewing the single layer and get stuck. But thanks for the help
-
This is probably a silly question, but I gotta ask. If you change from 69 thread to say 138 - top and bottom - do you need to readjust the bobbin tension? My 111W155 seems too tight with the 138, but fine with the lighter thread. Thanks
-
Do a search on "cobra splitter" without the quotes, from the main Forum screen and you'll find a number of reviews and such. Also, SWFLHolsters has a good video on it on Youtube. https://youtu.be/jvUKPjg1vXw Hope this helps.
-
I have an Olfa and a Fiskar 45mm and both are about the same. As long as the blade is sharp. Just don't force the blade. The 45mm is a good general purpose size, but the large the blade, the less of a curve you can make. So a 60mm can do less curve and the 28mm can do tighter turns. I think Fiskars has a 45mm in a standard and a heavy duty for heavier cuts. You can also buy sharpeners for the blades. Later