-
Posts
6,542 -
Joined
-
Last visited
Content Type
Profiles
Forums
Events
Blogs
Gallery
Store
Everything posted by Northmount
-
I would think the old singer would do what you want better than a seamstress/dress making machine will. I have a techsew 2700 and a 1975 singer industrial 20-33 dress making machine. For light weight flat stuff (2 or 3 layers of 1mm each of pigskin, etc. for wallet liners), the singer does okay. The 2700 cylinder arm does better for most stuff, especially for purses where you need to be able to reach inside. I use the 2700 more than the singer. When you get a machine, get leather point needles too. They help the backside look a lot better. Call Ron at Techsew and see if he has any used machines. Tom
-
Great looking boots, as you usually do. Tom
-
.thumb.jpg.6e903dd66163ad5672f00f144058c571.jpg)
My Latest Cellphone Case
Northmount replied to bob21804's topic in Purses, Wallets, Belts and Miscellaneous Pocket Items
Nice job. Tom -
You need to define what leather you are intending to sew. Garment weight, 3/4" harness, etc. When you decide what type of work you are doing, then you can define what machine can do the work. Techsew is in Montreal. You will get more responses in the sewing machine forum. I'll move your post there. Tom
-
.thumb.jpg.6e903dd66163ad5672f00f144058c571.jpg)
Used Consew 206rb or new Highlead GC0618-1S
Northmount replied to olie's topic in Leather Sewing Machines
You can buy second hand machines from the dealers too if they have one in stock that suits your needs. Some will put you on their list if they don't have one currently in stock and you can afford to wait. Tom -
Best guide is for the buyer to measure his/her current comfortable belt according to your instructions. Pant sizes are not consistent, so would not be an improvement. There are several threads about this topic. Some with pictures/diagrams that you can send to your clients. Tom
-
Cut a willow switch. You can adjust the whippiness by trimming the skinny end. Take more off, becomes a much stiffer switch. Cheap, easy to replace! Tom
-
Have missed your posts and comments. Good to see you are still around. Kids take a lot of time, but provide very long lasting and great memories. Even better than leatherwork. But is sure is nice to squeeze in a bit of time now and then. Good luck with your next move. Tom
-
.thumb.jpg.6e903dd66163ad5672f00f144058c571.jpg)
Something I haven't seen before -- how to clean it up?
Northmount replied to llucas's topic in Leather Sewing Machines
Here is something that works with some contact cements. Pour out some contact cement on wax paper or something you will be able to peel it off or and let it set. Wad it up and press it repeatedly against the cement you want to pick up until it lifts it off. As the surface gets dirty or less tacky, knead it some to bring new material to the surface and keep going. Works similarly to using a wad of tape to remove sticky tape residue. Tom -
Take the one you are currently using apart and use the stiffener (and clip if any) in your new one. Sometimes the lowest cost is to purchase a cheap ready-made item and use it for parts. Provides examples of how it was manufactured and you get the parts that might be hard to find otherwise. Have done that for 3" 3 ring binders. Tom
-
Only the USA and two other very small country have not gone metric. http://gizmodo.com/5786004/these-are-the-three-countries-who-dont-use-the-metric-system There used to be the complaint that mechanics would have to buy new sets of tools, and on and on. Now when you work on a car (and many other mechanical devices), you need both sets of tools anyhow. There are certain items that will never change even under a metric system. Look at house construction. All materials are for 16" or 24" centers. Plywood will continue to be 48" by 96" other than what is available for cabinetry and such work. Pipe will always be measured in inches. Three are standards for both metric and English units pipe dimensions, but most usage defaults to English units. For conversions of inches to or from metric units, your only need to remember one number. 1" = 25.4 mm. The rest is grade 3 math. Tom
- 41 replies
-
- strap cutter
- strap cutting
- (and 2 more)
-
Ambassadors welcome new members and promote the site. When you begin a thread, you have the option of adding "tags" to the thread that the databases or search engines use to index and locate subjects or main topics contained in a thread. For instance, if I was making motorcycle saddles, I might add the tags motorcycle, saddle, and type or make of the motorcycle. A blog is a regularly updated website or web page, typically one run by an individual or small group, that is written in an informal or conversational style. It may be sort of an online journal about a person's daily activities, trips, or some other favorite subject. A gallery is a place to store pictures. Tom
-
Welcome to the forum. There sure is a lot to share and learn. Keep enjoying and share your work. Tom
-
.thumb.jpg.6e903dd66163ad5672f00f144058c571.jpg)
new to me pattern matierial
Northmount replied to Albob's topic in Gun Holsters, Rifle Slings and Knife Sheathes
Looks like a great idea. Do you have a brand name? Is it non-slip? I see some that is textured, is yours? Tom -
Hi Mrs Hicks, see question for you. Tom
-
I'd check out the cost of blades and spacers first (and any other accessories you may need) first. Buying them separately may cost you as much or more than a new machine with a warranty. Tom
-
.thumb.jpg.6e903dd66163ad5672f00f144058c571.jpg)
Brookes bike saddle refurb - what do I do?
Northmount replied to BalticZephyr's topic in How Do I Do That?
Shouldn't sand the grain (finished) side of the leather. Tom -
If you click on the red dot left of the post title, it will take you to the latest unread post in that thread. Hope this helps someone a little. Accidentally found it a few days ago when the mouse cursor was hovering over the dot. Not so obvious on tablets. tom
-
There are about 50 bikes on display and lots of vintage cars and trucks. The whole exhibition is called Gasoline Alley. Includes a lot of the old fashioned gas pumps where you manually pumped the gasoline into the top glass reservoir, then drained by gravity into your gas tank. Lots of old oil company memorabilia too. Gasoline Alley is a permanent display. Just the bikes are leaving Apr 24. Then a number of vintage cars will be brought back out of storage and put back on display. Tom
-
.thumb.jpg.6e903dd66163ad5672f00f144058c571.jpg)
Snake skin belt
Northmount replied to mike6642's topic in Purses, Wallets, Belts and Miscellaneous Pocket Items
Add to the same thread instead of starting a new one by replying to your post. Merged the two threads for you. Tom -
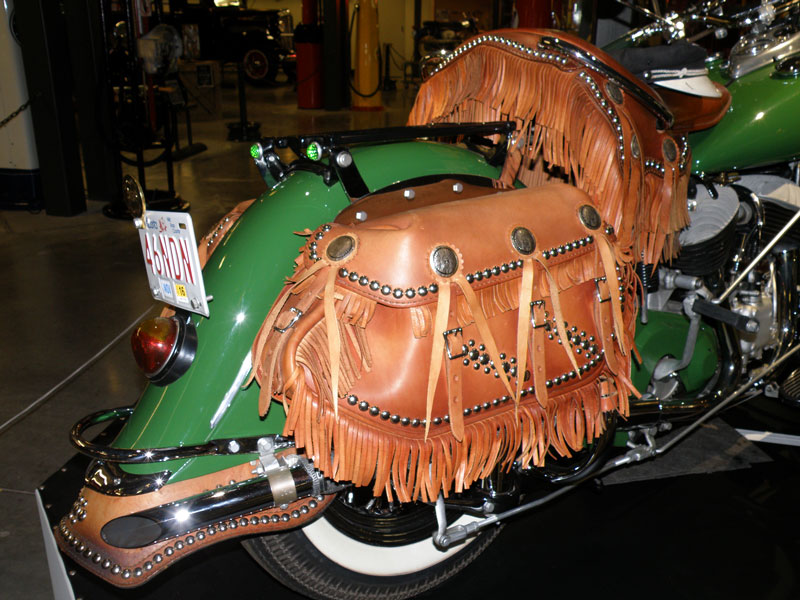
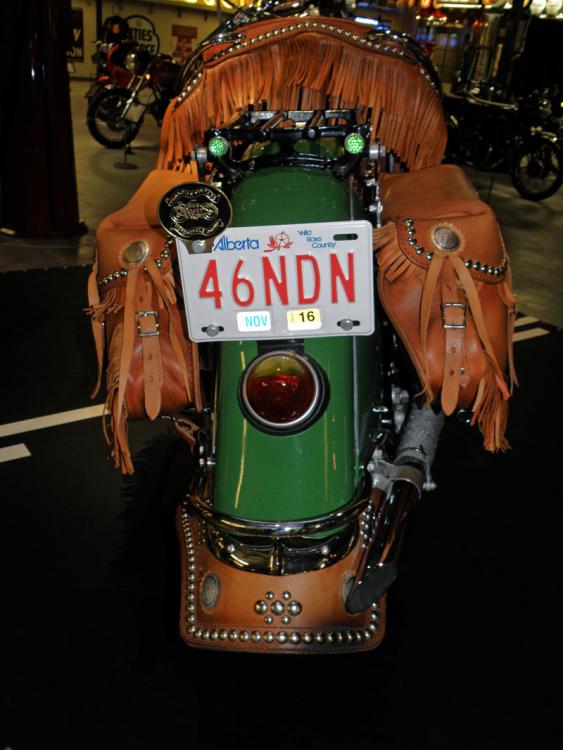
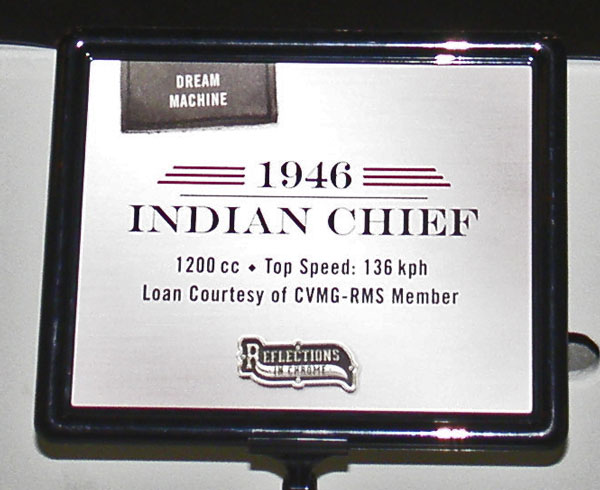
Visited the Vintage Motorcycle Exhibit at Calgary's Heritage Park. Exhibit closes Apr 24, 2016 so if you live close and want to see it, there is not much time left. I thought you might like to see the work someone has done in restoring this bike and adding saddle bags and saddle. (This is definitely not my work, just my photos. Credit goes to the owner.) Many of the bikes in this show belong to Canadian Vintage Motorcycle Group, Rocky Mountain Section. Tom It's as old as I am. It's in a lot better condition than I am!


