toxo
-
Posts
2,263 -
Joined
-
Last visited
Content Type
Profiles
Forums
Events
Blogs
Gallery
Store
Everything posted by toxo
-
Higher End Leather Recommendations
toxo replied to DartmouthDuffer's topic in Leatherwork Conversation
You don't say how experienced you are but the answer to your question is tricky. The "grade" of leather can be more than just quality. You can get some excellent leather that's been downgraded because of holes/scratches/scars etc which for someone making small projects needn't be a major concern. Paying more for an unblemished skin may not get you any better quality leather. You could look at ready coloured skins, either veg or chrome that might give a better finish. Coloured veg will be dearer, coloured chrome will be much cheaper.Exotics might be something to look into. Also you need to be sure that your market will sustain the higher prices. -
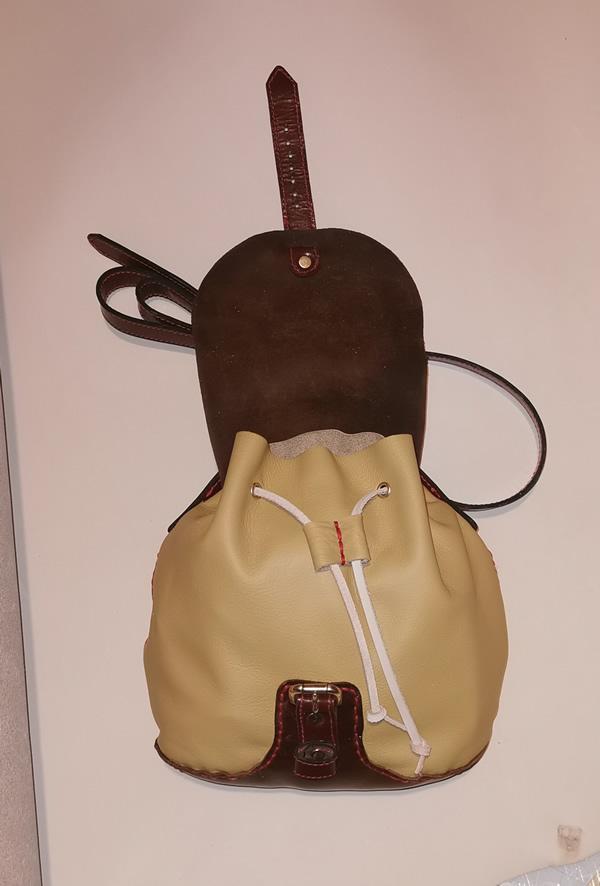
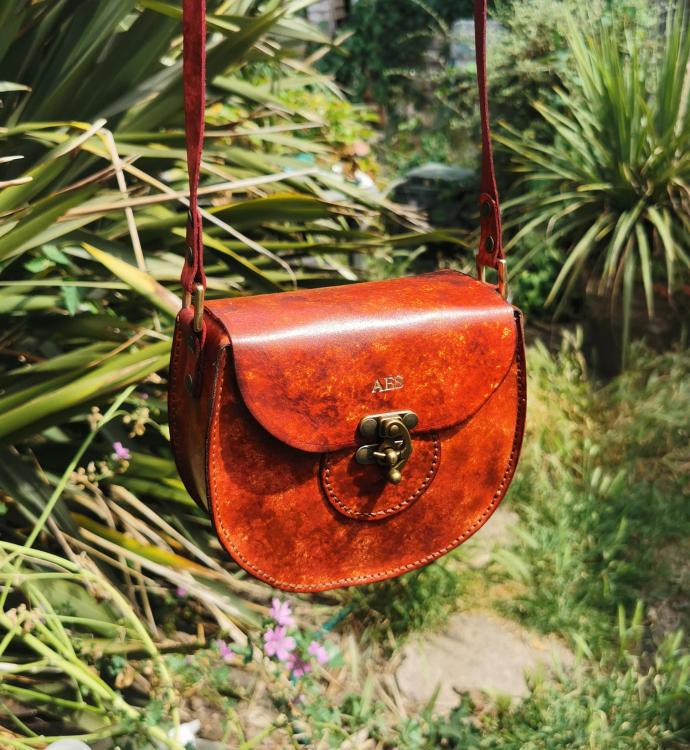
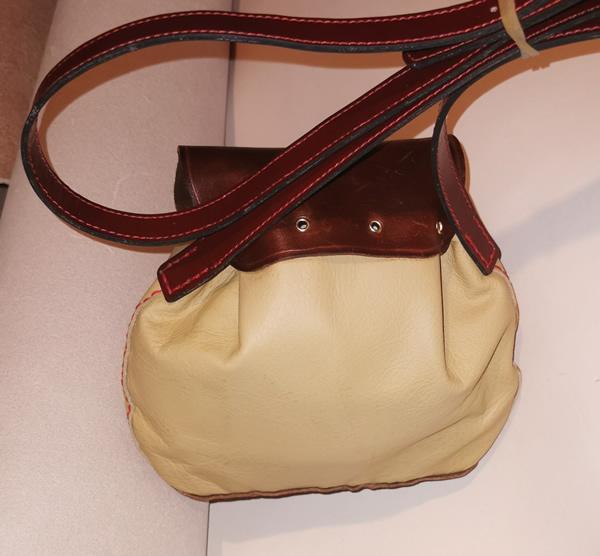
My latest cross body bag/purse.
toxo replied to toxo's topic in Purses, Wallets, Belts and Miscellaneous Pocket Items
Frodo I've no doubt you're capable of good work but imo you rarely put in the yards to show us. For me, it's a balance between who I'm doing it for (maybe mates rates), the practical purpose, (a tool bag or a lady's handbag), the time I've got in it and the cost of materials but whatever the project is there's no reason why I can't make the effort within those parameters to do a good looking job. I could have done a very different job on this bag. I could have burnished everything to death, put swivel clips on wider, doubled up and stitched straps etc etc but this bag is for a friend of my daughters and so is mates rates and then some. She's paying what some folk charge for the hot foiled initials alone and I guarantee she's gonna love it and cherish it. I'll also add that bags like this can be tricky because there's no straight line to work with. Just lining up the initials took an hour. Remember you only get one go at it. Get it wrong and the whole thing is ruined. -
She wanted "Warm". Was a lot of sponge dabbing.
-
Where's the links Fred?
-
Just looking for a reasonable job for a reasonable price here in the UK. Any recommends apart from Sergey. He's the benchmark.
-
You're over thinking it. Use a silicone chopping board and hit it hard enough and the plugs will work their way out.
-
I find these shapes very useful. I just put a strong magnet under the ram on my arbor press (similar to your press) and any of the shapes will stick to it and just pull down on the handle. https://www.amazon.co.uk/Yuhtech-52Pcs-Leather-Hollow-Cutter/dp/B07YBZVQQ4/ref=pd_sbs_sccl_3_2/259-3317810-1066024?pd_rd_w=MigSu&content-id=amzn1.sym.0b2f9572-34c5-41a4-9aef-ddde079c4608&pf_rd_p=0b2f9572-34c5-41a4-9aef-ddde079c4608&pf_rd_r=CHB5VDMKRSCT23GFX5HV&pd_rd_wg=0TT3P&pd_rd_r=148c932e-7ba2-4eff-aead-aa3588658e17&pd_rd_i=B07YBZVQQ4&psc=1
-
Those presser feet with the blades are meant to be used on an edge. This is the enlarged pulley on my Durkopp Adler 69 (Similar on the 239). It's 270mm diameter with a 40mm pulley on the servo motor. Total cost about £50 iirc. Note the needle positioner doing it's job.
-
Welcome to the forum Alex. I have the same machine and can do a stitch at a time simply by changing the handwheel for a bigger pulley. Very cheap to do. The needle positioner is very useful once you get used to it. I also have those presser feet with the spring guides, again useful in their place but they don't dictate the stitch size. Thats adjusted by the reverse lever.
-
Ordinarily Fred I would agree 100% but in my book "As Ye Sow, So Shall Ye Reap". Show me and others some respect and I'll show you the same. This forum should be a place for folk to come and have a good time with mutual interaction of techniques, information and ideas not ideals or philosophy. There are plenty of places elsewhere for that.
-
Lets face it Frodo, you are an absolute rebel. As has been said your work is crap and you know it's crap. You make no attempt to improve and I believe that's intentional. To provoke a response. You're not interested in anyone's point of view or opinion (except other rebels) except your own. Leatherwork is low down on your priority list and I really don't know why you're here except to troll at every opportunity.
-
I find that as much as I'd like to get closer, I have to stay back in order to keep my foot flat on the treadle to toe down/heel down. @lambchop ???
-
I Know it's not the same thing but I've always liked the idea of refillable spray cans. You can have one for each dye colour. This one uses araldite, some solder and some just drill a hole the right size, that's what they do in your car wheel right?
-
There's a simple answer to this. I use a swivel stool on castors that allow me to raise up for my cylinder arm and lower for my flatbed. This type has no castors so will slide under the base. Simps. https://www.ebay.co.uk/itm/125248155123?hash=item1d295f2df3:g:rLUAAOSwL0piT7ML&amdata=enc%3AAQAHAAAA4GwJQk6FGOmIyaCJZTSSwzn6DPcgicTfxlr2vLvoGyWBGeGZEmQeB%2BD7QTRJC3CcM0Gg%2BoQOy9j9DojZLkT2sNqRjArlNMlcLXU4rrEthu24vHYCvQhU4CHyQbhcVCtgIcBu%2B0zv7eAsBqVhgXaQKZkwDhCzDaFqyIWouGYQ6n1r3nW4nQQkBwZQheFuCRuLnhb%2Bu7%2F4%2FxO%2BHPkbD%2BrQOzlpJ0Y3%2BIxwyLpM8%2BuMo2iQwj4S%2BCSuNqAgAXN84KkrBm4ApBUpvXUUCbPGyea05u9mXfRHgQFvbOD8wyrlhHAK|tkp%3ABFBMmuWb-7Ng
-
Best beginner sewing machine for making leather goods.
toxo replied to RockyAussie's topic in Leather Sewing Machines
Hi Brian. Just looked at the Hightex site and there's no mention of the 246 or any model with that kind of reverse lever. Is it a US thing? Where can one buy a 246 in the UK? -
Before you try a dark dye, why not try dappling it all over with a very light dye applied with an art sponge or similar. You have absolutely nothing to lose. I hesitate to mention that I recently had to wash some veg tan with very hot water and dish detergent (4 times) to get the neetsfoot oil out of it. You'll have to re- wet mould but maybe better than re-doing the piece.
-
Wrapping handles - how do I line up the holes??
toxo replied to argentumleather's topic in How Do I Do That?
I suspect you're unwittingly favouring one side slightly when tightening. Apart from that I always work from each end toward the middle when punching so any discrepancy is hidden in the middle. -
My first carved holster.
toxo replied to dikman's topic in Gun Holsters, Rifle Slings and Knife Sheathes
Looks good to me even though flowers don't do it for me. well done. -
I was only saying yesterday that I thought Ivan was pretty good. After trying a cheap wooden strap cutter that bit me a few times because of the exposed blade I bought an Ivan and it was like chalk and cheese and the blade is enclosed. I bought a very nice Ivan crew punch on Monday and as well as looking good it was sharp from the get go.
-
Update! Four times was the charm. Here's the offending pieces after 4 very hot baths and a coat of Resolene. Here's the (almost) finished pouch.

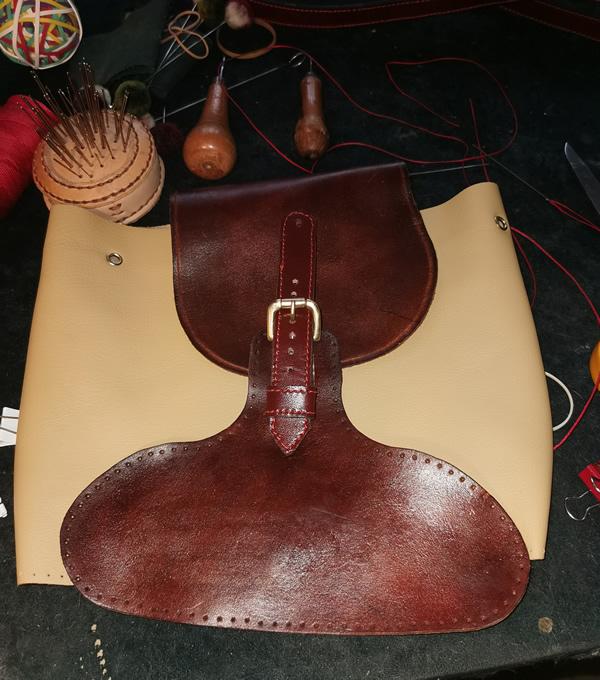
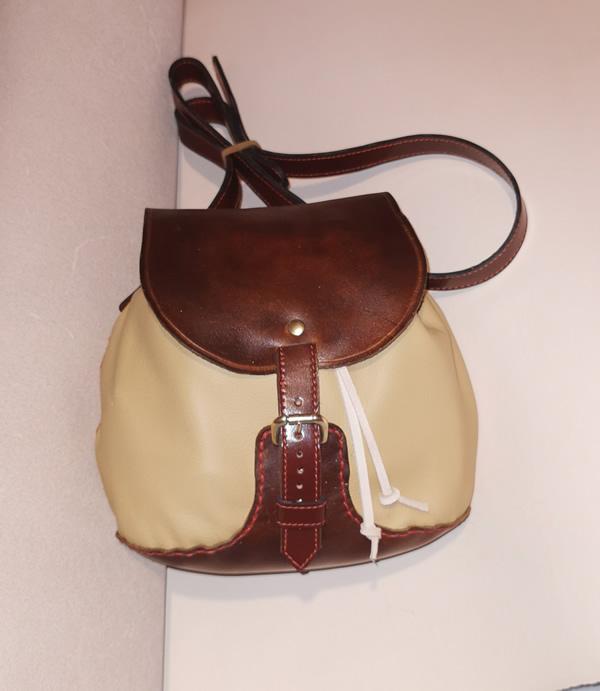
-
Days/weeks haha. No chance. It's just two small pieces and it wouldn't have taken that long to do em over but it had become a thing now otherwise I'd have gone with Dwight. After a bath in seriously hot water and fairy liquid (Dawn) I tipped some dark brown water away and I thought I'd cracked it. I hastened the drying with a hair dryer and there was not much difference. 3 similar baths later, with each one throwing away brown water has them drying on paper towels. Will try again tomorrow.
-
Thanks Scott but it's been two days now and I've use half a large size kitchen towel and it's still coming off. I've even rubbed a coat of thinners over it and it's still coming through. Have I ever learned a lesson here. Read somewhere that a scrub in hot water might do it. have to drill out some rivets but it's useless like it is. I'll let you know.
-
I'm halfway through a foragers bag and the leather components are around 4oz veg tan. After dyeing I planned to Resolene the top side and thought I'd treat it to some neetsfoot oil. Not wanting to mess with the top side because of the Resolene, I applied some oil to the back side. It made it's way to the top side in double quick time and now the dye is "alive" again. I know it would be a waste of time trying to put Resolene on it now. Is there anything to be done?
-
This is an issue that I've been fighting with for a while now. I think eyelet/grommet is interchangeable. I think eyelets have splits on the top of the shank to help the foldover and are used where the foldover side isn't seen because they aren't pretty whereas a grommet with a washer is neater when viewed from either side. Washers can be used with eyelets also. What you need to watch out for is the mismatch you often find in the sizes. I have a Green Machine and several dies (about £18 apiece and each only does one size). I have1000s of eyelets/grommets but it's amazing how many won't fit any of the dies i.e. some of the so called 8mm w/gs won't fit my 8mm die because they're coming out at 7 or 7.5mm. The biggest problem I find is the length of the shank. Most w/gs are made for thin stuff like fabric or tarpaulins which are useless for going through 1/2 layers of veg tan. One last point (for info only), to fill in some of the sizes I haven't got, I recently bought three manual setters from Ebay. Each came with a hole punch, and the two part setter and a few eyelets. the exit hole in the side of the setters (all three) were razor sharp and I cut my thumb open on first use. The seller refunded my money and didn't even ask for them back because no doubt he knew he couldn't sell them so why waste money on the shipping.
-
https://fb.watch/d7y_GHxKRV/