toxo
Contributing Member-
Posts
2,263 -
Joined
-
Last visited
Content Type
Profiles
Forums
Events
Blogs
Gallery
Store
Everything posted by toxo
-
Update: Tank is now sorted. Can't show pics yet because the two daylight tubes of the four in the lighting unit have blown and \i'm waiting for replacements. All blue at the moment. The initial success with the shop given brine shrimp has been followed by a week of frustration with some ebay bought brine shrimp eggs although some of it has been my fault. I finally got a hatch last night but of course they're not really needed now. The disparity in size of some of the fish is interesting. Whether different species or subsequent spawnings I don't know. They could just be runts I guess. I do know they go crazy for brine shrimp. It's a bit like a shark frenzy at feeding time and I saw one of the big ones chomp onto one of the tiny guys. Whether it let go because it realised it made a mistake or in response to my frantic tapping on the glass I don't know but it was too late for the little guy who spiralled off into the void :(
-
Won't know how bad it is until I see it Fred. I know nfo tends to darken, never used mink. Years ago I had some jars of a white cream that was labeled "Leather food". It was for leather clothing. I have no clue what was in it but as far as I can recall it left no residue or colour. I still have a jar somewhere. I'll try to find it.
-
My cousin has asked me to refurb her late fathers camel leather pouffe which originated in Zambia many years ago. I haven't seen it yet but apparently it's the worse for wear and the stitching has gone in places. I'm thinking I can unpick and glue in some reinforcing around the stitch line and treat the outside to a good feed. What the best treatment/product for the outside, preferably something that won't darken it too much?
-
Being fairly new myself I can only generalise. I don't think any of it is difficult per se, the problem is once you put a hole in the wrong place it's there forever. The trick is getting all your ducks in a row as regards thread size/needle size/upper tension/lower tension/speed/guides etc. I found getting the machine slow enough gave me the chance to learn and I loved it, and still do especially when it goes right. Good luck Phil.
-
If you're looking for perfection you have a long way to go but if it does the job and you love it, you have the satisfaction of knowing you made it yourself so well done.
- 18 replies
-
At the risk of sounding stupid - Has anyone tried paste? As in wallpaper paste! It is a glue right? and as far as I know doesn't rub off on anything.
-
Update. Can't say for certain whether the forty year old eggs were a success. When first hatched they are truly tiny and the fry were eating something, could have been softened eggs or baby brines. Anyway started a new batch yesterday using the freebie shop eggs. Started at 3pm yesterday and I've just checked them and they are starting to hatch (Innit exciting). Now I really have to get the fry out of the tank so I can clean it and get a filter in there. I'll start the second shrimp hatchery in a couple of hours to maintain an overlap. All this is making me want to set up a bigger tank and get some of my beloved Discus again. The breeding process of the Discus has to be experienced. Later.
-
As I said, It depends on the application. It can be done with a 12v battery. I was cutting stacks so invested a bit more including a proper power supply so the length of the wire could be balanced with the power for best speed. I also made a jig so I could just run the arms of the wire rig along it for a perfect cut every time.
-
Don't know the answer to your question but, depending on the application I use a piano wire and a low voltage current. Lots of info here. https://www.youtube.com/results?search_query=cutting+foam+with+wire
-
They'll stay in a 2ft wide x 2ft high x 1ft 8inch tank until they shape and colour up. (Where the others are now.)Then I'll decide which ones to keep in the tank and which ones go back in the pond.
-
This is what came from a couple of dips in the (small) pond. About 25 I reckon and the tiny tiny ones in the tank are huge compared to some of these.
-
They're Goldfish Sheila. Some regular types with nice long flowing tails. I don't go in for odd types where the poor things have to shudder to get around. There are some that I like a lot. They're a nice bronze colour and darker on top so you don't see em in a pond but they look good in a tank. I did have some videos but can't find em. I'll try to get some pics. The shop owner was a star today. he not only gave me some eggs for hatching , he gave me some live ones that he hatched yesterday. I did spend some money in there though including some hi-protein fry food that he feeds after two days old. The bigger fry are looking like regular fish now, especially when their bellies are full of food but I can see even the tiny ones are feeding. Soon I'm gonna have to siphon off the fry so I can clean up the tank and put some filters in there. I might even make a fry trap to rescue some more out of the pond before the big ones eat em.
-
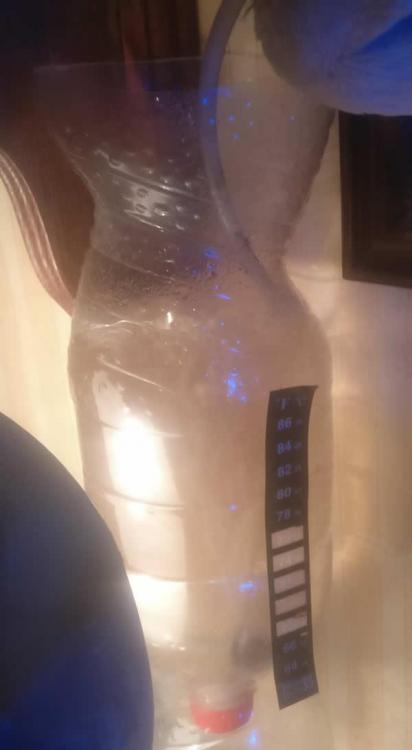
Quick update. Can't see any movement in the hatchery but the stick on thermometer must be dodgy. I've just taken the temp @ 32.7C which might be too much for those little monkeys. The new batch won't be here for a few days but I'm just about to go to a shop where he's kindly gonna let me have some of his stock to help me out. The fry are growing. The bigger ones more quickly of course. Watch this space.
-
UK non-specialist needs sofa advice: can I lighten it myself?!!
toxo replied to Mynkibird's topic in How Do I Do That?
I don't have the answer to your problem but I will say "blotchy" is trendy these days. People are paying good money for blotchy. Good luck. -
3rd son, 3rd laptop bag
toxo replied to BDub77's topic in Purses, Wallets, Belts and Miscellaneous Pocket Items
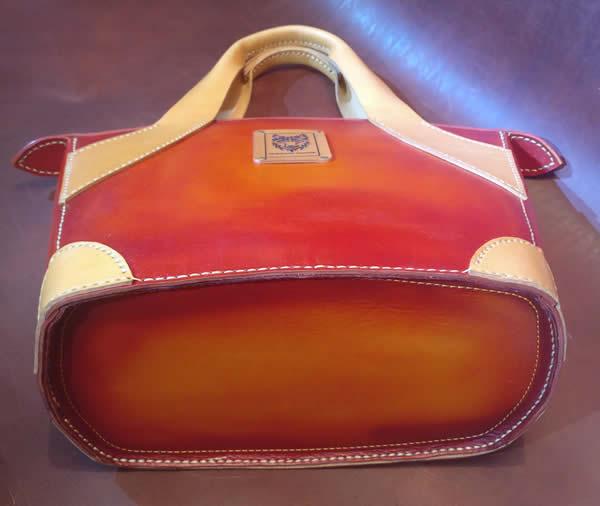
Here you go! This was my very first leather project. A few mistakes but it would take wild horses to get it out of her hands. If anyones interested in the pattern it's here. you can buy on it's own or even cheaper for the set of three. https://www.leather-patterns.com/product/leather-bag-pattern-pattern-set-leather-diy-pdf-download-leather-bag-video-tutorial/161?cp=true&sa=false&sbp=false&q=false&category_id=2 -
I remember those Sea Monkeys also but I've never seen anyone attempt to explain how eggs laid forty years ago can burst into life when immersed in salt water??? Anyway, I was looking in the tank today and was amazed at how many fry there are in there. The size range is enormous, some are around 15/16mm and some are a tiny 4mm with others in between. I've been puzzling over what to feed them. I've tried a pinch of ground up biscuit. I bought some pond flake today and tried a pinch of that after grinding it up. I've got some lactol powder I might try. it's very fine and meant for new born puppy milk and it's full of protein. The problem is except for the bigger ones you can't make out if they're eating or not. Gonna have to rig up a foam filter. Don't want to poison the water. B/S eggs still merrily bubbling away.
-
Most of the hand stitched patterns I've used so far have been from Dieselpunk.ro (Tony See). He uses a 1.5mm hole punch together with a 1mm or a 1.2mm thread. I think this combo gives enough movement for what you need. All of his patterns are cut out and punched on the flat. Here's an example. The bottom panel is damped down and fold over.
-
3rd son, 3rd laptop bag
toxo replied to BDub77's topic in Purses, Wallets, Belts and Miscellaneous Pocket Items
Great job! I like that "D" ring. Haven't seen those before except on webbing. I know how long it took because I made a similar one for my daughter. I got paranoid about the scrotes on mopeds cutting through the strap so I incorporated a 2mm stainless cable inside the strap. -
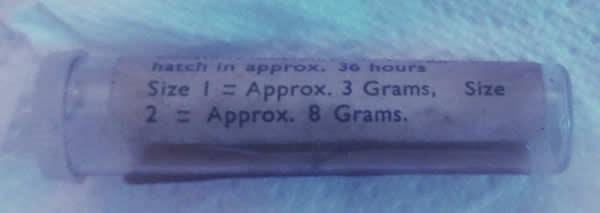
I'm about to test Axelrods assertion that some brine shrimp eggs that he'd had for forty years hatched out. Still blows my mind actually. Anyway, my small pond in the garden was covered in eggs and me loving a project stuck a handful of weed in an empty tank indoors to see what (if anything) hatched out. I say if anything because I all the eggs I could see were cloudy and my experience tells me that unfertilised eggs go cloudy whilst the good ones remained clear. I'd almost given up looking and didn't even bother checking for a few days.Three days ago I was amazed to find about fifteen tiny babies swimming around. Their yolk sacs were gone and there wasn't much in there to feed on. The best start you can give tiny fry is live food and remembering what Axelrod said I fished out a vial of brine shrimp eggs that's been in a drawer for at least forty years and set up a makeshift hatchery. Not holding out much hope because apart from shit coming alive after forty years, how can that be? My via of eggs had a crack in it where someone has trodden on it. I've ordered some fresh ones but I'm hoping some of these old guys will come good and carry on blowing my mind. A little encouragement will get updates.
-
it wouldn't take much effort to make three round bottomed holes in a piece of 2x2 and glue different grades of sand/emery paper in the bottom.
-
I think you're over thinking it. No need to wet mould. Surely, Start off with s flat piece followed by a shaped welt to allow the shears to sit on it in the upside down position which will negate the handles sticking out too much. Followed by the top layer. Add a snap strap somewhere and a belt follower on the back. For me the belt follower would have the shears in the slanted position so they weren't digging in my legs.
- 18 replies
-
Welcome Tom. I'm from the opposite end in Kent. You don't look as old as me and I've only been in it for a couple of years so have at it my friend.
-
Sailing - The Riggers Mate
toxo replied to ZigZag's topic in Gun Holsters, Rifle Slings and Knife Sheathes
Very very nice! As Matt said how about those rivets? I too have only used copper. Everything about that marlin spike appeals to me in a very strange way. Well done.- 21 replies
-
- sailing
- rigging knife
-
(and 2 more)
Tagged with:
-
This. Every time. Starting by marking the stitches before punching will show in the middle how much error you're dealing with.
-
This is the stuff I use Fred. Not superglue. It needs damp to work and it foams and gets into every crevice. You would'nt use it for big jobs but this is the size I have and I've had it a long time. Edit; Forgot to say it's not contact. Needs holding in place until it sets. I put some books on a project to hold it overnight but had inadvertantly moved the piece while doing so. Ask me how I know how strong it is. https://www.amazon.co.uk/Gorilla-1044202-Glue-60ml/dp/B001W030CW/ref=asc_df_B001W030CW/?tag=googshopuk-21&linkCode=df0&hvadid=207961523712&hvpos=&hvnetw=g&hvrand=8485715406187694190&hvpone=&hvptwo=&hvqmt=&hvdev=c&hvdvcmdl=&hvlocint=&hvlocphy=9045025&hvtargid=pla-421292502629&psc=1


