toxo
Contributing Member-
Posts
2,261 -
Joined
-
Last visited
Content Type
Profiles
Forums
Events
Blogs
Gallery
Store
Everything posted by toxo
-
I've gone and bought it now.
-
On closer scrutiny, it's an Adler 69-372 not the 373 which I thought it was. This machine won't handle Tkt 20 polyester will it?
-
I agree Fred. It's so annoying though when all depends on whether he pours out his coffee at the moment you drive by. I think it's too good a deal not to try. I've tried to sort out a pallet but as usual the courier wants everything all wrapped up ready for pickup. All very well for a company but there are many who are just not able to do that.
-
I need to go 30 miles into London to pick up a sewing machine. Will I get away with saying I'm getting it to sew masks? I'm happy to pay a courier but the seller isn't able to palletise it.
-
Nice job! I don't have anything like enough patience. As for the rest I'll leave that for those better qualified than me. I will say if you want to learn about upholstery Subscribe to a guy called Cechalo on YouTube. A genious with a sewing machine.
- 5 replies
-
- sewing machine
- carriage
-
(and 3 more)
Tagged with:
-
Mouse purse
toxo replied to ironwrx's topic in Purses, Wallets, Belts and Miscellaneous Pocket Items
Good stuff. I love anything that looks good AND has a purpose. Well done and lets see those feet. -
Avoiding wrinkles when using two layers of 4/5 Oz.?
toxo replied to jaredwalker's topic in How Do I Do That?
If you have two pieces the same size and the glue them, when you bend or fold you're making the outer layer stretch while the inner layer has nowhere to go but wrinkle. Is why the outer layer on a wallet is bigger. Try marking out the leather in the bent/folded form. -
Guardian Article On Goat Leather Micro Tannery
toxo replied to Arturomex's topic in Leatherwork Conversation
My go to leather shop has small size skin bin which I love to delve into, could be goat, calf or sheepskin size. All different colours and reasonably priced. -
Love your rustic stuff Frodo. I might have mentioned Tony See a time or two but if you want some inspiration or a pattern, https://www.etsy.com/shop/SteampunkMasks?ref=seller-platform-mcnav&section_id=20258358#items I'm gonna do the Indiana Jones pattern but not got round to it yet.
-
Long gun cases
toxo replied to DannyBoyCustomLeather's topic in Gun Holsters, Rifle Slings and Knife Sheathes
Nice job. If you were in the UK I'd say a scoped rifle and a shotgun but you guys do your shooting differently over there. -
Thanks Eric for taking the time. This pooling of information is what forums are all about. Well done.
-
I think I bought the wrong type of leather to practice on? Or....
toxo replied to TestTube's topic in Getting Started
There's always a way. I made this from just the same leather. My leather shop has a bin full of sheep/calf/goat sized leathers, mainly garment/upholstery grade And I really enjoyed designing and making this huge tote. I backed it with cheap pigskin lining and it lovely and soft. If the backing is a different colour just leave an allowance to fold the outer edges so the lining doesn't show. I even made a bag for a young lady and reversed the same leather as lining so it had a kind of suede on the inside. -
If you're talking about the area, I would put the two end semi circles together and add the circle and the remaining rectangle.
-
Where are good places for beginners to buy leather online?
toxo replied to TestTube's topic in Getting Started
-
Making N-95 type masks (sharing pattern to leather workers)
toxo replied to hvxsilverstar's topic in How Do I Do That?
On most forums we're kinda treading on eggshells because you can't please all the people all the time but this is ridiculous. But mikesc you know how much I admire and respect your work ethic, your knowledge and your altruism and after reading some of this, that extends to your wife also, in fact more so and I hope with all my heart she doesn't come to regret what she's doing. That's perhaps the wrong way to say it because I suspect that even if she catches the damn thing she won't regret doing it. The fact still remains that if you want to reach the masses you have to talk in a way that the masses can understand. Tesco don't sell a cleaning agent by listing the ingredients. If I've touched a nerve I'm sorry. You know it wasn't meant to offend, that's just not me. I just hope you were tired when you responded but you're far too valuable to this site to leave and if me being here is going to offend you then I'll leave. -
Making N-95 type masks (sharing pattern to leather workers)
toxo replied to hvxsilverstar's topic in How Do I Do That?
+1 . Mike, what's the point of talking as if we're all bio chemists? If there's a mask pattern that we can make that works, show me the pattern. If there's a bottle of something that I can soak the mask in, show me a bottle label to look for and where to find it. If I need to add this to that then show me two bottles with labels. -
It's an old video and I guess many have seen it but I was fascinated from beginning to end. Interesting how they deal with the waste. Connecting with other tanneries and even the waste from the waste is usable.
-
This is purely for interest for you masochistic restorer types. Didn't want to interfere with the other thread for the Little Wonder but I saw this. Maybe you could cut leather with it?? https://www.ebay.co.uk/itm/W-Crossland-bredbury-1930s-cutting-press-sold-as-scrap-good-for-a-museum-/142952905232?_trksid=p2385738.m4383.l4275.c10 And then I saw this,
-
Suggestions for sewing/stitching for hands with issues
toxo replied to TCL's topic in Sewing Leather
You can make some good stuff using thin leather that you can maybe use on your domestic. Here's a very large shopping tote that I made from garment/upholstery weight leather (around 1mm) that I backed with a pigskin lining (less than 1mm). It's extremely soft and I love it. The next one will be darker colours so I can use it -
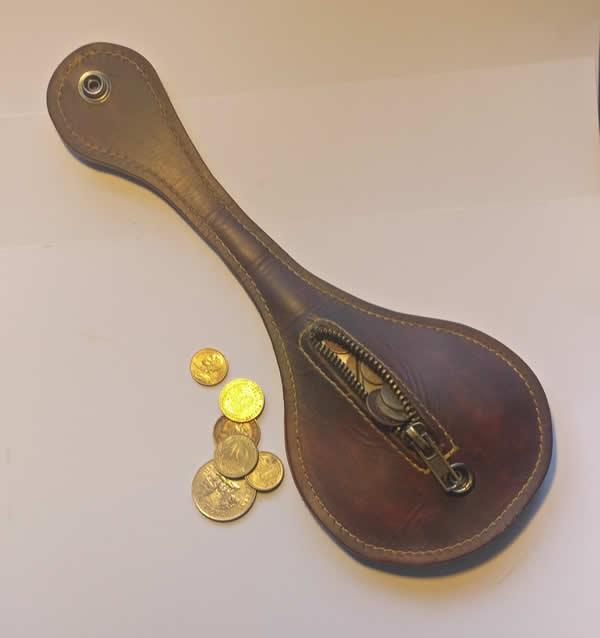
It just came into my head when I was looking for something small enough and it is just a coin purse your honour. The next one will be a handbag, promise.
-
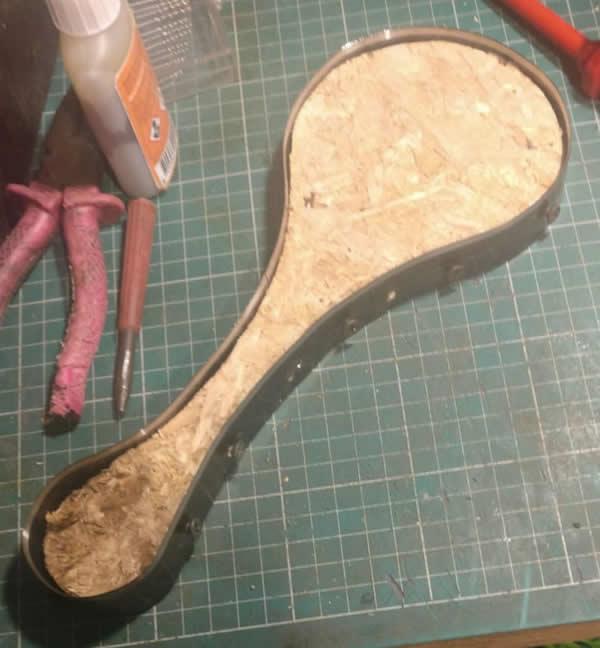
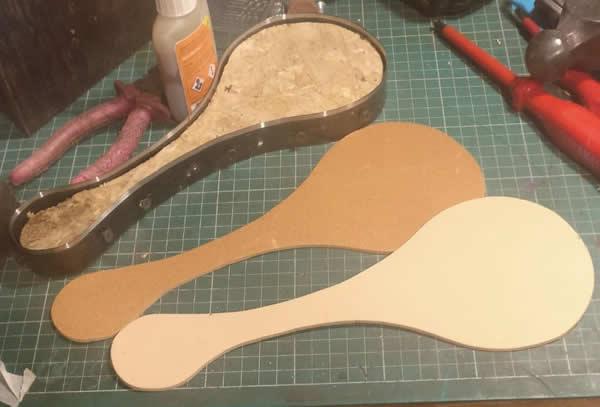
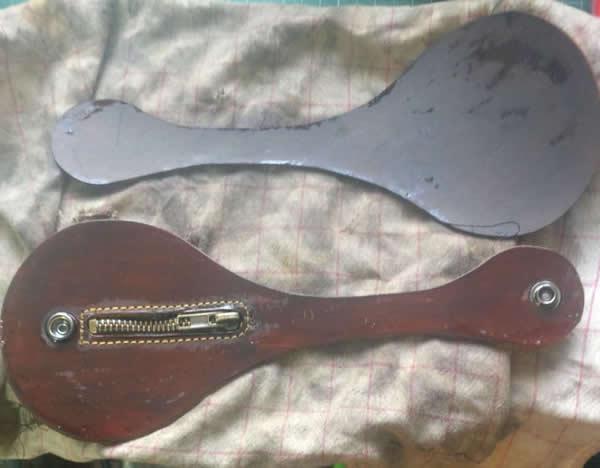
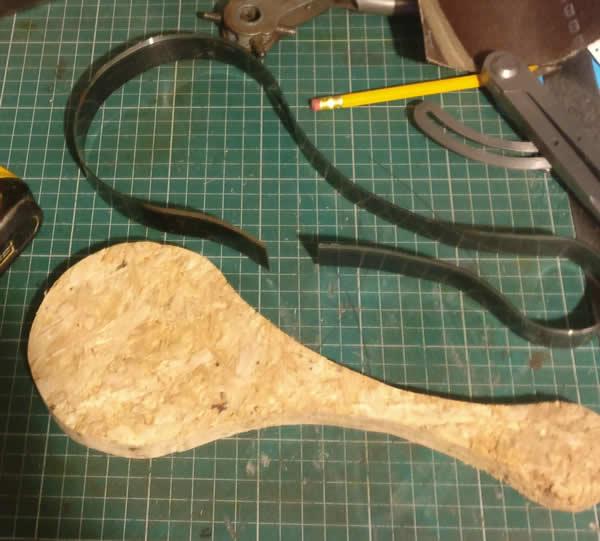
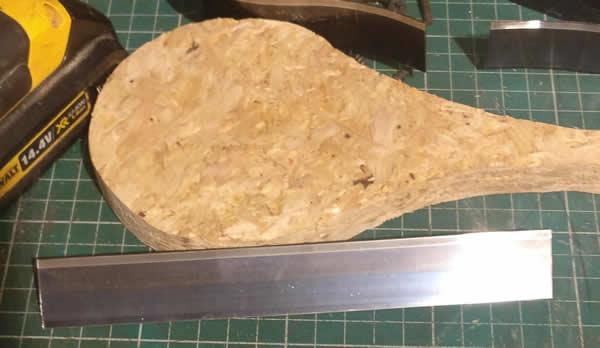
After recently getting a one ton arbor press I wondered how useful it would be as a small clicker press. I ordered some rule steel which came in a box of sixty one metre lengths. The project I chose was something that was posted recently that I found interesting and was small enough. I used just two bars in a vice with a small gap and a pair of Stillsons to pull the steel. It wasn't easy but with some pushing and pulling and bashing I got it into a rough shape. Remember I wasn't trying to be exact, rather testing the feasabilityof the concept. Without putting a back on it I tested it with a steel plate on top and bottom with a silicon cutting board under the leather. I made the waist too thin which compromised the length of the zip but I only broke three needles entirely my fault. Then a couple of coats of neetsfoot oil. And finished. I seem to have lost the pic of it folded over the belt. A coin purse that might be handy when walking down those dodgy dark alleys. As usual I learned a lot and am looking forward to making some tools to make the making easier and more precise. The thing I'd never thought of before was the two parts are completely identical and thus making the edges more perfect which can never be achieved when cutting by hand.
-
This MUST be worth a look for you restorer guys. https://www.ebay.co.uk/itm/W-Crossland-bredbury-1930s-cutting-press-sold-as-scrap-good-for-a-museum-/142952905232?_trksid=p2385738.m4383.l4275.c10
-
I thought the image had to be bitmaps. All the sample images are bitmaps. Is that why the image won't resize properly, because they're not vectors? The problem is, the instructions are nowhere near comprehensive. I'm not even sure I've installed it correctly. I got it working and left it at that. The computer interface isn't the same as the instruction leaflet and has less options. I'll post some pics later and hopefully find out what's wrong.
-
Welcome to another Brit. Looking forward to seeing what you're up to. There's a few places on here for resizing pics but until you sort it out just email em to yourself.


