rickybobby
-
Posts
722 -
Joined
-
Last visited
Content Type
Profiles
Forums
Events
Blogs
Gallery
Store
Everything posted by rickybobby
-

Threepersons project continues to grow
rickybobby replied to Lobo's topic in Gun Holsters, Rifle Slings and Knife Sheathes
Ray, Great information for business, Thanks, Rick J Ray, If I may ask, what is your "other" business? I have seen a couple posts that you mention it. If it is private, no need to post, but I always wonder what others "do" besides leather work! I always enjoy your posts, Rick J. -
Threepersons project continues to grow
rickybobby replied to Lobo's topic in Gun Holsters, Rifle Slings and Knife Sheathes
Ray, You have a nice little business going. Thanks for keeping us up to date. I have followed your posts since you started and always enjoy and learn something from them. I especially like the "business" end of your discussions, what has worked, what does not, and you openly share that. I thank you for that. Your basket stamp looks great! Maybe it will make a comeback with LEO's! lol !!! Congrats on #9 grandchild. Save some time for yourself. Rick Jorgenson -
Done, It is a nice little store, been many years since I have been there. I used to go to the Tandy Store there next door, I was so glad that they took up the cause and started this shop at a time when NO ONE was starting a leather crafts shop. Thanks W.C. & friends! Hope you make it! Rick Jorgenson
-
Dan, P.M. Sent Rick J.
-
Bob, With some practice you may be able to do some pretty good work !!! Your work Rocks!!! I like that you can work with a leather that you have never used before, make something you have not made in a long time, fix a problem with the hide (the hole) and still make it look like that!! You sir, are a true leather artist. I think all my tools are bent or something? Rick J.
-
sole repair
rickybobby replied to stockyardjohnnyred's topic in Shoes, Boots, Sandals and Moccassins
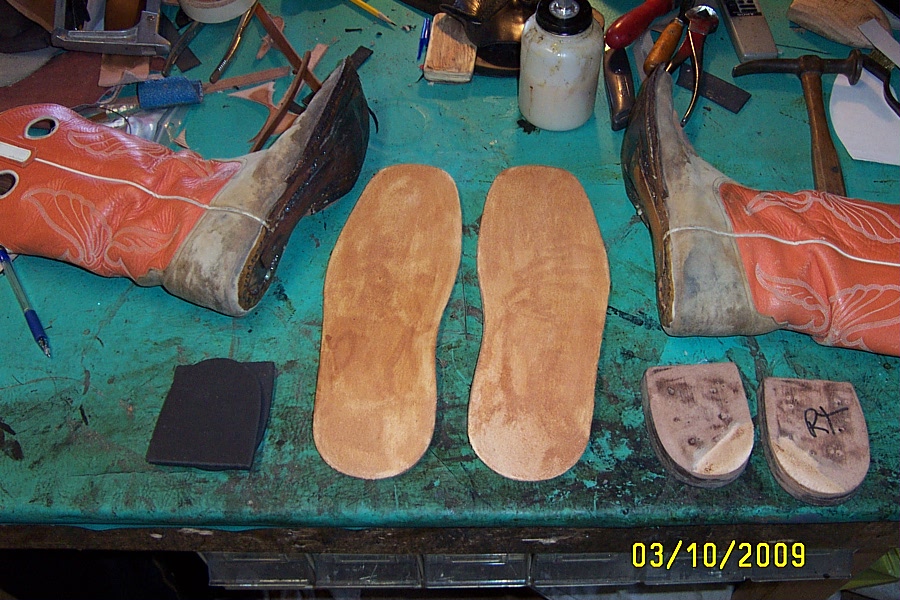
Hi, The machine you bought will not sew your shoe soles. It takes a "sole stitcher" machine to do it correctly. You can Hand Sew them but you said you wanted to get away from that. If you decide to do this yourself after getting all the supplies cut your pattern for your sole, skive the backside transition to match the skive and transition you make on the shoe/boot. Apply glue to both and let tack up. Lay soles on and hammer them to be sure they are stuck on. Pinch the welts/soles areas to be sure the welt is glued solid. On the underside of the sole groove out a stitch groove so your threads will be under the surface of the sole (so you don't wear the stitches out) use a dremmel and small bit and drill stitching holes. You can "hook and loop" stitch or double needle your holes to sew them up. Sand the sides smooth, finish with edge polish, sand your tranistion skive area near the heel smooth and sink a couple shoe brass tacks to help hold the skived area. I seal the new sole with some polish, only to make it look more finished for the customer, it comes off when they walk on it but looks good when they pick them up! There are some uTube vid.s on this subject. We sell a Cowboy Boot Resole Kit on our Ebay store and have sold a few, some old shoe repair guys and some cowboys out in the sticks with a lot of time on their hands I guess. We are in the process of a uTube vid. to go with our kit but have not finished it yet. This process is doable with out special machinery but you need some direction and simple hand tools and that is what we are trying to put out there on our uTube vid. I wish it was done, it could make some procedures clearer. Hope this helps, Rick J.
-
Irons, Lasts, and overambition
rickybobby replied to nobearsyet's topic in Shoes, Boots, Sandals and Moccassins
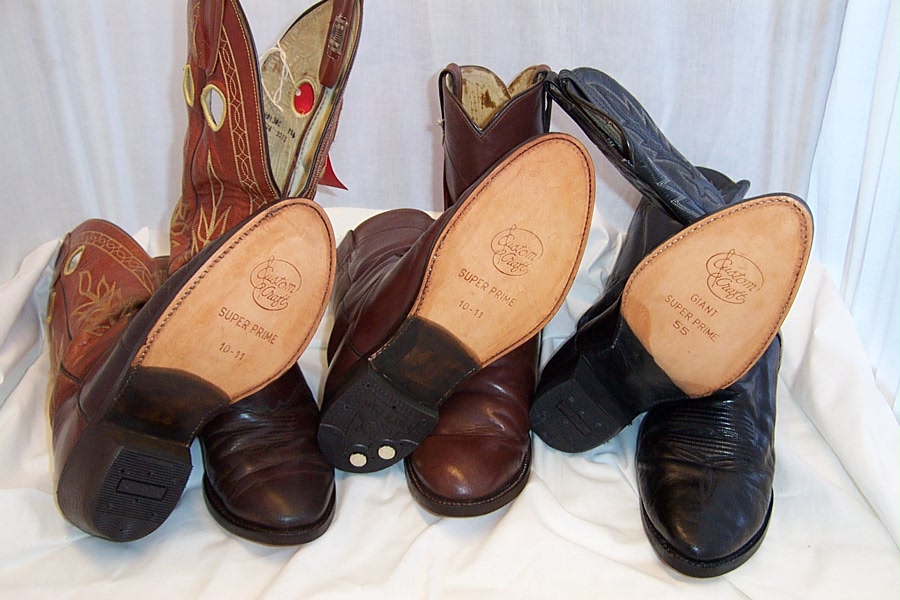
Hi NBY, I do boot resole work. I have Leather full soles and neolite (rubber) full soles with or without ribs. You will also need rubber heels and some extra sole bend material to make your heel bases. I can get you that. I use brass tacks instead of pegs and have never had trouble. You will need those and some square nails for the heel bases (holds them on) and rubber heel nails. Let me know if there is anything else I can get for you. Rick Jorgenson -
Welcome Boots, In my business we do Cowboy Boot Repair as well as other leather repairs. Its nice to see some others that work on boots showing up. Post some pic's of repairs, techniques, ect. Maybe some others will join in on the boot forum. Take care, Rick Jorgenson
-
Hi! Welcome to the forum. It looks like you have a great start in leather. Your tank bibs look great! Search though the posts and you will find lots of inspiration, there are a lot of talented folks here that share tips of the trade. Use the "search" button in the upper right corner and search "motor cycle seats" "bike seats" you will get much info on bike stuff. Welcome again, Rick Jorgenson
-
rdb, I would check out the area north of L.A. I lived in Ventura County for many years and drove to L.A. County for work (15years) Ventura county has a good population, some open spaces, it has a much to offer and is 1 hr. drive to downtown L.A. Look into.. Simi Valley Closest to L.A. County Moorpark next closest (nice area) can be pricey Thousand Oaks Agoura Pricey Camarillo Oxnard Look here carefully, some nice, some not so nice Ventura Ojai Valley I lived here for many years, some good areas, some not so good. Allways a drive (10 miles) to get to the 101 freeway. When you live there you adjust your driving, you just leave early morning or drive late night to avoid traffic I left there and spent 2 years on the Big Island of Hawaii, there was no leather work going on there, Now I am in Phoenix, it feels like the heart of Leather Land !!! Rick J.
-
Top Hat
rickybobby replied to Froghunter's topic in Purses, Wallets, Belts and Miscellaneous Pocket Items
Hey !! I just saw one just like it in the local PHOENIX AZ. Tandy store!!! It looks even better in person!! You were not in the store when I stopped by, Andy said you were getting settled in (looking for a place to live) ect... I will stop by to meet you, I have admired your work in photos here on LW.net it is even better in person! The hat looks so COOL!! Rick Jorgenson -
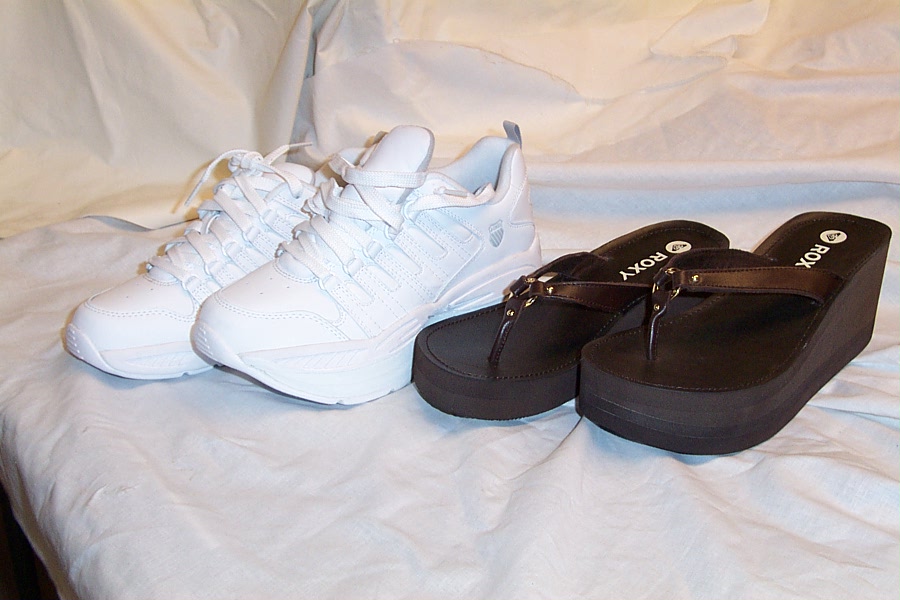
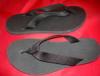
Adam, I do boot repair & resoling as part of my business. I have "Full Sole" pairs for cowboy boots in stock. I would be glad to sell you some material to get a couple of pair made. The full soles are $12.00 a pair (+shipping). They are 12 inches long and wider than a cowboy boot. There are not many boots out that these will not fit so I would think you would be o.k. for sandals. They are "Super Prime" material which is the best you can get. Using regular skirting is great for practice but the first time you step on a rock you will feel it, skirting is just not as "dense" as sole leather. I have Crepe sole material that we make "flip flops" out of, I have not posted any here because they don't have any leather on them!! A pair of soles of that material is $9.00 (+ shpg.) I have 5/8in. thick and 1/2in. thick in black, 1/2in. tan & brown We use 1in. nylon webbing for the straps, 1/2in. for the toe piece. I need to do some leather straps so I can post them, my list of things to do is growing longer!! Send P.M. If you would like anything. Rick J.
-
All the posts in this thread have merit, especially in these rough economic times. This is a good thread to read on occasion because it reminds us of WHY we need to figure out "How much to charge" The better question to bring forward is "How do I sell this for a fair price?" Bob has a great idea that has been used in the business world for years and that is Job Costing. How many times have you figured out how much leather/materials cost you AFTER you have given the customer a price? Its to late then, you think you will make it up on the next piece. That is a spiral downward that is the sure sign of a beginner/rookie people recognize this and can spot it from 10 feet away. Job Costing forces you to know your prices, at least in the materials dept. Keeping track of time will tell you how long a project takes. Try it!! I have, it will suprise you how long some things take to build and how little other take and you can price these accordingly, you have a better understanding and explination to the customer when they ask you "your time to build" something. I use a stop watch and a sheet of paper like Bob for my time studies. As far as how much to charge for labor by the hour you need to look at your level as a craftsman and decide what the customer should pay for your level of craftsmanship. It always takes longer to make something you have never done before than something you have done dozens of. Practice and expanding your abilities will help you with pricing. Making projects for stock will polish your abilities and help you with the materials/time per job to do a cost analysis. This will help you when asked "How Much" Tell customers you need to research material costs and get back to them with a price. I know somtimes this needs to be done "on the fly" so give them a Ball Park figure, if you have been doing the Job Costing you will have a better understanding and at least be closer to the final price. Bree has a good point not to be known as a discounter, this cheapens your work and lets people know you are desperate for a sale. No one likes getting less than they think they should for their craft and pieces of work. Asking a high price only to discount it after it does not sell at a event is not a good feeling, price it right and selling it does, it puts another piece out in the community with your name on it which hopefully will bring others to you for work. The customer bought it for a fair price, you sold it for a fair price, everyone wins!! Bottom line is "Know your costs!!" Expand your abilities and talents and your business will build the correct way on a solid foundation it may be slow but it should be steady and controlable. Thank you to all that have added to this thread. It is a good source of information for all leatherworkers. Rick J.
-
Case For My Shears
rickybobby replied to Storm's topic in Purses, Wallets, Belts and Miscellaneous Pocket Items
Looks great Storm! I really like Oak Leaf and Acorn patterns. Good choice!! Its nice to make something for yourself!! Rick J. -
John, They are all really nice, good work! I like the Quail, its a little abstract but I love watching those birds in my backyaard every morning, They are almost as funny as Chickens!!! Rick J.
-
I like it! Another "Rat Fink" fan! I had the pleasure working with "Big Daddy" Ed Roth when he lived in La Mirada Ca. I was going to Cypress College (82/84)and was in the Auto Body Repair Tech. School learning all I could about Body and Paint work. Great job on the seat!! Rat Fink is not an easy guy to draw or tool!! Rick J.
-
I use these when I need to make a 1/2 punch for scallops. Not real good quality but they are cheap. Save yourself a few bucks and get the Harbor Freight punches, a couple less punches but only $4.99 http://www.harborfreight.com search punches Rick J. http://www.harborfreight.com/cpi/ctaf/disp...Itemnumber=3838</IMG> 9 Piece Hollow Punch Set Central Forge 3838-7VGA $4.99
-
Storm, I see a light muted hint of red on the roses and dark green for the leaves, then and black antique over the rest. You would need to play with the amount of resist to use and hint of color comming through. I see this as a very dark piece but hints of color on flowers and leaves/stems Nice job!! Hope it finishes well. Use lots of practice pieces!! Rick J.
-
Josh, I have a latigo hide. Are you sure of your measurement? Is there some curve to it? Let me know. Rick J.
-
Small holes in saddle tree
rickybobby replied to kyleglentzer's topic in General Saddlery Discussion
Kyle, Welcome to LW.net! You will get much advise here, everyone is helpful so just post a question and try to include a photo or two they really help! For your saddle tree... Make sure there are no cracks in the bars from the orig. screws. If none the tree should be o.k. Find wood dowels that will fit in the holes, some use tooth picks, some may need 1/8in. dowel from hardware store. Use a wood glue, such as Elmers white glue. Some people swear by Gorilla glue, I have heard Gorilla glue expands, needs water, ect. Read directions if you use it, I never have so I can't comment. (seems like a lot of work to use the glue) Fit your dowel in a hole to get an idea how deep it is, use wire cutter to cut it 1/8 to 1/4in. longer then needed. Coat the dowel in glue and insert in the hole. Use a mallet/hammer to tap it in untill you are sure it "bottoms out" don't mangle/force or crack the wood dowel anymore than you can help it, the glue will hold it in place. Just let the end stick up, you will take care of that later. After the glue is dry, use your nippers to cut the dowel off flush with the tree. Use sandpaper the flatten the wood dowel, try not to sand to much of the rawhide on the tree. Use a clear type of varnish to seal and water proof the repair area, brush it on where the hole and sanding marks are to make the rawhide water resistant again. I have done this on a few hole in a tree (never for 30!) You need to ask yourself if it will be safe to use? It may depend on where the holes are located. Post a picture so some of the other, more experienced saddle makers can give some input and to see if will be a safe tree to use. Rick J. -
Tom, Very cool hat!!!! You have really "embraced" the Steampunk look in some of your art. Thank you for posting the pattern, very nice of you so those of us "artisically challenged" can try! Rick J. I looked it up about a year ago but here it is for others that may not know what Steampunk is, http://en.wikipedia.org/wiki/Steampunk
-
Josh, If the saddle is just dusty and dry, Drop the stirrups off so you have access to the fenders and can pull the leathers down a bit. Polish silver, polish brass, polish copper, if any I like to use Bentleys Saddle soap in the spray bottle or Murphys oil soap (liquid or paste) a damp sponge and a vegtable brush for scubbing caked on dirt. Clean the whole saddle seat and all, and let dry for a few hours Use Neats Foot Oil Compound, some only need one coat, dryer ones may need more, don't over oil. Let that soak in for a couple hours or overnight. I put a light coat of Fiebings Bag Kote on for a finish Clean the cinch. Brush out the hair and inspect The time spent on a saddle (less dry time) is about an hour, we charge $45.00 Add 5.00 to 15.00 for breast collars, breachins, bridle, ect. they all take your time to clean (we inc. some breast collars and back cinches) While you have it inspect the riggings for wear. Check the wool for stickers and make sure there are no nails comming out of the bars under the wool. Here in Az. it is real dry and if a nail was put in the bars they work out of the tree, maybe because the wood shrinks and drys out? I have pulled quite a few nails out that had worked their way out 1/8 to 1/4 inch and were hidden by the wool. (I do not put nails in the bar area on my saddles so I do not replace them, only remove them). Check the stitching on the horn, around the skirts. These seam to get some wear and need some follow up sewing, If it takes you 10 minutes to sew up a horn cap that has come loose, charge them 6.00 or 7.00 (call for approval first) Folks that want to maintain their saddle will have you do it, if they don't care don't do it for free!! Check the rear cinch keeper, the one that hooks it to the frt cinch, those are always broke, bent, mangled, replace the buckle and strap and charge them. (approval by phone first) A lot of saddles also need a Off Billet and On Side Latigo, and/or a Cinch. Have a couple of different types in stock and people really appreciate that you are looking for safety items. If they are worn bad and they do not want to change them out, o.k. but note it on the reciept. You were the last one to touch that saddle and if one of those items breaks, they may come looking to place blame, (I am not an Lawyer or giving Legal advice, just covering my poor leather worker behind). $45.00 saddle clean & oil $12.00 rear cinch keeper buckle and strap replaced $18.00 off billet $24.00 Latigo $12.00 sew a horn cap and frt jockey or skirt edge It adds up quick and you make some money on your labor and a few bucks on materials (latigo and off billet, ect.) I am amazed that people do not know much about their saddles, they use them everyday but never look at them the way we do. They rely on us to keep them in good condition and in safe working order so I try to let them know what they may need soon, next summer, next year. Then they pay attention to what is wearing and will bring it to you later to be repaired. Some get a "see you next season" for a clean and oil!! Those are the one's in good condition. Hope this helps, I know you are building a business and these are some of the things we have done in the shop I worked in and I do with my customers. Rick J.
-
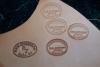
Try the "search" button for Maker Stamps. There are a couple threads and some members here on LW make them and many people are happy with them. I have one from "Infinity" in Canoga Park Ca. that is one of the nicest I have seen. I got it about 10 years ago. Great quality, clean crisp lines. I have moved (changed states) and ordered one from "Tuffcase" ,it is a plastic or delrin ?, very inexpensive but not useable. The imprint is so shallow it looks awful. I am going to try Jeff at Grey Ghost Graphic for my next maker stamps. As soon as the money truck shows up!! Rick J.
-
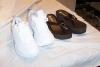
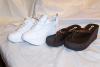
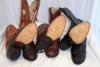
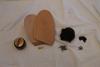
When doing a "lift" for someone with one leg shorter than the other you need to, Is it done safely? Does it work correctly? Does it look as "natural" as possible? Will it last? I am sure there are others. It is important to use the shoes original sole bottom whenever possiable. This will give the shoe the same "feel" when worn, same stopping, same gripping. Some shoe designs are better then others for this procedure due to their construction and quality. We first remove the sole, install the light weight "cloud" material. Level and contour so the rolling action and stride are not affected. Reinstall the original sole then finish all edges to make the shoe look as "natural" as possible. Many techniques & tools used to do leatherwork are used in doing Orthopedic Build Ups. Our business is fairly new but people have been bringing many to us because of the variety of shoes we can do. My business partner has been doing them for 25 years. We have a lady that brought a couple of shoes to us and was so happy we would do them she went out and bought more. She said she has never had so many shoes that she can wear and feel comfortable in! We have done 12 for her. Rick J.