


fredk
-
Posts
5,966 -
Joined
Content Type
Profiles
Forums
Events
Blogs
Gallery
Everything posted by fredk
-
Nice work on those wallets Morse is still very useful. Year before last was talking to a soldier. He'd been sent into an African country to help local LEO to rescue some hostages. The patrol was going thru a remote village when they heard some banging. All the patrol but him ignored the banging but he recognised it as Morse. Long story short - communication was made, one of the hostages was able to tell the patrol where they were and how many baddies there were. After a gun fight, result was 8 hostages freed, 12 baddies dead and another 3 taken prisoner.
-
I think there may be 'The Guild of Master Craftsmen' and 'The Guild of Master Craftsmen' A long time ago, when I had a business making wooden toys, all 'hand made' by craftsmen I was contacted by a 'The Guild of Master Craftsmen' and invited to join them. Basically they wanted £1500 per year as a member so I could use their logo and say I was a member, but there was absolutely no need to prove our quality or standards. Just sign up and pay the fee. It had, generally, the same aims as set out above.
-
I was told. An expert is someone who knows all about how you should do your job, but cannot do it himself
-

Edge on holster opening
fredk replied to Davm's topic in Gun Holsters, Rifle Slings and Knife Sheathes
1. I think you need to look at your awl work. In 21 years of leatherworking I've never broken an awl, never even so much as bent a tip. Try using cork, a block or sheet, to poke your awl thru the leather into. If you can afford them, buy two* pair of these special pliers for making sewing holes; * 4-tooth as per the picture and a 2-tooth for going around corners and tight curves 2. If you have the holes prepared its better to use blunt saddlers, aka harness, needles for saddle stitching. Less chance of piercing the thread or cutting it with the needle 3. Contact glue really only stays on the surface or near the surface of the leather fibres, it also keeps the two leathers apart, very minutely. The hammering forces the glue deeper and forces the leather closer together. Just use a small nylon or rubber mallet to tap the leather along the glue line after joining the two pieces together, then clamp up till the glue sets 3a. We are assuming you are joining the leathers flesh to flesh. If you join a piece grain to flesh you need to roughen up the grain side otherwise the glue won't work very well 4. Here is how I'd tackle it. Cut the main piece very slightly over size. Cut the liner very slightly bigger than the main piece. Glue the liner to main piece. Plenty of glue along the edge joint of the two pieces. Tap/hammer around the edge Clamp the edges good and tight. Leave to let the glue set. Then trim the main piece down to correct size. Run a groover or wing dividers along the edge to mark the stitching line. Then mark and make the sewing holes on the front half of the holster. Fold holster over. From here, three or more options, 1. Glue the edges of the front & back halves together and make sewing hols in back side. 2. use double sided adhesive tape and make the holes or 3, hold together with temporary clamps, make just a few holes and use wire, thread or lace in those holes to hold the two halves together making other holes and for sewing
-
Good point, humidity here today is at 75% average, ie its raining somewhere here today
-
It would, if the leather needs nfo. I store my leather in large plastic boxes mostly, never applied nfo, never needed to
-
1. the Vasa was built in 1623, about 20 years after Lizzy 1 died 2. Standardisation and mass production of naval ships types did not come till the true Royal Navy under Charles II, 1660 to 1685. Lizzy still held to 'hiring' the private ships, then refused to pay them. She seized the Ark Rawleigh from Walter Rawleigh as she thought it was too powerful a ship for a privateer. She renamed it Ark Royal
-
Possibly the researchers looking thru old documents, newspapers, hand-bills have identified the words being used in the 17thC (= 1600s, not 1700s = 18th century) An example; 'square meal' - often thought to be of Royal Navy of about early 1800s, now known to have been used as far back as 1580s
-
Logo / Maker's Mark / Hot Press or Cold Press?
fredk replied to SewMuchToLearn's topic in Getting Started
I don't know those leathers, I have no experience of them If they are veg tanned; cased, veg tanned hand stamps easily, arbor pressed the stamp can make a good impression in dry or cased, cased is better but it can be done dry as well -
Edge on holster opening
fredk replied to Davm's topic in Gun Holsters, Rifle Slings and Knife Sheathes
I think you just need to look at your glueing up procedure. Plenty of glue and hammering the two pieces together before a good tight clamping up. Hammering as in going along the edge area with light mallet and tapping it with purpose, but not like you are trying to put a 6 inch nail thru a board in one hit -
Logo / Maker's Mark / Hot Press or Cold Press?
fredk replied to SewMuchToLearn's topic in Getting Started
1. Its almost impossible to make a decent mark in chrome tanned leather just by cold pressing or hammering. You don't really need a hot machine, a good interchangeable tip soldering iron or pyrogravure will do 2. I prefer a press, an arbor will do the job 3. Brass all the way. Long lasting, will heat up easily 4. I get my stamps made in brass with a flat back and a 5mm tapped hole in the back centre. Then I can, if I want, put a 5mm threaded rod (usually supplied) in and slip it on to the soldering iron -
If your referring to the dictionary - Webster's, Oxford Dictionary, Cambridge Dictionary, etc employ full time and part-time researchers who look for the oldest printed example of a word and in that by the context the word is used what it meant
-
Not just in the US, here as well. As soon as anything goes past the fence at the dump no one is allowed to recover it for any purpose Nice find on the bike,. Although I hate those hub gears. Sturmy-Archer? On my bike it always went out of synch too quickly
-
I think I have some of those saved. Most of them are small memory and I can email them but afair the 'Percussion Pistol Holsters' is a big memory and I can't send it by usual email. I need to look out a link another LWer gaveme for sending big memory stuff. PM me an email address and I'll send you what I can
-
Further; the way I do it is; Needle in right hand goes into hole first, when its about 1/3 to 1/2 way thru the needle in the left hand is pushed into hole, using right needle as guide. Right hand needle is close to me, the left needle is away from me. When the two needles are in the hole finger grip is changed so that my right hand now pulls the left needle thru and left hand pulls the right needle thru. Left hand pulls needle and thread thru and back towards me and right hand pulls needle and thread thru and away from me, thus the two threads always lie the same way repeat above
-
teehee. that be funny mmmm, what might my code be? MIMA? Made In My Apartment? We call it a 'Flat' but MIMF doesn't work so good
-
@Tugadude and that is why we must be careful what we write. An ordinary word to me/you might be honestly offensive to someone else. I was taken to task on another forum for calling people 'plebs'. I learnt that at school; its Latin (plebeian) for the common person, but to the English its an insult.
-
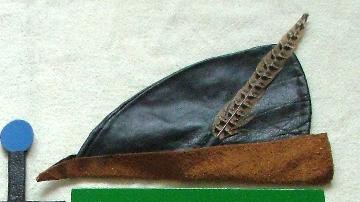
True, but its also very much fun taking odd pieces of 'scrap' and turning them into something These were made from my upholstery 'scrap' I've made maybe 30 - 40 wee hats like this, this is a 4-panel type, some have 8-panels because of the size of scrap pieces; Maybe 20 book covers like this; I used to make this 'Robin Hood' hat for children. I reckon I made about 20 or 30 Numerous draw-string money bags, odd pouches for my (old) medieval team. Once I had a very large piece and made it into a tabard for one of the 'knights' in my group. Using some of my scrap #3 son glued the scrap to some canvas in patchwork fashion and made a tote bag for his girlfriend. I find the thinking out a design to fit what stock I have is part of the fun of leatherwork

-
Interesting. Very cartoonish. What does ATC mean?
-
Its not a word we think about here, but generally 'manufacturer' means a big company. eg BMW is a manufacturer, the truck building place near me which builds about 20 trucks a month is not
-
No drinking alcohol during working hours with most businesses in N.I. Very much frowned upon here About 5 years. There were about 6 photographers. Yes, they got plenty of customers. They cleaned up in the wedding photos scene. £1000 to attend the wedding, £1000 for small album with proof photos (30 to 36 of 5 x 5 inch) and £1000 per finished album with 24 main photos (8 x8 or 8 x 10 inch). For that I charged a total of £250-ish, £200 was profit. 7 times out of 10 the photos were rubbish. When the wedding people tried to sue they lost and we, other photographers, got the job of re-doing the photos as far as could be done, which cost the couple another £2000 or so, for hiring suits, venues, new cake etc. To put this in more context; average weekly wage was about £160 then
-
I say go for it. The leather will last you a while and you can make other things from it. Almost 20 years on I'm still using some of 50kg upholstery leather I got in a deal
-
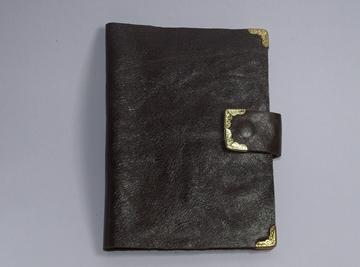
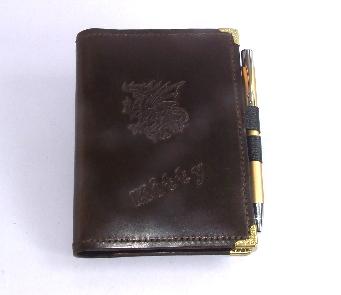
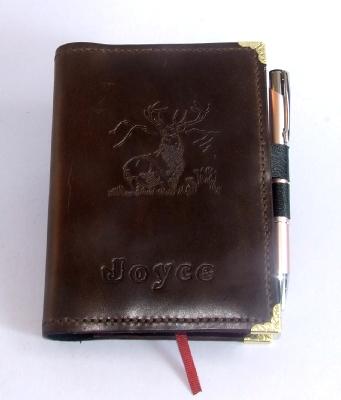
yup, agree. even October is a bit late. Year before last I made a handful, maybe 9 in total, I can't remember, leather book covers and included an A6 diary and a pen. Inside there is a panel piece front and back to hold the book covers and on each of those panels is a slot cut for a pocket I'm a slow worker. It took me several days to cut all the pieces and then about one evening to assemble each cover. I think I decided during late November to do these and some had to be ready for 5th December. Got them done ok, but it would have been maybe easier to have started them in September/October time
-
The latest buzz word is 'Artisan'. Artisan coffee, artisan cheese, artisan sandwiches, artisan cakes.. . . . . etc. Nowt has changed in how those things are made but put 'artisan' in front of the description of your 'hand made' sandwiches in your cafe and you can charge 3 or 4 times the normal price. Direct example; a cappuccino decaf coffee in Starbucks = about £2.80, go down the street, same coffee, made the same way with the same machines but 'artisan' = £6.50. Go to a local coffee & tea importer with a tea room, same coffee from them = £1.60. Guess what? people are flocking to buy the 'artisan' coffee, they are leaving the likes of Starbucks empty, and the wee local place, only the wise go there. Put fancy words and fancy prices and the common folk will flock there because they think they'll get something special. My son and I call it the 'Kings new clothes' syndrome. A deviation. When I had a photo studio I did children's portraits, sometimes family groups. I charged £25 to £30, for the sitting plus a selection of small proof prints. A group of photographers got together and formed the 'One Thousand' club. They charged £1000 for a portrait sitting. Just for the sitting. Minimum order was £1000, even if you just wanted one small photo. People flocked to them. I was told 'you must not be a very good photographer if you only charge £30'. I did put my prices up, a wee bit. The 'One Thousand' club also did weddings. Although they charged £1000 they weren't very good photographers. I and a few associates ended up re-shooting almost all the weddings done by the Club and re-doing a lot of their other work. The common person can be blind-sided by fancy terms like 'hand made', 'genuine leather', 'Artisan . . . , PS. I was once given a jacket and the label said 'Genuine faux replacement leather type material' !
-
I'm downloading ALL the Doodle Page Sets. 43 in total, 25 done so far. You never know when something on one of them might be of interest or be needed so best to have them all. Or, as children's toy adverts used to say ' Be the first on your block to have them all!' And it costs nowt to get them. After saving to my computer I'll be saving to a DVD and a pen-drive as back ups Time for another cuppa whilst I do the next 18 downloads. By the way, the set doesn't say on its PDF what it contains so I'm copying the contents off the Tandy website and putting them into a 'word' document