Dwight
-
Posts
5,247 -
Joined
-
Last visited
Content Type
Profiles
Forums
Events
Blogs
Gallery
Store
Everything posted by Dwight
-

Dog Collars-- Feeling like I need help!
Dwight replied to KarissaTepp's topic in Leatherwork Conversation
I was tasked with a special problem with two Boston bull dogs. Each one would tug at the other one's braided cloth shock collar, . . . until it fell off. Then the other dog would get his off, . . . and the pups would flee the yard for squirrels, frogging, mud running, . . . whatever. I made two new collars, . . . 8 oz veggie tan, . . . two layers, . . . sewn together like a cowboy belt, . . . Feibings stain, . . . Resolene finish, . . . and I have not had one bad comment from the owners, . . . That was a couple years ago, . . . I consider it a total success, . . . but just my situation, . . . YMMV. May God bless, Dwight -
Johnsons paste wax and mop n glo experiments.
Dwight replied to Ledbeter36's topic in Getting Started
Occasionally I will use shoe polish, . . . but as an old Navy man, . . . Kiwi is the only shoe polish that comes in my front door. I have tried mop & glo, . . . prefer Resolene, . . . mainly because it is the only product out there that has a sun shield in it. I'm doing a few different things now, . . . and I just may step across the line to mop & glo, . . . will pass it on if I do. All my finishes are either dip and drip or brushed on, . . . and I want to experiment some this summer with spray finishes. Also want to look at two tone finishes you can get with spraying on the dye, . . . gonna do some "playing" so to speak. May God bless, Dwight -
When you wet form
Dwight replied to Ledbeter36's topic in Gun Holsters, Rifle Slings and Knife Sheathes
Supercub hit all the points I would have mentioned. I do have a couple patterns, but for the most part, your way is the way I do it as well for most pancake holsters. May God bless, Dwight -
Western Stitched pattern belt
Dwight replied to KY23's topic in Purses, Wallets, Belts and Miscellaneous Pocket Items
I'll do it for $62,500.00 (the price of the new Ford Quadcab I would like to have) May God bless, Dwight -
Ray, . . . please don't be a stranger here, . . . you may not be "creating" anything on the production table, . . . but your vault of expertise can be profoundly useful here to many of us. I'm actually looking at the same situation in a year, . . . maybe 2, . . . maybe 3, . . . but for sure within the next 5. Seems like every project took so much longer than the one before it did, . . . and my arms aren't quite long enough to get stuff out there where I can see it anymore Take care, . . . may God bless, Dwight
-
Snap-on Holster loops
Dwight replied to steelhawk's topic in Gun Holsters, Rifle Slings and Knife Sheathes
What I do is roll them around a small steel dowel, . . . do that a couple times, . . . they will loosen right up. May God bless, Dwight -
Opinions Wanted On 1911 Western Holster
Dwight replied to Boriqua's topic in Gun Holsters, Rifle Slings and Knife Sheathes
No "slight" intended SooperJake, . . . I owned an XD double stack, . . . carried it for a while, . . . and I'm sorry, . . . but I just could not get past the Glock look and Glock feel of it. Honestly, I never got to the point where "I" trusted it, . . . no doubt everyone else in the county did, . . . I just could not. Finally got a chance to trade it up and up for an ATI, all steel commander, . . . grabbed it while I could, . . . never looked back. I would love to see one disassembled, . . . see what makes the thing tick, . . . never had the time or inclination to do that with mine while I had it. A 1911, I have never taken one apart blindfolded, . . . but I'm thinking I could almost do it. I have taken it down to a pile of pieces, . . . the only parts still together were the sights still on the slide, as I recall. I wouldn't do that to an XD. But then again, . . . lots of people trust them, . . . and their trust is verified by their safety record. Can't even come close to saying that for Glocks. May God bless, Dwight -
I have kind of shied away from making a lot of pancake holsters, simply because I've seen some worn that I wouldn't put my worst enemy's gun in, . . . they were all loose, floppy and more like a flannel bag than a leather holster. I tried Katsass' method of making them, . . . and I've become an enthusiast at least, . . . and in all probability, . . . a convertee. "THANK YOU", Mike. It is not readily apparent, but the holster is 4 pieces of leather: front and back each made of two bonded pieces of veggie tan. I think it could be marketed as the 11th round, . . . 8+1 coming from the 1911, . . . the 1911 itself being the 10th round, . . . and the holster, removed from the belt, could be the 11th round down range. Certainly if a guy was hit up beside the head with this at any speed at all, . . . it would certainly get his attention. I was also surprized at how well this process takes to the molding detail. I kinda figured it would not do well, . . . pleasantly surprised that it molds very well. This is for a full size 1911 that has a rail on it. Anyway, sorry the picture is not of better quality, but all black holsters don't photograph really well. May God bless, Dwight

-
New guy trying new things
Dwight replied to Christopher's topic in Gun Holsters, Rifle Slings and Knife Sheathes
Here is a sample of what I was talking about. The right side is sewn down, . . . the whole thing submerged, . . . gun outline made (Beretta 9mm in this case). After it dries, . . . finish gluing it together, . . . gouge, stitch and be on your way. It also allows you to use a bit bigger piece of leather, . . . and you can then mold it to the weapon, . . . especially if you do not have a pattern for that exact model. In this case I'm using a 1911 pattern back, . . . and a slightly enlarged front, . . . to do the Beretta, . . . and my "lucky guess" as to how much bigger to make it came out pretty good this time. They don't always May God bless, Dwight
-
New guy trying new things
Dwight replied to Christopher's topic in Gun Holsters, Rifle Slings and Knife Sheathes
I tried the game of having patterns so perfected that I could plot the stitch lines, . . . sew everything flat, . . . wet & mold later, . . . etc. Personally, . . . I did not like it. Much prefer to get one side of the holster stitched down like it needs to be, . . . wet & mold, . . . dry, . . . do the stitching on the second side. I also lightly gouge for stitch lines, . . . mainly to give these 71 year old eyes a target to put the stitches in. AND, yes, . . . they are also flat, . . . less chance of wearing and abrading through. I only mention these techniques as "the way I do it" and it is not necessarily "THE BEST" way for everyone, . . . but it makes my shop hum and be productive. Trying different approaches will sometimes create a nice pile of beautiful scrap leather, . . . but it will also give one foresight on what can and cannot be done that way. May God bless, Dwight -
No, . . . believe me, . . . this is a "one of a kind" weapon. They sell for less than $200 new, . . . if that gives you any idea. Personally, . . . would not own one unless I had to. Google "image hi point 9mm" and double click on "more images". It'll give you an idea of what you're dealing with. Plus, . . . there are several different versions of the 9mm if I'm not mistaken, . . . you would need to know exactly which one. It's kind of akin to saying you are making a holster for a Glock 9mm. Which one??????? May God bless, Dwight
-
Unfortunately, . . . you will be making a Lincoln to haul pigs in. Hi-Point firearms are notoriously heavy and unweildy beasts, . . . make sure you use at least 8 oz leather on that thing, . . . and put some kind of retention strap on it. I personally have never been asked to make one, . . . and from my personal experience with one of them, . . . it's just as well. Last time I held one, . . . my finger had been clear of the trigger for a good 10 seconds when it finally decided it wanted to go boom. Depending on how good you are at woodwork, . . . you may be able to cobble up a dummy gun from wood that will suffice. I've done that in a pinch a few times. May God bless, Dwight
-
Heck, . . . I like it, . . . Now if that had a USN insignia in the middle.............. Seriously, DD04, . . . you could probably sell those at a local fair faster than you could think of making them, . . . course, . . . depending on price. My big old case goes to the left side of my billfold if I carry it, . . . learned that over in RVN, . . . Anyway, . . . welcome to the forum, . . . glad to have you here, . . . pull up an ammo crate and have fun. May God bless, Dwight
-
Belt Leather Cracking At Buckle Fold - How To Eliminate It?
Dwight replied to CustomDoug's topic in How Do I Do That?
I've never done it, . . . but I have heard of folks using mink oil as their final finish, . . . Can't be all bad, . . . I mean, heck, a couple hundred years ago, what were your options: mink oil, bear grease, tallow, beeswax, olive oil, . . . many items were used then that we have developed replacements for now. Give it a whirl, . . . worst thing that will happen will be like some of my "experiments", . . . off to the "didn't work out" box. It's getting pretty full May God bless, Dwight -
Belt Leather Cracking At Buckle Fold - How To Eliminate It?
Dwight replied to CustomDoug's topic in How Do I Do That?
Mike516, yes you are right, . . . the only thing that goes onto my belts after the resolene, is the dust that gathers hanging in the closet........lol. My outside piece on a lined belt stays flat for stamping, sewing, tooling, and all that stuff. Then when all that is done, . . . it gets dyed. When that is dry (and I mean DRY................), . . . I'll actually flex it a bit in my hand, . . . nothing serious, . . . just roll it enough so if I lay it on its edge on a table, it will stay standing up, . . . maybe a 40 inch circle???? Then comes the Resolene process, . . . with a 1 inch pig hair bristle brush (them cheap little rascals at harbor freight, . . . I get em when on sale). I give it a good coat on the inside, . . . going back and forth, . . . brushing out all the bubbles. That includes the buckle end, . . . I usually do it last. I then flip the belt over, . . . give it a real good coat up at the buckle end, . . . and this is when I do my bending, . . . and I do it kinda of slowly, . . . making a really good bend, . . . usually with a small wooden dowel where the buckle would be. I then complete the Resolene treatment to the rest of the belt, . . . come back up and touch up the buckle end, . . . lay it on the top edge on a piece of cardboard for about 15 minutes, . . . flip it to the other edge and allow it to fully and finally dry. Tomorrow, when it is fully dry, . . . I'll take it to my electric burnisher (think 1 hp electric motor with burnishing wooden tool on the shaft), . . . i burnish the edges, . . . put on the buckle and belt keeper with 2 chicago screws, . . . it's done. Seriously, I have never had a problem since I started it this way. May God bless, Dwight -
Welcome to the forum, . . . glad to have you aboard. May God bless, Dwight
-
Belt Leather Cracking At Buckle Fold - How To Eliminate It?
Dwight replied to CustomDoug's topic in How Do I Do That?
Like you, . . . most of my belts are also lined. I have a special cutter that puts the two pieces together up at the buckle end. Just one of those "process steps" that we all get into, . . . I found that the Resolene dampens the leather plenty enough for me to make that bend without any cracking and so I've just "done it that way" so to speak. I also had a problem one time with snaps, . . . quit using them, . . . all my belts go out now with Chicago screws. I put one in front of the keeper and one behind it. No complaints so far, . . . and I usually don't have to skive, because my lining leather is almost every time, from the same hide. I cut two pieces, . . . take the better looking one for the outside, the other one goes to the inside. May God bless, Dwight -
As well, . . . the "recent posts" is a blank screen, . . . "No new posts available" or something to that effect. May God bless, Dwight
-
Let me jump in here a second, . . . just wanted to say YES, . . . I like the new format. Much faster, . . . "looks" cleaner, . . . May God bless, Dwight
-
Belt Leather Cracking At Buckle Fold - How To Eliminate It?
Dwight replied to CustomDoug's topic in How Do I Do That?
The vast majority of belts I make are final coated in Resolene, . . . when I get to the buckle end, . . . I coat both sides with Resolene, . . . then I make my bend, . . . fold it over real good and tight, . . . then smooth out the Resolene finish, . . . hang it up to dry. I busted one of the prettiest belts I ever made before I learned this trick, . . . have not had ONE problem since I started doing it this way. No, I do not skive the ends of my belts, . . . 95% of the time. Only occasionally for special effects will I do that. May God bless, Dwgiht -
You can tell them for me (and I would suppose, a LARGE majority of the folks on here) that they should stick to running the cash register, . . . they obviously do not know much about leather or leather working. I have used Resolene for a number of years, . . . it works first time, . . . every time, . . . does a great job on my belts, and holsters, and knife sheaths, and gun bags, and purses, and billfolds, . . . and I probably missed a few things. Yes, . . . it does take a bit of getting used to as far as using it correctly, . . . but once you catch on, . . . there is nothing out there in it's league, . . . everything else is on a lower ladder rung. I normally brush it on with a 1 inch pig hair bristle brush, . . . but I have sponged it on, . . . air brushed it, . . . and dipped it. They're retail counter people, . . . would probably cry if they had to try to work for a living. May God bless, Dwight
-
How Much Leather Will I Need To Make Chaps
Dwight replied to BarrelPony's topic in Clothing, Jackets, Vests and Chaps
That's a good one too............. Thanks, may God bless, Dwight -
How Much Leather Will I Need To Make Chaps
Dwight replied to BarrelPony's topic in Clothing, Jackets, Vests and Chaps
Hey, BondoBob, . . . thanks pal for the picture of the little lady in the pink. Haven't been feeling all the way up to par, . . . needed something to bust the monotony, . . . erase the fog, . . . y'know. THAT picture did it. Seeing the smile on her face, . . . ribbon in her hand, . . . and that beautiful piece of horseflesh she is riding, . . . just made my day. Again, thanks for posting, . . . May God bless, Dwight -
^^^^ Good looking stuff Big Sioux.......... May God bless, Dwight
-
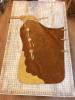
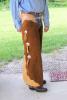
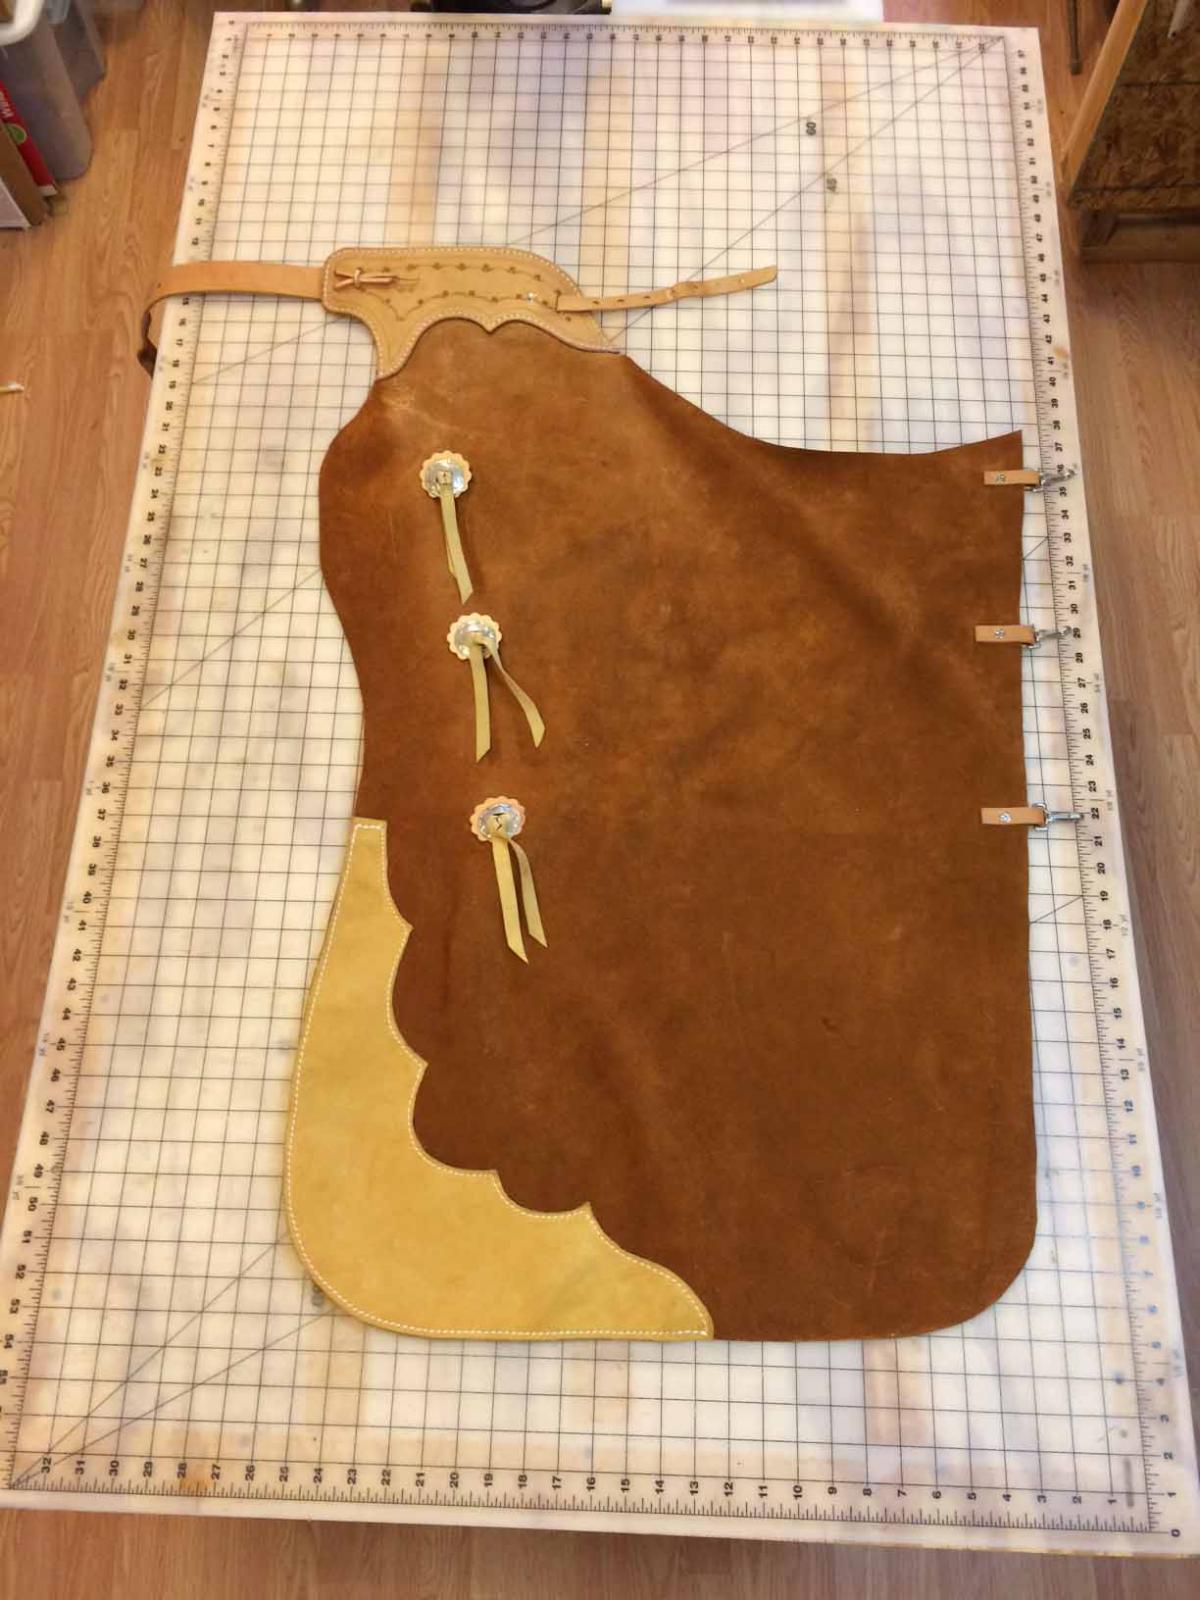
How Much Leather Will I Need To Make Chaps
Dwight replied to BarrelPony's topic in Clothing, Jackets, Vests and Chaps
I know this is not the style you wanted, . . . but just to give you an idea of what you need, . . . and a way to think about it. I made these a couple of years ago for a parade, . . . made them from suede leather, . . . if you can read the legend on the cutting table, . . . you'll see that the main piece needed to be 29 inches wide, . . . and just about 32 long. These chaps were for me, . . . I'm 6' 2". And of course, I made the pattern in the vinyl first, . . . May God bless, Dwight