-
Posts
1,653 -
Joined
-
Last visited
Content Type
Profiles
Forums
Events
Blogs
Gallery
Store
Everything posted by alpha2
-
I know. I'm awfully hard on myself. Or so says my trophy wife! It's just that my last holster was so much better, I feel like I'm backsliding bigtime. But like I said, I learned a lot! So it was a roaring success.
-
I so wanted to go, for the instructional seminars. Not this year though. Maybe next year after I retire.
-
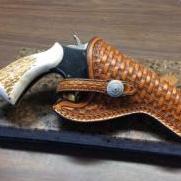
Well, here's my first attempt at a pancake holster from one of JLS' patterns. A lot of learnin' went into this one! If I do another with the reinforcement, I'll skive it down or use thinner leather. And, I won't forget to edge finish the reinforcement panel before I stitch it to the front. And I'll use thinner thread. And I'll use better leather. And I'll clean the leather before I stain it. And I'll move the slot stitching out a bit more, as my plan is to use a thick gunbelt I'm just finishing up right now, and the slots could be a it wider. And I won't pull out a lot of the antiqueing with the first coat of finish on the reinforcement. But, hey! The pattern worked just fine! Thanks!!! Jeff
-

How Many of You Have Had This Problem?
alpha2 replied to Sheilajeanne's topic in Leatherwork Conversation
It's all about "focus"! -
Also, try pulling the thread down, and inserting the needle at the top of the hole, or pull thread up and insert second needle at bottom of hole...while pulling thread back through hole a bit during insertion, as mentioned above.
-
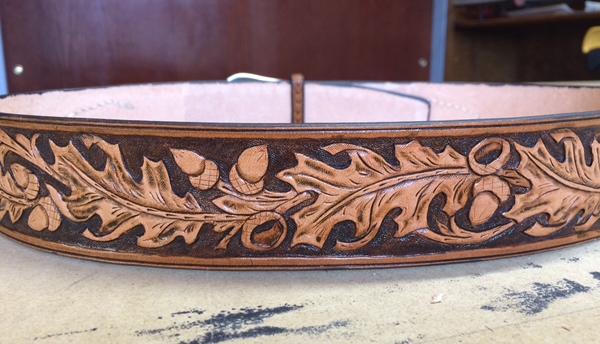
Try "antiquing" for more defined end results. You don't need antique past or liquid, just use Hi-lite stain, cut 50/50 with water if you like, it settles in to the impressions and the excess is removed immediately with a damp paper towel wrapped around something flat so it doesn't get into the tooled areas, just skims the stain off the surface. Go to YouTube for some videos on the subject. It will color all the leather some, so be sure you've done a sample on scrap! Here's an example of the effect it has on tooling. Also, make sure you are properly casing the leather, and be somewhat aggressive with the tooling. Shallower impressions tend to fade with dyeing and such.
-
3 of the four sides are great, but you need to "lean" the camo tool when it will not quite get to an edge. The Camo tool will blend with that lower edge and it will all appear the same. Practice on some scrap first, of course. The interior is fantastic! BTW, what basketweave tool was that for the body? I like it.
-
That tool is not an option if your stitching isn't all on an edge. Like the pancake holster I did today for my 1911.
-
The Tandy rounds stretch a bit when stamping or carving. I don't know how thick the Springfield rounds are. I didn't back mine, they turned out alright for practice rounds. They did turn out just a bit "concave" after stamping. I don't think I'd go to the extra effort of backing for practice pieces. Actual work that thickness would benefit from backing though.
-
That's a heck of a start, can't wait to see what you come up with next!
-
I watched that video yesterday, sharpened my awl per his advice, and did some stitching today. Wow, good advice. HUGE improvement, glided through the leather. I don't think I could have put a 9mm bullet through the leather before. Hmmm, should've tried, could have been a good video!
-
I feel your pain. I had my first attempt at a holster split one of the loops, and I actually added some extra room because I didn't think the dimension allowed enough room. (Al Stohlman book). There has to be a more accurate and dependable guide out there. As for me, I'll just add what I think is reasonable, screw the books. I also just completed a Ranger style belt, and I thought "I wonder if they allowed for the additional thickness of a Ranger belt to this dimension." Well, I was right, they didn't, and I had to "unstitch" the billet end and re-make it. Lesson learned. Apparently I'm pretty sharp for a newb! Good luck with your search for an answer.
-
If you would do one without nasty metal "music" and someone's hand in front of the important of the video, there are actually a LOT of people waiting for your video. I know I am. Frankly, though, I don't know where you get the time for all of this. It's a stretch for me to put in the time that I do, until December...retirement...AND I GET MY LIFE BACK!
-
It's under their special edition belts page. Made for them in Paris. Sounds expensive.
-
That's an interesting buckle, can't wait for more info!
-
You can't really say "from the loop", as the loops are in different placed on different pants. Is that the loop you were referring to? On my Wranglers, there always seems to be a loop right where the keeper ends up.
-
I did my first tapered belt from plans in Al Stolmans (sp)? belts galore book. I wasn't pleased with the results. The billet end was fine, but the buckle end needed to to be tapered further from the buckle, in my opinion. Also, his dimensions for a ranger belt I felt didn't take into account the added thickness of the ranger style belt, but I listened to the master, turned out I was right, and I had to re-do the billet attachment to account for, you guessed it, the additional thickness of the ranger style belt. I've found that without a template, getting the starting point and taper absolutely correct is a challenge. In answer to your question, I'd say make up some templates of your own, check out for fit, and then start cutting leather.
-
I've got a piece of 8/9oz that is downright shaggy on the back, I put some 800 grit sandpaper in a sanding block and took a lot of the fur off before I dampened it and took the glass burnisher to it. Now it's at least bearable! Also, if you can spare a bit of thickness, and have a skiver, you can take just the furry layer off. Assuming the piece will fit in the skiver.
-

Tired of soft edge bevelers. Edge holding brand?
alpha2 replied to Tallbald's topic in Leather Tools
Throw away the basic Tandy stuff, get AT LEAST the pro stuff. I'm presently replacing all my basic Tandy stuff with AT LEAST the Pro line stuff. They have a beveled underside to follow the line, and hold an edge for a lot longer. I never pick mine up without stropping it. That helps too. Check out some videos on now to set up a beveler stropping kit. -
I recently moved my shop from the basement to an upstairs room. Huge window, lots of daylight, and in good weather the window is wide open. No comparison. There's no substitute for daylight! I still do gunsmithing and reloading down in the hole, but that's not that much time anymore.
-

Seeking Quality Sponges, or new finish application technique.
alpha2 replied to maritimemoose's topic in How Do I Do That?
Well, I can tell you don't bother with the "synthetic" wool applicators they sell. I'm still looking for the best thing for finish application, it's probably the real wool patches, but I don't have any spare wool laying around, as I don't do saddles. They sell the real stuff at Tandy, but it's pricey for what you get. Now, as far as edge finish, I've recently switched to the Mr. Clean Magic Eraser. Wow, effortless with no runs, hits or errors! I just dab it into the finish, and it wicks up plenty of liquid into the porous sponge, and only releases it evenly without dripping at all. The edge is perfect. I saw it on an Asian youtube channel and if it was anywhere at easy as it looked, it was worth a try. It's even better than it looked.- 10 replies
-
- dye application
- sponges
-
(and 1 more)
Tagged with:
-
I delivered my first collar yesterday, attracted the dog to the back fence, put the collar on, realized I didn't make it quite long enough! I was devastated. Texted the neighbors and told them to check out Willis's new collar, they texted back that they tightened it up two holes and it fits perfect! Apparently, I know more about making collars than fitting them. Also, Willis was fine with his name placement, as he can't see it from where he is anyway.
-
Just an FYI from my personal experience, the Walther PPQ 9 and 40 cal are also the same size and shape gun. But, they did move the mag release on the M2 version, don't know if it changes the "blue gun" fit at all.
-

Tooled .45 LC Rig
alpha2 replied to Josh Ashman's topic in Gun Holsters, Rifle Slings and Knife Sheathes
Mop and glo, I don't think I would have ever guessed that. Thanks! -

Tooled .45 LC Rig
alpha2 replied to Josh Ashman's topic in Gun Holsters, Rifle Slings and Knife Sheathes
Forgive a noob question, but what is "M&G"?


