RockyAussie
-
Posts
3,265 -
Joined
-
Last visited
Content Type
Profiles
Forums
Events
Blogs
Gallery
Everything posted by RockyAussie
-
Thanks again mikesc. The Australian suppliers I've been all over several times and the only 1 that will even talk about 1mm wants 5000 metres. That is a bit to much I'm afraid for me and I was hoping to find a more industry related reseller perhaps. I have found the EVA foam link in Taiwan before and have not as yet tried them. If nobody has any better suggestions I will let you know how I go. Thanks again for your effort and kind Regards Brian
-

Cutting shoulders straight in quicker time
RockyAussie replied to RockyAussie's topic in How Do I Do That?
Hi Floyd, I would be interested myself but the cutting part per shoulder would be only about 30 seconds per sheet if I take out the handling on and off the table and lining up etc. It actually took one of my staff longer to unwrap them and lay them on a table then the cutting part of the job.The beauty of the round knife is that I only needed to polish on a rag wheel with Tripoli twice on this lot. I am always looking for easier and quicker ways but I am dubious whether the rotary knife would work long term wise. I did get a Good improvement on time on the next step today by changing the strap cutters motor pulley from a 2 1/2" up to a 4".This gave a 60% quicker cutting time. . I have also changed the speed setting on the splitter and so far is going well but unfortunately I figga I still got maybe another 3 or so hours there to go. Be a lot better if it wasn't for my main competitor in the belt area.(love these little faces) -
No. Not with a slot. It is best to use a hole that fits a little tightly with the ball. If the leg that the ball is on the end of angles back a fair way they are not to big a problem but if straight, make the hole quite tight.
-
Thanks for the tip mikesc. I've had a quick look and can can't find where Tyvek is used in this aplication. EVA foam is a sort of rubbery foam that has a good memory. If you squeeze it, it springs back a bit like rubber thongs do. Does Tyvek behave like this? The application I want it for is as a supple stiffener and padding inside bags and purses and such.
-
Maybe you will have to try colouring the veg yourself. Just think romaxoma as I have found, the more difficult the things are and the more you find the solutions the better than others you will become. Truly I'm not Putin you on (Sorry I could not help that one)
-
Wow!!! that is one handy site to have with such a well laid out and huge range. Thank you Constabulary. Would you have any clue's as to where I may obtain 1 and 2mm eva (I think) foam as used in bag and purse linings?
-
Cutting shoulders straight in quicker time
RockyAussie replied to RockyAussie's topic in How Do I Do That?
It is a high density polyethylene as shown in following link. Could not spell it like a lot of things so looked it up and found this. http://www.usplastic.com/catalog/item.aspx?itemid=23751&catid=705 I first starting using this type of material years ago when I made shoe orthotics and such. Due to it being thermo mouldable I found it to also be useful in casting outer shells for leather moulding cases and such.Being a slippery type of surface it is great for repetitive work leaving no scratches and marks etc. -
Cutting shoulders straight in quicker time
RockyAussie replied to RockyAussie's topic in How Do I Do That?
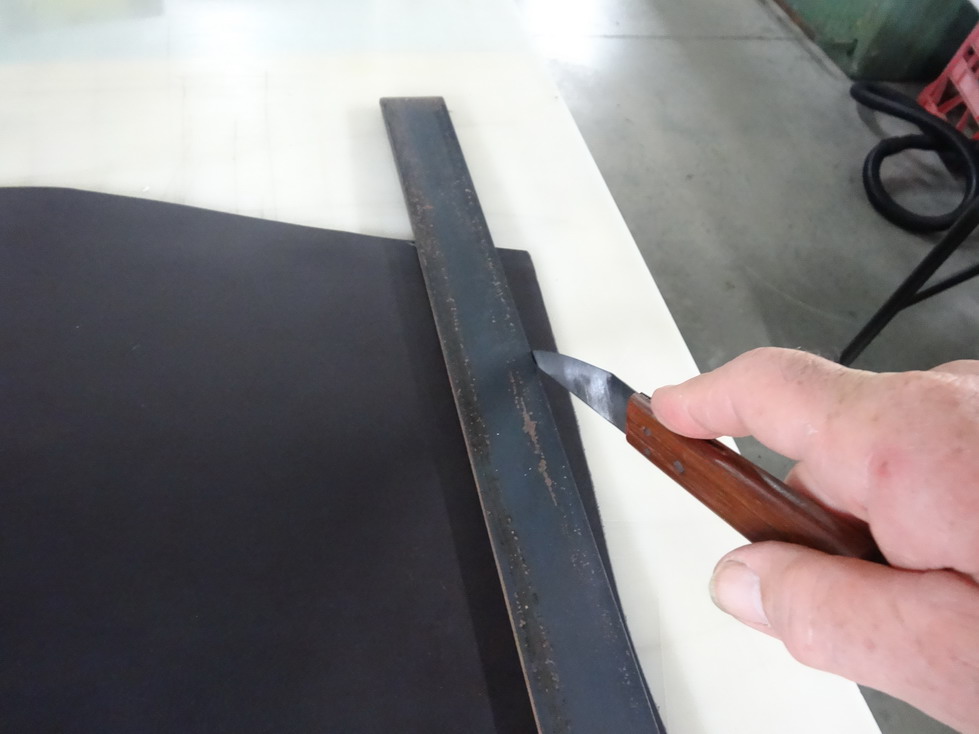
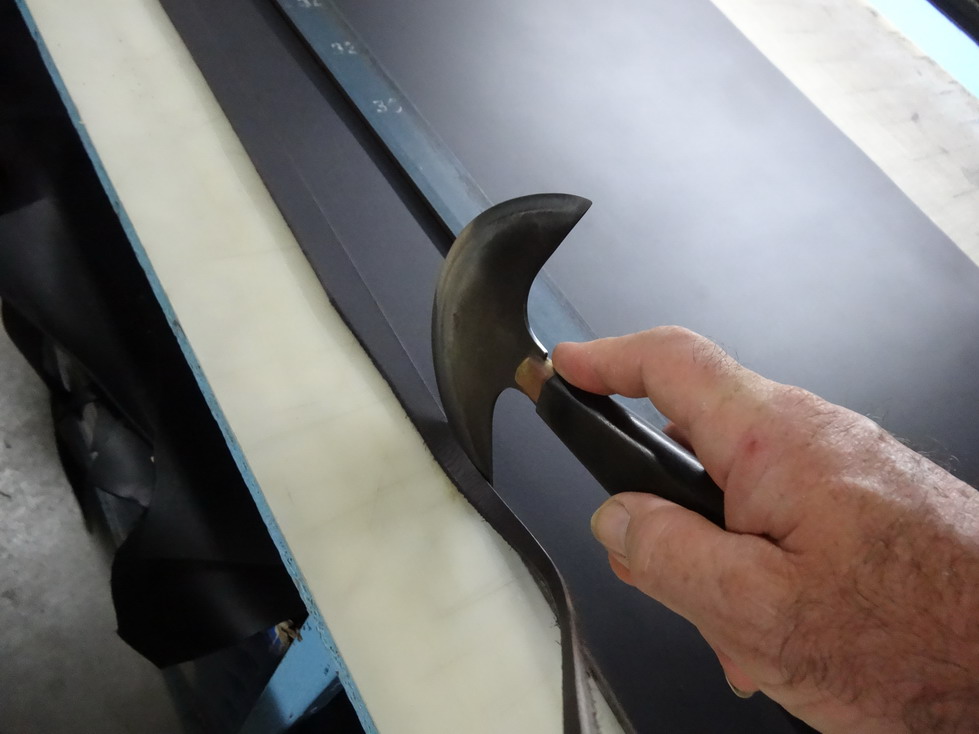
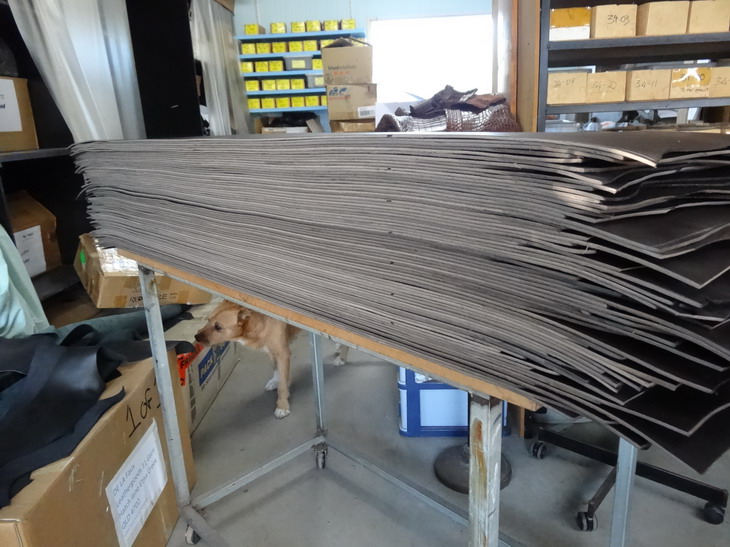
Just a note on that point, previously I used to use the the hand knife you see in the 4th picture and swipe through with 2 or 3 swipes. This took a lot longer and I had to resharpen probably about 8 to 10 times to do this amount. I only needed to polish the tip of it once for this lot and the round knife I polished twice. I barely touch the cutting table at all as once the cut is started I pull the strip up a bit and the knife just slides along the scribe mark. This is NOT mellow leather either. -
Cutting shoulders straight in quicker time
RockyAussie replied to RockyAussie's topic in How Do I Do That?
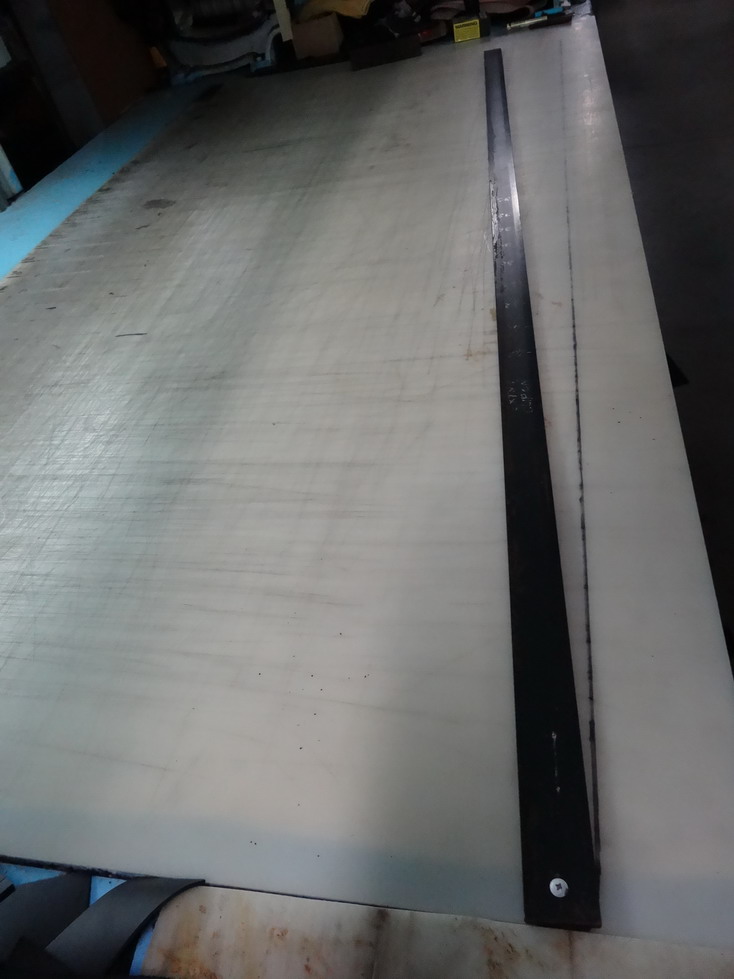
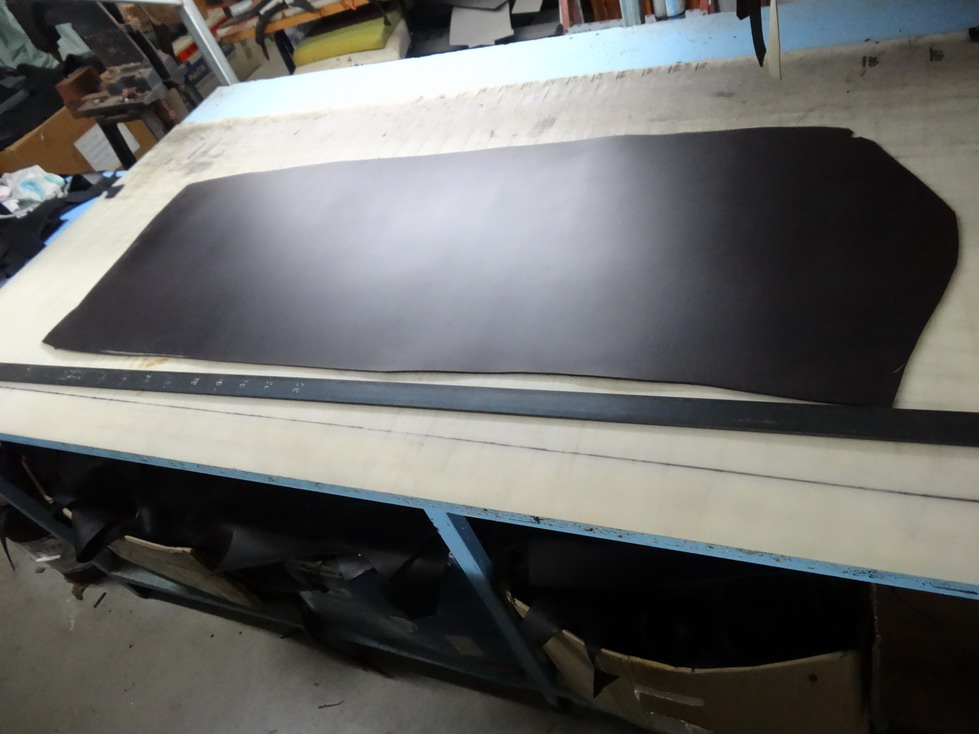
70 more shoulders to straighten up and here is my latest improvement on cutting method. The main change is is that I have secured the straight edge(40mmx5mm flat mild steel) down on one end with a screw with a 1/8" thick bit of leather between the cutting surface and steel.This keeps one end firmly held while I push in my scribe cut. the other advantage is that by putting a Nikko line mark on the table i can quickly see where the leather has to cover and line up to.I often see people asking how to get straight cutting here and something similar may help. Hope the following pics help explain better. Job was easier to do but the time still took nearly 2 hours. Maybe I was just bludging!!!

-
Tricks for CAD (Cardboard Aided Design)
RockyAussie replied to TinkerTailor's topic in Patterns and Templates
Whatever thickness you want the leather to be in making a book cover or a purse a wallet or a handbag, you cut a strip of the same leather normally about 20mm or 3/4" wide and longer than needed a fair bit. Use this to surround the object as you would want it to sit and mark it then measure.The object is, that by using the same leather it will be the right thickness on the curves and what is near impossible to get in Auto Cad, it will stretch to length close to the right amount. In time if you use the same type and thickness of material a lot you can just put on more permanent ruler measurements. -
You got my vote either way sound good, But I reckon he'd miss all the fun here tooo much
-
Second thought.... if we git ta pick, let's git a gurl Are you for real???? No Way!!!!! I'm looking down the all activity column this week saw from one of esteemed (VIP) lady members and all I see is "No". .........I had to resist real hard not ta just respond to that ya know.
-
Hi Roger If your tension is intermittent you will probably find it is a worn presser foot. It allows the shoe or article to lift a bit on the right and therefore the knot shows at the bottom. Unfortunately when I last looked for a new one the cost was over $400 Aus. If you find any at a better price please let me know. Regards Brian
-
Yes I agree Tom, often when you would like to help, knowing where a person is at, State or at least Country could make the advice a bit more relevant. I was discussing a splitter/skiver machine the other day and had a look online and there in Miami I see a Fortuna style skiver for $850. I thought that was worth mentioning but probably not if you live in Africa or Australia or............ Here for anyone anyway is the link http://www.miamisewing.com/specials/special machines.htm Regards Brian
-
belts belts and more belts
RockyAussie replied to Wedgetail's topic in Purses, Wallets, Belts and Miscellaneous Pocket Items
Just a note on the keepers. The smokey look looks OK when new but in my experience it is a paint type finish that does not hold up well against scratching. A proper brushed nickel finish holds up way better. Wedgetail I f your up this way I have a lot of buckles and keepers in this finish that I will not use and you can have if you want. They cost a bit more but check out Harry at Mr Buckleshttp://www.mrbuckles.com.au/index.html If the quantity is a problem let me know. Oh for that thickness leather the holes are fine in my opinion. -
OK . Unless anyone has something better to offer up what I would suggest is get some either spirit dye or raven oil and try a small patch first. If not good take another sample and soak and wash in hot water with a little detergent. Let this go near to dry then soak in the dye if your happy for a full dye cover. Take out and let dry fully then wipe the face and most likely dye again. If this works for you make sure you cut out your working pieces oversize a bit. What country are you in? It may be possible to send me a little swatch.
-
There are a few ways to colour it possibly. When you say you cant dye it what Happens?What dye are you trying to use? Will water soak in to the top grain side at all? Does it have a greasy or extra slippery feel? Will it take up black dye and is that an option?Make sure the wrinkles go in the same direction as the length of the knife.
-
Another tip, the cotton bud plastic is something I've used in my watch bands for the pin to go into. They are easy to cut with a sharp knife. For edge coating I use a bit of 3/8" green sponge foam cut to shape at the tip and a stainless egg cup. A belt length with practice will take about 20 seconds with practice.

-
Sacrilege!!!! how many bikes cost less than a Grand(that are worth having)? You can use the bell knife skiver to split with as well by doing several passes and a lot of fancy shaping as well if look into it. Other than a good sewing machine (cylinder) this would be my next most important purchase. Its not like a lot of tools where you are not likely to get your money back either.
-
Like Tinker Tailor said. I would not even try this with just moulded Veg as a beginner and I doubt you would get something along that line of snap on attachment to work for any length of time by even the best people here. I would like to be proved wrong.I have heat and vacuum moulded plastic to achieve something similar and to explain the method in the end would take too long unless you have already a lot of this type of equipment. Best wishes Brian
-
As you described they are pretty much just that. I have had in the past a few types and if all you really want to do is skive mellow veg they are not to bad, but if you ever want to split/skive any soft or thinish stuff your in trouble and taking out the blade to sharpen it sure pysoff pretty quick. Wasting your money on a lot off this stuff I believe and I wish I had gotten at least a Fortuna skiver right from the start and saved a lot of money and agro. Make sure that it has an aspirator (suction device for extracting the waste). 2nd hand generally about 1k or less but new not to bad if you shop around. If that's all to much you wont go too wrong following something along my Multisander adaptation.I hope to do up a new updated version of same this Christmas, and I will post some plans. Tom posted an interesting one last week but the time to do is something to consider if you are paying yourself anything worthwhile.
-
Honest I wasn............well...... read your subject heading!!!!!!What about a nice level vacume table to hold the leather all down flat and an electric wood planer suspended on an adjustable drop down ...........No i reckon your idea should work OK
-
Nuther idea... Get that blade and put in some elongated holes about 3/8" to 1/2" long like in an electric knife and set one end up to attach to an electric jigsaw. I think that could be easier and prolong the need for sharpening a lot but would still have to be taken out for sharpening occasionally. Should we patent this? Ha bugger everyone knows now
-
Well If you got that amount of time on yr hands..... why not get a bandsaw and turn it on its side, nock the teeth off and sharpen it, pully up the hand crank on the wringer. Remember to leave room for a strap folder to feed through the wringer as well. Ha whala. Honest I would do it sept I already got 2 bandknife splitters.
-
Hi AngieSA, I believe I have one of these in storage. The punch section you see is interchangeable with a lot of other different punches. It operates a bit like a sewing machine and you offer the leather up and just sew along punching holes. One I have does brogue holes (1large and 2small holes). You need to get a cardboard tape made about 1mm thick and 12 or 13mm wide I think and feed it under the gaps in the base. This is for the punches to punch into but not right through and it feeds along with the job.The brass coloured thing adjusts the length of gap from memory. If you need some pics or whatever let me know.