


RockyAussie
-
Posts
3,265 -
Joined
-
Last visited
Content Type
Profiles
Forums
Events
Blogs
Gallery
Store
Everything posted by RockyAussie
-

Cowboy 227R left corner tension problem.
RockyAussie replied to RockyAussie's topic in Leather Sewing Machines
Will give that a try and get back to you this afternoon. Thanks for the thought. It seems to have some relationship to lifting the feet when turning as well I think. -
Help needed please. I have a 227R cylinder arm that keeps pulling the knot to the top when i do a left corner. The top tension has the knots close to the bottom mostly except when doing a left corner. Right corners no problem. I have tried swapping from an LR needle to a TRI needle and that helped a bit but not much. I am on size 20 nylon bonded and have tried using a size 22 needle instead of a 23 needle but still only a little better. The back foot is the right side with an open toe center front foot in place. Any ideas what else I may be missing??
-
If it is for indoor use a couple of eyelet holes put into the instep area just above toe sole will allow air to be move in and out as you walk which might be a lot easier option. I do this even on outdoor wear shoes which is only a problem when I step in water. Keeps the shoes from getting smelly as well.
-
Looks good to me. Nice edge work as well.
-
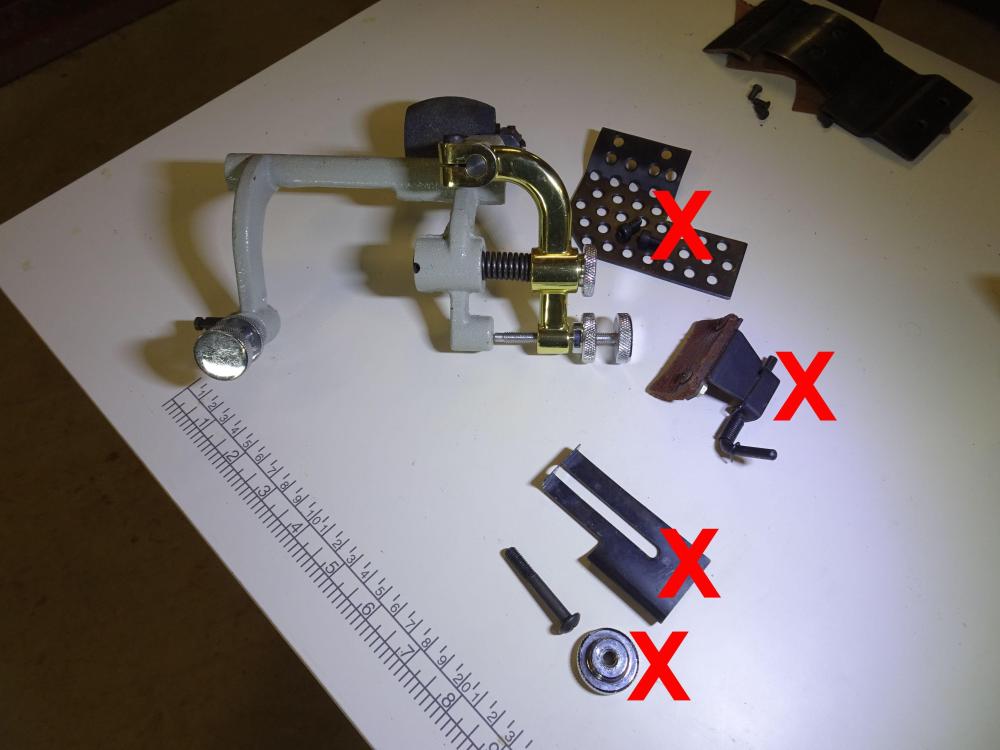
This picture shows all the parts I recommend taking out so as to remove anything that the leather skives can get caught up on. It has been tested well for over a year now with my customer and he reports that it works very well.
-
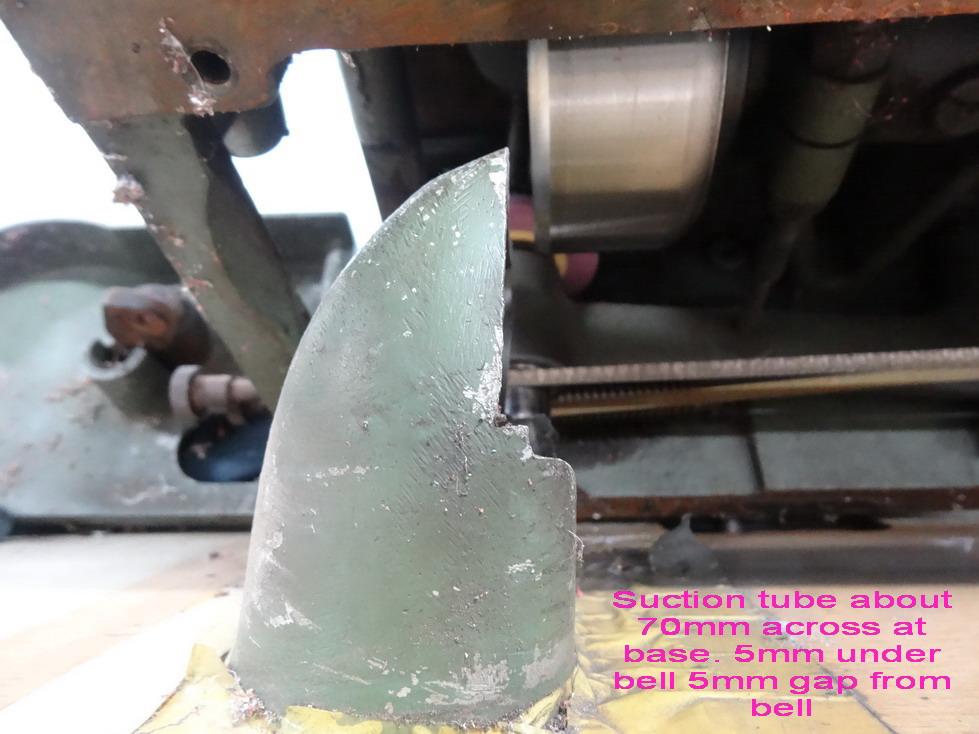
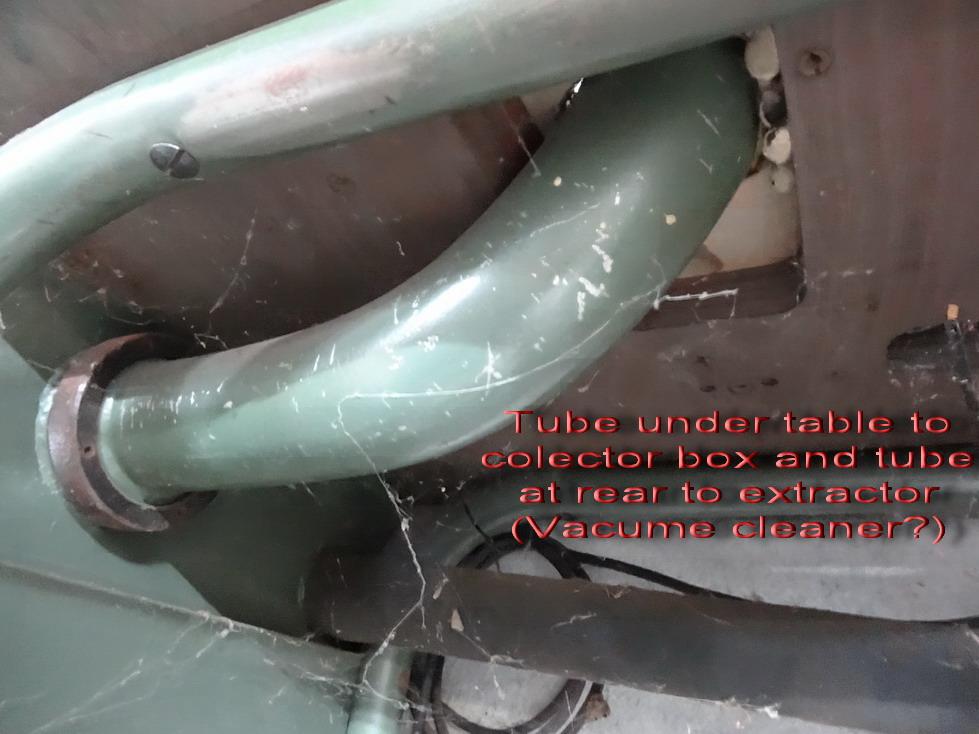
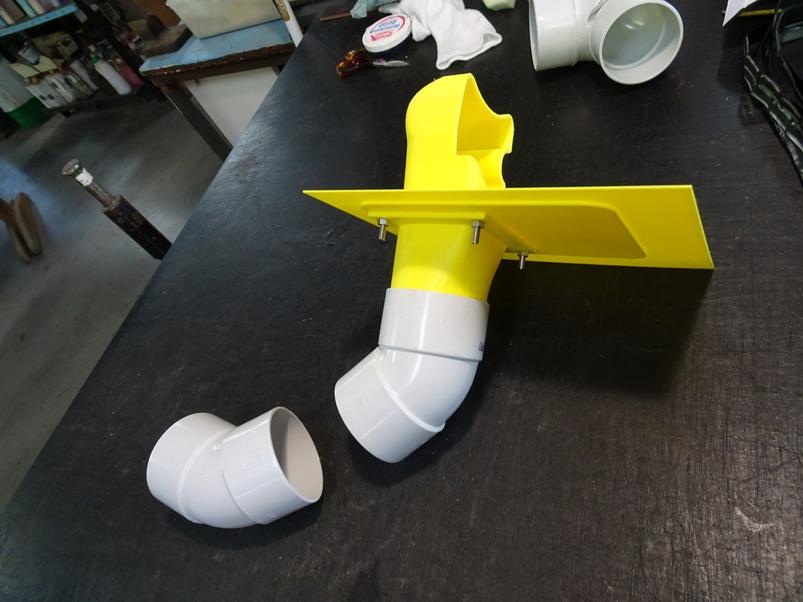
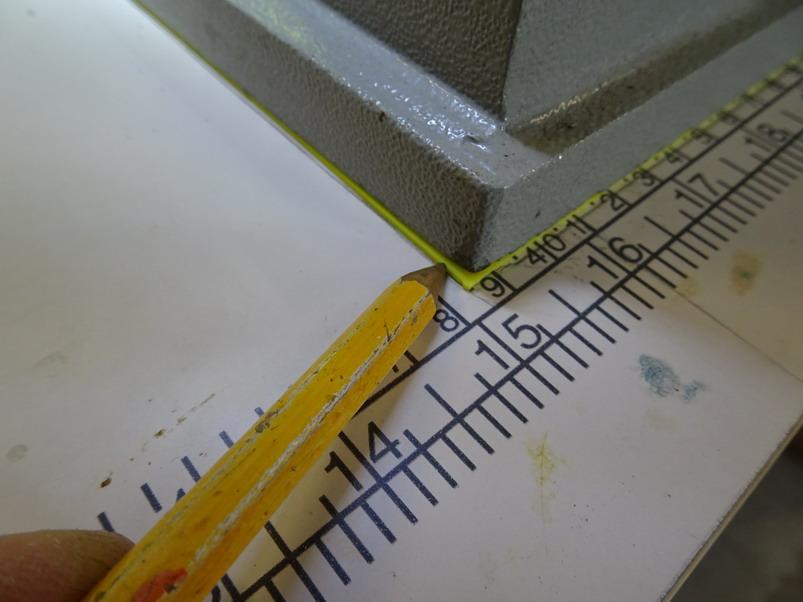
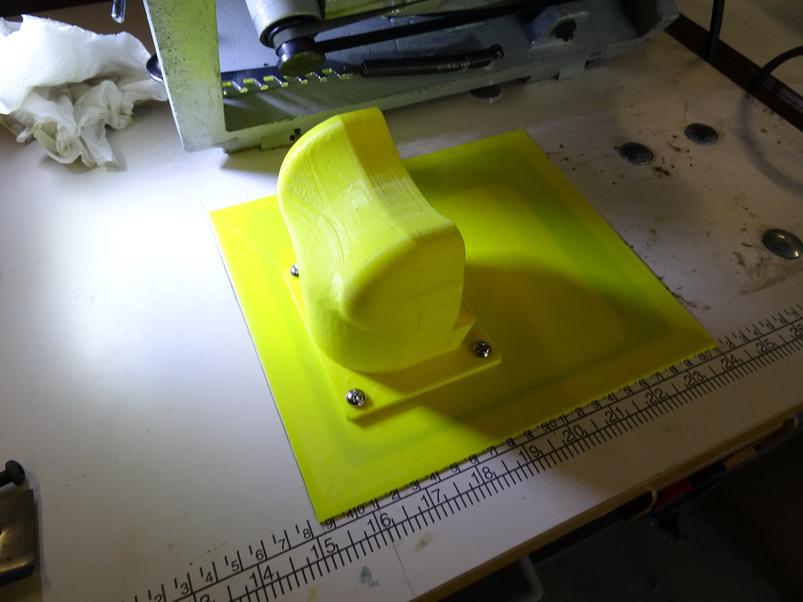
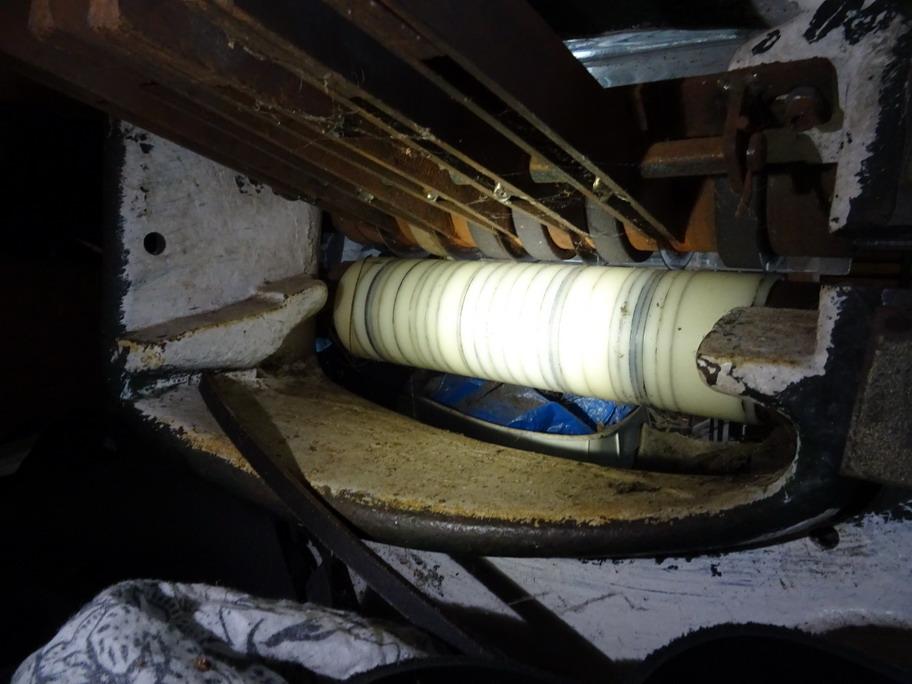
Looks like the vac took one part but left another piece behind. There is some skives of leather still caught up around the feed wiper which is pretty common with the wipers when they are left on. As long as the vacuum is working fine you will find less problems when you remove that wiper I found. On Fortuna and FAV skiving machines they have a bell type funnel that mounts closely to the bell as shown in this next pictures which may be of some help - What I have done for a machine for a customer and one that I have here is to make something similar which adapts easily to the 801 type skivers. You mark the front and side corners to get a line up position then attach the base plate to the table top - This shows the parts which I have designed to connect up to standard 65mm pvc pipe The idea is to run the pipe down with fittings into a collection box such as an esky cooler box for easy of handling and emptying when required. The box has separate fitting to attach to the vacuum. Makes it a lot safer if you sharpen the blade so sparks don't destroy your vacuum cleaner.

-
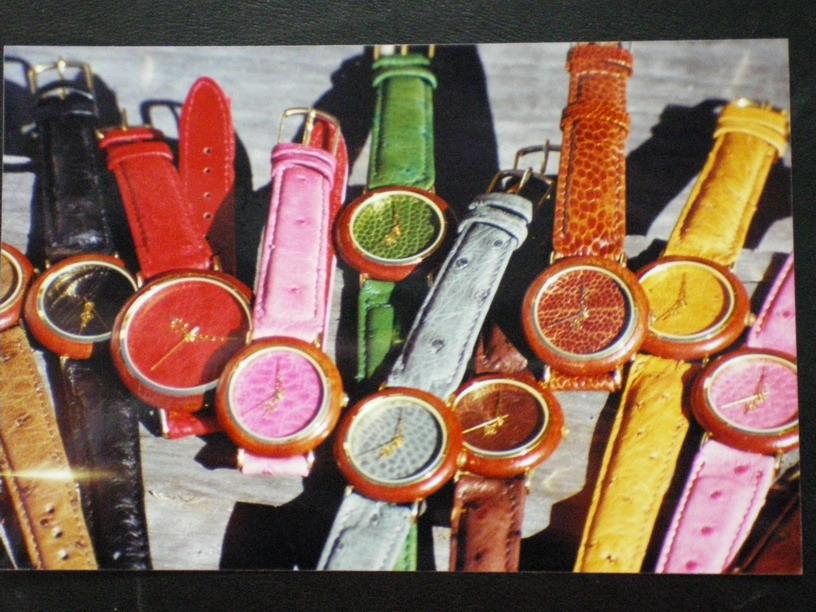
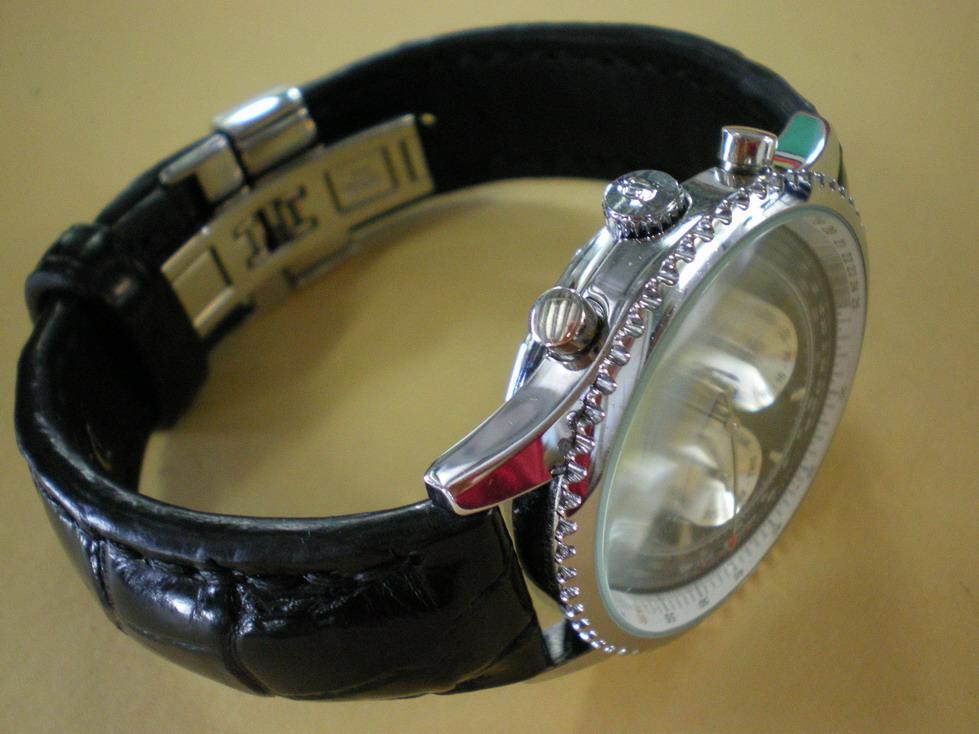
The picture does not show it well perhaps but I would be pretty sure this is made with folded edges over a shaped eva rubber. (EVA can be shaped with heat) I have made plenty of watch straps with folded edges and edge painted edges as well. The folded edges type have the top leather cut wide enough to tuck under a firm veg by about 4 to 5mm. The folded part gets taper skived quite a lot. The tongue tip get trimmed a lot closer to avoid too much bulk at that point. The foam as shown in the picture would be done to the full width of the strap and attached to the veg before the upper leather gets connected. This crappy old picture shows some of the folded strap versions I have made in the past but not with the bulged edges, just the center part. The next picture shows a heavily padded watchband but with edge painted edges.
-
Very nice work there @TomE
-
Sorry to say but I doubt you will get a lot of joy with that. Try just a little metho or isopropyl alcohol and see if that helps to get you through.
-
This pattern looks to me to be done without any folded edges and meant to be done in a veg tan leather. I would be doing it with 2mm veg as shown in the video method. If you do not have a lot of skill including skiving skills I would not be trying to do with the materials you describe above. I would also recommend not using a double cap rivet for the handle in the method shown. If the straps were to go through the top the rivets would be a lot less able to come apart. If you decide to use the peltex anyway do not allow any adhesion on the outer piece that goes over the top as it will cause all sorts of wrinkling. Glue to the inside piece only. I don't think it shows in the video but I would not do any gluing between the dotted lines on the pattern shown as the top cover section except about 6 to 10mm in from the edges.
-
This post I did awhile back may help. I did make the jig in it for going over belts but it could easily be made to go over flat leather as well. Main advantage is that it can be adjusted to whatever stamp size you want and hold firmly in position at the same time.
-
I think you may still have too much hanging down into the area where it will get caught. The other thing I am not sure about is whether the plastic will have enough back weight to stay down firmly. Only testing will show this I guess but be ready for the leather to get caught right at the start. (Its a bitch if it does) Also extra sharp knives help to avoid it but do not always do such a nice cut as semi sharp knives.
-
Although these pics look different they work the same in that they go either side of the blade and held down by the weight. - Note that some fingers sitting in the middle on the wide gaps may be better than putting in foam rubber spacers as I did in this case.


-
No not a waste of time at all. You are definitely on the right track doing as you have. Done right you will not need any washers or spacers at all. You will need to make sure you DO NOT have any of the finger low enough to catch on the leather. Cut the groove for the blade up fairly high to enable easy lifting and moving across when changing size widths. I will load a couple of pics of one of my old ones which should help to confirm you are on the right track asap.
-
COWBOY CB 4500/441 Stitch length increment fix
RockyAussie replied to RockyAussie's topic in Leather Sewing Machines
Good looking end result there @CdK every little bit helps. Magnet attached screw driver rack I assume? -
COWBOY CB 4500/441 Stitch length increment fix
RockyAussie replied to RockyAussie's topic in Leather Sewing Machines
@1hpThat is a nice neat looking job and looks a lot better than my effort. Worth the exercise either way though. I think from memory for every 3mm extra in height you move the knob one click to keep the same stitch length. -
Table Top Questions for Cylinder Arm Machines
RockyAussie replied to kgg's topic in Leather Sewing Machines
Nice looking job there Patrick. -
Cobra class 4: 346 bonded polyester thread? Help!
RockyAussie replied to DieselTech's topic in Leather Sewing Machines
Another point that seems to get missed is the foot presser adjuster has a large funnel shape in it. Guess why? A couple of drops can work wonders in there. Also some times the adjuster is not exactly straight with the shaft so it is worth checking by lifting the feet when doing the adjustment to feel for any binding. Doing the lock nut on it can also make it sit crooked and bind up. -
Cobra class 4: 346 bonded polyester thread? Help!
RockyAussie replied to DieselTech's topic in Leather Sewing Machines
Quite a few changes I would think are needed. First when you do thicker thread it often needs the bobbin backed to be looser. Try at least a 1/4 anticlockwise turn.(remember the lock screw needs to be loosened first) The needle should be size 26 for that thread and the s point or LR should look better than the d or tri points. If the needle is too small for the thread you will be getting flagging a lot more because the knot is having a hard time getting up in too small a hole. Lubricating the thread with some machine oil running through some foam can help as it transfers to the needle and makes it slip through better which includes making it easier to pull the knot up. The foot pressure marks would be better if the back foot were the double one that goes on both sides but the narrow set may not be the best in this application anyway. One tip I will offer is get a sample piece ready of the thickness you are wanting to stitch and keep backing of the foot pressure until the job starts to lift then take it down 2 or 3 turns. If You need to run the left foot only then you could do as I have done and tig weld a wider base to it as shown in the pictures.The wider base reduces marks by a lot.

-
Good thinking on that setup.
-
Table Top Questions for Cylinder Arm Machines
RockyAussie replied to kgg's topic in Leather Sewing Machines
Just checking if you know the dealers here make a stainless steel plate one that is not all that expensive. I could print you up a good one but I doubt it would be much cheaper. -
If you are wanting to do this as a business then this video may help. Skip to about the 5 minute mark to see a machine I have been using for 20+ years with out problems. Because I do a lot in crocodile leather I can not use burnishing methods so the rest of the video is about edge painting. Some wallets I've made can be seen in it.
-
Manual Strap Cutter Machine: Opinions/Recommendations
RockyAussie replied to DieselTech's topic in Leather Machinery
That part of the setup is a bit silly really. If the fingers were made out of something heavier (3mm or 1/8") and with a longer back section they would not need to be spaced and locked in place. The weigh at the back would let the front part ride against the cutter shaft. I have an old machine like that and to change position I just lift the finger forward and move it sideways to where I want it. 5 seconds to change each finger. -
A lot of finishes will make the gold go dull when applied to it. I would get some of the scrap leather and do some gilding on it before doing any the desk top. I suspect the neutral polish would be the safest but good chance you will need to clean the whole top surface first for shine matching.
-
Manual Strap Cutter Machine: Opinions/Recommendations
RockyAussie replied to DieselTech's topic in Leather Machinery
This video I did a little while ago could help you on this - https://youtu.be/Q3cVOtCNjEg?si=xrCJA5Rep8YEl89Y
