


RockyAussie
-
Posts
3,265 -
Joined
-
Last visited
Content Type
Profiles
Forums
Events
Blogs
Gallery
Store
Everything posted by RockyAussie
-
There are several reasons that could cause this problem unfortunately. Sometimes even high quality leathers to start with can age and deteriorate in time and the wrong conditions. Some leather are tanned poorly and if the finishing is not done well it can crack easily. Generally I test a strip of leather before I make it up by bending it over fairly tightly to see how the grain is running and if it looks likely to crack. There are a couple of places over here that sell cheap veg under different names so if you want to give me a call feel welcome to do so through my Wild Harry contact phone Wild Harry Regards Brian
-

Narrow feed dog FLAT Plate for Cowboy CB4500 and Cobra 4
RockyAussie replied to Patrick1's topic in Leather Sewing Machines
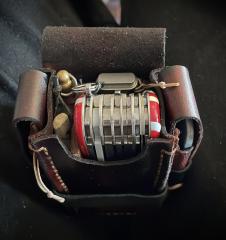
For anyone interested I can vouch that the Narrow presser foot set made by Patric are a very useful addition to have for any of the 441 clones. I have been making and selling molds for wet casting a lot of different pouches which can be seen on my YouTube channel and most of these get stitched using this foot set. You can see on this video where I am using one of Patric's sets stitching up a Leatherman pouch which I have made using the mold I make and sell. -
Nice deep forming and the edge finish looks good as well. Like the formed belt holder part and the one piece pattern.
-
I think @kgg pretty well answered that for me. Possibly if I had the printer he has I would be better off speed wise but either way not having a printer backup leaves me nervous at times. I hate not being able to get people what they pay for as quick as I say. If one of these parts go bang and I am left waiting for a replacement I would not sleep well. So far no body has had to wait more than a week luckily. I have looked a little at the Bambu printer but I as yet nervous about the operating system not being open source exactly. I could do a lot more improvements on the one I have yet and with another new one I may be able to get time to do some of these changes.
-
Looks like you have them set alright which makes me think the snaps are too week. As you already have them installed I would suggest some light tapping around the rim on the side that holds the clip ring. A little resistance there should make it harder to open but too much and you may have trouble getting it closed. Good move
-
Thanks @kgg I am quickly learning over the last couple of months how long parts don't last in a 3d printer. Its a Tronxy x5sa pro and I can get it to do good quality but the power supply fan, the parts cooling fan the extruder bearings amongst a few other parts have all needed replacing in this time. I will have to get another one pretty soon cause people just keep on ordering and I just can not get stock ready ahead let alone keeping up with my normal customer orders.
-
Could you show a picture of how you have installed the snaps? I would have thought that the snaps you show would have had too long a length for that thickness leather and that may be stopping the snaps from fully closing as they should.
-
Sorry to take this long to answer, I have been flat out making 3d casting molds for other makers over here of late. You should have a set soon Michael. I have pm you back.
-
I feel your pain so have pm'd you back. Best regards Brian
-
Bell skiver should be around 1270 RPM
-
I forgot to say there is a screw on the back of the head that may need to be loosened as well. This post link should show a diagram that may help you better -
-
Looks like the center walking foot and needle bar may be both be too far to the left. They are all in one block together and I am sure you can adjust the whole lot a little to the right. Look at the machine head in front of the needle bar and you will see a screw bolt that is slightly slotted and above that in a hole is a locking screw which needs to be undone first. I would take the side cover off and have a good look at the whole lot first. If the needle bar or its clamp were out of line it would show up pretty easy by loosening the needle bar and turning it around while watching the needle.
-
Funny you mention that. I have a freind up the road had his dog sit on the peddle while the machine was still turned on. A nasty mess with timing and all. Always make sure you turn the machine off when you finish I learned. Servo's don't let you know they are running.
-
Hi @kgg , I would suggest dropping out the left leg and try and get something closer to the 3rd pic down on this page.http://www.cowboysew.com/heavy-sewing-machine-stand.htm In this video I did awhile back shows what I think is a good reason to consider it all be it a different machine the same problem exists
-
Pre-Cut Leathers or Full Sides (Or Hides)
RockyAussie replied to TanneryNYC's topic in Marketing and Advertising
@fredk, I have to ask ,why veg tan on steering wheel covers? The heat through a windscreen over here would shrink veg very quickly. -
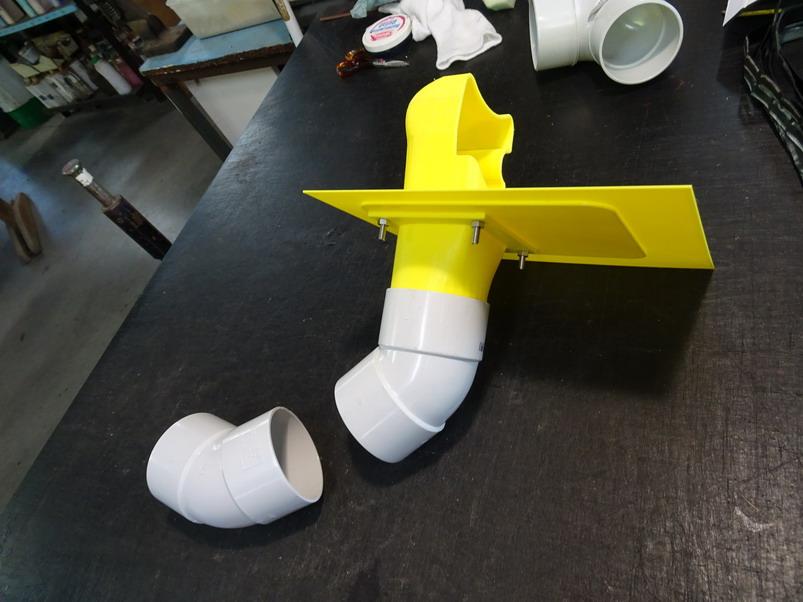
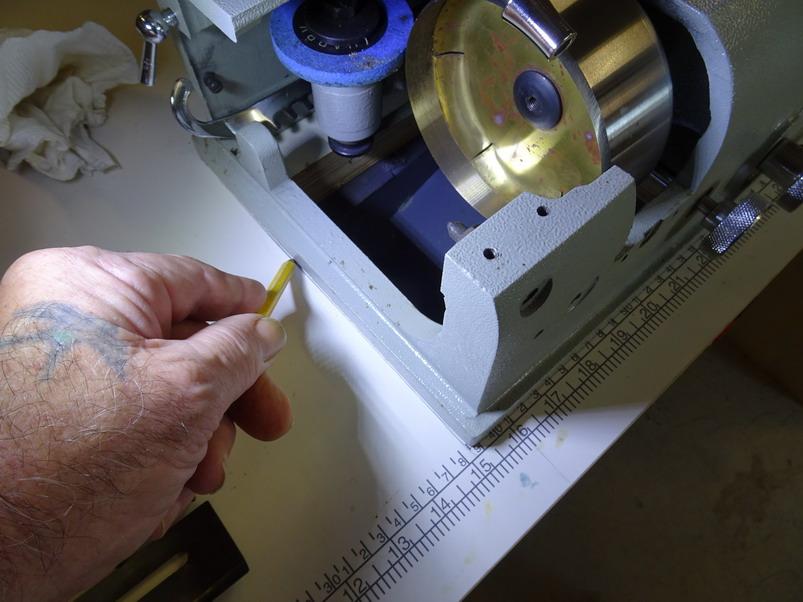
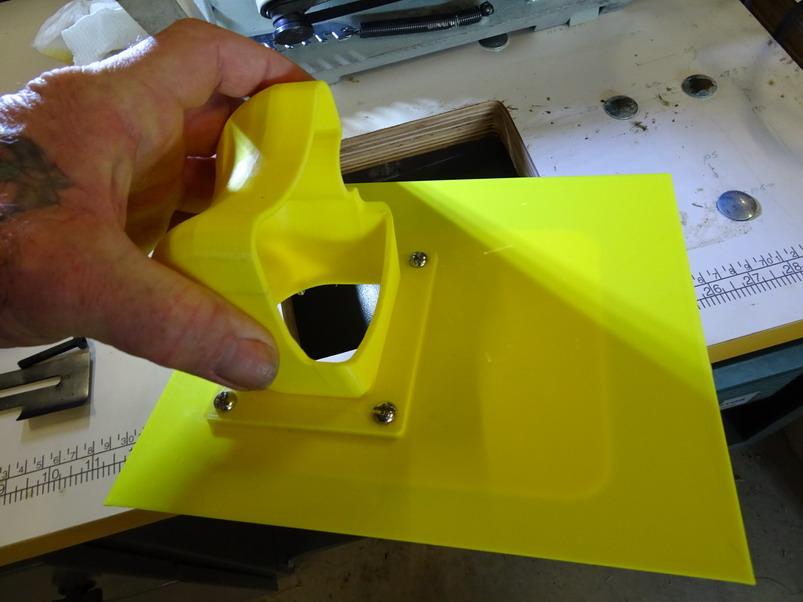
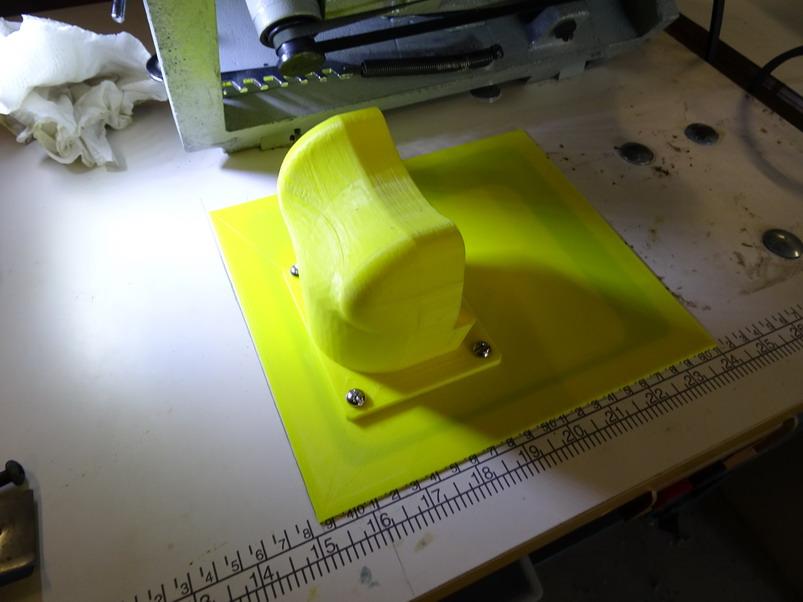
With soft upholstery type leathers you will need to have the spring pressure for the feed roller on the lowest setting. You will need to polish your presser foot shiny enough to see your teeth when smile. Less pressure means the the leather does not so easily roll back as it feeds through into the bell knife edge. A roller foot is a lot better for this in my opinion. The distance of the presser foot to the edge of the bell should be quite close (.3mm) as you can see in this video I made - A separate motor that allows the bell to run continuously at around 1270 rpm also helps as when you are feeding slow the bell is cutting at max efficiency at the same time.You see the separate motor at the front in the video picture above. Last thing is that upholstery type leather loves sticking to the feed stones and wrapping around and wrecking your work. I also always recommend getting a skiver with vacuum extraction for that reason. I am working on a funnel for this at the moment and will load a video showing it in action within a week or 2. Here is a couple of pics of it at the moment - The first one shows where I have designed it to attach to common plumbing fittings to feed into a scrap collection box to which then a vacuum can be also attached to. To set in position you mark the front and side of the machine to give a line up position for the edge of the funnel assembly. I will do a seperate posting of this when I have finished all the testing. So far it is going well.
-
D50C3CD4-32F4-4988-8342-3FE661F05A10.jpeg
RockyAussie commented on TooledByML's gallery image in Gallery- Our Leatherwork
 For some reason when you hit the picture from up in the gallery section it only shows that picture to me. Thankfully I hit the picture from where you commented and that allowed me to see all 15 pictures which sheds a whole different light on the project. If you go to OP profile section and check out his gallery it will also show these and more other fine works as well.
 -
Thanks for the thought mate, I will have a look in the local one when I get in town next.
-
This Paskal mob over this way do some snaps but they dont have much of a colour range. What they do have is different spring pressure settings in the socket section. The stiff ones are very bloody stiff. https://www.paskal.com.au/media/productattach/p/a/paskal_press_studs_specs.pdf
-
Nice and tidy work. Well done
-
Light weight press for making stitching holes quickly
RockyAussie replied to SteveOz's topic in Leather Sewing Machines
Hi @SteveOz, you know I would favour a sewing machine myself but I would have a think about the multiple uses that can made with a cheap drill press. You can get very nice holes with a punch in a drill press and whether it is stitching chisel a little bit of fence building can save you a whole lot of time. The pics below are a setup I use when I want a line of holes spaced evenly apart and nice and quick as well. Notice in the pic below where there is a little peg (3mm aluminum welding rod) which I have inserted into the wood. When I have made a hole it gets located onto the peg and the next hole gets punched. If I want a wider spacing I just move the fence in the vice and that's it. Forgot to say they make great sanders and burnishes and the speed can be changed to suit the job. I will have to take a few shots of my little drill press that I use for a lot of that type of stuff. Regards Brian


-
I don't think those plastic leg extensions are gunna work for me
-
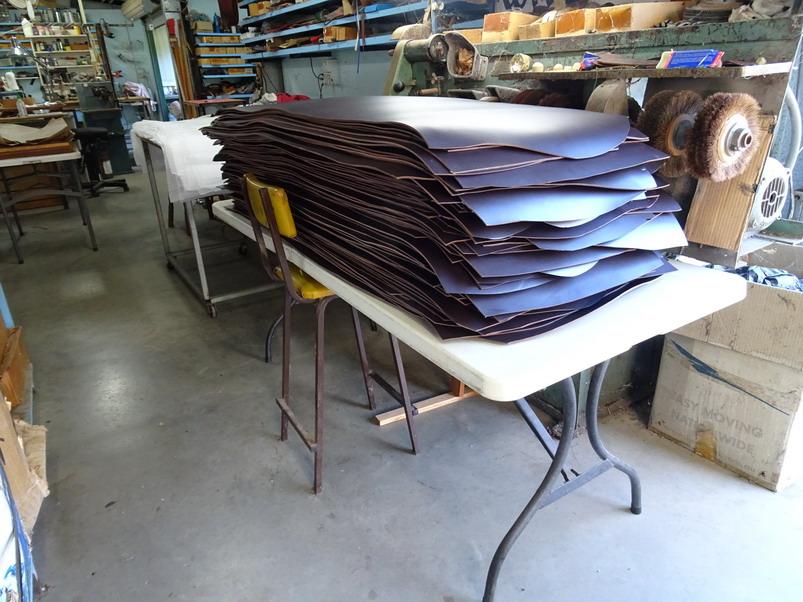
The Albeko splitters have not been made for many years now and are few and far between these days. They do have another feature which is a good idea in that they have a revolving brush that touches the bottom feed roller and that stops any bits from sticking to the roller. I have to split about 1200 belt strips for backing this week so I will do a bit of a video on it to show it in action as I go. This pic shows the pile I have to straighten up to go through the strap cutter today so I probably wont start splitting until Wednesday -

-
I have a Comoga that feeds scrap to the rear and that is a pain but it does have a leather flap at the rear of the tray which I hang down over the edge of a tall large cardboard box which catches all the scrap. There is a sort of blower that feeds up into the front of the shute tray that blows the scrap down and out the back. This needs to be checked occasionally to be sure the blowers intake has not been clogged up with dust and scraps. The box holds a lot of scrap but is a pain in that the machine has to sit enough away from the wall (3')to get the box in and out for emptying. I prefer my old Albeko because the scrap come to the front and slides sideways down into a oil drum that fits under the shute nicely. When I have a LOT of belt lengths to do I can grab them on the run and stack as I go. Saves a lot of time. I have not taken any pictures of these that I can find but the first few secs in this video show the Albeko with its front shute -