


RockyAussie
-
Posts
3,265 -
Joined
-
Last visited
Content Type
Profiles
Forums
Events
Blogs
Gallery
Store
Everything posted by RockyAussie
-

First Purse
RockyAussie replied to Fraulein's topic in Purses, Wallets, Belts and Miscellaneous Pocket Items
I think you have done pretty good on most details. Only thing I can offer is that the D attachment pieces could have been used to cover the side seam join at the top line. I am sure she will treasure it anyways. -
Tall post sewing machine in use
RockyAussie replied to RockyAussie's topic in Leather Sewing Machines
Thanks mate. I only made it for the customer really so I should do a lot better when I do some more that really show its potential. What.....you want two??? I gotta admit I wish I had one years ago. Doing elbow patches and hat patches and jacket patches and so many things better than a patching machine could do. Might even have a go at them holes in my socks that seem to keep happening these days. -
Your needle is in the wrong way around. Turn it 180 degrees and try again. Also an size 18 can often work better with the size 40 thread.
-
Here ya go - https://youtu.be/ncEgTJhOORs
-
This machine would have to be one of the most versatile sewing machines for its price on the market but strangely it is rare to see it in action so here is my bit on using it for now. It does allow for many products to be more simply constructed and it has been a very simple machine to operate and use. As time allows I will try and show some more of its uses on my YouTube channel. Here it is -
-
Inconsistent stitch length Ferdo Pro 2000
RockyAussie replied to jrk65's topic in Leather Sewing Machines
Does this machine not have a needle guide down under the needle plate? I believe that on most other 441 class machines that this part is where a feed dog is normally in place and what @Wizcrafts is suggesting is that you check that this part has not come loose. As for the needle/walking foot timing I have to wonder why it would be right most of the time and not other times. I would first check that the back walking foot lifts smoothly and easily without any catching This pic shows a screw that allows the roller to be tighter or looser to the guide for the back walking foot - and then also that there is no excessive slop in any of the linkages that connect to the front walking foot and needle bar assembly. Make sure that the connecting rod coming off of the cam on the end of upper shaft has not come too loose or worn out. Many many operators do not do a good enough job of lubricating those knuckles on these rods. They do have oil holes in them and most people do NOT oil them. No video or even most manuals show all of the holes that should be oiled on these machines. Simple ...if it turns/revolves it should be oiled.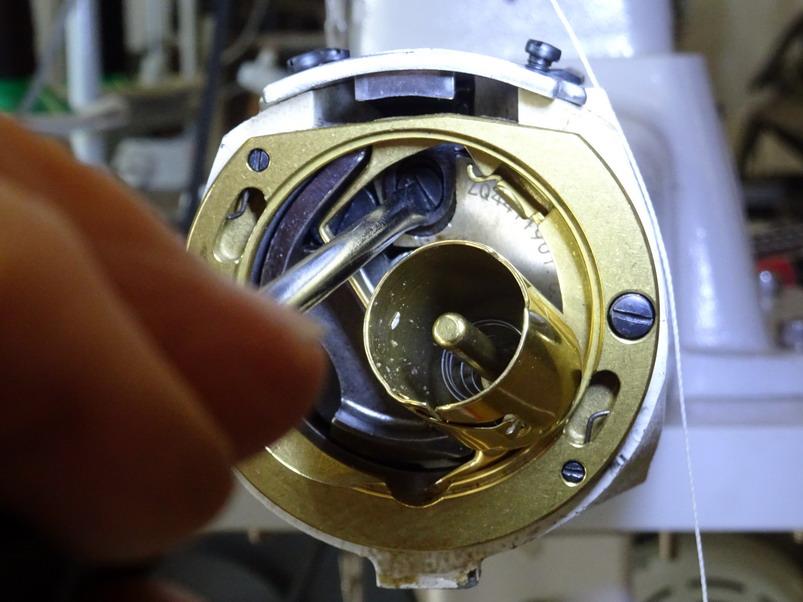
-
Sewing Across Different Thicknesses
RockyAussie replied to SmithLAFD's topic in Leather Sewing Machines
It is not unusual to have to change the top tension on the run. Normally you would have the tension set for doing the thicker part then as you get down to the thinner parts work out if a half a turn or more out is enough to keep the stitching centered. Usually the knots come to the top on the thin stuff so loosening is what has to happen. If the thread is too thick to center into a single layer alright then nothing will help except thinner thread. Another suggestion and just MY opinion ...on the 341 don'. t go over the little post beside the tension discs as nearly all the videos seem to show. Show me where it is done this way in the Juki manual if you like. Thinner threads will file a track in that post and cause you no end of grief when it starts to serrate the thicker threads. -
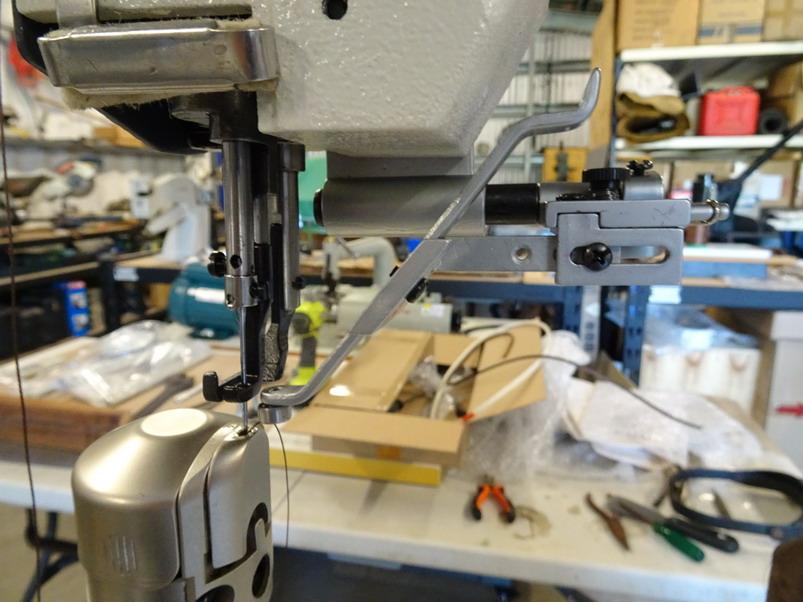
That it is. I have never come across any other machine that can sew that close to the edge of a product. Only problem I have with it is that the needle goes in the other direction (long slot to the right) and so does the thread. Cant think how many times out of habit I have put the thread in from the left instead of the right. Makes stitching tall totes an easy job when you get it right though. . I have done a bit of a crappy video (more crappy that my usual stuff) on a tote bag stitch which I will put up soon only because there is so little to be seen out there on these machines in use.
-
Is that fob attached to the belt keeper? How is this so done? That to me is artistic
-
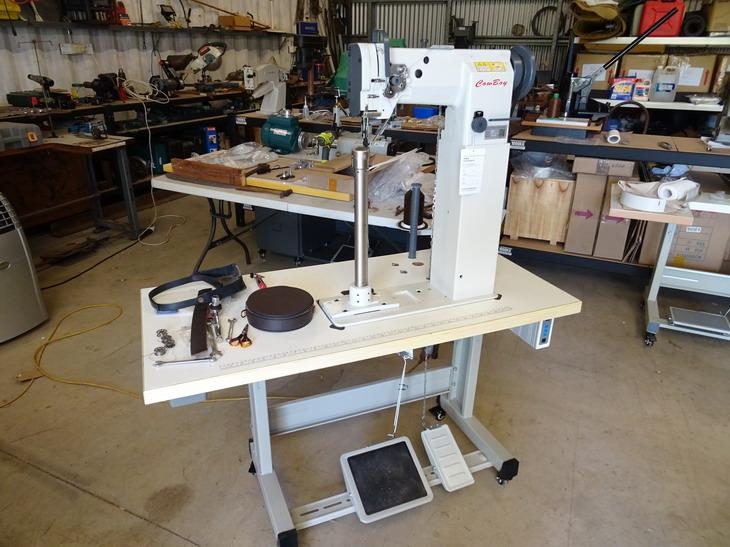
The machine for that job is a tall post. This is a couple of pictures of one I have here. It is a Cowboy CB 8365. I have not had time to do any videos yet but I will try and get some up soon.

-
Good Video @TomE and thanks for sharing. You may think about using a temperature controlled soldering iron as I have used for many years now. Here is a post I did showing how I made one up using a light dimmer switch Although I have used edge coat in that posting it does work well with wax coatings as well.
-
Excellent work
-
May be able to help. If you want send me a pm message with your phone number and I will give you a call or swap back my ph number.
-
Had me looking for a bit but I think this is the one you mention Matt
-
One on the left I am pretty sure is a sole stitch channeler. If it is the same as one of mine somewhere it has a curved blade that cuts an angled slice just in from the edge of the sole which gets pushed back when stitching the sole on and then gets glued down to hide and protect the stitch.
-
New Sewing Machine GA441 Sewing Machine
RockyAussie replied to Tim Schroeder's topic in Leather Sewing Machines
As long as Pats needle plate can move a little to the left when done up then you can adjust the feed dog as I show in this video - You could also file away some on the left inner edge of the needle plate if needed. -
@robygen There are a LOT of possible reasons that could cause this and to help narrow this down it would help to have some pictures or even better a video showing what is happening. Have you used the machine alright previously or not? Do you have both feet attached? When you say the presser foot does not move do you mean they will not lift? or will not move forward and back?
-
Could you load some pics of the thread path showing the top tension discs and down on the bottom around the thread return spring? The thread return spring may be getting too much travel but the spring pressure of it may be applying too much pressure as well. It can be adjusted to give more or less if needed. The thick thread you are using may be going through too many unnecessary paths as well. Pictures will help. Did you back out the bobbin race cover screws as Wiz suggested? Some newer machines can be a little too tight in this area and may need some sanding back to allow the race to move freely as it should in there. Ideally when the screws are out about 1 turn you can easily move the race in and out and the springs will keep things in place. In your videos the screws appear to be wound in tight.
-
Presser foot for cowboy harness machines
RockyAussie replied to milkman's topic in Leather Sewing Machines
Your welcome, here is a pic where I am using the open toe foot with the right paddle foot.

-
As Wiz said above there is a possibility that the feed dog could be loose or needs some sideways adjustment. This video I made although done for mounting the narrow needle plate set would hold true for the standard set as well -
-
Presser foot for cowboy harness machines
RockyAussie replied to milkman's topic in Leather Sewing Machines
That setup will be fine for doing the bag gussets though you may want to get an open toe center foot for better vision. We make a narrow needle plate set for the cb3200 if that helps and you can read some stuff about it in this post if you like If you would like a set pm me here and I will get back with a price delivered. I would need to know what country you are are in to work out the postage cost part. -
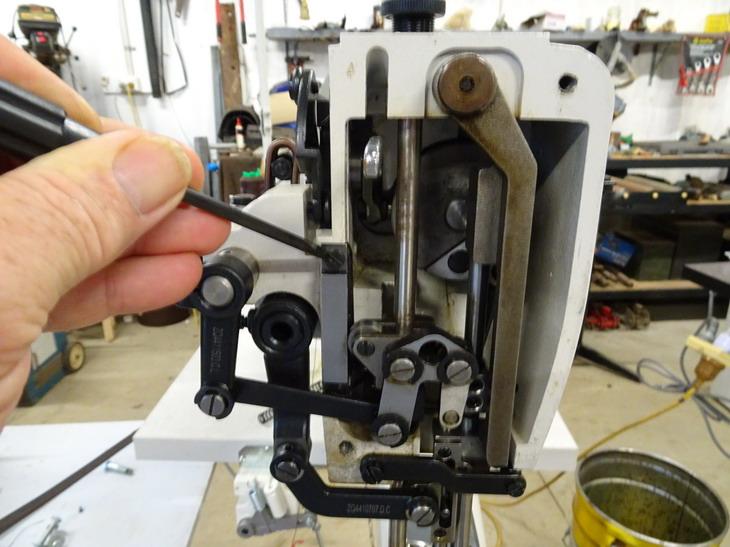
There are a whole lot of varying factors that may need to be considered such as the thread take up spring pressure etc but ...to simplify this tension question, if the leather is thin or soft you would normally run light spring pressure on both the top and bottom tensions. If the tension is too tight it will gather the leather together. If you were doing firm leather then you would run a tighter pressure top and bottom. As a very rough guide on most machines you would start off by having your top tension adjustment so that the the screw adjustment was close to half way in. If you had say 9 full turns of adjustment untill you could screw in the top tension no tighter then the starting point ideally would be about 4 and 1/2 turns out. This then means that you have the most adjustment possible tighter or looser on the top tension. Once that is set you then set your bobbin tension so that it can be pulled out by hand reasonably easily to start with then test stitch and adjust until the bobbin spring pressure balances the knot consistently. This should give you a setting that for most leather only requires adjusting the top tension. The top tension is then way easier to adjust on the run if needed which is something I do when the thickness or stiffness changes on jobs as it does sometimes. Foot pressure is also important to adjust on the run sometimes etc. In this video I start with some fabric and the tension is tighter than it should be but not shown is where I tighten the top tension several times as I go up into the thicker stiff leather -
-
Help with machines, leather and rubber sole.
RockyAussie replied to Kovant's topic in How Do I Do That?
Rubber soles need fairly rough sandpaper to cut away well and that means the grinders you show above lack the horsepower to do the job. A 1 horsepower would be a better choice. The https://www.justwood.com/buy/75mm-sleeveless-drum-sander_34.htm link is reasonably useful up to a point and I have used it for sanding edges of leather when making belts etc. This link shows a video where I have used a couple of 1/3hp motors and similar sanding drums to sand belt edges if that helps - What rpm is ideal will depend on the diameter of the sanding drum as the surface contact area is what is what counts. The smaller the drum the slower the contact speed. On a 6" drum 3000 rpm will be too fast. I would think about running a transfer pulley set up to allow for changing speeds to what ever you find works best. As a rough guide I would expect a rpm of around 1500 would be a good starting point for most applications as long as the motor has sufficient horsepower. The pvc pipes do work well for the dust extraction and they are attached to a 2 hp extractor unit. -
Mastrotto Adria Double Dollaro Leathers $2 per foot
RockyAussie replied to nstarleather's topic in Old/Sold
Darn that is some nice looking stuff. Wish that pond was not so large, for that price . I got no plans for overseas travel but if I ever get over there I am gonna visit for sure. -
Sanding Edges of Shoes
RockyAussie replied to TomBanwell's topic in Shoes, Boots, Sandals and Moccassins
Yes I believe that rpm speed is way over ideal. You can get a crepe rubber stick for cleaning the sandpaper up which can help but overall a finishing machine would be the best bet really. They generally are good at removing most of the dust as you sand at that is more important for your health.