RockyAussie
-
Posts
3,265 -
Joined
-
Last visited
Content Type
Profiles
Forums
Events
Blogs
Gallery
Everything posted by RockyAussie
-
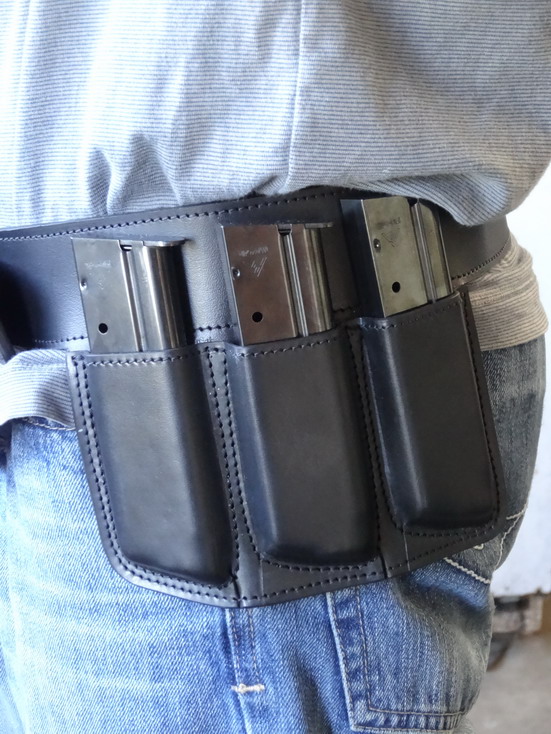
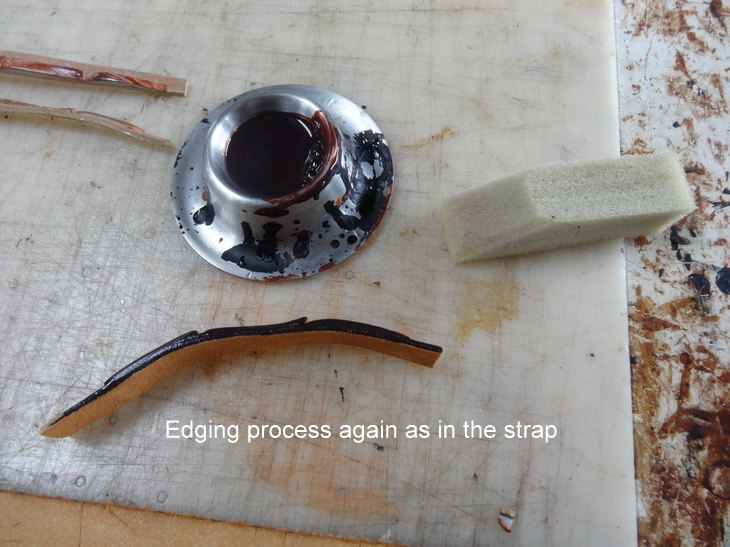
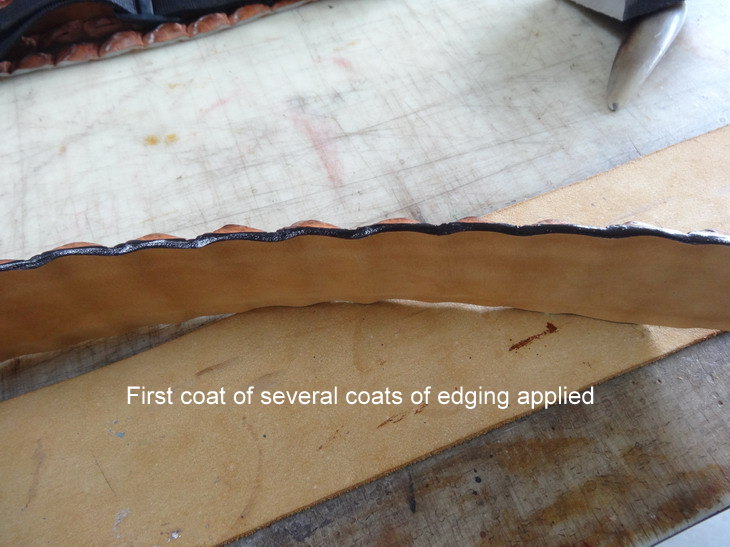
 Now that"s a thought I could pop a few bullet holders in instead of croc teeth.Ha Ha. Next one maybe Your most welcome ,and I hope we get to see some from you as well. Thanks Tessa I checked out yours and they look great to me. Please feel free to put any helpful details on here that might help others like the thumb hole location and size etc if you would like. I would love to see that Dwight, and thanks for the blessing and I in return ask the same for you. Brian Will have to see how it performs over time but at present the grip with the nu buck and foam inlay is excellent. It would only be possible to stitch the strap area on this as there are some nasty bones that no needle agrees with that I have ever found. I not very concerned about it as the glue I use is the same glue I repaired shoes with for many years and I,ve been making hornback belts for years with it with very little problems. If it were not for the bone problem though I would definitely be stitching the strap.
 -
Just found another one

-
Yep, that's a 80 watt soldering iron with a tip I've reshaped to go over the rounded shape I want. It is temperature controlled via a light dimmer switch. Should say I been doing it that way for about 25+ years and way before I ever heard about these filituse things or however you say it. Haven't made any croc skin holsters as I don't tend to get much in that style of stuff. Only ever made a couple of leather holsters come to think of it. No laughin here's some pics of one.


-
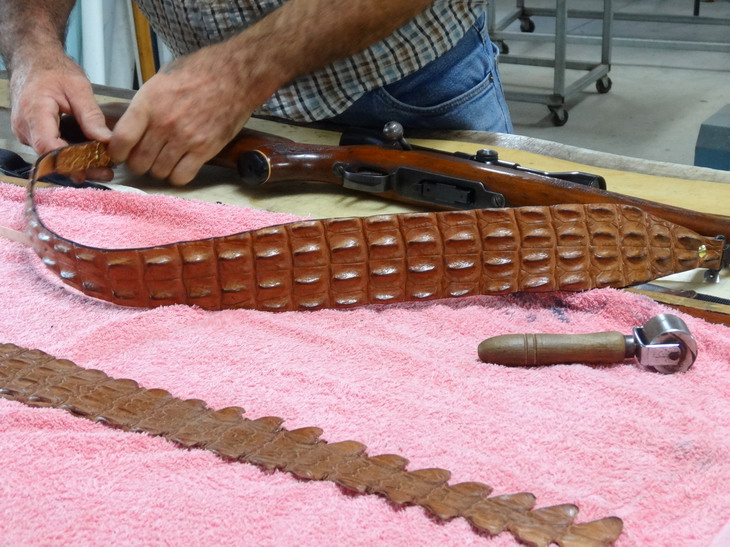
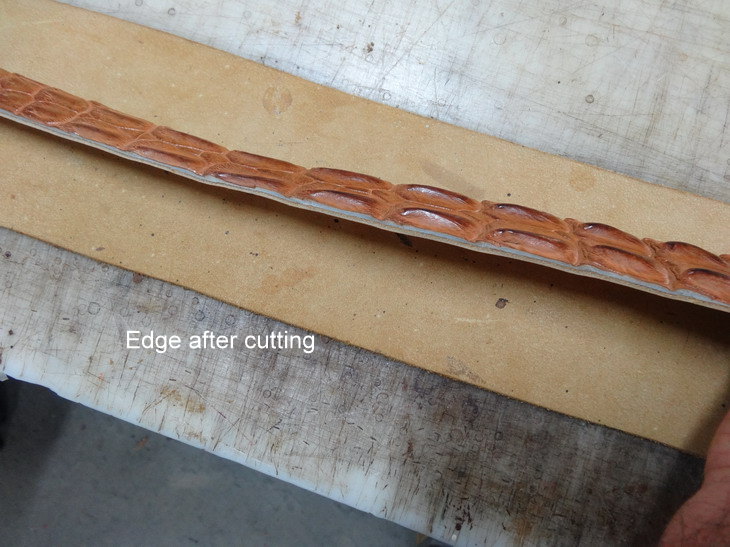
Thanks Joon1911, yes if you cut through the bone sections it can break your knife. That is the reason to work around cutting through the leather in between them. I only work with Porosus crocodile that has less bones problems than the rest to deal with. Unfortunately it is the dearest as well. Lucky for me I have thousands of them here and make them up into belts most days.
-
Croc clutch!
RockyAussie replied to motocouture's topic in Purses, Wallets, Belts and Miscellaneous Pocket Items
Thanks for that @motocouture .Don't know if that is available in Oz but I will check it out. -
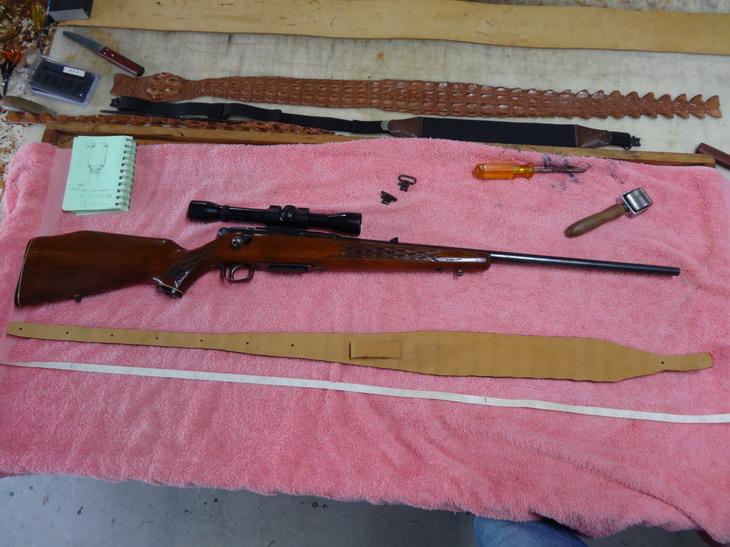
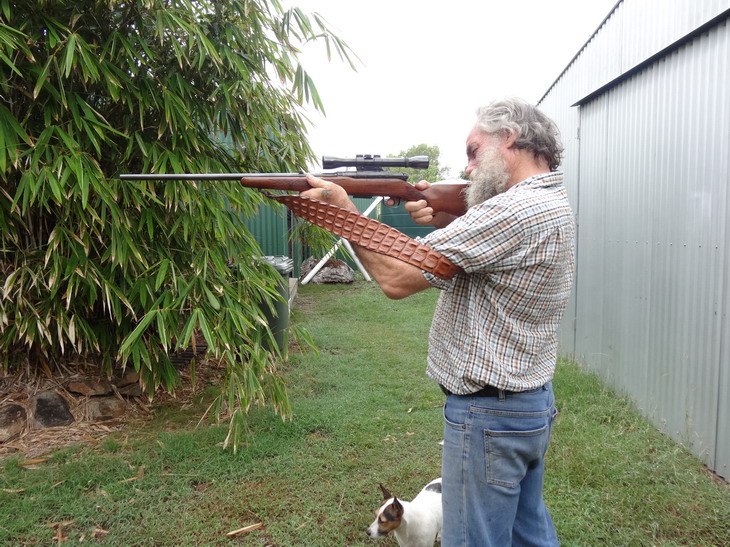
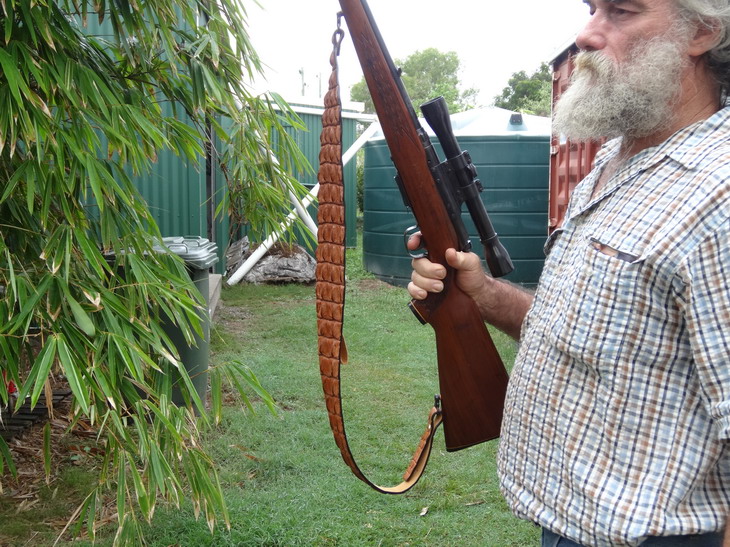
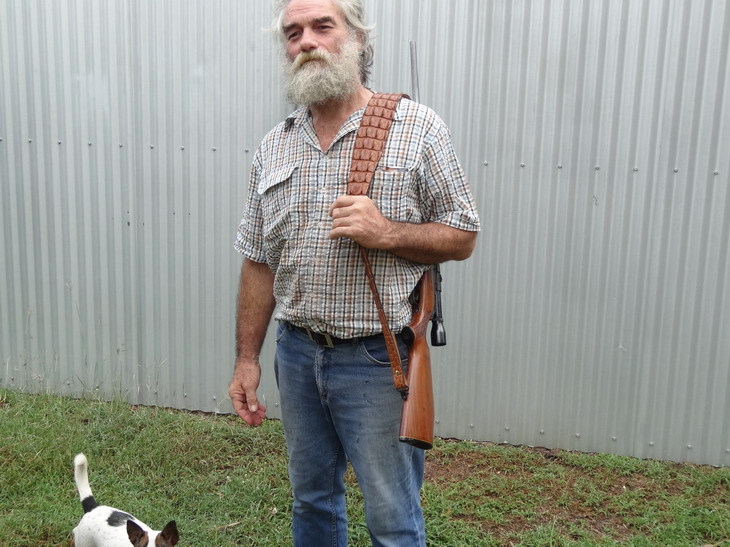
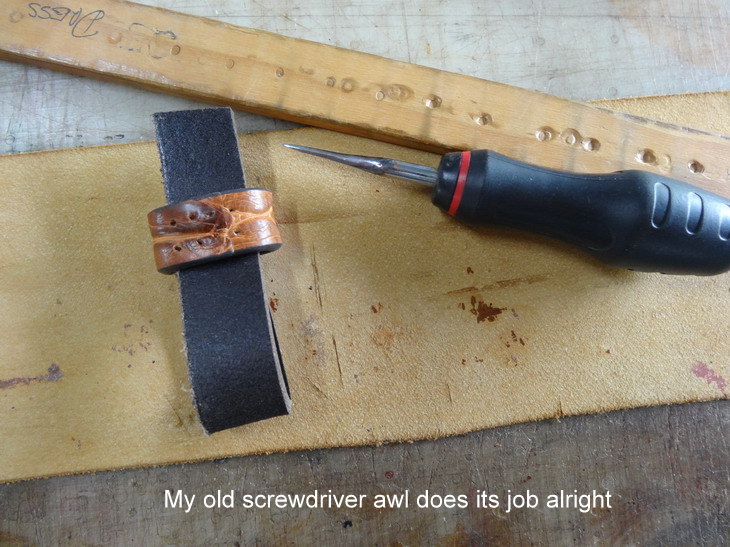
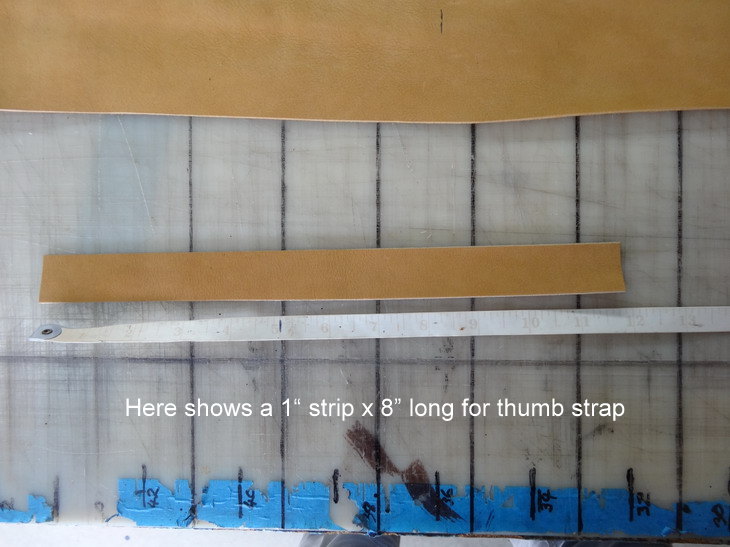
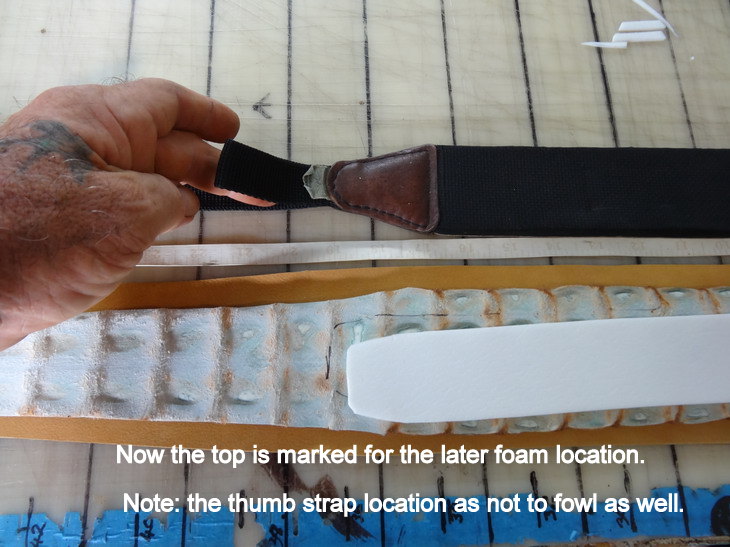
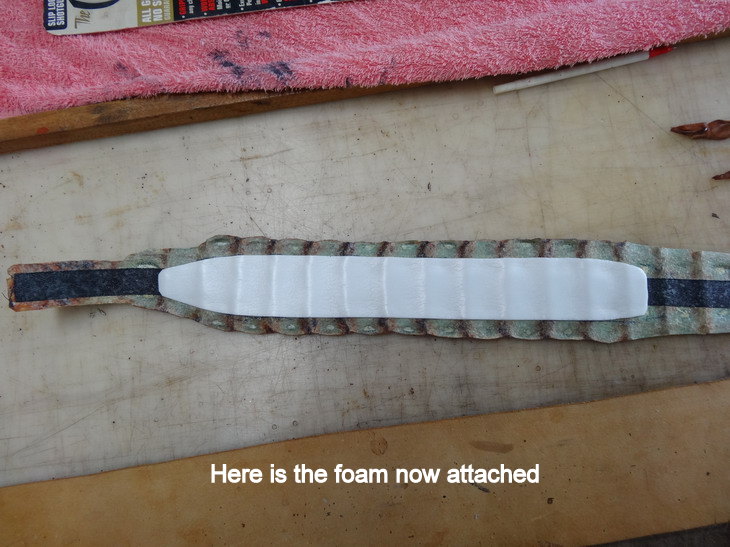
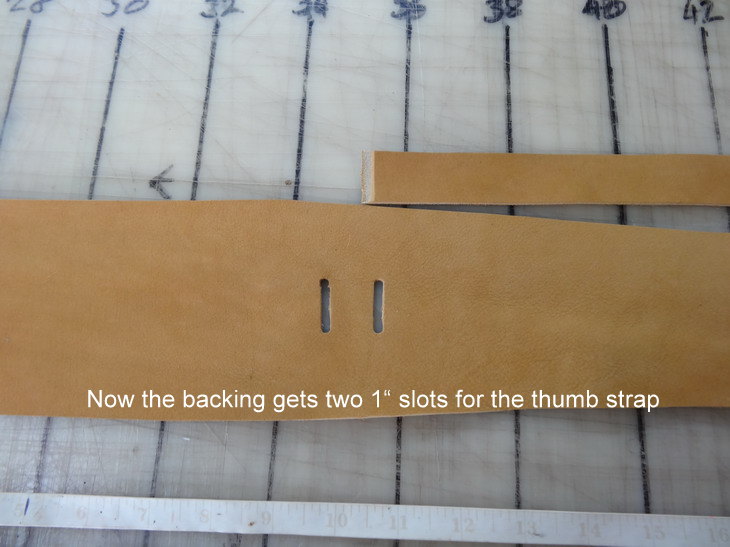
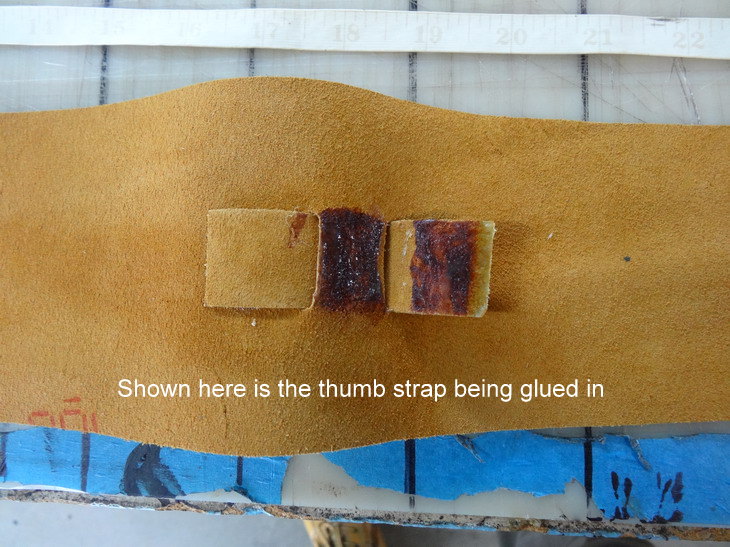
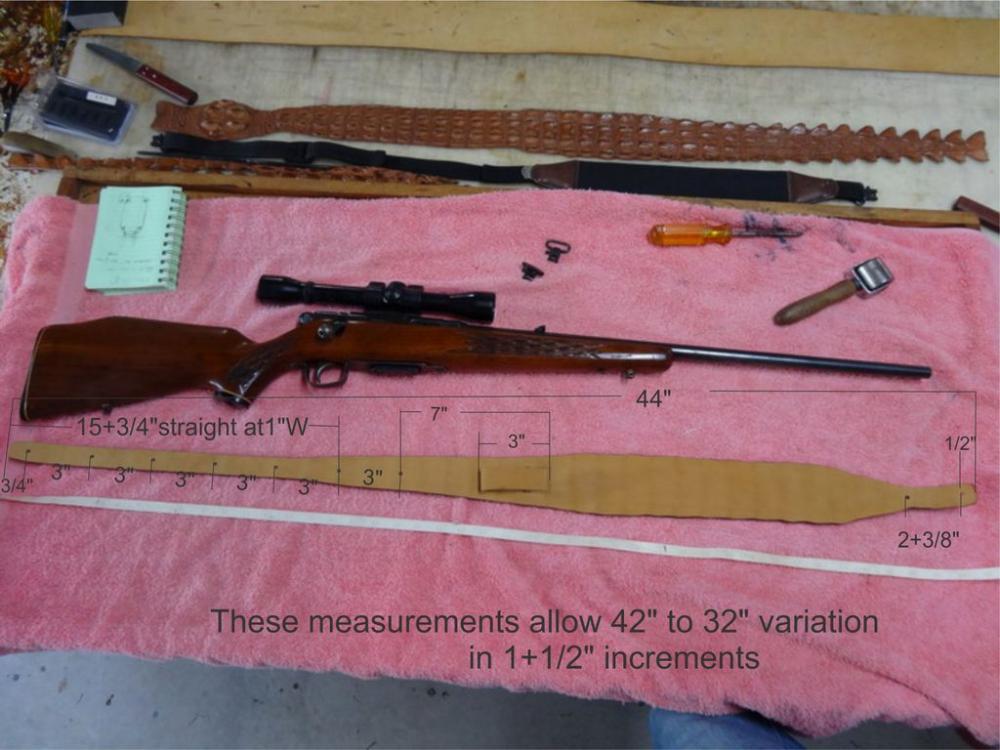
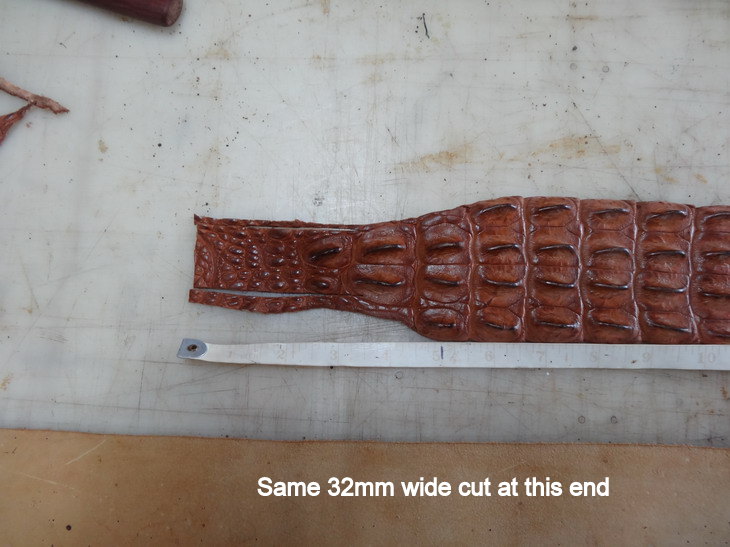
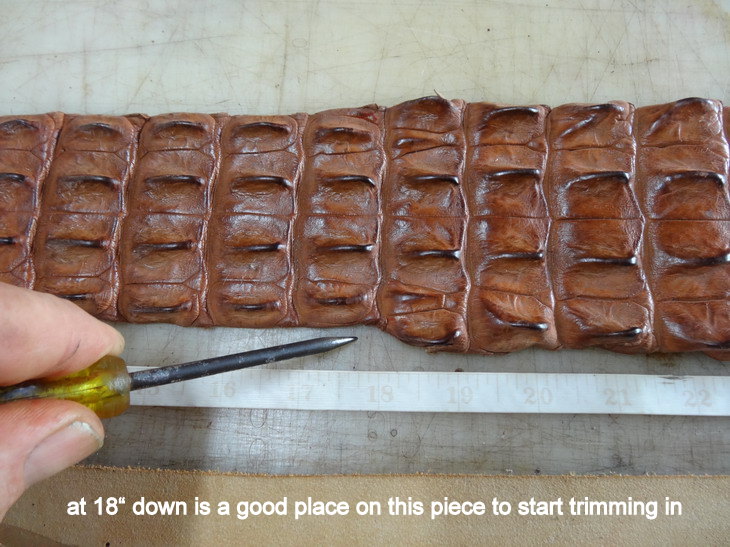
Thanks Rockoboy The thumb strap helps to stop the rifle strap from sliding back when you are walking with it. See the picture below here I have my thumb in the strap there. I did not think much of it until I used it then I completely understood and think it is essential. Many now put a hole right through but I thought that, that may weaken this strap too much. Hi @YinTx I should have made that measurement clearer in my measurement picture. From the wide end, end the first crew punch is 19" down. On the average that should work fine.
-
roughout leather is what I would call it.
-
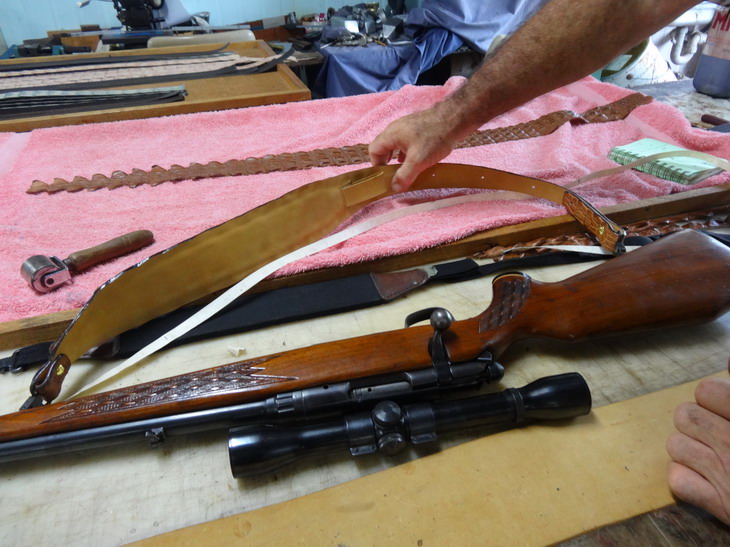
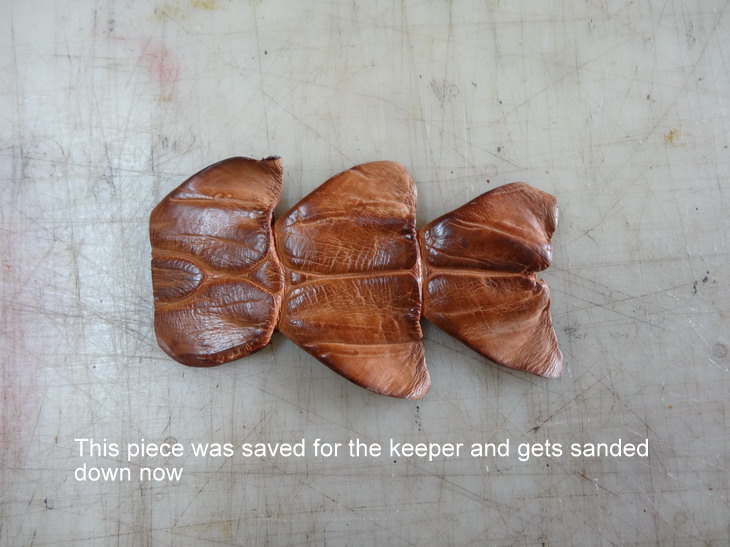
Missed the keeper being stitched up sorry That's it all now. I hope this can be of some help and please if there is something better to add or comment on feel free to do so. Brain
-
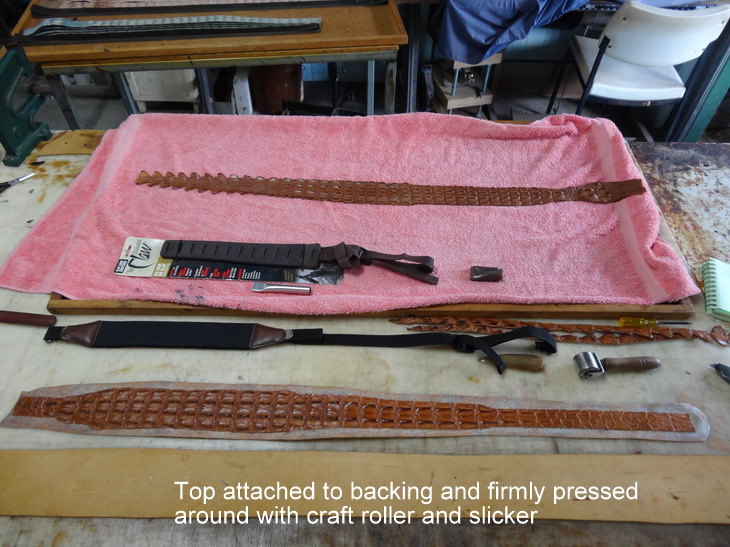
Just a few more pics More later


-
Have you got any pictures?
-
Thanks @bikermutt07 I hope the new owner thinks so as well. Thanks @noobleather Here is the next lot of pics for now


-
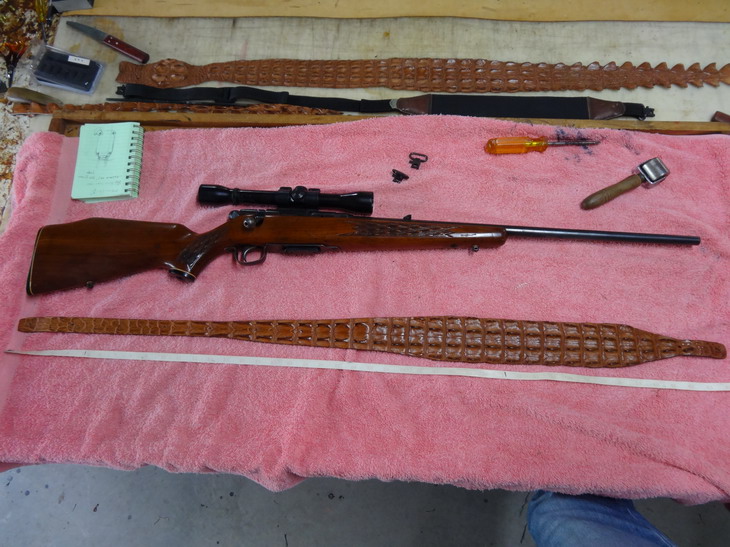
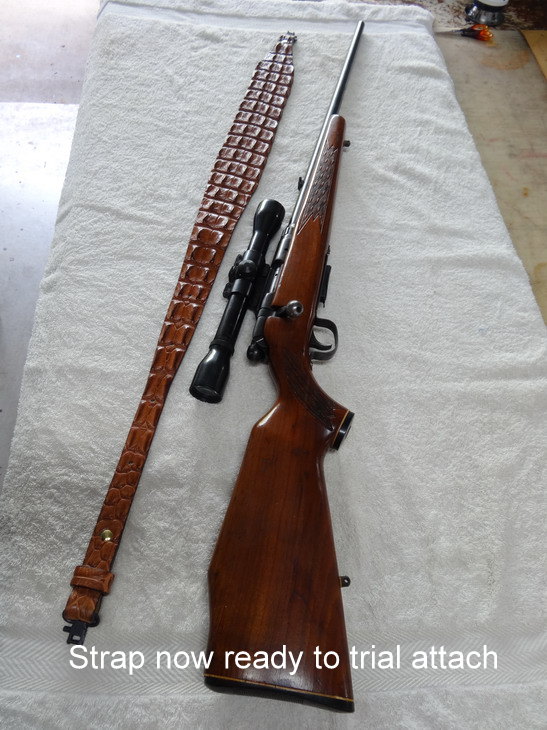
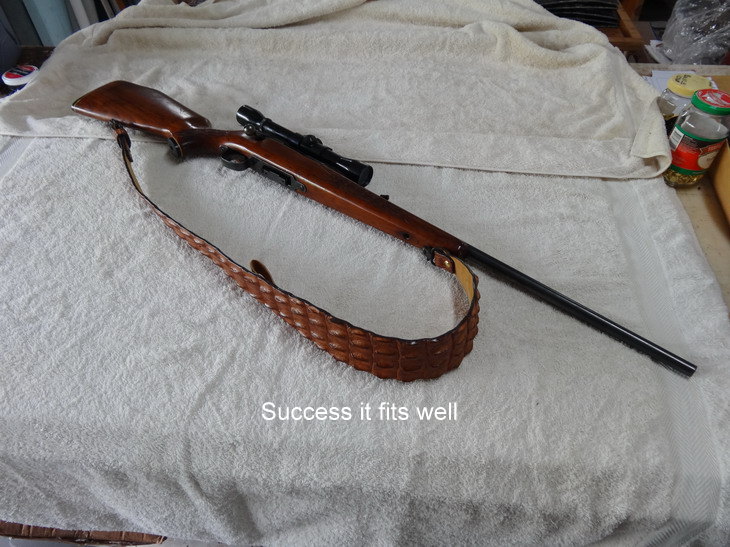
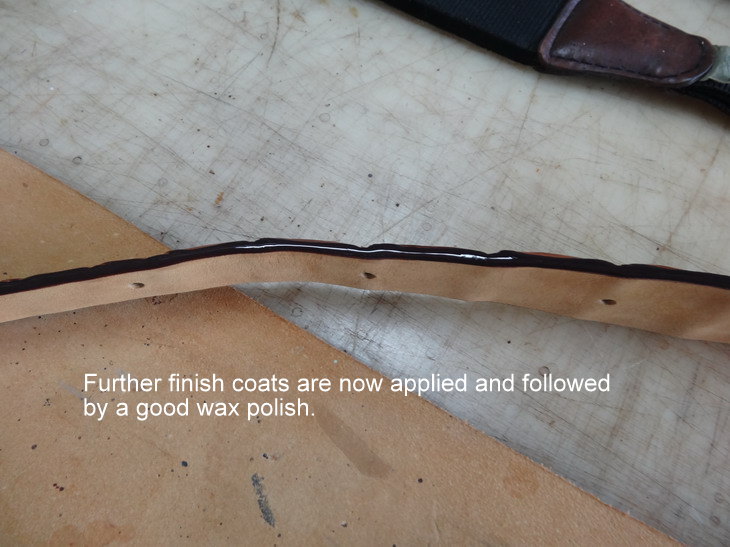
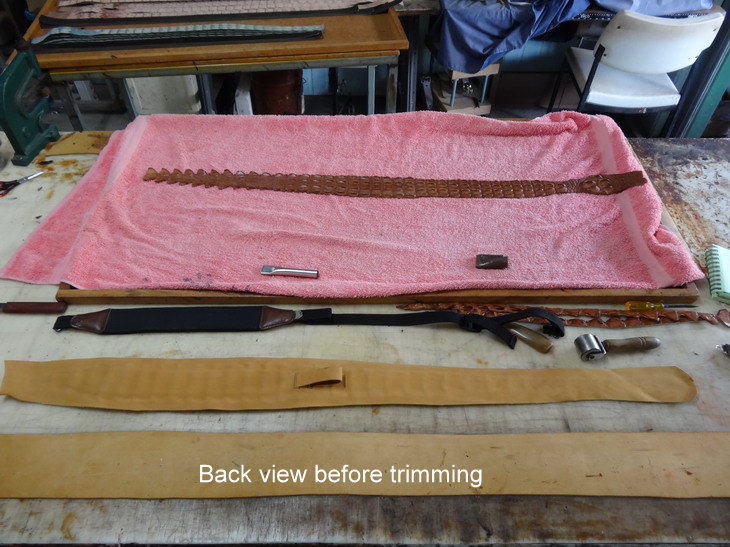
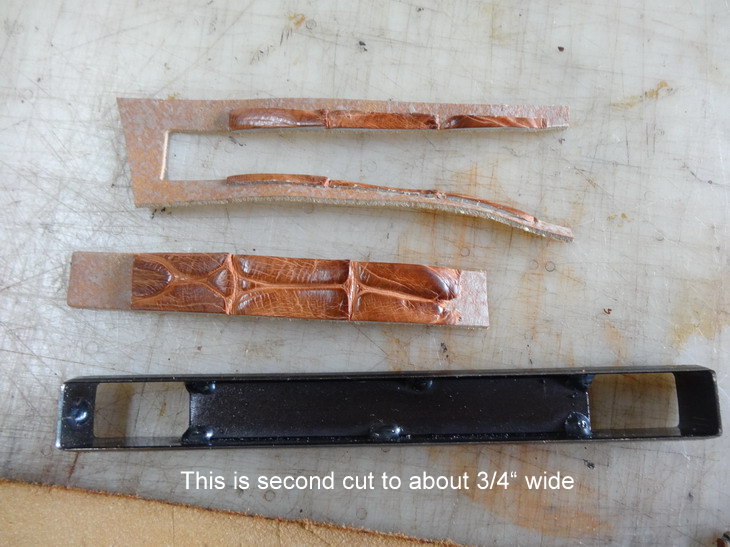
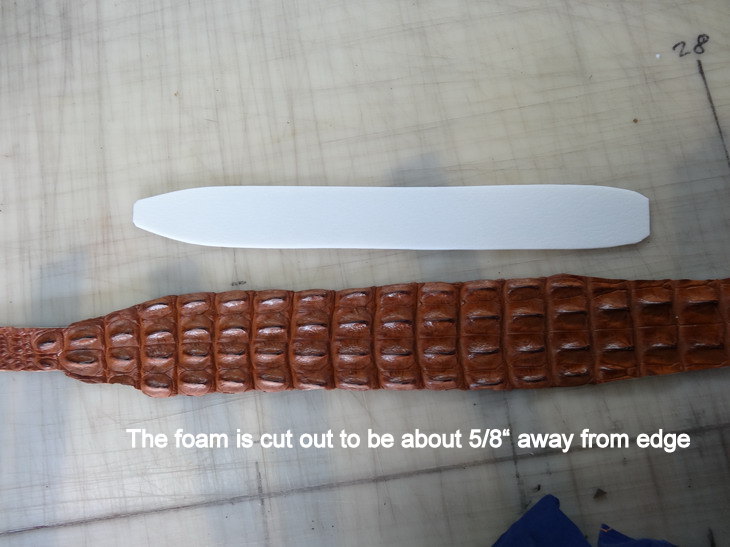
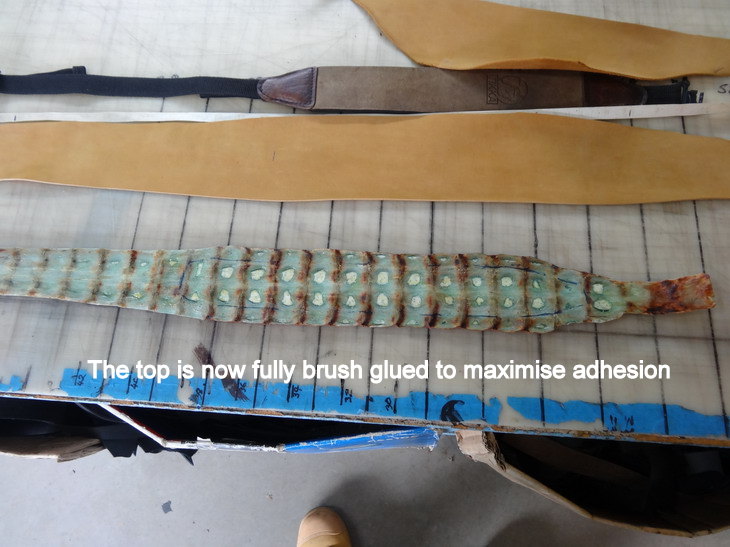
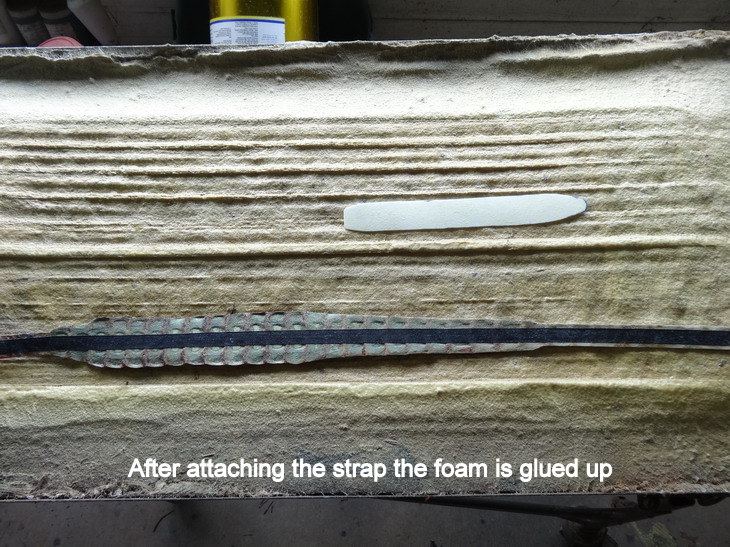
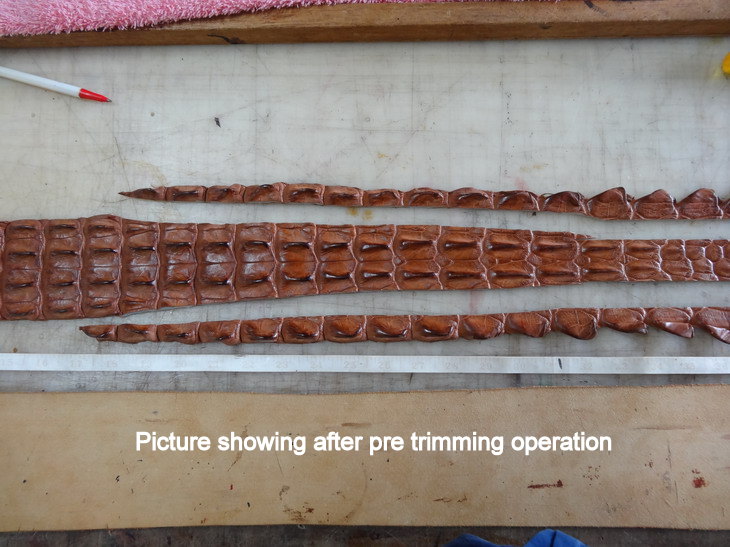
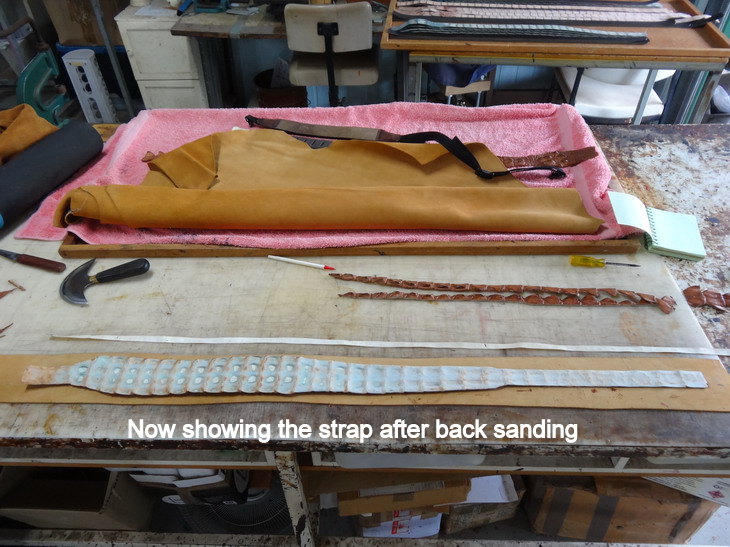
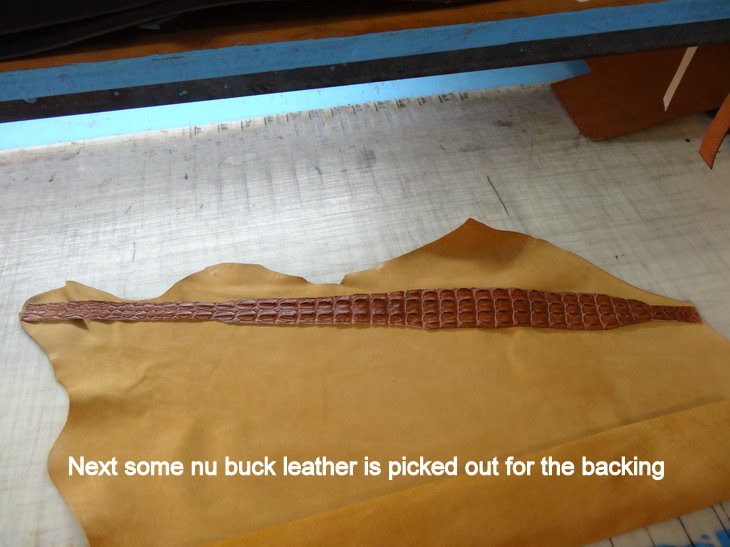
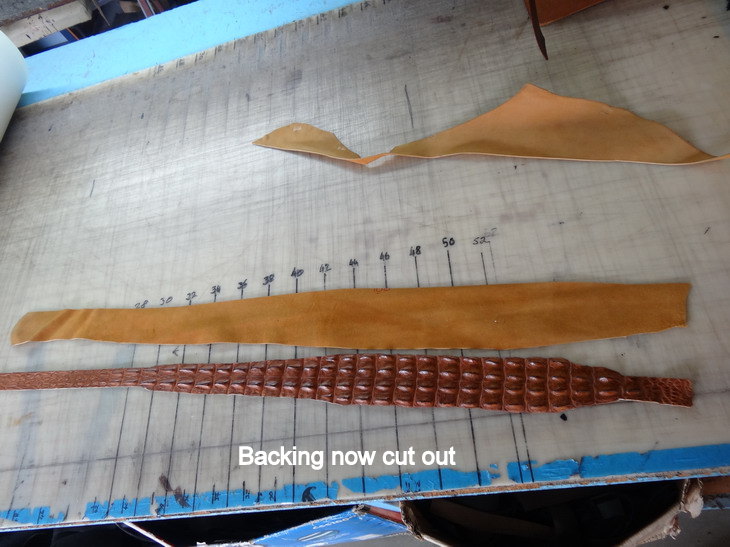
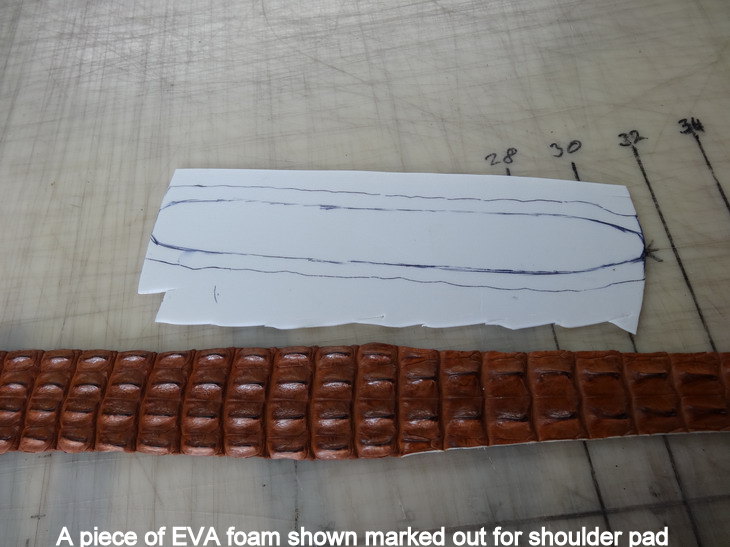
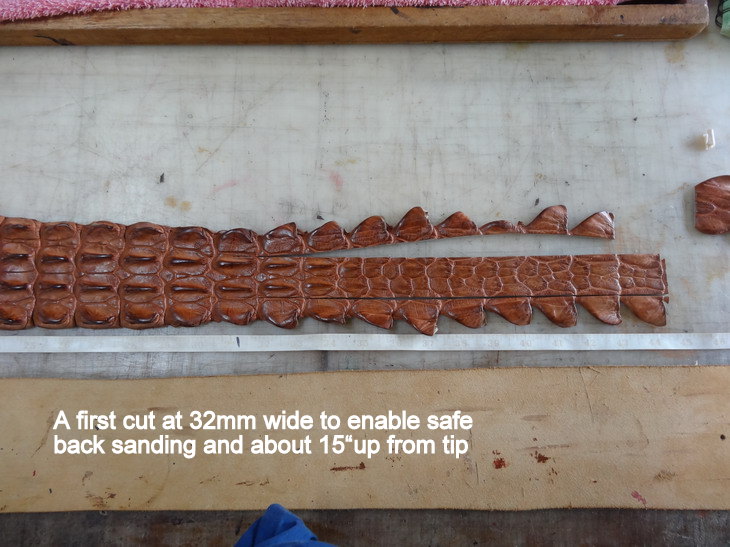
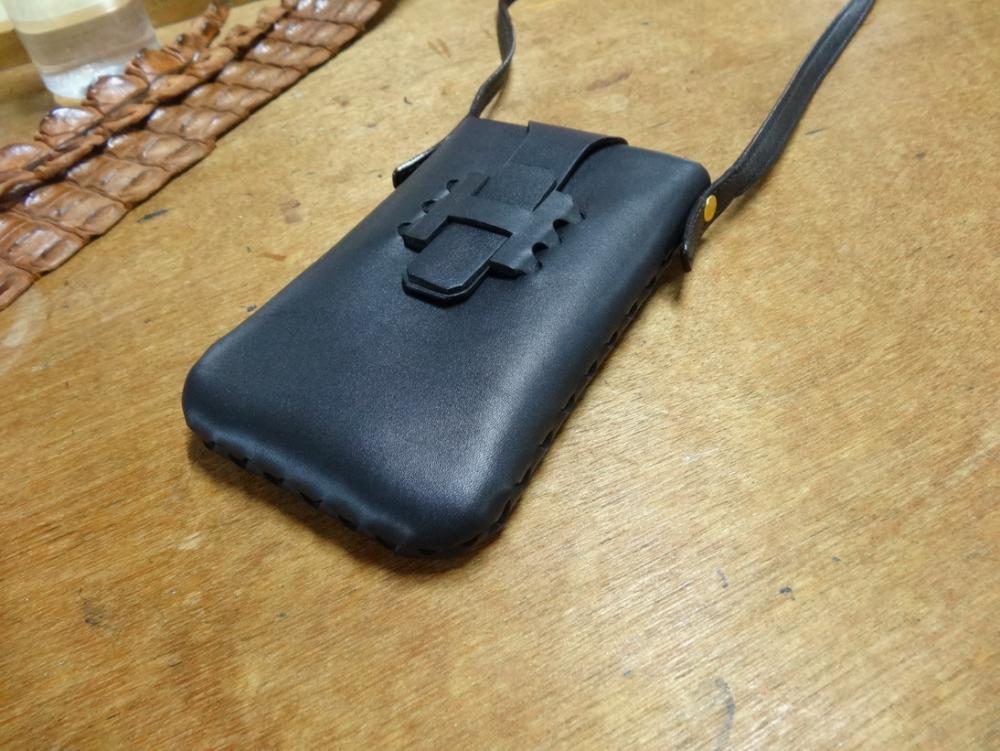
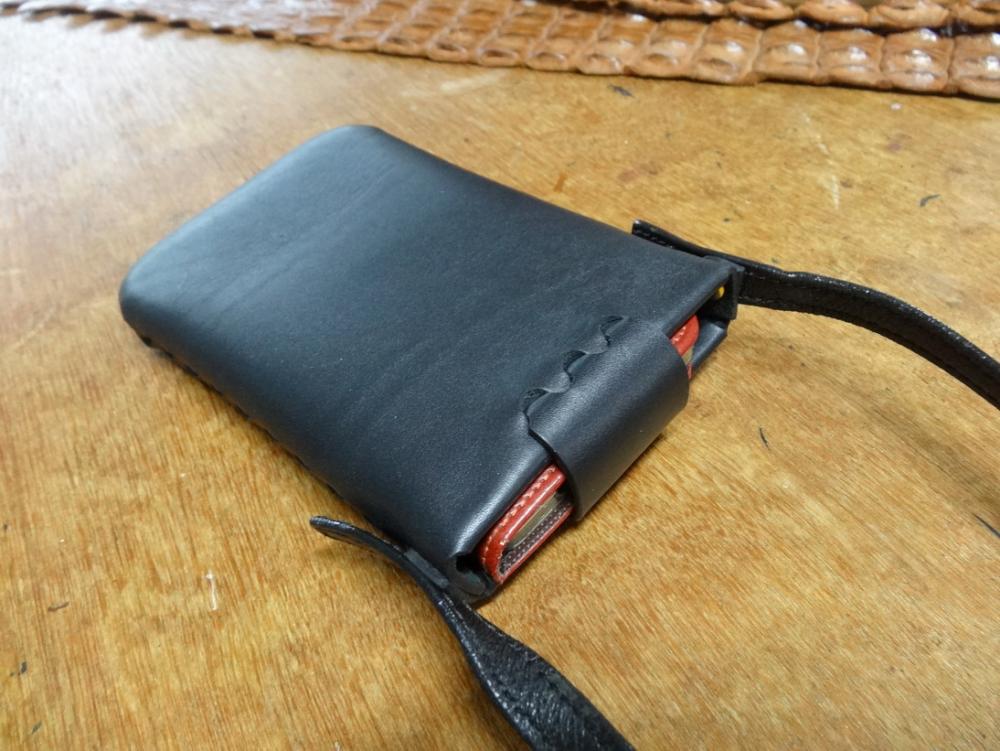
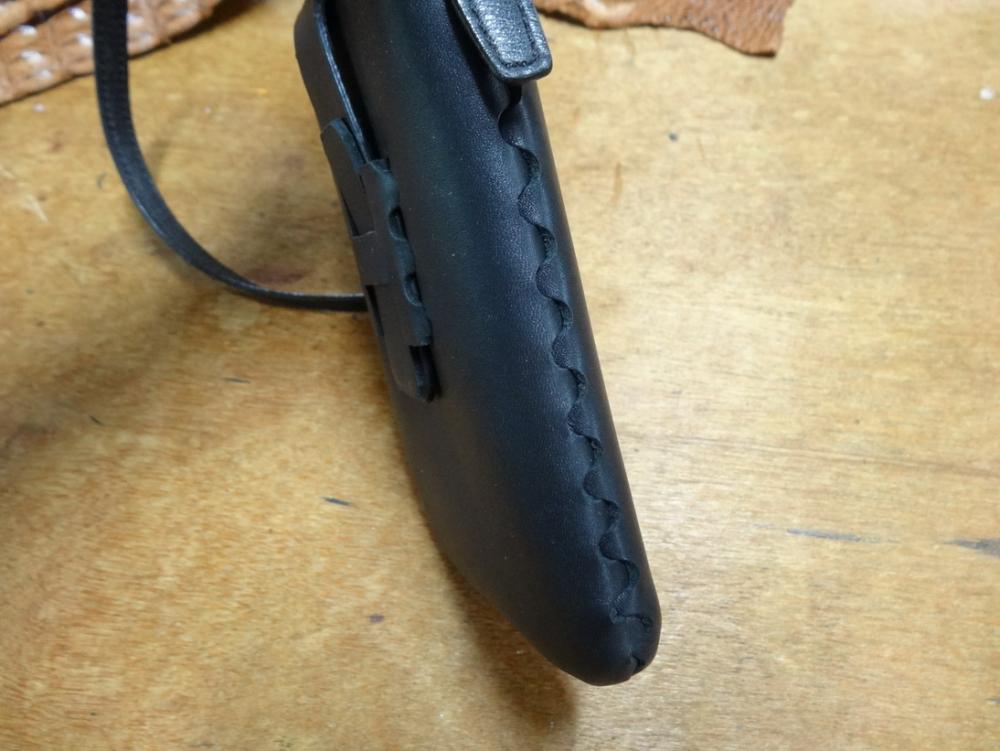
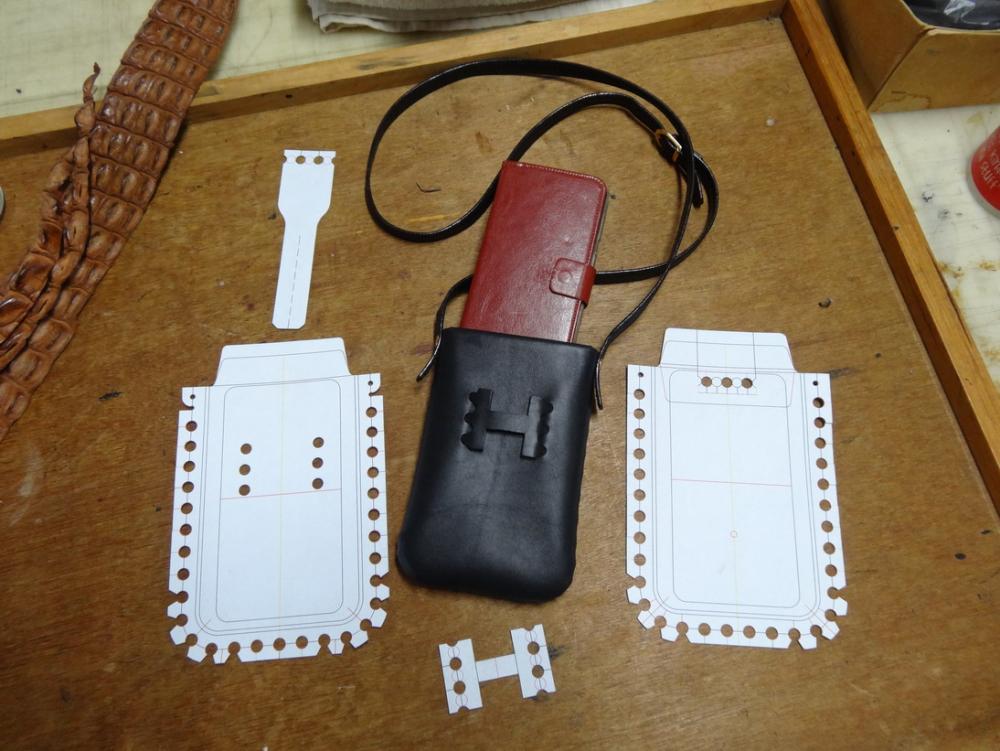
Recently I was asked to make up a Cobra style rifle sling out of some hornback crocodile skin. Not having much of an idea on how these slings work and the measurements and so on, I dug into the forums on LW and could not find enough in any one place to give me what I needed to make one so I have decided to post on here how I went about making this one. I must thank .ABR from Utah...... for his help given in providing some of the measurements. This is a link that shows his post and some of his excellent work is there to be seen. http://leatherworker.net/forum/topic/80132-photos-of-leather-work/?tab=comments#comment-536112Due to the hornback croc shape and some other size checking I was unable to follow these sizes ABR kindly provided but I believe what I have come up with will work pretty well. PLEASE feel free to add or criticise any part of this you feel could be improved. This first few pictures show the sling that is made here This next picture shows most of the measurements I have used through the making For this post I think the file size may be close to full so .......More a bit later.

-
Thanks for that Tom. I am surprised that there is not more out there on this method. What is posted on LW though little, is better than I have found elsewhere so far. I hope I can get time to do a few bags and such using this and similar related methods sometime soon. Brian That is what I am thinking and along with a bit of 3d printing to help I think I can come up with some pretty interesting stuff. I am talking to some laser sign people in town here about trials on cutting the leather and should have a few answers over the next couple weeks I think.
-
Croc clutch!
RockyAussie replied to motocouture's topic in Purses, Wallets, Belts and Miscellaneous Pocket Items
All looking great so far. Good thinking on the drawer liner ...I think. Is that the rubbery stuff that has holes through it? Love the edge coat idea. -
Now they would be interesting to see some pictures of. Stitchless seems a bit lacking as there are lots of ways to make a product stitchless. I like Holy Poke as you make a hole and poke the other part in. Mmm.... works for me anyway .
-
Ouch ......That is a scary thought but I guess as a last resort maybe. I spose I'd have to have washing instructions next....Please remove your phone first blah blah
-
I forgot to say I am calling this my Holy Poke method. If anyone knows what it should be called please advise us.
-
Thanks Chuck and Frank for that info. What I am wanting to be able to do is along the lines in these pictures below. This is at the very rough prototype stage at the moment and further pieces are to be added to it yet so please overlook the roughness as it has not been hammered etc as yet. As you see by the patterns the numerous holes and cuts that have to be precisely placed makes doing by hand tedious and with a clicker very expensive knife costs. Cleaning the edges in an efficient way may be important. ps. I got bored with stitching and wanted to explore other alternatives looks.
-
Thanks for that Chuck. What watt size are you running? I am wondering if the size will have a big difference with the charring as well? You are cutting through the low tack transfer tape when you are cutting and thus keeping some of the charring from transferring over? I am thinking of making some pretty intricate stuff that would be impractical to further cut with a knife and so am wondering what methods people have found gives an easy clean up. For instance when I used to colour change shoes, I used a glass bead blaster to etch and clean the shoes first. One little bit of sticky tape is all it took to stop the glass blasting away any areas I did not want blasted. The tape just makes the beads bounce off . Therefore I wonder if the transfer tape left on until after blasting would be an effective manner of char removal. Perhaps some edge sealer can penetrate the charring and keep it fixed? and so on. Brian
-
Thanks for the input @LatigoAmigo. I guess cleaning up the charring on the edges is something that will have to be solved before I commit to too much expense. I will try and get a bit done somewhere to have a look at it further.
-
I am seriously thinking that this laser stuff could have some merit in it. I have been doing some prototype production work recently that I believe would probably only be realistic to do with a laser. I am curious to find out if a 40 watt can actually be used to cut 3mm (7to 8oz) with the right software and such or not? @LatigoAmigo That bag looks good and different as well.May I ask if after cutting is there much work in cleaning up the edges before applying edge coat? I mean such as in the crew punch strap holes in your bag and similar. I think that would be an excellent idea. Lets do it.
-
Photos of leather work.
RockyAussie replied to ABR's topic in Gun Holsters, Rifle Slings and Knife Sheathes
Thanks again for your kind help there ABR. I really don't have much knowledge in this area as yet. -
Photos of leather work.
RockyAussie replied to ABR's topic in Gun Holsters, Rifle Slings and Knife Sheathes
Thanks YinTx I have a bit more work to do on it yet but will post it all with measurements used etc when done. Customer is a croc farm manager and does a lot of hunting in the wet tropics so that should test the construction techniques to the max. Time will tell. Brian -
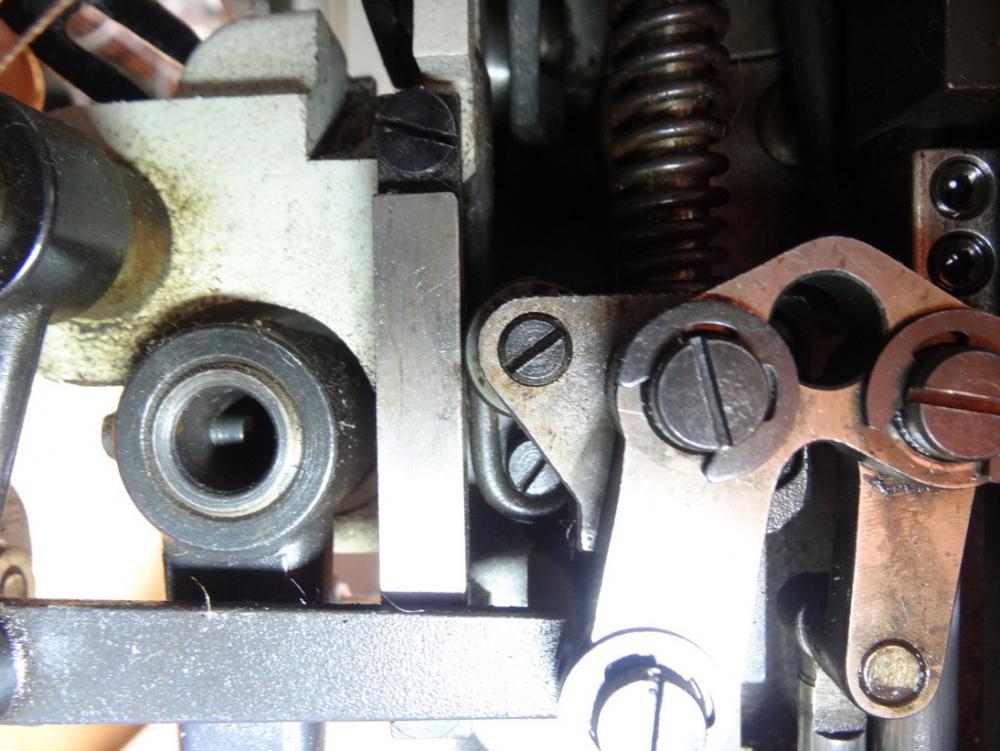
Foot Lift sticking problem with 441 clone
RockyAussie replied to dgkfit's topic in Leather Sewing Machines
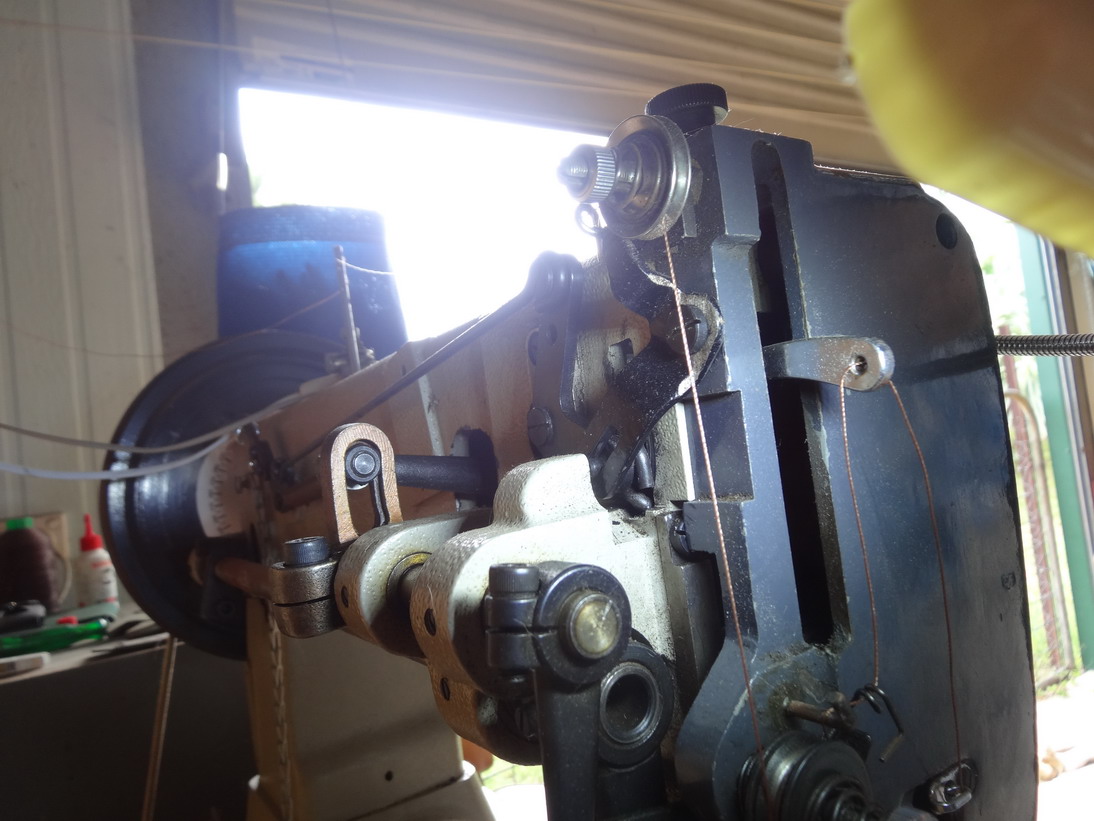
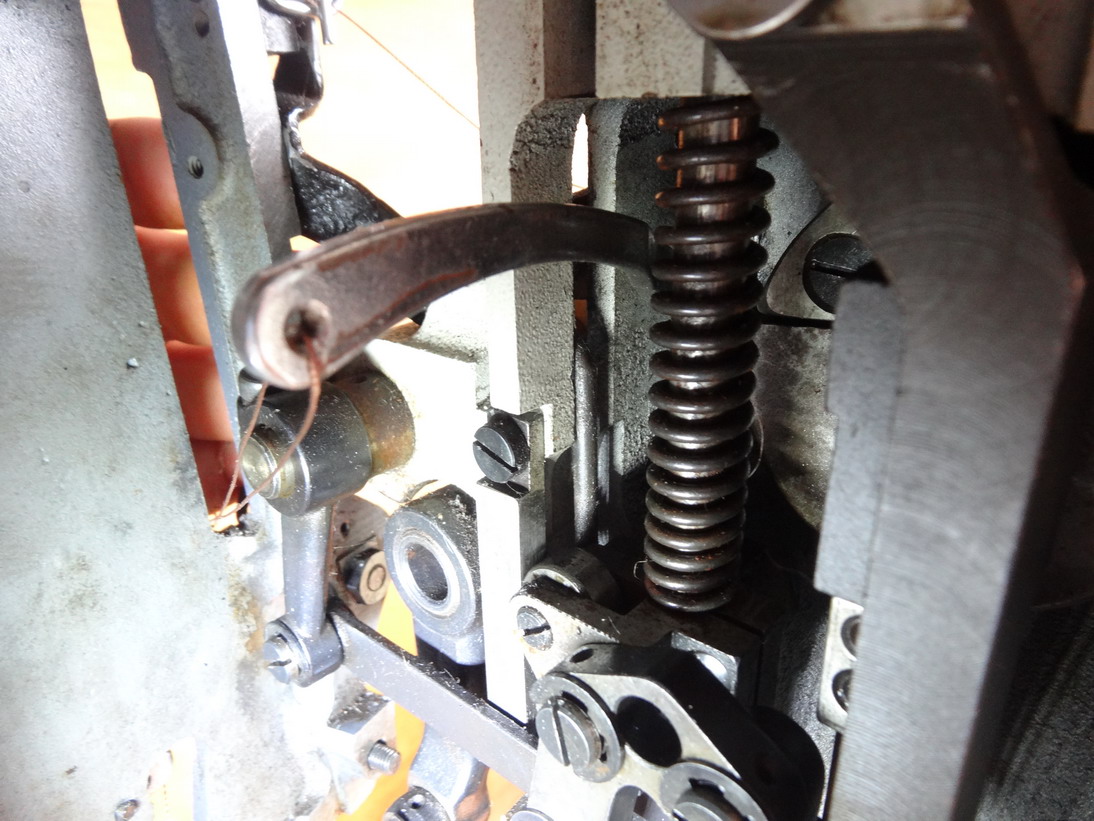
This part that you mention has me confused and as you have not pictured the disc or that area, I have tried to find what it is you are mentioning. It may be something peculiar to the Cobra machine though. I have taken some pictures of my Cowboy that may help some and I have attached a pdf that does not show any disc but is about the only diagram I could find that shows that area. As Floyd said I think correctly the bent rod needs to be hooked back on to the hinge screw and then the loose screw that lets the mechanism rotate needs to be tightened up. I hope this helps some. Brian 441 parts.pdf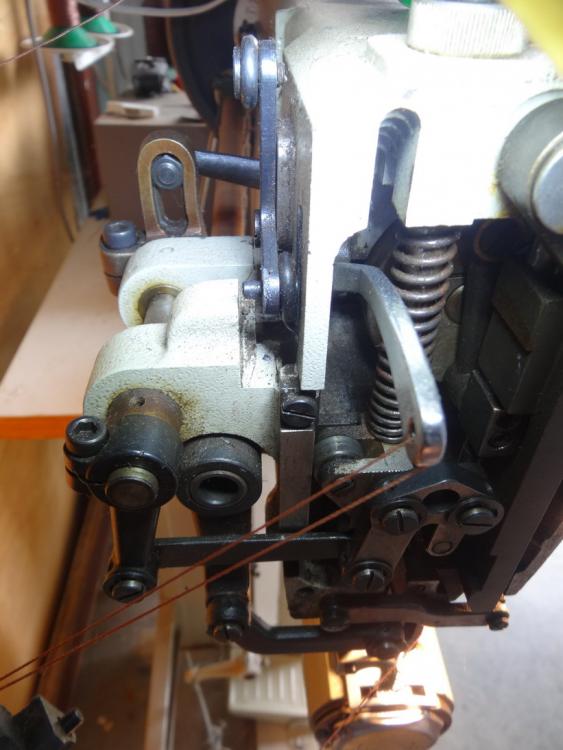


-
Photos of leather work.
RockyAussie replied to ABR's topic in Gun Holsters, Rifle Slings and Knife Sheathes
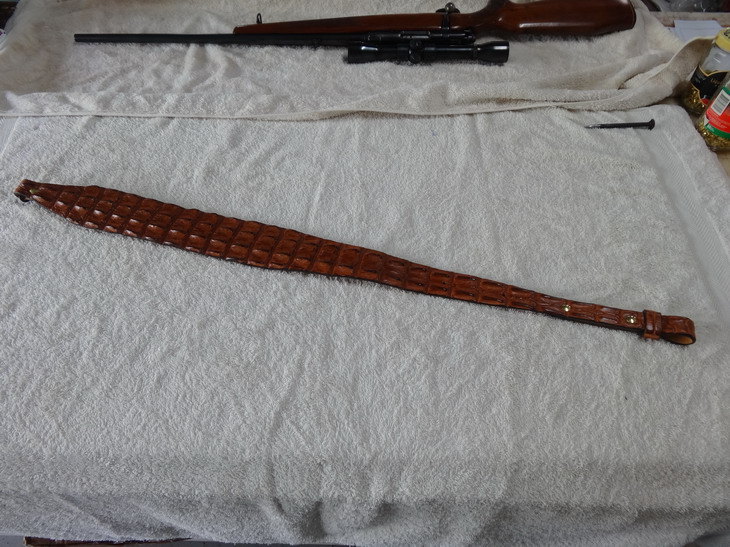
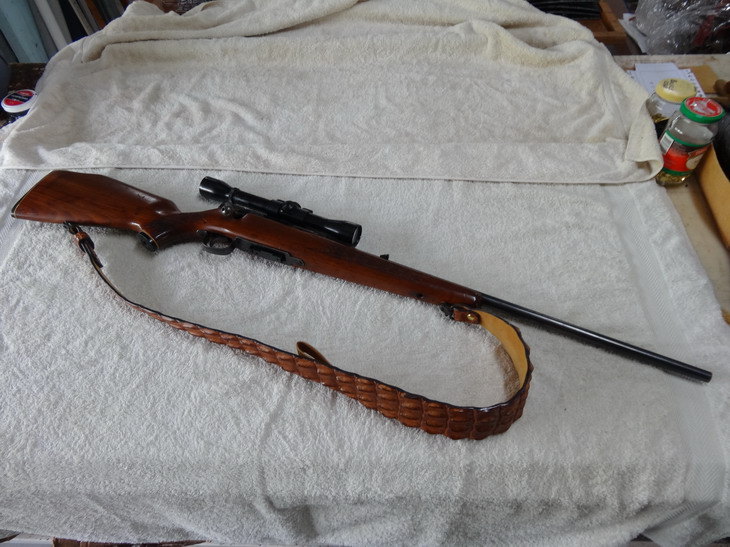
Well it"s not too ugly ...I think so let me know what ya think. I will post in a separate a more full break down of the steps and measurements I used later on. Shown below the strap is just over 44" long out fully.With loops on can go down to 32". Hope that's enough range. Backside of strap shows the nu buck lining and thumb loop set into and stitched down. Chicago screws installed The padding shows here a little better. All ready to test now isolright I reckon.