


RockyAussie
-
Posts
3,265 -
Joined
-
Last visited
Content Type
Profiles
Forums
Events
Blogs
Gallery
Store
Everything posted by RockyAussie
-
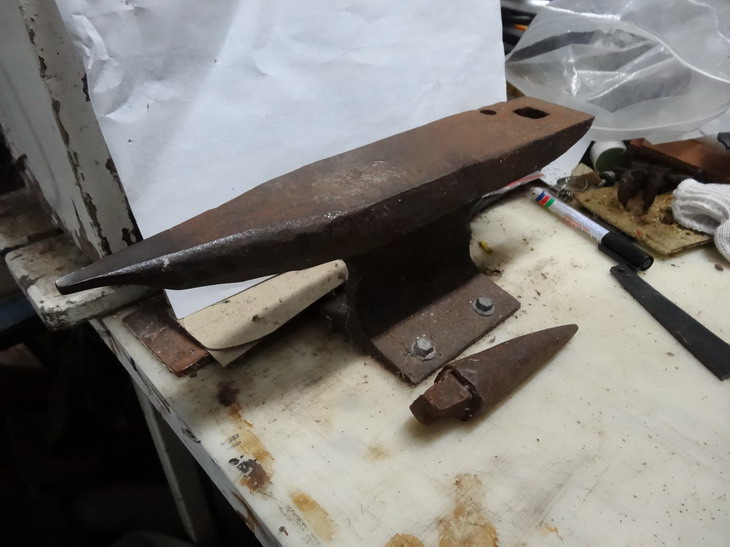
Now you got me thinking hard...I have done them but I don't remember doing it to this. I can remember doing the tip shape as it has been refined many times over many years but the back spike I hardly ever have a use for it. I may have drilled it and filed it out or an old friend Jack may have cut it out on this chisel type machine that shaves little slices off a bit at a time. It may have even been there already when I got it.
-
Hi Dun, I have no idea what name you would call this style of gusset. I think I normally refer to them as bar..s ..turds or something like that. I have quite a few of these bags on order, as always so I will take a few pictures this weekend which may help you some. I normally only make these up once a year or so.
-
You guys always embarrass me with your clean looking stuff but I am gonna say mine gets into tighter spots ...if you can see the point Ha ha

-

Consew skiving machine has 3 small chips missing from blade
RockyAussie replied to JeannieH's topic in How Do I Do That?
I doubt whether the bell needs replacing. These chips outs are not all that uncommon. There is a line just before the edge on the bell that makes me thing that the bell was too close to the foot as that happens like that and is murder on the bell if it is too close. I would like to see a picture of the sharpening stone as If it is well used the size will be small and the sharpening is less broad across the bell. If it becomes too angled the feeding becomes more difficult. IMHO whether a machine is new or not if it is not set up right it is not the machines fault. For now here is 1 link that I found that may help- Its not brilliant but is a fair enough to start off with. -
-
Consew skiving machine has 3 small chips missing from blade
RockyAussie replied to JeannieH's topic in How Do I Do That?
AQ few further back pics would be good ...but it does not apear to be all that new so far. The bell is a little too close to the foot. Once you sharpen out those nicks it will be about right though. The feed stone is sitting down too low and should be very nearly touching the bell inside.One turning knob on the left at the front will alow angle changes and on the left side there is an adjustment set up to allow you to move the stone upward. There are a few you tubes out there on how to do these adjustments and I would check them out first. I will look some up and give you some links tomorrow. My dinners ready NOW i'm told. -
Consew skiving machine has 3 small chips missing from blade
RockyAussie replied to JeannieH's topic in How Do I Do That?
Alright ...but a wrong set up and sometimes some leather types as well will cause this and you may want them for help at some future time. I would give us a chance to see the other pictures first myself. Brian Did you get a dressing stone stick with it? -
Consew skiving machine has 3 small chips missing from blade
RockyAussie replied to JeannieH's topic in How Do I Do That?
Those nicks should sharpen out alright.Just off the top of my head the bell starts at about 2" wide and I normally replace mine when they get down to about 1" or a bit more. I would like to see a few more pictures all the same of the sharpening stone, where you have your foot set to in relation to the blade and the angle of the stone in relation to the bell blade and so on. -
The answer to Duns question is in my question. Sorry to be so obscure but out of respect to Niwa I am hesitant to elaborate any further. There are more than one way to achieve this effect and if someone wants to do something similar, I can only say that burnishing and the leather types are not necessarily the only way to come at it.
-
Clear yet???
-
Man ...we got a lot in common sept I just turned sixty. I wonder if they think I'm 13 yet??
-
There is a lot of theory in coming up with that relief line, and some advantages are as follows. 1 - to reduce the waste when pushing down the top mould it helps create a little drag and keep things tight. 2- As the leather is trying to compress everywhere and on particular the corners, the relief gives the leather somewhere else to go beside just sideways and thereby reduces the wrinkles. 3 - It gives a very nice and reliably accurate cut off point to cut and sand to. I did sand the mould pieces a bit but mostly just rubbed the edges very hard with a rounded steel rod in order to achieve maximum smoothness. On large scale pieces a printer may not be the best answer always as the time to print can be very long but can allow a lot of fancy details to be embedded if that is desired. CNC routing/milling can be a better alternative at times. The big advantage with using the cad design start is being able to come back and easily make minuscule changes and corrections in a very quick way. At least the printer can print it again while I am getting other work done. For anyone interested in wet forming leather I recommend looking at a couple of this mans videos. To me it is amazing and I am sure you will be inspired by them. Brian
-
How to do nice even stitchinig using Cobra class 4
RockyAussie replied to DarkGoku's topic in How Do I Do That?
Check out this post I did awhile back, I think it will give you the answer. I had the same problem. -
It does help if when you attach it you set the angle at around 90 degrees. I would generally bring my stitching just over the edges of my pockets to stop them from dog earing. This counts a lot when you get around to burnishing or edge coating. I think that is a fine looking effort all the same. Brian
-
I think that is very good @Webicons and I think you reduce a lot of your waste than you are at present. You may some of the info in this post I did awhile back of interest. I found I got my waste on these handcuff pouches down to less than 1/4" and if anything I would say the results were better. Also on the top mould having a relief groove just past the cut off point helps the forming. Brian
-
I did it again! Wrong side out!
RockyAussie replied to alpha2's topic in Gun Holsters, Rifle Slings and Knife Sheathes
It may be true but I don't want a hat with this on the back of it -
Congratulations Charles, I look forward to seeing how you go with it and swapping notes etc. Brian
-
I just checked the 794 needles here and the shank is 2.5mm I think. Have you tried turning the LR needles a little. I have found when the all the tensions etc are right that the result can be very similar to the hand saddler's stitch. I could be wrong there so see this picture below. This is without any twist given to the needle. Brian

-
Ha Ha ...thats 40 drops of blood . What the hell ....Key tags are are not going to be any fun. I'll check out the local blood bank first ....
-
A blood spot to show hand made???? I guess that will slow down the mass production items a bit or the craftspersons.
-
I did it again! Wrong side out!
RockyAussie replied to alpha2's topic in Gun Holsters, Rifle Slings and Knife Sheathes
Nah...Its easy cos I know it'll be the wrong way up to what I first think so I just flip it over. Just a thought, what if it had a bit of thin suede glued onto the pattern on the side that has to be ........ No ..I was right the first time. -
Chrome tan, Veg tan, Other tan....Help me understand
RockyAussie replied to Rossr's topic in Leatherwork Conversation
This is true and I can only say that I have found many Wives tales continue and I can be thankful that I have many times checked out the tale and found it to be false. Just because a person holds themselves up be knowledgeable in this area may only mean they want recognition.Many I have seen would learn a lot more if they stop teaching and start looking and listening more. BTW there are a lot more different methods of tanning than Veg or Chrome and the variety of further processes on even just these 2 methods can make any claims with regards to tooling or moulding and many other assumed good uses quite wrong. And I have to say most leathers can hold oil well as well. -
This is true and I think the term "hand made" is not the bigger issue. I do a lot of work that many would call hand made, including myself, but I have never bothered to brand it that way, or even make such a claim. Making a product that looks and performs better than another, and if the cost is acceptable is more important in my world. The base product leather we work with could could rarely be called "Hand made". The tools whatever they are we use, are rarely "Hand made". You could forever argue what machine is acceptable to use and still call it "Hand made" but what a person wants and how well I can help them with that, is what keeps me and my business going.
-
Well put.
-
That video shows a fairly good procedure Gigi.Thanks for posting it.