RockyAussie
-
Posts
3,265 -
Joined
-
Last visited
Content Type
Profiles
Forums
Events
Blogs
Gallery
Store
Everything posted by RockyAussie
-

Foot Lift sticking problem with 441 clone
RockyAussie replied to dgkfit's topic in Leather Sewing Machines
I would also check that all of the parts around the tension discs that get spread open are not getting caught up and or out of alignment. Was on my Cowboy. -
Newbie with questions
RockyAussie replied to Tigdim's topic in Gun Holsters, Rifle Slings and Knife Sheathes
Looks good. Another strap to the other side and a couple stirrups and she should be ready to ride. -
Photos of leather work.
RockyAussie replied to ABR's topic in Gun Holsters, Rifle Slings and Knife Sheathes
Thank you ABR. I will hopefully get 1 made this week and I'll get back with a pic when done (if it is not tooo uglly that is) -
Photos of leather work.
RockyAussie replied to ABR's topic in Gun Holsters, Rifle Slings and Knife Sheathes
They all look good to me. How long do you make the rifle sling straps when they are at full length. I have been asked to make one from the hornback crocodile straps and I think this design shape would work perhaps. Any padding tips would be welcome as well. Brian -
Latest belt
RockyAussie replied to gigi's topic in Purses, Wallets, Belts and Miscellaneous Pocket Items
Beautiful> I would like one but with oval holes please. -
I guess you could take the shaft right through and hose the end into a bearing held into a vice at the base.
-
New Cowboy 4500 - Need some help.
RockyAussie replied to internetcowboy's topic in Leather Sewing Machines
I agree with Floyd and have run it straight down for the same reason and have not had any problems. -
Newbie with questions
RockyAussie replied to Tigdim's topic in Gun Holsters, Rifle Slings and Knife Sheathes
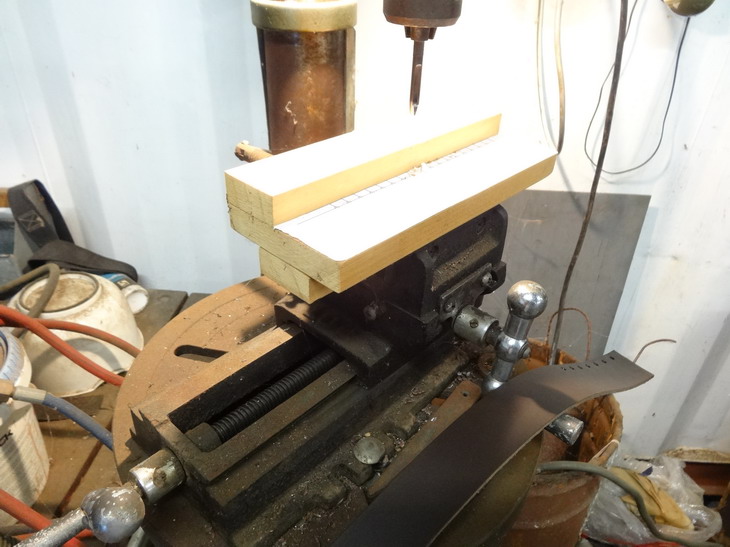
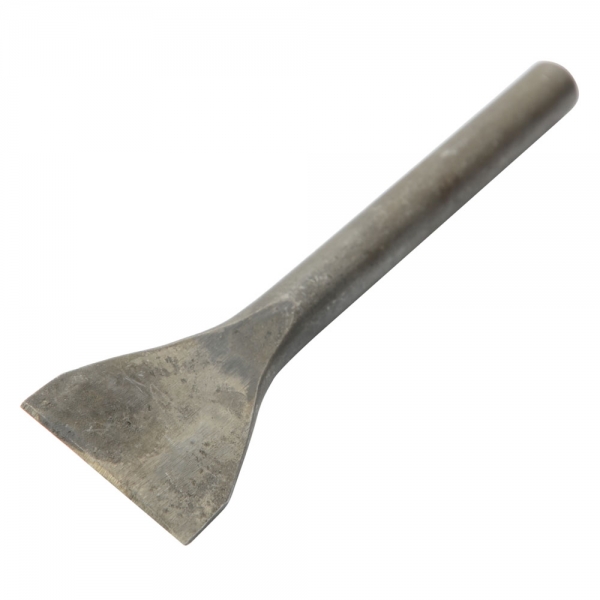
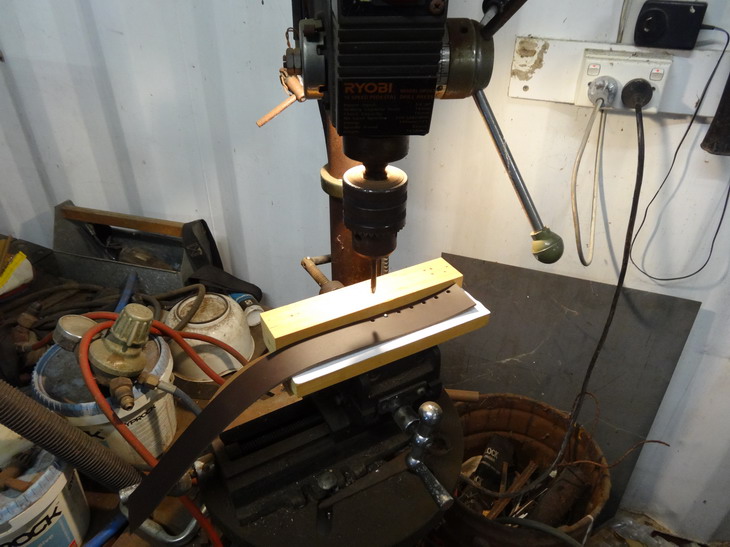
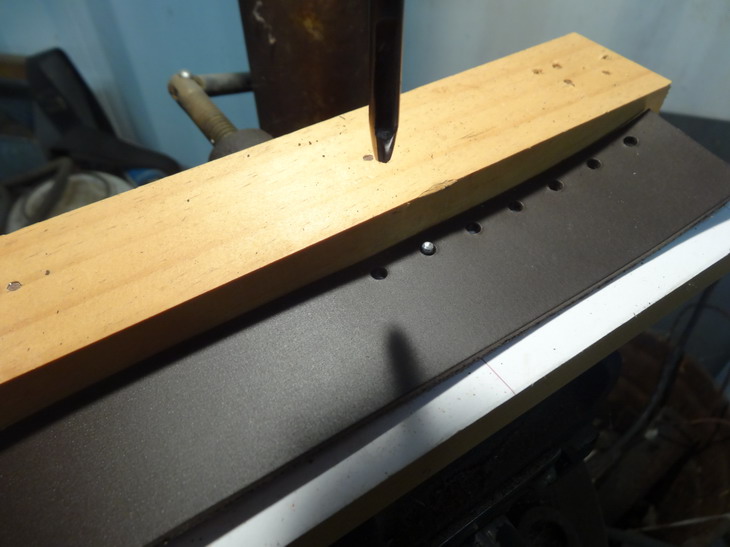
Hey Dwight ...I just thought I would add a little to this as I have used your answer here in a different post http://leatherworker.net/forum/topic/79982-braided-dog-leashes/?tab=comments#comment-534074 There is some more detail in that post but in case it helps, here are some pics here that should tell the story . Note that with this set up you can easily set whatever hole or needle spacing you want and get at the same distance from the edge consistently. Brian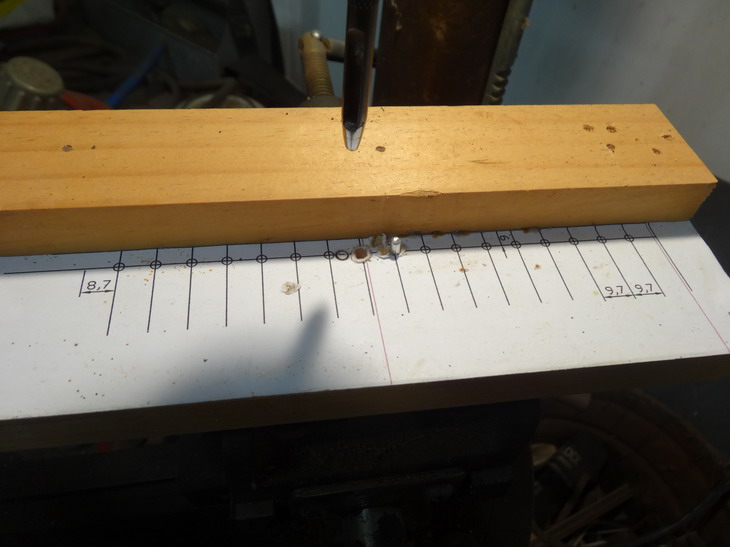
-
Further to @TomG excellent tip I will offer 1 step further in case it is any help. Firstly as I am trying to out do @Dwight at being plain lazy so I will high jack his answer to a similar sort of question. As follows....... Now this is going to rankle some feathers , . . . and it is just too bad. I'm just plain lazy, . . . do not like to do any extra work that I can figure a way around or to get out of. That is why I have a Tippmann Boss sewing machine, . . . "Hands are for hamburgers, . . . sewing machines are for stitching". But if you don't have the machine yet, . . . this is a down and dirty way to save yourself some grief. If you have a small drill press, . . . or one of those $20 things that hold a hand drill and work like a drill press, . . . drill a 3/8 inch hole in a piece of plywood about a foot square, . . . tape it down so the hole is where the drill would be, . . . chuck up your awl blade in the press, . . . run your stitch wheel so you know where they need to be punched, . . . use the drill press to punch the holes. Take a piece of duct tape and tape your chuck so it does not turn on you, . . . or just eyeball it every time you get ready to drop it through. # 1: it is a super whole bunch easier # 2: it is easier to see where you are punching because your hand is not in the way # 3: the holes are absolutely 100% straight up and down (otherwise the back looks somewhere between "not perfect" and "downright shabby") # 4: you can punch all the holes for a project, . . . take your awl, your needle and thread and go over to the couch, . . . turn on your favorite TV show, . . . sew and watch the boob tube at the same time. AND, . . . it is so much easier on the hands. Also, . . . if you want a bit of a fancy stitch, . . . turn the awl blade about 30 degrees, . . . and it gives a bit of a rope looking effect to your stitching. May God bless, Dwight Me again.Thanks Dwight. Now some pics to make maybe a bit more sense to this. The first pic is a tool as Tom suggested and note the end is round and could go into a drill chuck. . The second picture is a drill press set up with a jig I made and has a hole punch in the chuck in this case.The purpose of the jig held in the 2 way vice is to allow adjustments in both directions and to keep the leather at the same distance away from the edge hole after hole or slot after slot or awl after awl etc. In this next picture closer up you can see a little rod set into the wood and this is to move the leather onto each time a bit like a sewing machine. I drill down and it cuts the leather with very little effort and does a little burnishing as well if I want. Great idea for lacing up bags and such hey. Last pic here shows leather being hole drilled with same distance from edge as well as same distance apart. NOTE by moving the adjuster on the 2 way vice thingy I can set the hole distance apart at any spacing I like from the peg and get thereafter the same hole spacing time after time. With the slot you want you would need to set in a thin nail with out a head and work it to one edge of the slot each time.(MAKE SURE THE DRILL CAN NOT BE TURNED ON WHEN SLOT PUNCHING) I might make this a separate post a bit later. Brian


-
Is my watch strap supposed to look this worn?
RockyAussie replied to doingmahresearch's topic in Leatherwork Conversation
What makes it not look like veg to me are a few things.1. there is not depth of colour into the hole and it looks like a pigment (paint coat) 2.Veg will normally compress when cut and retain the compression after the punch is removed. 3. The grey colour looks like chrome tan and if it were coloured that way it would have gone into the lining as well. Still I could be wrong. What's your bet? -
Is my watch strap supposed to look this worn?
RockyAussie replied to doingmahresearch's topic in Leatherwork Conversation
I'd say the wear looks normal but I would have thought the top was not a veg tan just gong on the look and the hole colour green grey . Could be wrong!! -
Love the bobbin -thread inspection hole.
-
That'll stop a single wearing thread track.
-
Had some years to get all of them though. Now where is that emojie with a trail of money falling away???
-
Yea that happens sometimes.....not sure why. Be interesting if we get the patches size down for purses and such.......we wouldn't need stock for 20 years maybe Helps if you're a bit mad I think....or a lot Thanks Gary More next week and have a good weekend you all.
-
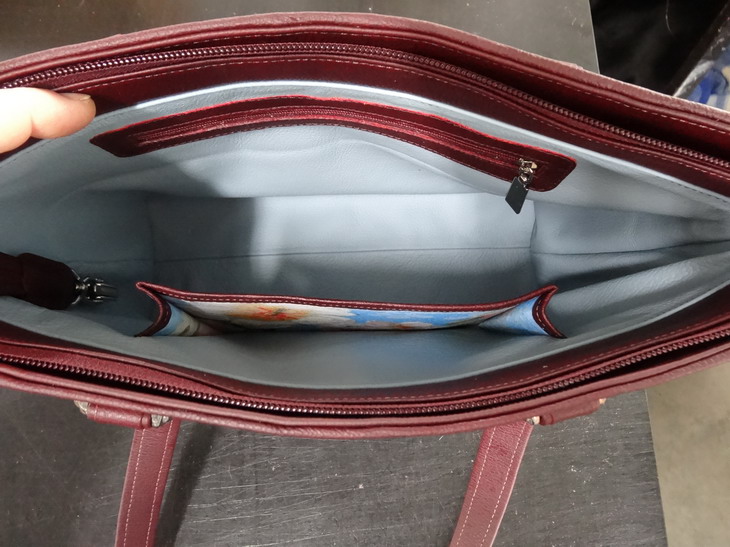
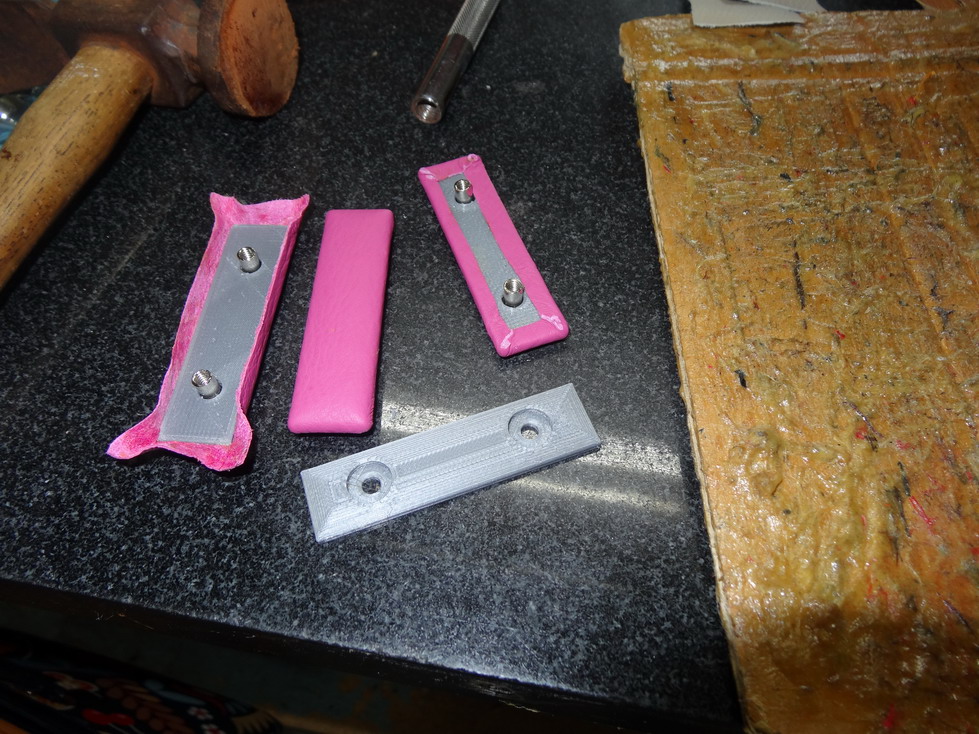
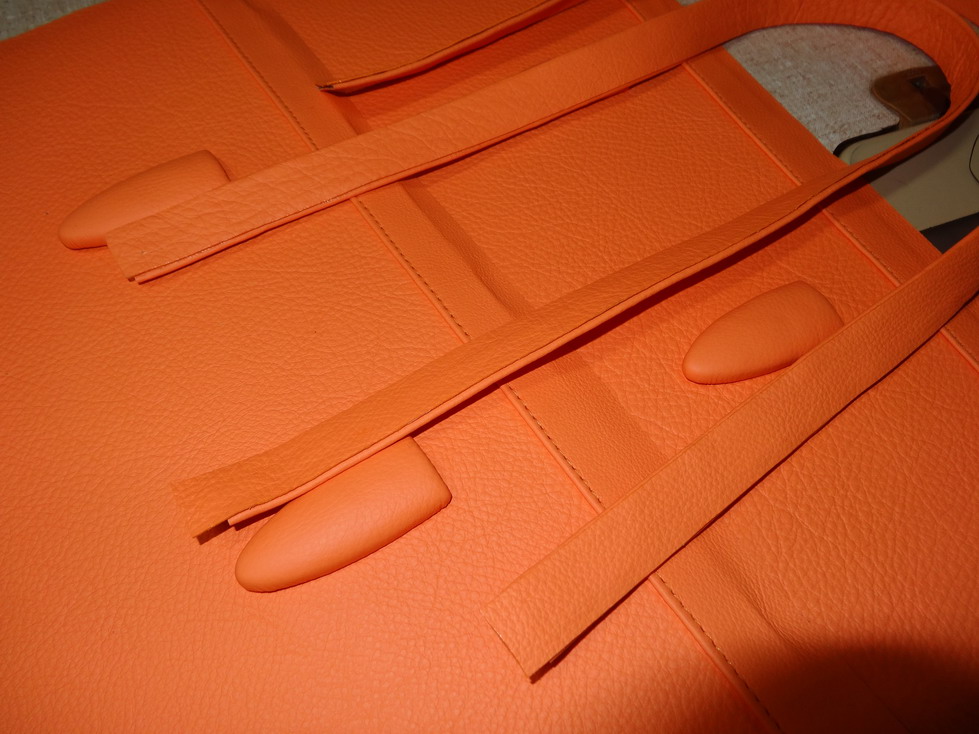
Thanks @bikermutt07. To be honest my wife Mary has more to do with the making I just work out the basic bag design and a few other bits. I will try and get to show a bit on the bottom stop protectors and how they are made as we get along more but for now here is a few pics that will help give the idea. Note that although I have elected to 3d print the support for these pieces they could be made fairly readily by putting 2 pieces of veg together with the different size holes and then skive or sand to shape. Chicago screws are what I have used in this case. I will attach some pics of a similar handle holding system I use on some bags as well again with Chicago screws and in one case a small bag foot as well. Note the bottom bag shows some more uses for the small leftover pieces to go to use.


-
I got it ...I think

-
Hep that's the one I reckon. Now ...not that I would need to use it often I guess....how do I get that into my computer to use again???? Thanks @JD62
-
Where is the emojie with a dripping salivating mouth????
-
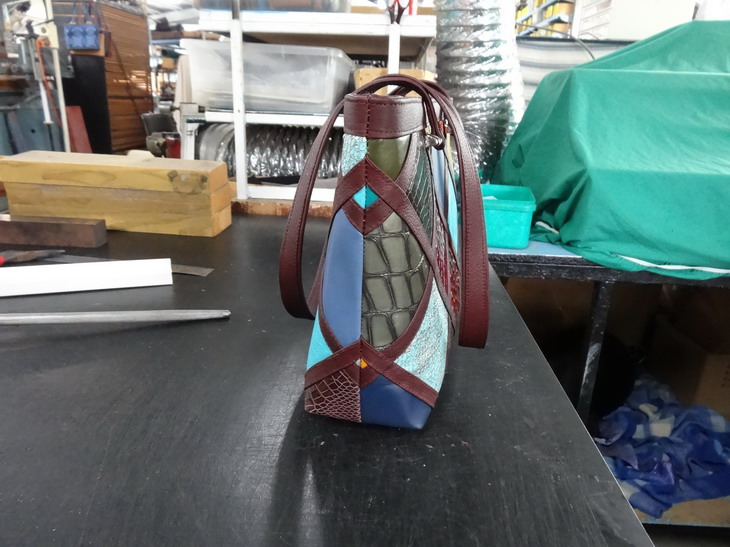
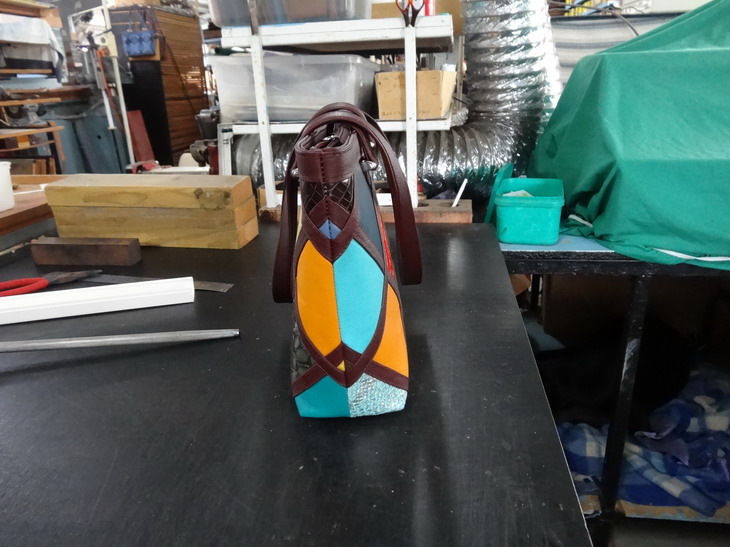
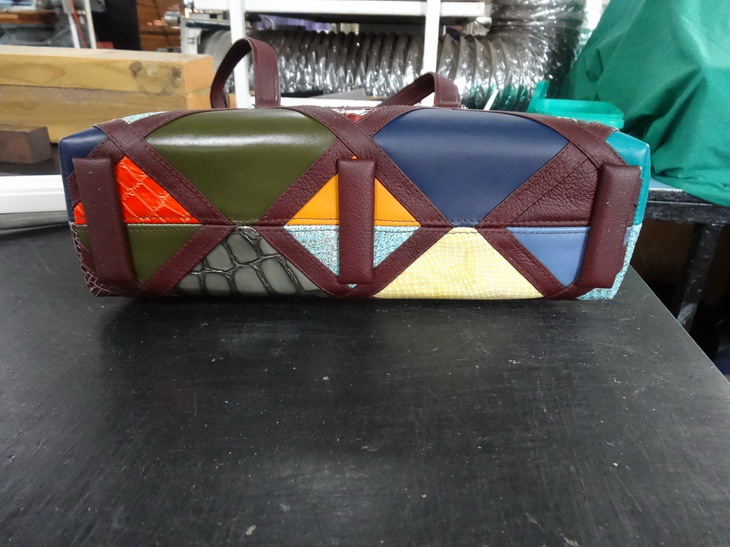
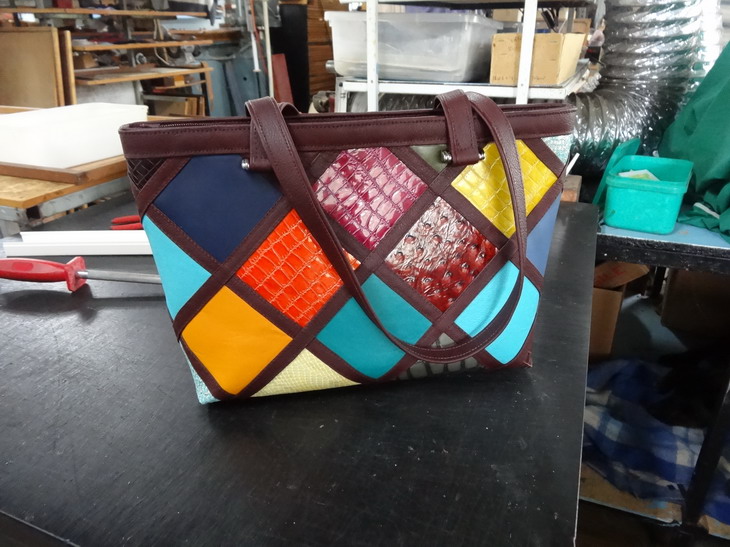
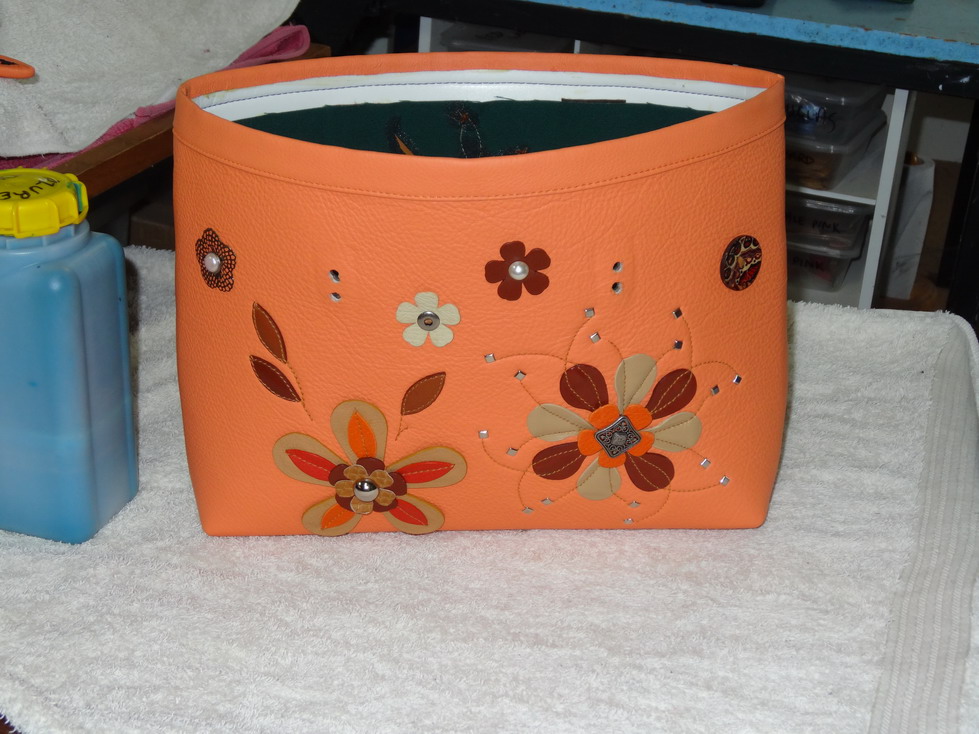
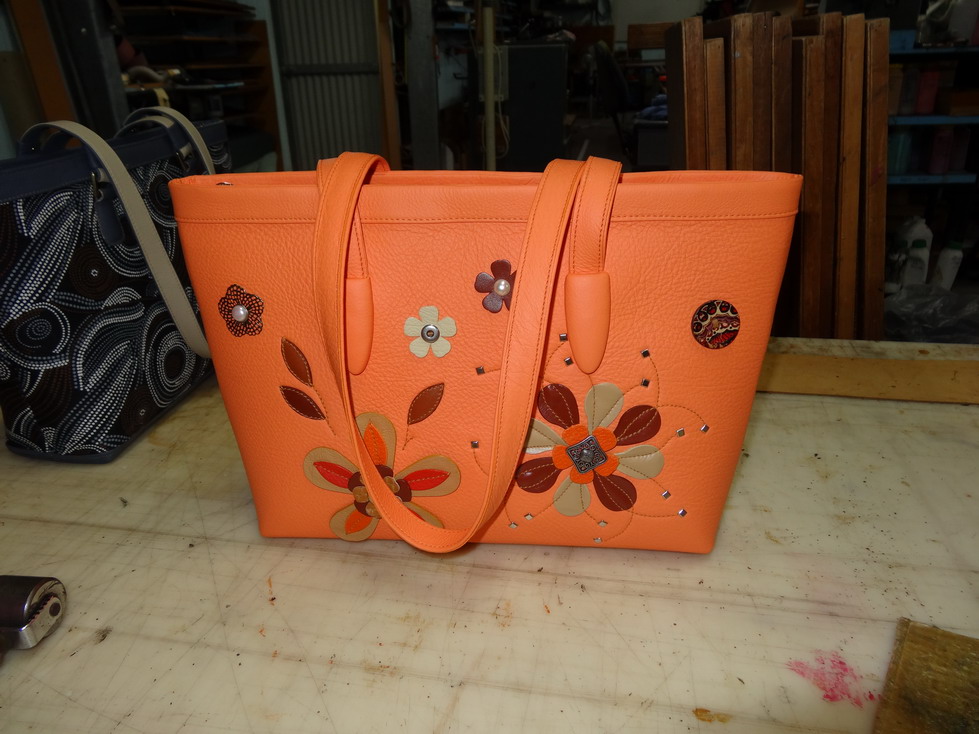
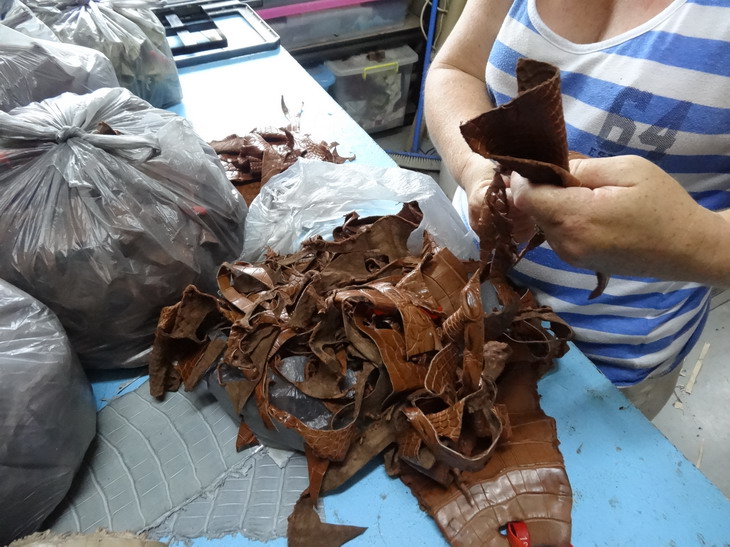
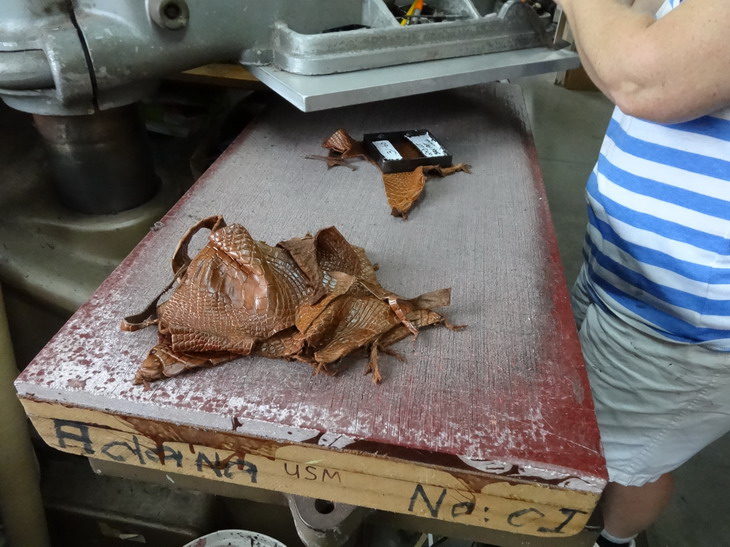
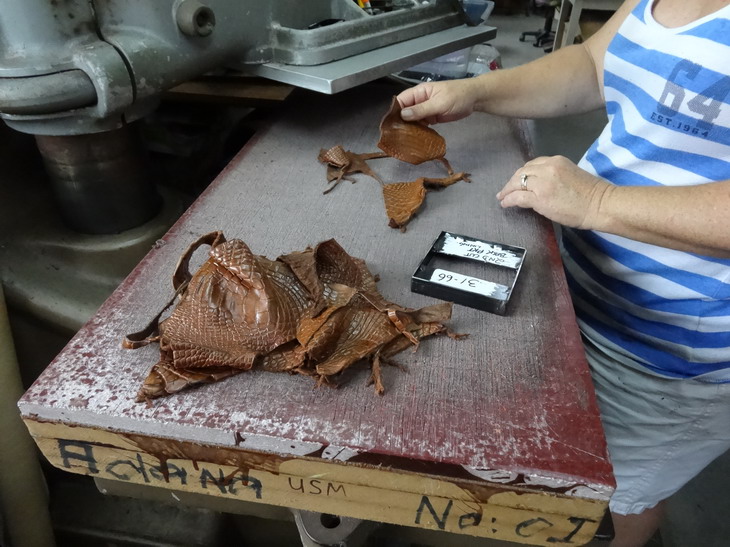
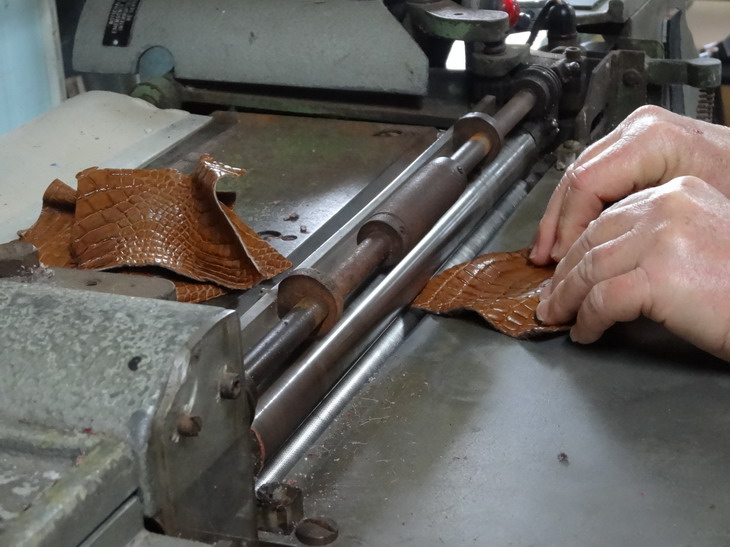
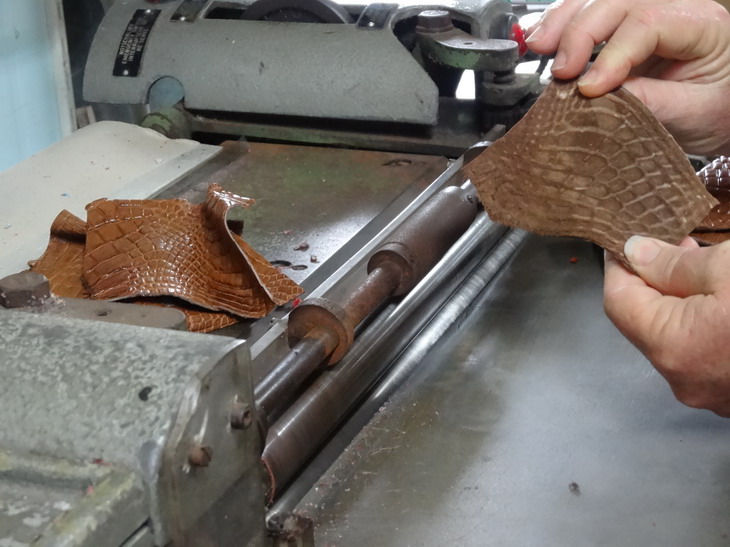
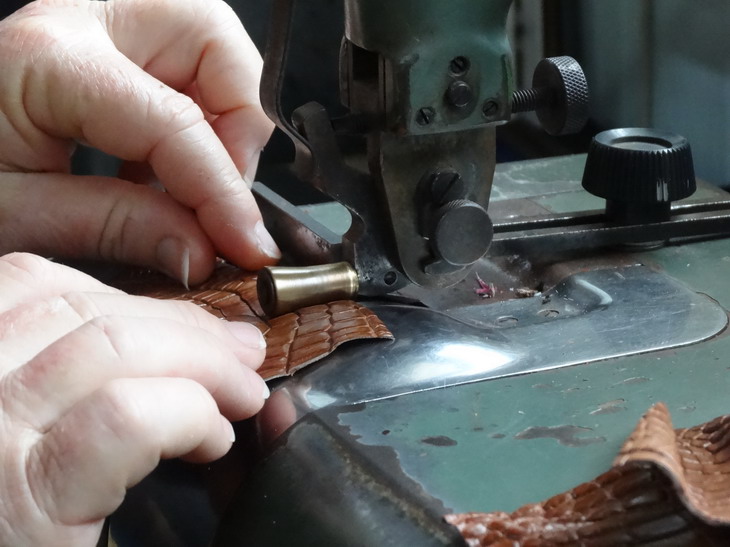
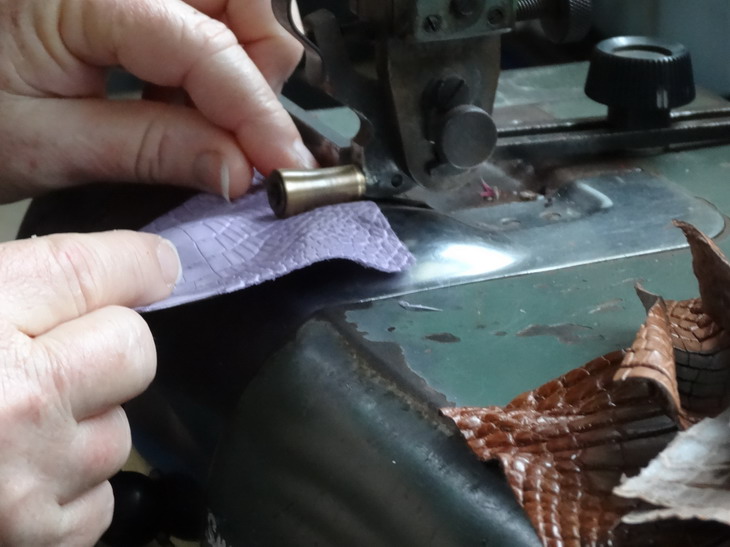
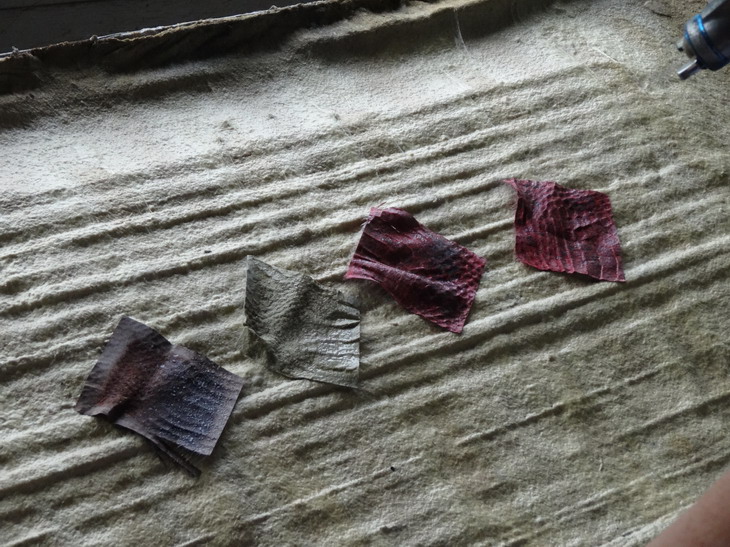
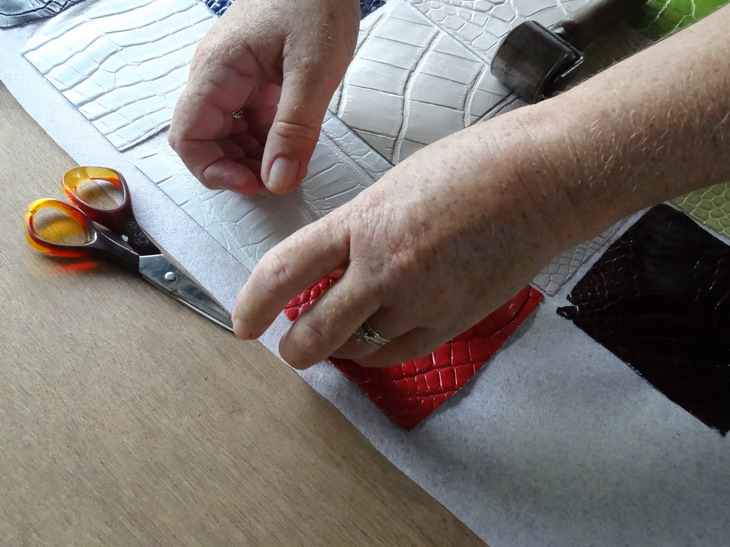
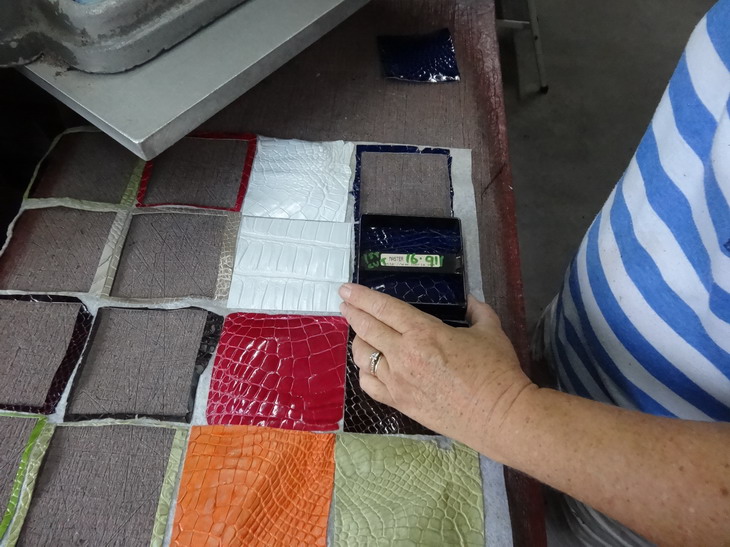
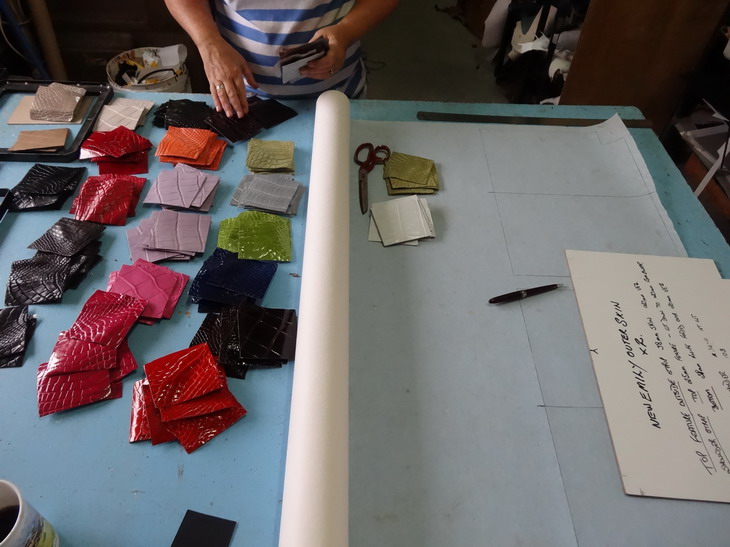
Thank you. With crocodile often elbows and the like get very wobbly and sometimes a little hard to make use of but this is one product we can get away with a fair bit as you will see. The first step is to sort through the scrap and find bits big enough for the pattern. Next step is to do a first cut a bit oversize and the easy way of course is with a clicker press as shown here. Once the bits have all been cut we then go onto split them down a bit thinner This is then followed by a skive around the edges to improve the look And now they are ready to be glued down which we do by spraying on a contact glue. These pieces are then carefully attached onto a pre sprayed interfacing material. this assists in getting the wobbles to sit a bit flatter. Now we go on to second cut these pieces and get a way more uniform size to work on further with. After the second cutting is all done we draw an outline of the bag shape and proceed to lay out the pieces to get the look we like. Finding a complimentary colour for the strips is then sorted out. With some luck here I have not gone over the file size loading restriction and I will load more tomorrow. B.T.W. Most leathers dont need all this first and second cutting procedure its just that I mostly work with crocodile so please excuse. Brian


-
Hey Gary, we have quite a large variety of them that we generally get in from Japan from a wholesaler. They come from different places with all sorts of names but over your side, Ohio Travel bag call them handle loops if that helps. I would get a copy of their online catalogue as they have a large range of stuff and not bad looking quality.
-
I believe that would be correct but I think it may also have a heater that transfers up the shaft to get a better embossing as well. Nice if it has a few other wheels as well.
-
Thanks B.Bob.
-
A picture would help Dwight but at a guess I'd say you first need to break away all of that probably poly urethane sole and clean it up with a wire brush. Next put a leather randing around the edge to cover up where the other sole came up too. Put on a mid sole say 1/8 -8oz or so thick and get some cobblers tacks long enough to clinch down into the mid sole after gluing it in place. These need to be hammered down onto a steel last normally. Then glue your sole down onto that midsole and sand it all up level with your randing. Often a thin sock liner (insole) would be put inside to make sure the tacks are not going to rub the foot. If it has a midsole already then the barge glue should work alright. Brian
-
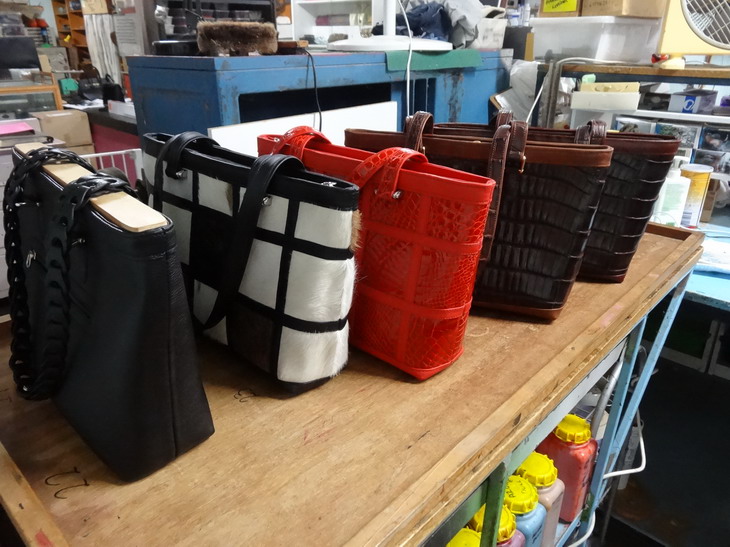
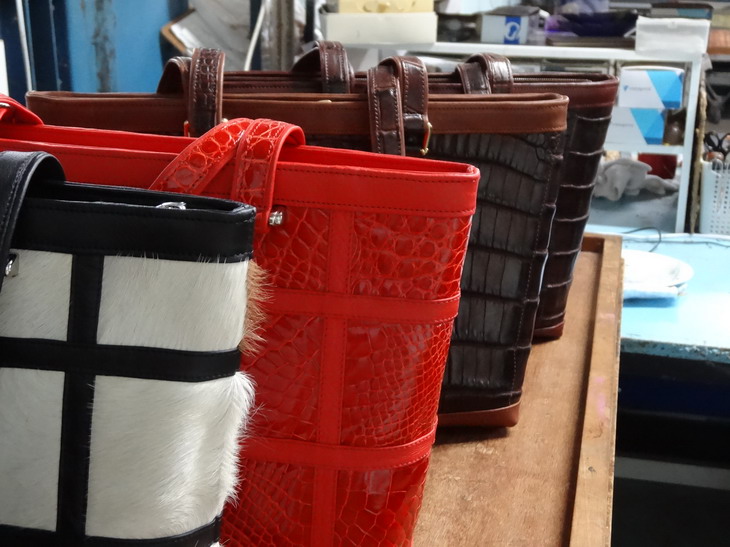
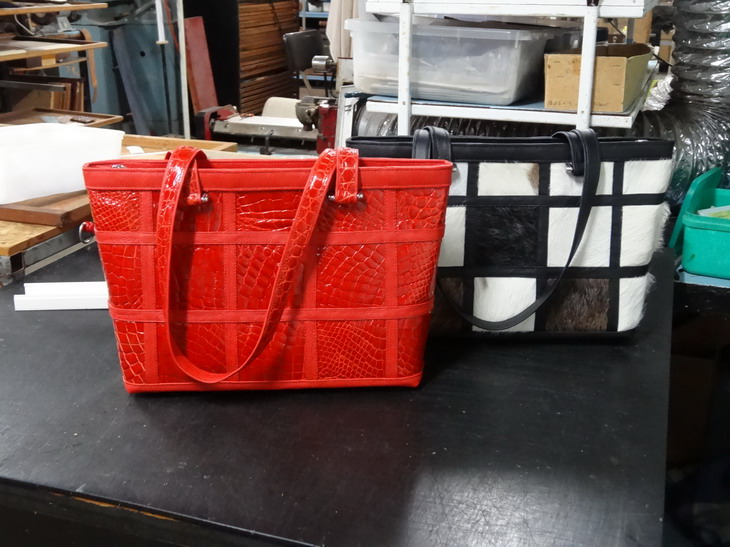
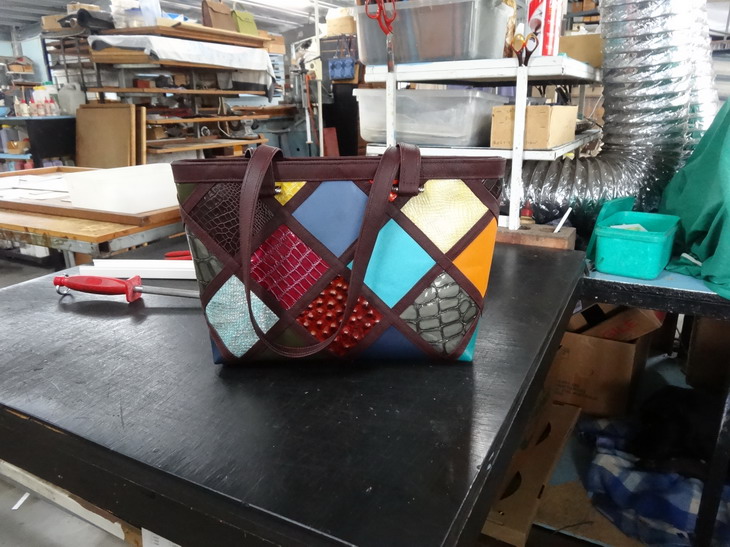
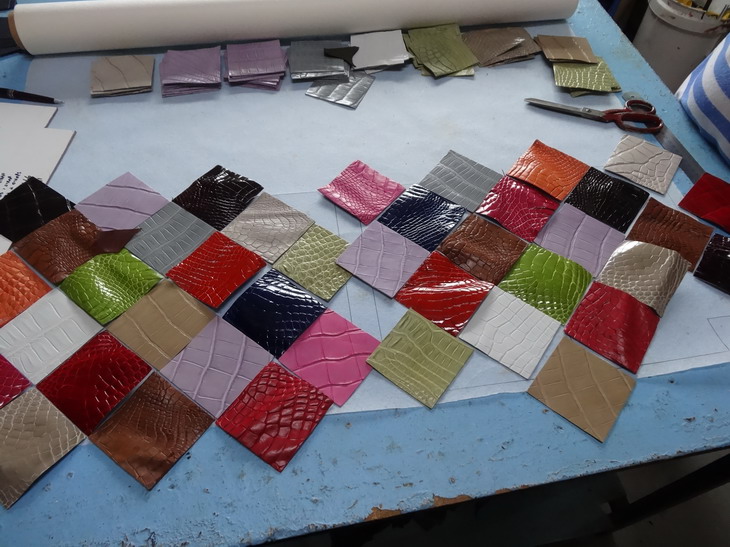
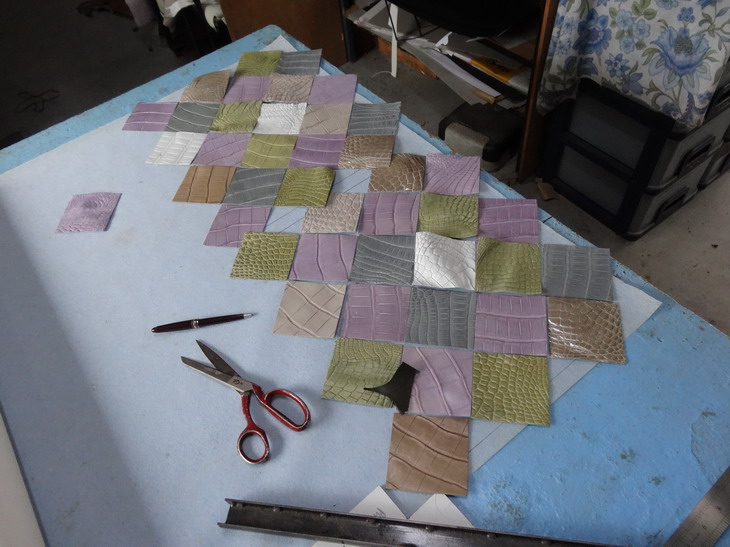
Done a few patchwork bags lately and thought I'd share a little of the stages of making with you all. Might help give you some ideas what to do with those bags of scrap you been wondering what to do with. I will post more pictures over the next few days showing one of the bags as it progresses along. If you check my instagram there is a little video footage of the making as well. https://www.instagram.com/p/BgDdzHLnzct/?taken-by=wildharryaustralia Note there a 5 I think little videos in the one post and you may have to click the picture as it gets to each part to make it play. To start with here are a few pics that show what the later making pictures will be about. The first 3 pics are the type of bag construction we have just started to make a few of. The next few pictures are the new diagonal style we have just developed and that is what the following making pics will be looking at. That's all it for tonight. Brian