RockyAussie
-
Posts
3,265 -
Joined
-
Last visited
Content Type
Profiles
Forums
Events
Blogs
Gallery
Everything posted by RockyAussie
-

What to line a knife sheath with
RockyAussie replied to GAELICROSE's topic in Leatherwork Conversation
In the past I made a lot of knife sheaths for a fellow in Norway and I think it was called a Puukko from memory. He used to supply me with a shaped plastic liner to be installed in the pouches. That gave me the following idea for the following. The sheaths for the Puukko's were all made out of porosus crocodile skin so the cost was not such a problem. What I have done a couple of times since is made something similar by first making a wooden blade copy then heating up some thin poly pipe tubing until it started to flatten then gently pushing the wooden blade down into it. If you make the tube longer you just need to sqeeze it together at the end and leave clamped until it cools off then trim to shape after. Hope that helps some. Brian -
Just to let you know the Cowboy CB 4500 according to the page on http://www.tolindsewmach.com/cb4500.html states this below Needle: 7x3 or 794: #18-#27 Thread Sizes: #69 - #415 I haven't tried taking the thread that thin myself as I have a few other machines that can handle that size fine such as Pfaff 335, an Adler 69 and a stack of others, but I would think maybe have a talk with Bob there first myself. I would still think a cylinder machine would be a better starting off machine myself.
-
The Unicorn has Landed -- Singer 19-10 in the shop
RockyAussie replied to Matt S's topic in Leather Sewing Machines
If you do please let me know. -
19th century Hugo Werteim shoe patcher
RockyAussie replied to RichardPorley's topic in Leather Sewing Machines
Congratulations....That is amazing. The base is so ornate I would almost be tempted to drive down and get it. I really hope it comes through intact. Brian -
Restoring Old Veg Tan Leather
RockyAussie replied to CoyoteSunCreations's topic in How Do I Do That?
This may be a stretch but many years ago when I was doing shoe repairs and selling leather craft tools and such I had one customer come in with a pair of old boots that were nearly solid. It did not matter what I did he said as they were not wearable now anyway. I knew that any normal leather conditioner was not going to go anywhere near close to working so I thought I would give this tanning solution kit a try out. The part I used was Leidreiters Leather Lube. I am not certain but I think the same stuff may be named Leder leather lube these days. The results were completely amazing. I got a brush and just painted over the leather and kept going on and off untill they stopped taking in any more. That was a mistake. The leather went that supple that it took another 3 months for them not be all sloppy when he wore them. I tried it on some tooling veg here to see how it would go and to my surprise it went soft but left no residue marks either. I found this page online and it may be of help. As I said I do not know if the formula is the same any more but if you give it a try please let me know the results her as I am sure a lot of others would like to know as well. http://www.archeryessentials.com.au/LederLeatherLube.htm I just checked and that site is in Australia but a bit of a google should show up some a bit closer. -
It may be your wording perhaps, but normally the stud stem does press into the hole and not the slit, contrary to what you have said above. In the picture of the bag you have shown if you were to pull on the strap it would be stopped by the hole and not the slit and is therefore correct. Have any pictures that show it the other way?
-
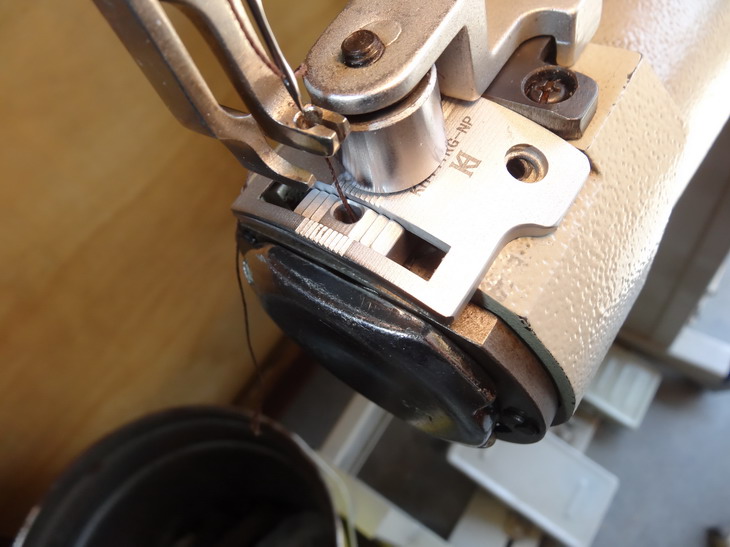
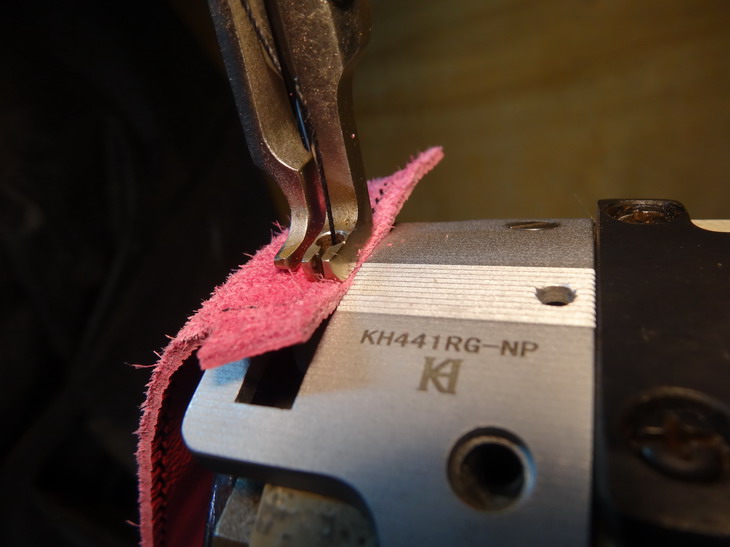
I spent near to an hour trying to work out how to say something along that line. Given the range of products you mentioned like dog collars and so on I would spend my money on a 441 Class machine first. Although I would not use it for doing wallets normally, I have done so and the results turned out well. The below wallet was done with 20m thread (138). If you track down where to get this needle plate and dog foot combination you can get down to upholstery weight and without any other changes other than thread tension and a little foot pressure go up to some very heavy weight leather as in this linesman's pouch which is about 3/4" thick. It also allows you to get up very close to the edge. The extra foot lift and capacity over the 3200 is worth spending the bit extra on. Lastly ....I do have some flat beds but they are there for the ladies to use.

-
Crocodile ridge Bracelets
RockyAussie replied to Plaitinem's topic in Purses, Wallets, Belts and Miscellaneous Pocket Items
Very tidy looking work there. -
For many years I have found Wmc Jackson ( Peter Jackson) to be very helpful. O3-94173131. http://www.wmcjackson.com.au/www/home/
-
The Outlaw has finally Struck....
RockyAussie replied to bikermutt07's topic in Leather Sewing Machines
Funny that....I said that to me missus ....I'm learnin bout cooking tonight. -
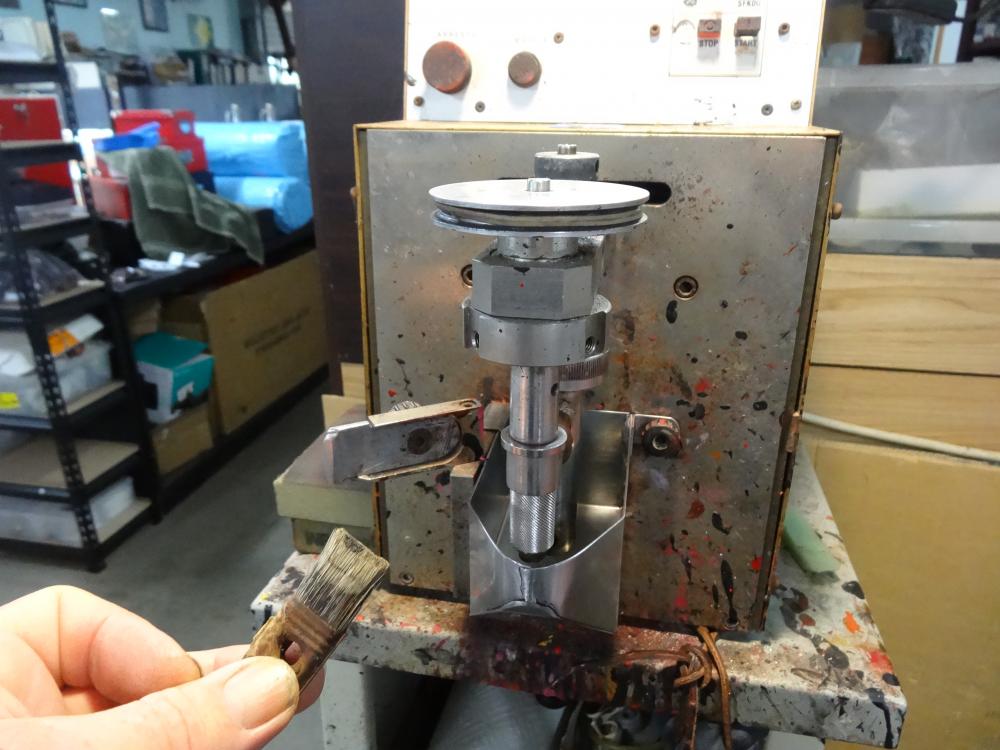
I have a similar edging machine and use it nearly every day. I find I get better results and more consistent application by getting rid of the brush and making up a aluminium strip to replace it with as in below pics. This also makes the cleaning up a breeze as you need only wipe it of with a damp paper and it does not need to be taken off then either.

-
Its actually pretty easy except the edges often work better with a leather covering such as in the top edge here. Ignore the missus....she'll expect you to shave and all next if your not careful. You'll even be expected to know how to make your own coffee
-
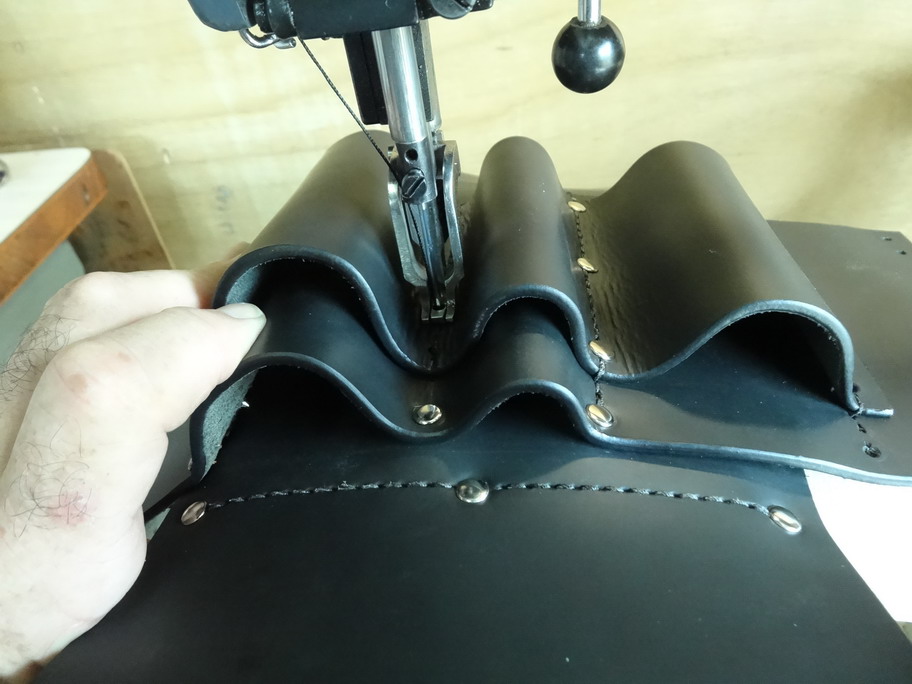
Hi @Dun That is the first time I have done that and being machine stitched I didn't think of the fold showing the bobbin side thread until I had it done. Had to unpick back to where it gets hidden about the fold and restitch. Live and learn. Re the feet ... I think I might make up some more interesting shapes like arc's and stuff. What do you reckon? Thanks for the compliment but as I normally do crocodile that has to be made to very high standards, these are really more practice pieces. The last 3 croc ones we made for a retail customer sold in only 2 weeks at $3000+au each. As you would expect heaps more orders. The hardest part is working out how to make the leather ones at an affordable cost, example here would have to sell for near $700au and that does seem to slow the average buyer down a bit. Unless they know our product quality already that is. Ha Ha ...I been wondering bout that.. but.......... Thankfully LW helps make that come closer a whole lot quicker. Thank you, we try.... a hundred pictures to start with help too.
-
I have to agree. I still have some of the Landis rough rounder and skiving machinery and never use them these days.They are very good if you want to cut hard sole leather but pretty rough for most leatherwork IMHO. For cutting knife sheaths I usually cut to shape one side first then attach the top side oversize and then trim it to size. A follow up sand and its done. Here a tube video I did awhile back and theres a couple more might pay to check out as well-
-
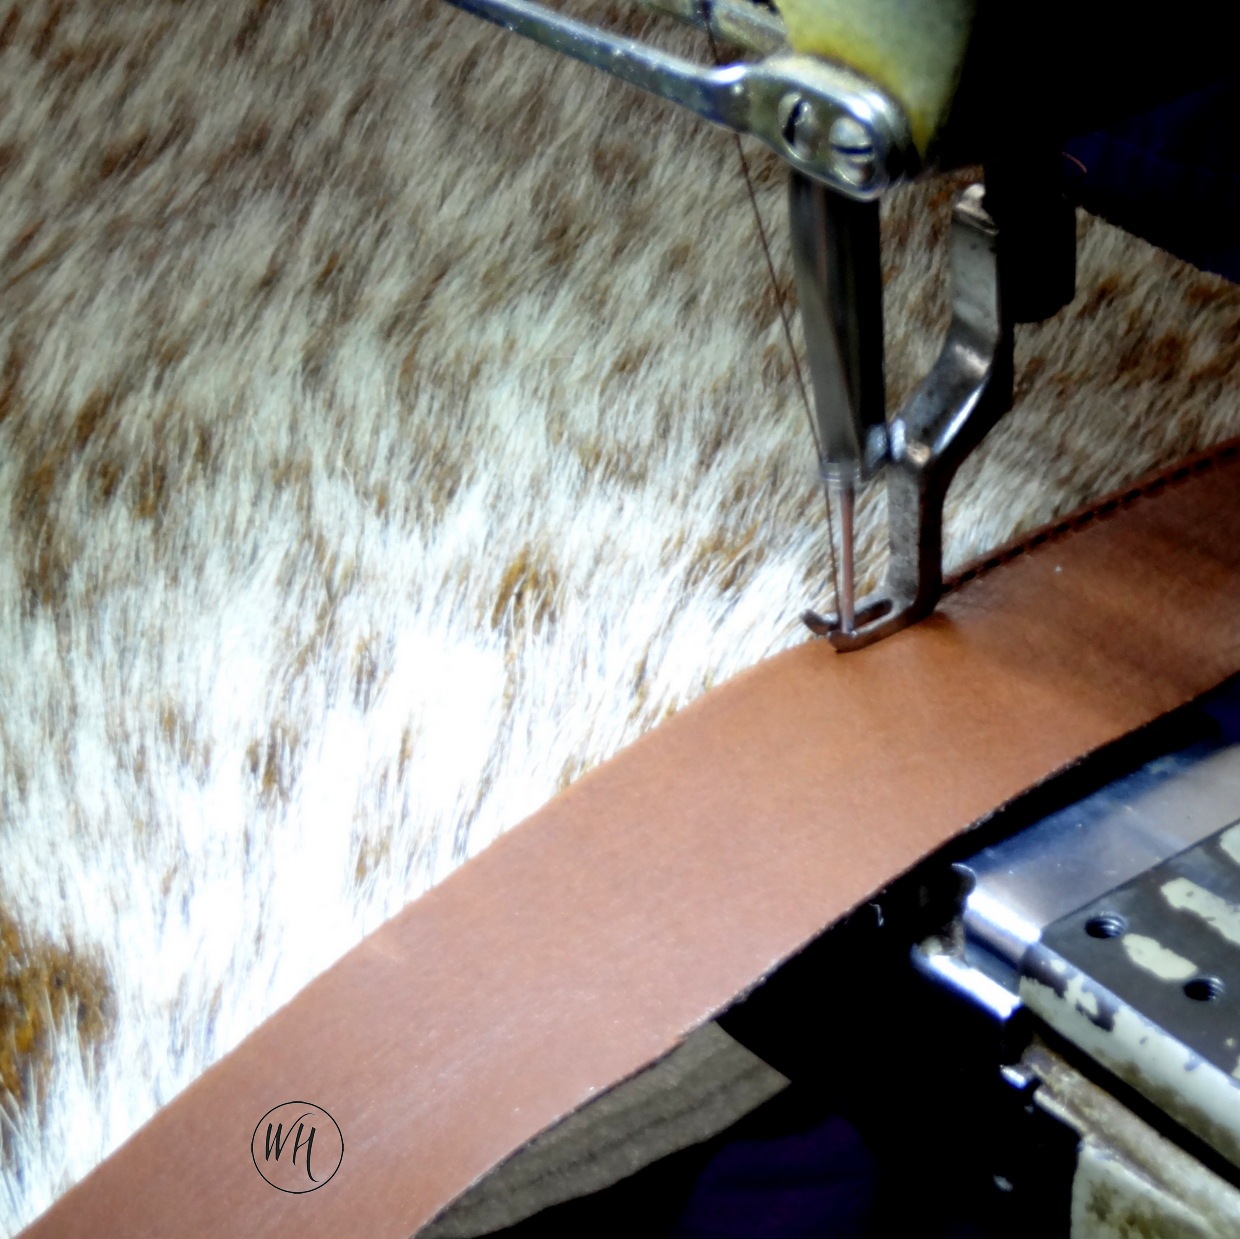
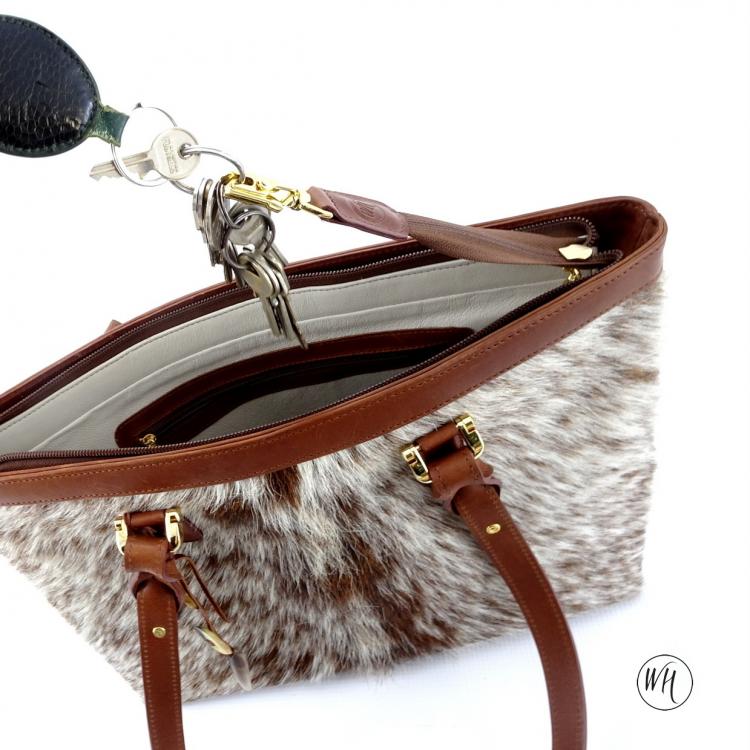
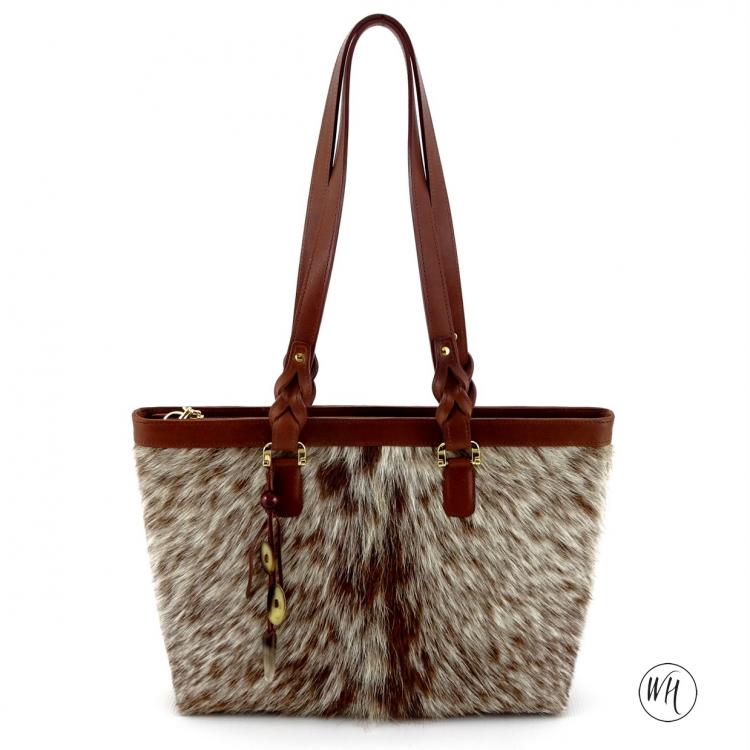
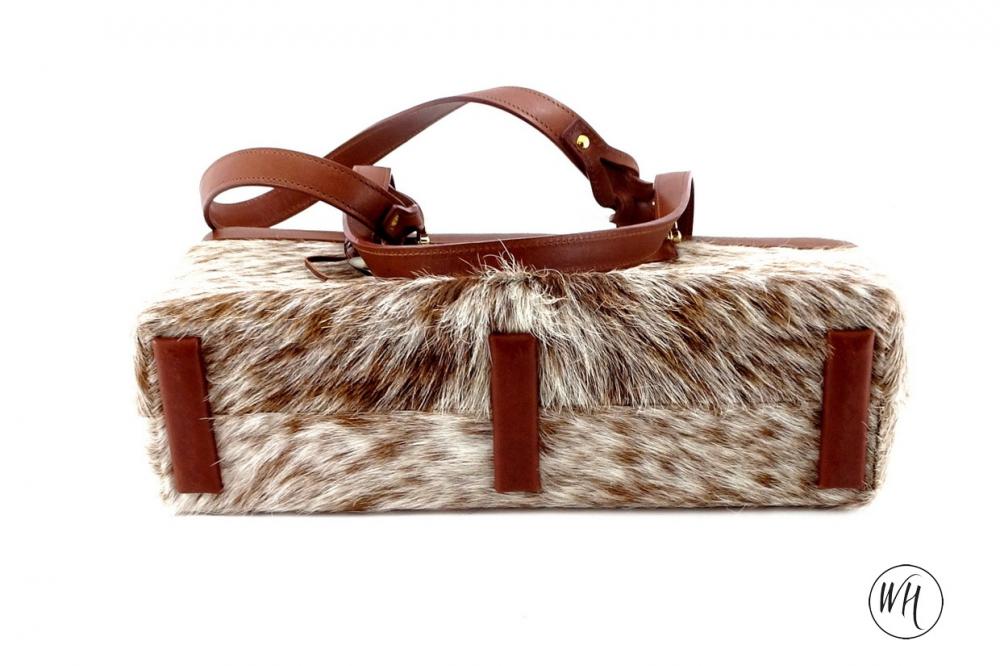
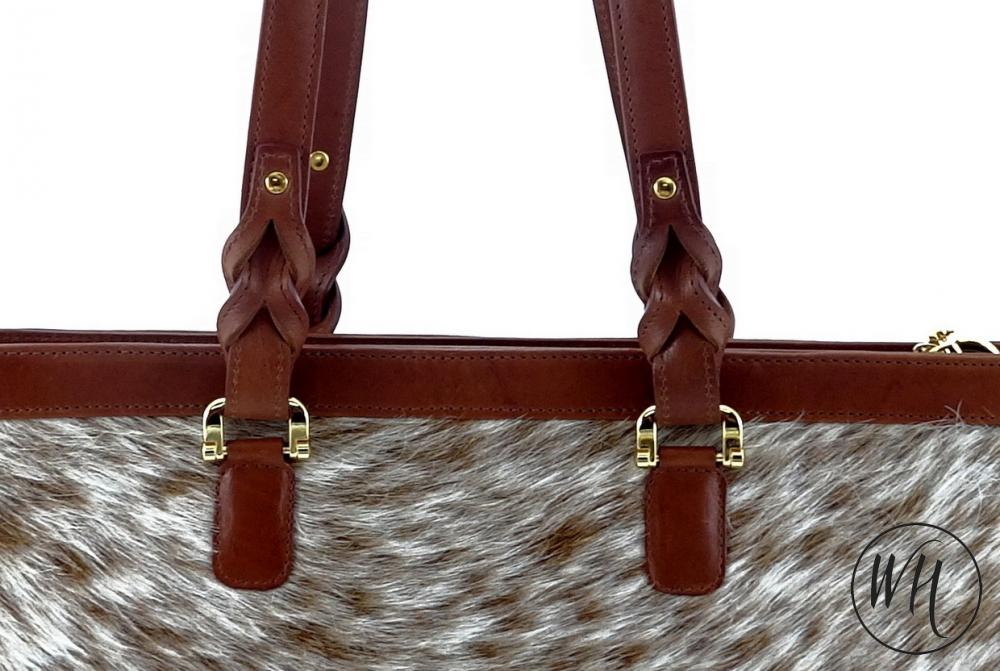
Hi Bugstruck. Thanks for the compliment. The leather I used on the straps and binding is called Jungle and is an oil tan retan from East Coast Leather in Brisbane Australia. It comes in about 2.5mm and I split it to suit. The feet or the pads on the bottom you could see more of in an earlier post I did on this tote done into a patchwork style. Here is the link- I'm told there may be a short Video in the instagram pics so here a link to it as well. https://www.instagram.com/wildharryaustralia/ Please ignore the bums in there....my daughter in law has been busy looking after the postings on that . Lookin for a broader audience I am told.....
-
Holly crrr...ap I just reread this and when I said A4 , I meant to say A3. I hope no one started something on that.. Sorry. With the lining until I did a few I left one end unstitched for a couple of inches and trial fitted it - marked the spot and then stitched it all the way up.
-
Thanks for that. Amazing what you can do with these digital cameras and 100 odd shots.
-
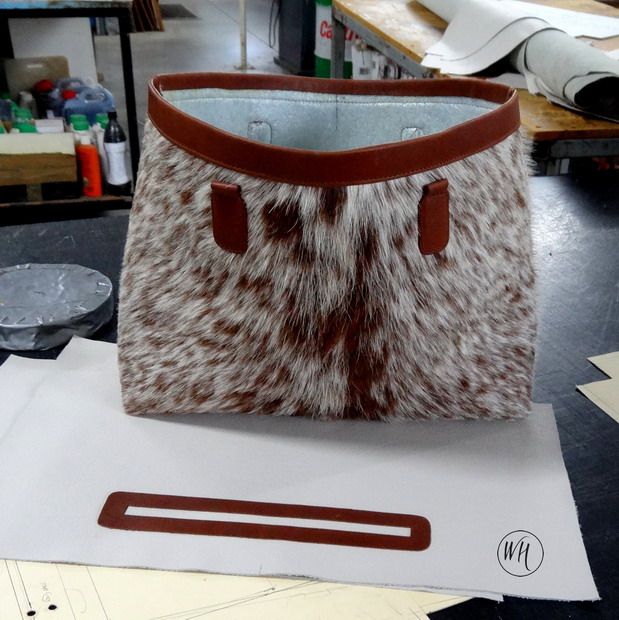
Thanks Wedgetail, The outer pattern's pretty simple really just a standard A3 sheet with 40 mm squares cut out of the bottom corners. Stitch up the edges 8mm in and then again 8mm across the bottom corners and bingo. Patterning and putting in the zip stuff and it gets a whole lot my interesting. I hope it does mooooove soon or at least before one of me cows gets to see it
-
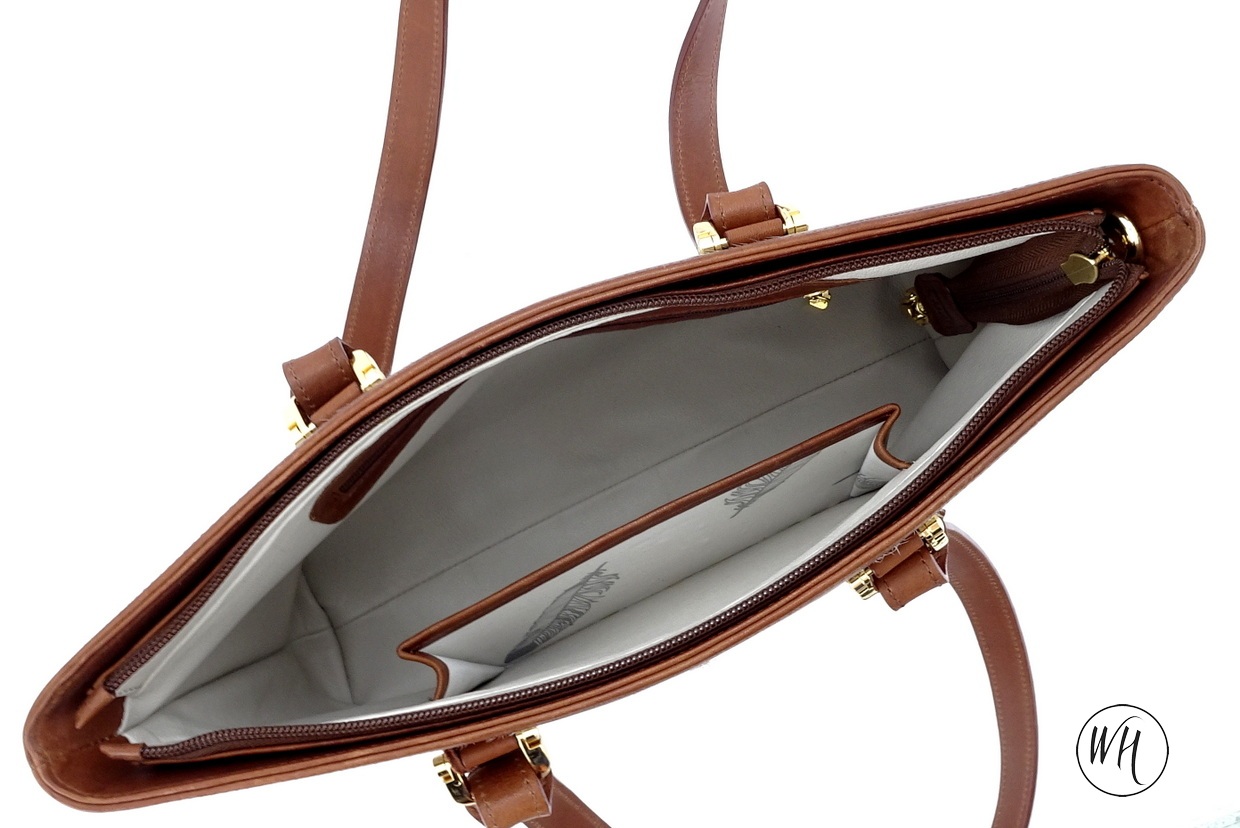
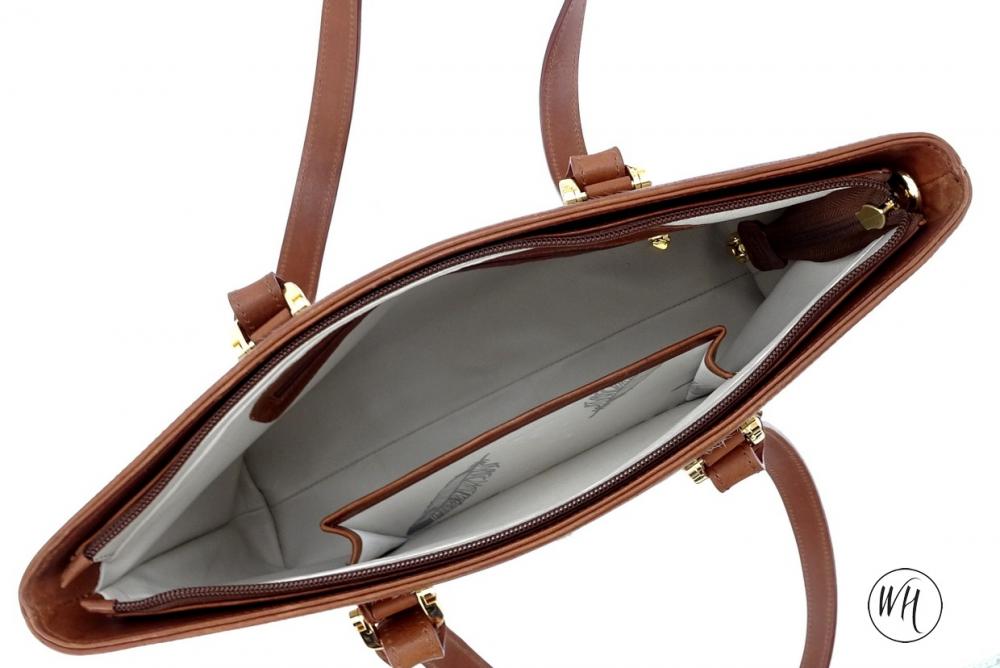
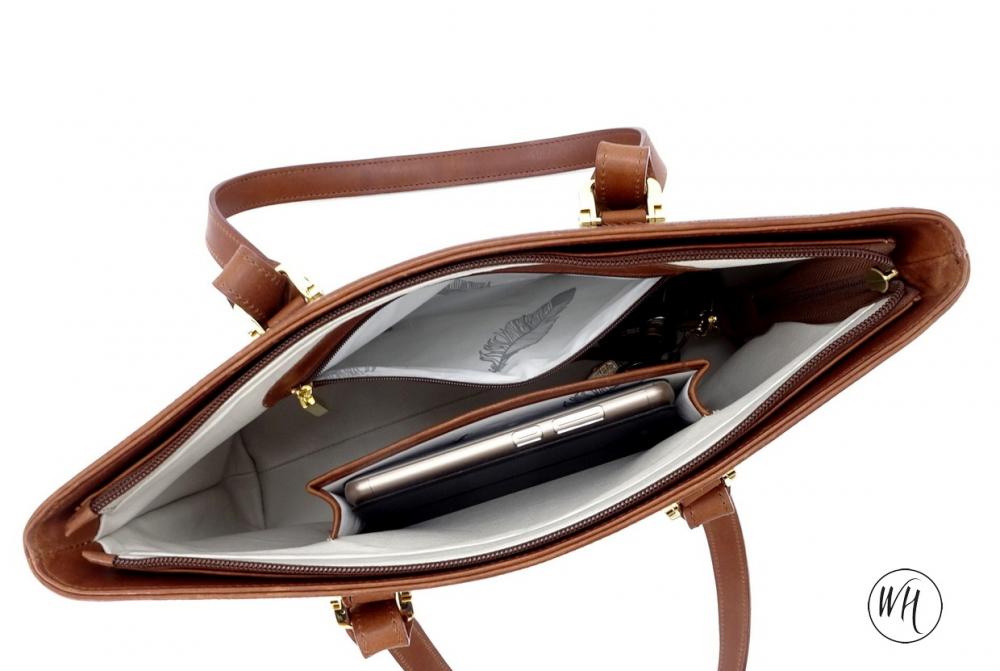
Hi Gary, the lining is upholstery leather except for the inner pockets and the foam padding acts as a supple stiffner and is from Sekisui and is called Softlon 3002 which is 2mm thick.
-
Thanks now I just need a customer that wants it Mooooor @YinTx
-
The Unicorn has Landed -- Singer 19-10 in the shop
RockyAussie replied to Matt S's topic in Leather Sewing Machines
What Joe said .... -
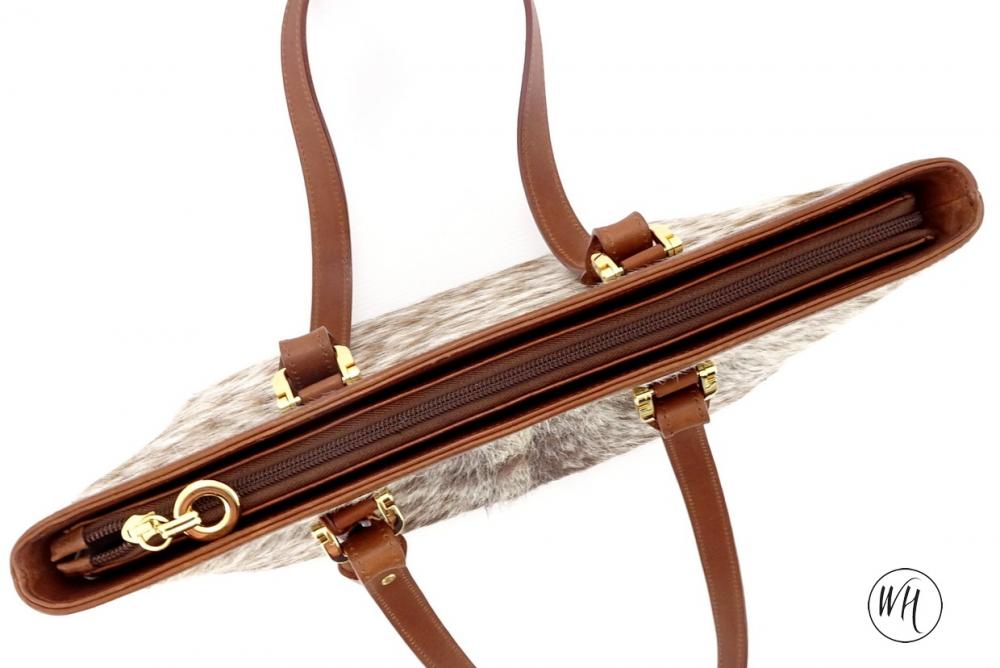
Here is a couple more to show the leather lining and lay out

-
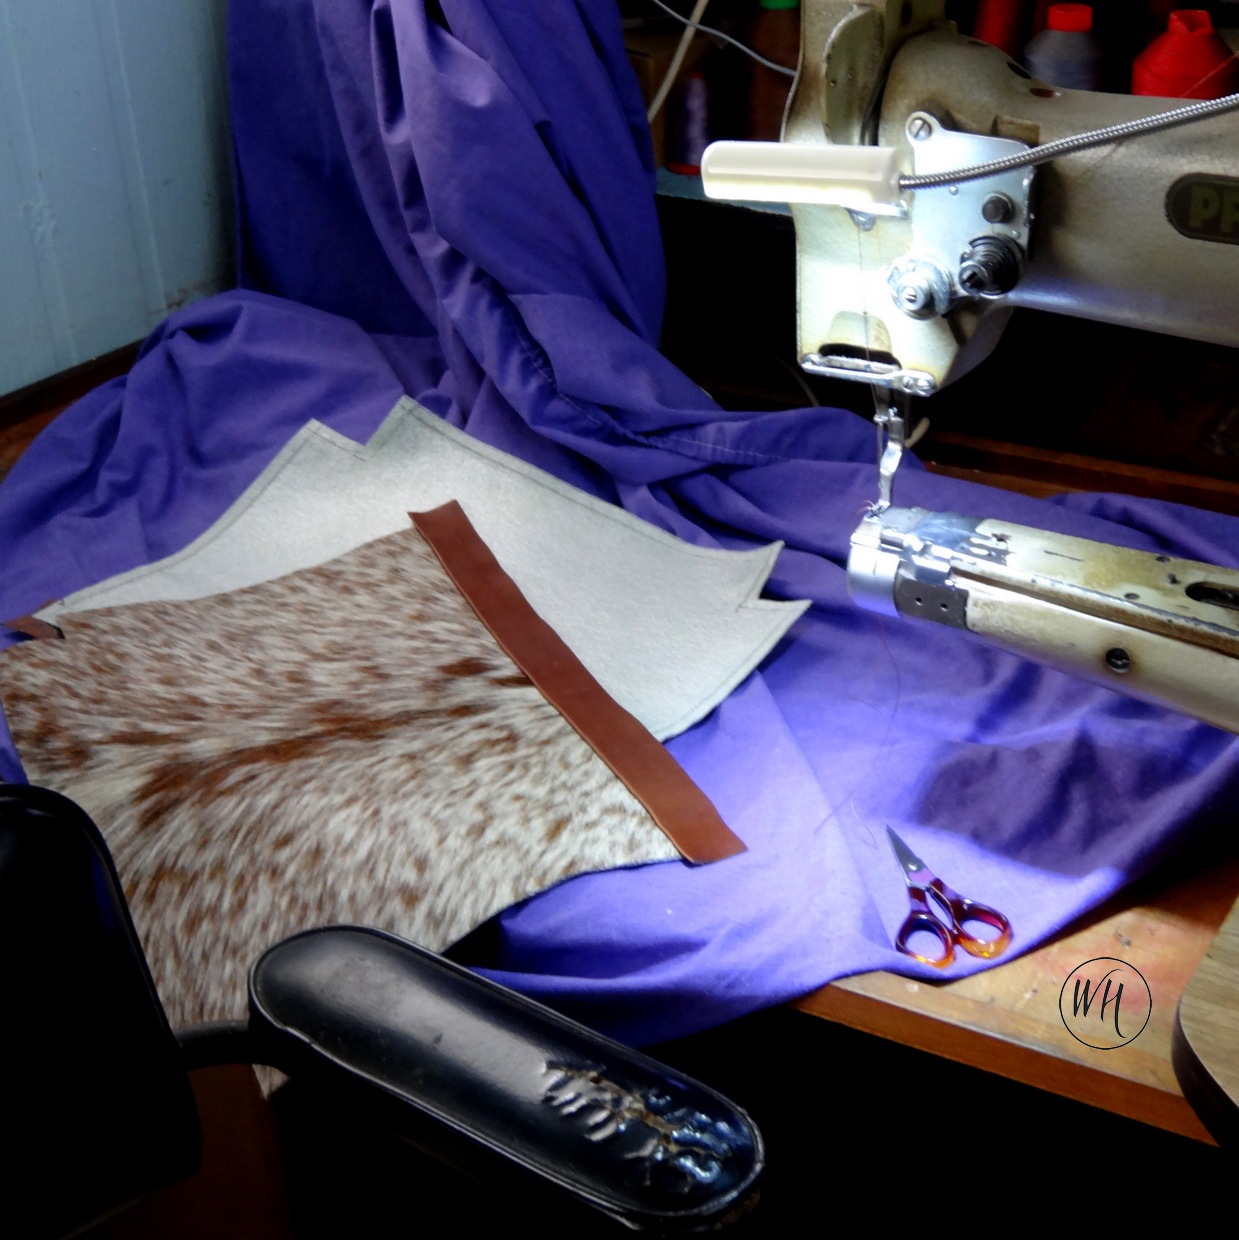
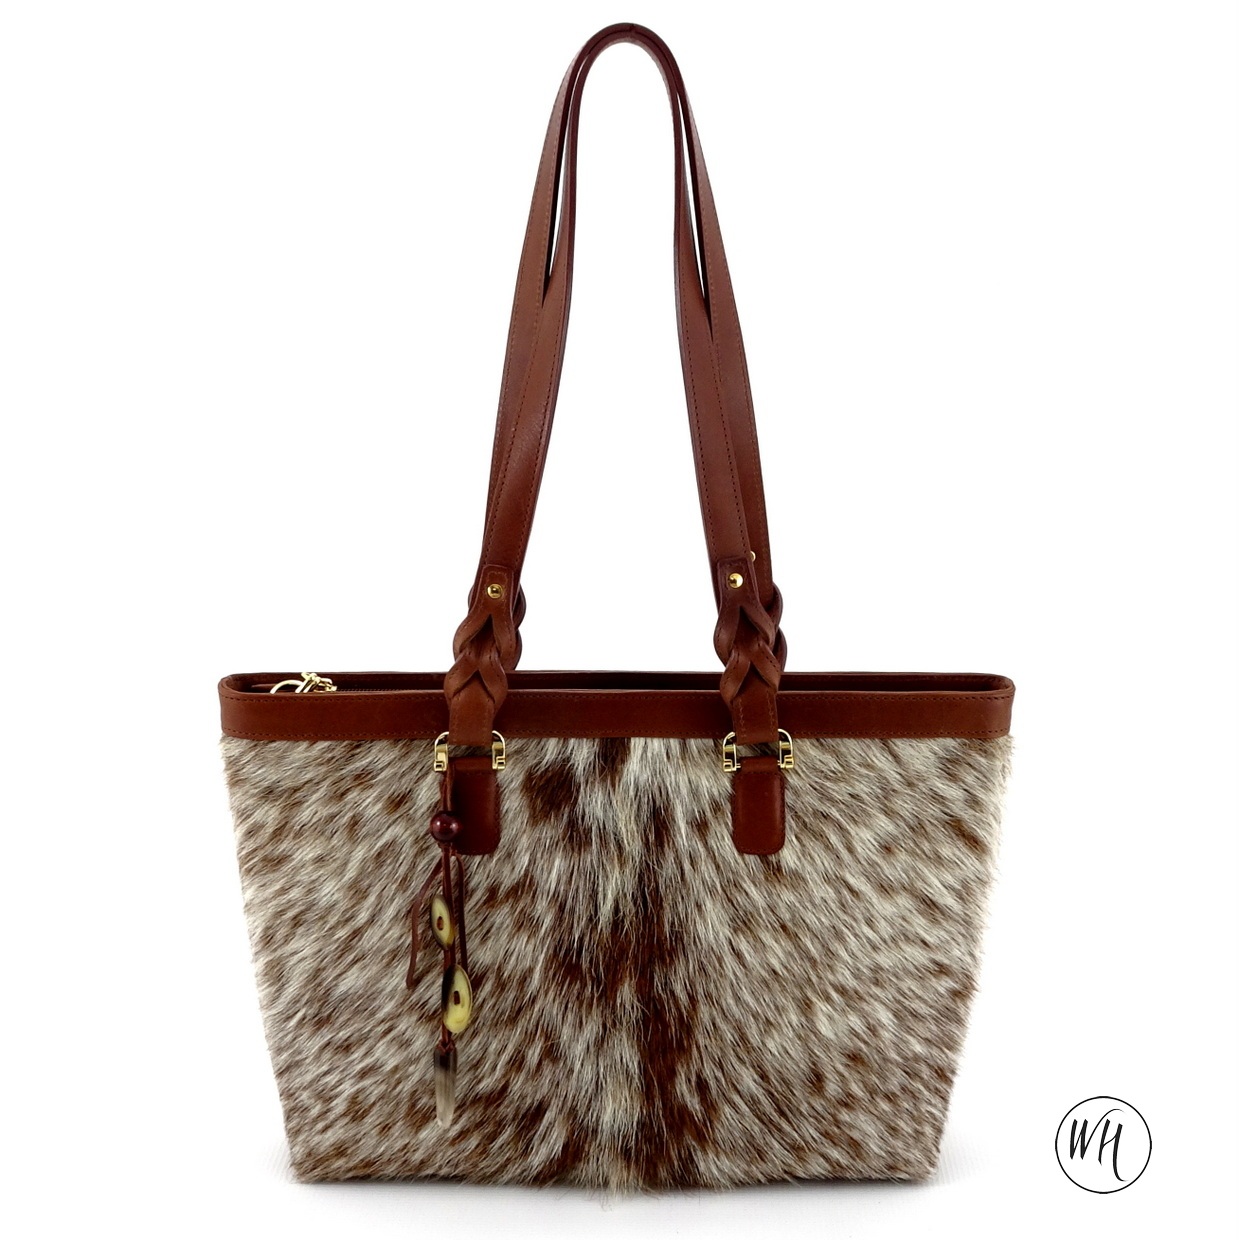
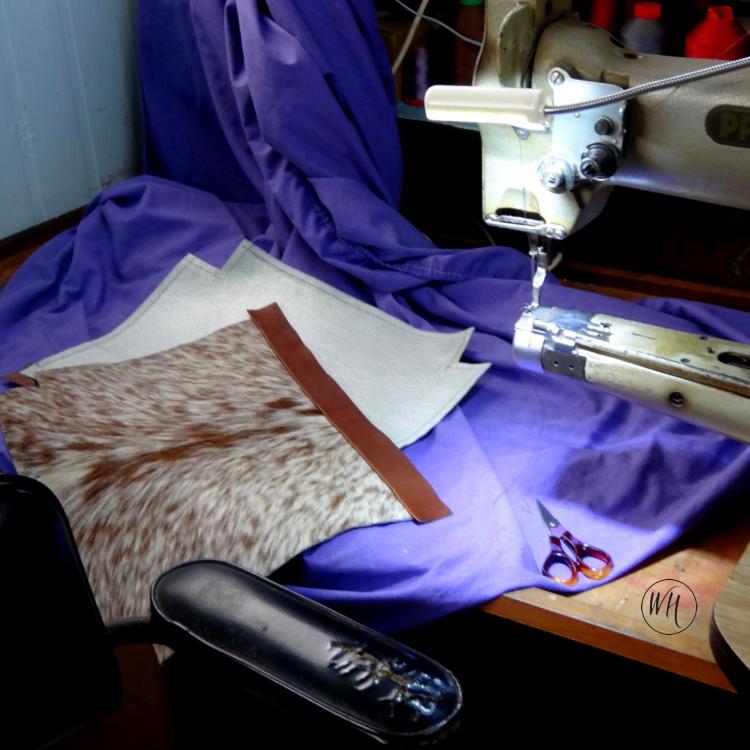
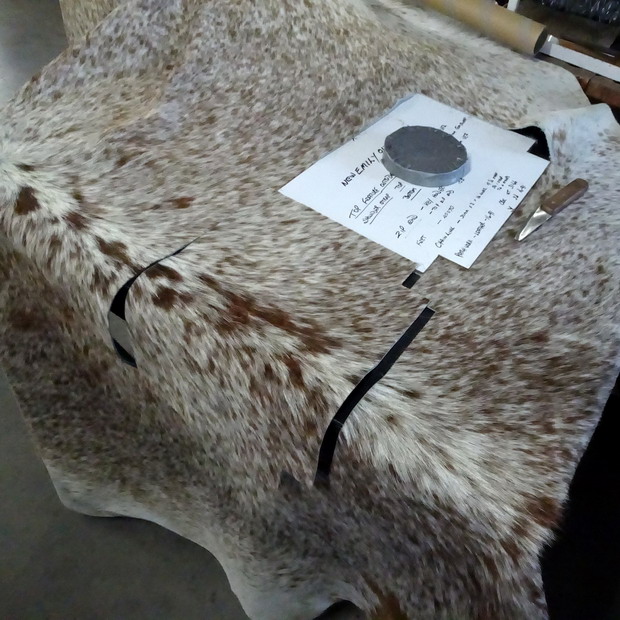
Here is a bit of this weeks effort showing how a nice hair on hide becomes a tote. Some purse accessories to come I guess...
-
And it aint even April Fool's yet ...
RockyAussie replied to JLSleather's topic in Marketing and Advertising
Well.....Thems fighten words I reckon. -
19th century Hugo Werteim shoe patcher
RockyAussie replied to RichardPorley's topic in Leather Sewing Machines
Thanks for the offer Richard .......Shame that roads like 6+ hours drive . I make a lot of machinery and stuff for my self but that bobbin hook would pull me up I reckon. If you want to get away from that rat race any time I think I could move one of this bull tits along or squeeze an acre out somewhere. BTW Brian is my name ,Wild Harry was a wild dog we had and named the web business after. Wife's call.... what can you say?