


wizard of tragacanth
-
Posts
569 -
Joined
-
Last visited
Content Type
Profiles
Forums
Events
Blogs
Gallery
Store
Everything posted by wizard of tragacanth
-

Most recent knife and sheath
wizard of tragacanth replied to Rossr's topic in Gun Holsters, Rifle Slings and Knife Sheathes
That knife is sweeet! nick -
IWB Holster
wizard of tragacanth replied to Hildebrand's topic in Gun Holsters, Rifle Slings and Knife Sheathes
So, this would be for a left-handed shooter, worn on the right side, so it would be a cross-draw holster... right? And it would be worn inside the waist-band? What would you change from the picture above? nick -
It's better to measure from the center hole.. Some belts have 5 holes, some have 6 or 7 holes. Some belts use 1" spacing between holes, some use 3/4" spacing, so measuring from the center hole makes more sense. Approximately 5 to 6 inches from the center hole. Others may have a different opinion. nick
-
IWB Holster
wizard of tragacanth replied to Hildebrand's topic in Gun Holsters, Rifle Slings and Knife Sheathes
Todd, I have read this 3 times and I am unable to understand the design. Do you mean something like this but for a left-hand cross-draw? nick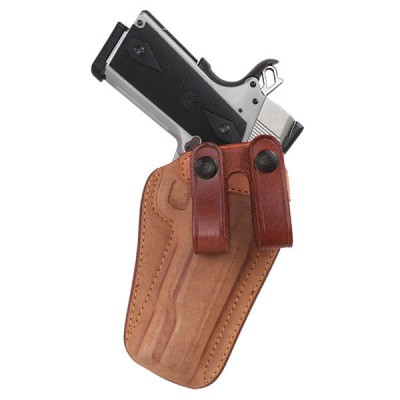
-
Though I have no intention of doing this myself, I thought that there might be some of you who would like to try this. I found two videos on this topic. One is done by Harry Rogers, a guy who was figuring it out by himself, much like we would. He gives info on the exact brand and type of steel rule that he used but unfortunately does not mention the brand, source or price of the tools that he used. The other video, done by a pro, mentions nothing -- but it is nice to watch his skill & technique. Both are interesting... to me anyway! Hope you like 'em. nick
-
Custom breast collars
wizard of tragacanth replied to Rolandranch's topic in Saddle & Tack Maker Gallery
Your work is superb! Great pics too! nick -
Pancake knife sheath
wizard of tragacanth replied to Rolandranch's topic in Gun Holsters, Rifle Slings and Knife Sheathes
Really nice work there! nick -
Yes, they have... but I am pretty sure that there is more to this question. I am assuming that you want to use it as a clicker, right? See this thread... And this one more specifically... nick
-
Nice work. I find the sheath on the right to be most interesting. That's a great look. nick
-
Very nice. He's gonna love it! nick
-
Knives and Sheaths
wizard of tragacanth replied to AlexOstacchini's topic in Gun Holsters, Rifle Slings and Knife Sheathes
That is a beautiful set. Absolutely stunning carving & color.. nick -
Thanks. I was very happy to find that. It is much nicer that the plastic envelope from Tandy... right? Got it from Rocky Mountain Leather Supply. https://www.rmleathersupply.com/search?type=product&q=needle+case Well, now that I think about it... I originally saw it on RMLS but bought it through Amazon. They were available in at least two different colors, light and dark, so if you want to keep two different types of needles, that helps. Oh, yeah, here it is. https://www.amazon.com/Chiloskit-Embroidery-Toothpick-Storage-Organizer/dp/B07F37885F/ref=sr_1_5?keywords=needle+case&qid=1577662792&sr=8-5 nick
-
Hey, thanks Frodo. I should have posted that the link worked for me the next day. Don't know what the problem was. That's a good find. nick
-
Okay, so you do have a diamond chisel but the pic that you showed, clearly had round holes, so what are we to think? Here is a comparison of Tandy Big Eye needles that I started this hobby with, and the Tandy, size 0, Harness needles that I use now. nick

-
You do not have diamond punches... they make diamond shaped holes. You have round punches. The holes are definitely big enough. Looks like you could drive a truck through them Not sure why you are having a problem. Maybe the needles are too big. If you are using Tandy big eye needles, that could be the problem. As my grip strength is waning with age, I have found that wearing Latex rubber gloves helps me to grip the needles much better. I sometimes have to use jewelers pliers to pull the thread through, especially when back-stitching. When measuring for thread length, I use a formula of 4 times the length of the line to be stitched, plus about 18-24 inches for working room. nick
-
Wow! Amazing. The link does not work for me but I think it is a problem with my browser. If anyone else has this problem, let me know. nick
-
Greetings from Central Florida
wizard of tragacanth replied to JohnSmith48's topic in Member Gallery
Welcome to the forum John. You might want to get started by heading over to this sub-forum for holster making. https://leatherworker.net/forum/forum/29-gun-holsters-rifle-slings-and-knife-sheathes/ Enjoy! nick -
1st belt
wizard of tragacanth replied to GnewVFL's topic in Purses, Wallets, Belts and Miscellaneous Pocket Items
Hmmm, well...off-hand, there is one thing that I can see that could be improved. One flower is mostly hiding behind the buckle and I am guessing that another flower, by the keeper, is hiding behind the tip of the belt. Next time, think ahead on placement of your design so this doesn't happen. The other thing that I notice is that there is a Glock on the table and a 1911 in your holster. Hehehe... nick -
I was gonna ask you what kind of leather that was. Thanks for reading my mind. Hahaha... Those look great! nick
-
That's a good start. Well done! nick
-
Well, you have to use a "mouse gun", of course! For those who are unfamiliar, "mouse gun" is a real, oft used nomenclature, for a small caliber gun such as .22 and .25 I am not making this up. I held off this comment, trying to let someone else get in on this but I didn't see that happening, so I had to go ahead. Okay, I'm done. Sraab... glad to see that you are enjoying this too! nick
-
Recommend you start by searching YouTube for "Making a Western Gun Holster". Watch all of the videos that look applicable. Come back here and ask questions! nick
-
Welcome to the forum! What kinds of things do you want to make? My advice is to watch some YouTube videos on whatever item you want to make, to learn the tools and technique. A great start would be videos by Nigel Armitage and Ian Atkinson. Don't buy any tools until you know what you need and then only buy what you need for your first project. Add tools as you need them. This helps to avoid wasting money. Have fun! nick
-
You got 2 mouse hides? That was a hilarious typo. I'm thinking, what's he gonna do with mouse hides? Then I'm thinking, where did he even GET mouse hides.... all of this before I got to the "moose" part of it. Can't stop laughing! Anyway, welcome to the forum! Looking forward to seeing your projects. Leather makes for a great, lifetime hobby or a business, if you should go in that direction. To me, there is no better feeling than the one I get when I finish a project that I totally made myself. There is a tremendous self-satisfaction in that. You know what I mean. I see that you are interested in guns. You might want to make some holsters? Yes? Whatever you make, you will find camaraderie here. This is a great forum... enjoy! nick
-
Pendant knife sheath
wizard of tragacanth replied to HeatherAthebyne's topic in Gun Holsters, Rifle Slings and Knife Sheathes
That's a real gem of a sheath. Nice work. nick