bruce johnson
-
Posts
4,401 -
Joined
-
Last visited
Content Type
Profiles
Forums
Events
Blogs
Gallery
Store
Everything posted by bruce johnson
-

Looking for: High Quality Copper Rivet and Burr Setter.
bruce johnson replied to SpruceMoose's topic in Leather Tools
Normally I put them head side up on most pieces and for saddle riggings (keeps the peened post from wearing on stirrup leathers). Like Tom wrote, generally bur side up if it is contact with skin. -
Looks really good, nice ground seat shape!
-
Looking for: High Quality Copper Rivet and Burr Setter.
bruce johnson replied to SpruceMoose's topic in Leather Tools
I’ve got some 3 piece sets in stock right now in #9 and #12 sizes along with pictures of what each piece does. I’ve got #14 sizes coming and other makers in the pipeline as well. Here’s a link - https://brucejohnsonleather.com/leather-tools-sale/rivet-setters/ -
Not weird, some people just don't need one or have somebody show them how to use one. I cut a lot of stuff with a grape picking knife early on. Still use the original in the tool shop here as a box opener and general cutter. There is a bit of a learning curve to using any cutting tool and then edge maintenance is major. I worked in a meat packing plant and a boning knife became as useful as my index finger. You get to a point where you don't even think about anything, it just flows. Same with a round knife but it took a few rope cans and saddles to have the feel. An old man changed my grip on a round knife and that made a ton of difference too. Having one tool to cut three layers of skirting and then turn around and skive a half inch radius curve to a feather edge is pretty handy.
-
Yes, you could make one. Here's the problems I see. Plane blades tend to be thicker and would be a lot of metal to remove to make a decent kind of knife. Two inches wide is really narrow. When a round knife gets down to 3-1/2 to 3 inches it looses a lot of function in my hands - too little finger clearance., limited rolling cut length before you get close to vertical with the handle for a couple quick things against them. I used a 3" knife for a while and finally just garbaged it. It wasn't as safe or effective for me as a larger blade. There was no advantage to it.
-
I had one and used it for a few years. I’d think about buying one again if I was doing much work. They are heavy and solid. The round platen was a bit limiting but wasn’t bad
-
Some saddles are finished with a pigmented topcoat. If water hits it potentially could make it run and show patchy discoloration. It is odd that sprinkler water made the spots but then water didn't change the surrounding area when you applied it. You could try contacting the maker and see what they use for a finish. If they will tell you, you've got more to go on. Otherwise option B - experiment with stuff and option C - ride it and you probably won't know it happened in a year. Sun, oil, and sweat cover a lot of finish blemishes over time.
-
Doc. Second question first. I got mine from the friendly folks at sharpeningsupplies.com - just plain good people to do business with and know their stuff. Why would someone have a sharpness tester? Average guy probably doesn't need one. Refurbishing and dealing in leather tools is my business. I blast, buff polish and sharpen a bunch of old tools. Every new Osborne tool I sell gets cleaned up and sharpened. In my tool shop I've got a 2x72 VSR knife grinder, VSR flat platen grinder, Brodbeck 1x42 VS sharpener, 1x30 HF belt grinder, buffing and scotchbrite wheels for the drill presses, five variable speed buffers with dedicated wheels for greaseless and buffing compounds, Dremels, Foredom handpiece systems, Foredom bench lathe with a bunch of interchangeable media, Diamond stones and sticks for hand work. With all that stuff, I want to make sure I am doing OK. Sharpness tester just made sense. I buy crappy sides of leather to test some blades and tools. I do the paper slicing test sometimes too, but in the end - I like to see numbers. It saves my left arm from being bald.
-
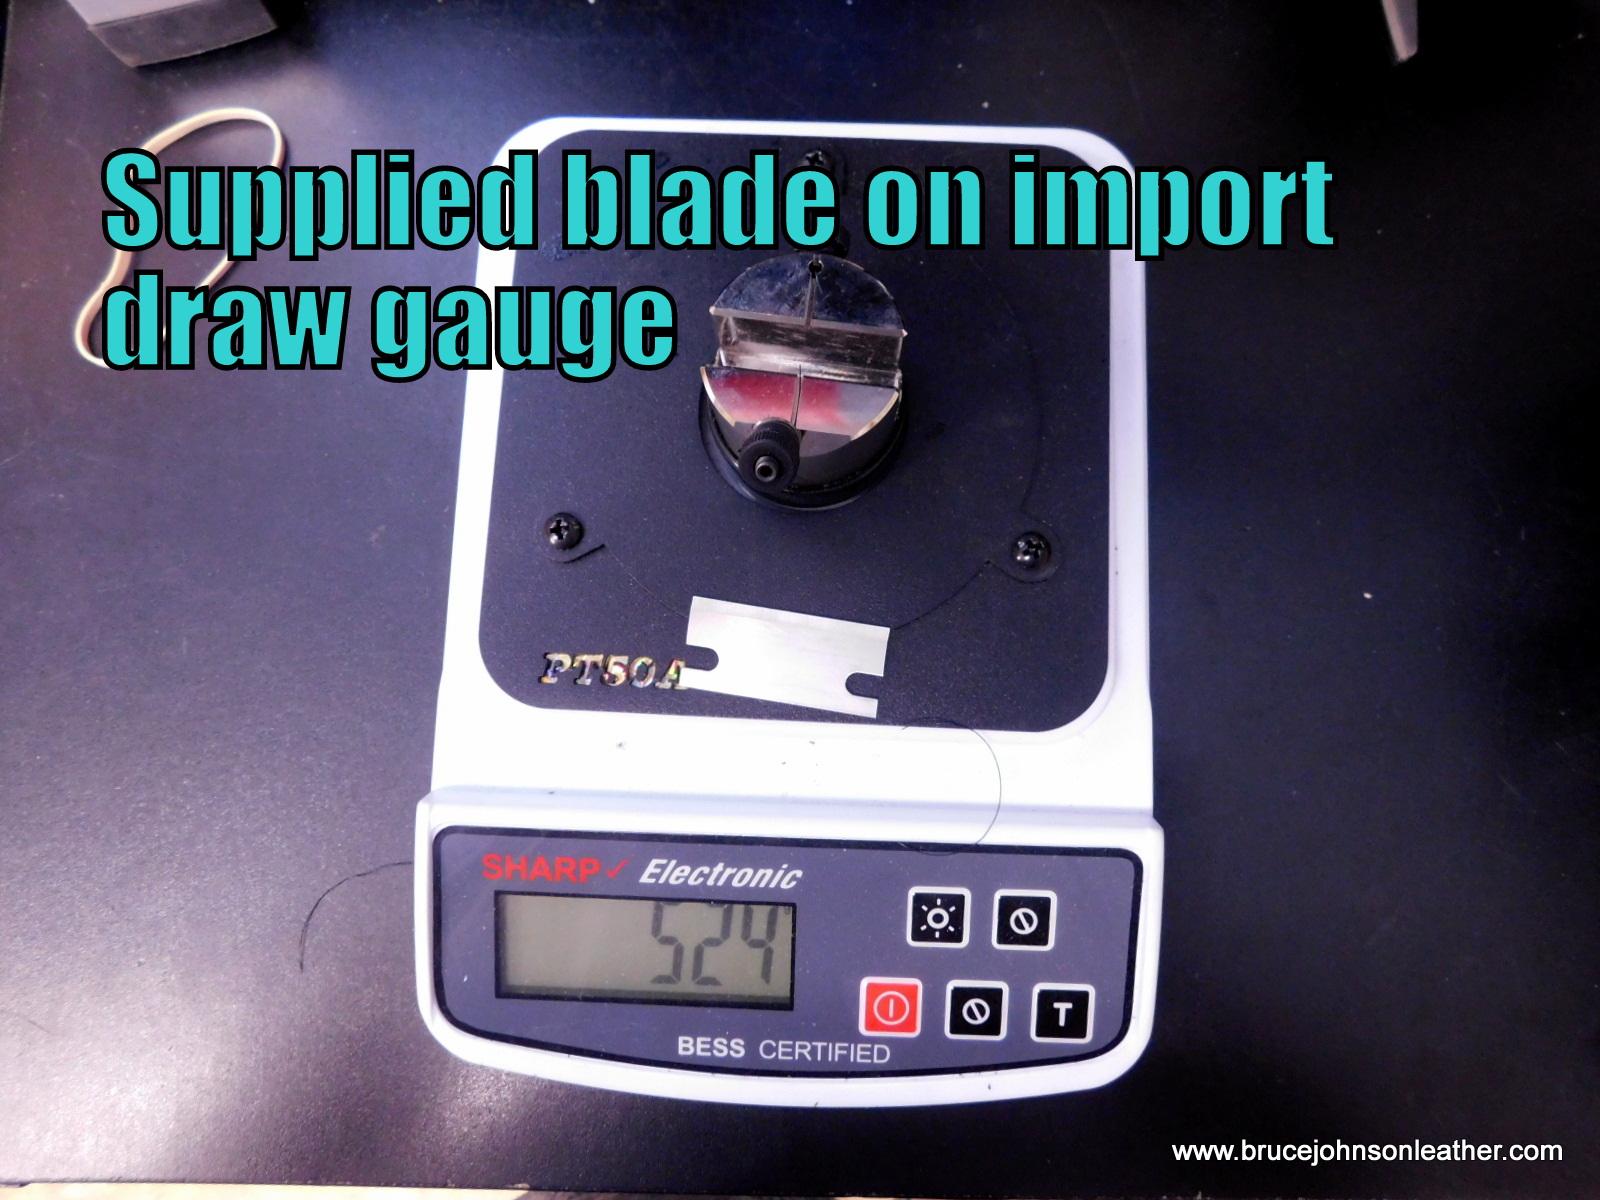
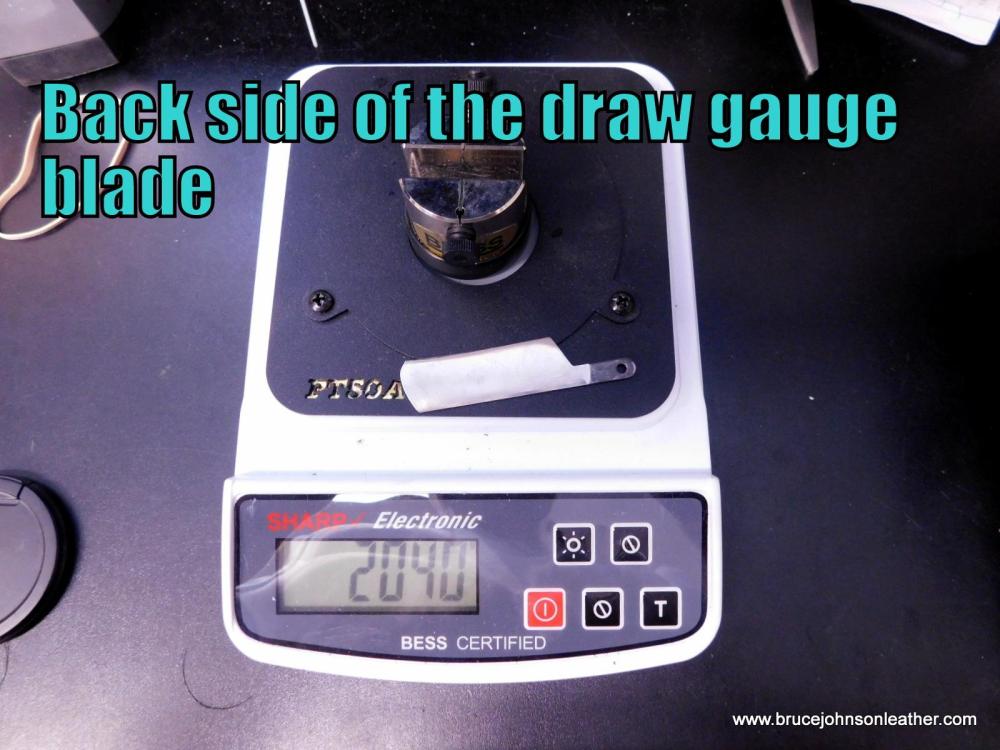
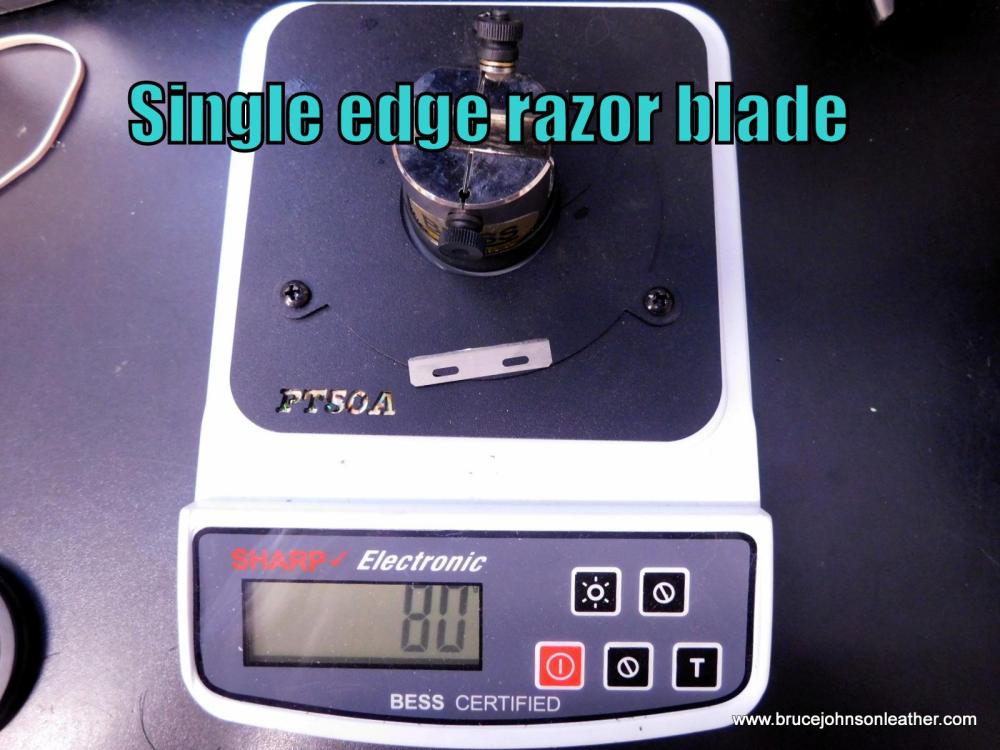
Chuck, Basically this edge tester uses a pressure plate to determine the force needed to cut a standardized media (looks like monofilament). I can shave with about anything less than 160-175 or so on the scale. There are a little chart that came with it but I cant find that right now. Basically 500 is butter knife. I just did a couple more. One is a single edge razor blade that went 80. I did the back side of the draw gauge blade just for kicks - over 2000.
-
Fred, yes it is pretty OK sharp. These Irwin blades are my personal favorite for good edge retention. I cant speak to others right now, no other brands to test. Two problems with utility blades for draw gauges though that I see. 1). Sometimes the utility knife blades are wider than the slots on some older versions of CS Osborne and nearly every HF Osborne. You have to grind the back off some to make them fit. 2). The pointed top end is no advantage except for the people who sell band aids or work in the emergency room. People get cut mostly two ways on draw gauges. First is trying to push the leather into the blade to get it started. Common with a dull blade and just poor user technique. Second way is reaching over the top either from setting it on the bench blade up or reaching over the top in use to tension the strap. You catch the point sticking up. I used to wonder why a lot of the old draw gauges I'd get in from estate sets had a rounded blade on them. At first I figured it was because they used whatever they had on hand to make a blade. After the second or third cut the light came on. It was rounded for safety. That is why I round the off and dull the tip on the blades I sell. That kind of affirmed to me a few years ago. I bought a large estate set that was dated to a harness maker who died in the 1930s. There were 5 unused blades in petrified paper that had been ground over at the tip. Four HF Osborne draw gauges and every one had a rounded blade. He might have been dead but his tools told me what I needed to know.
-
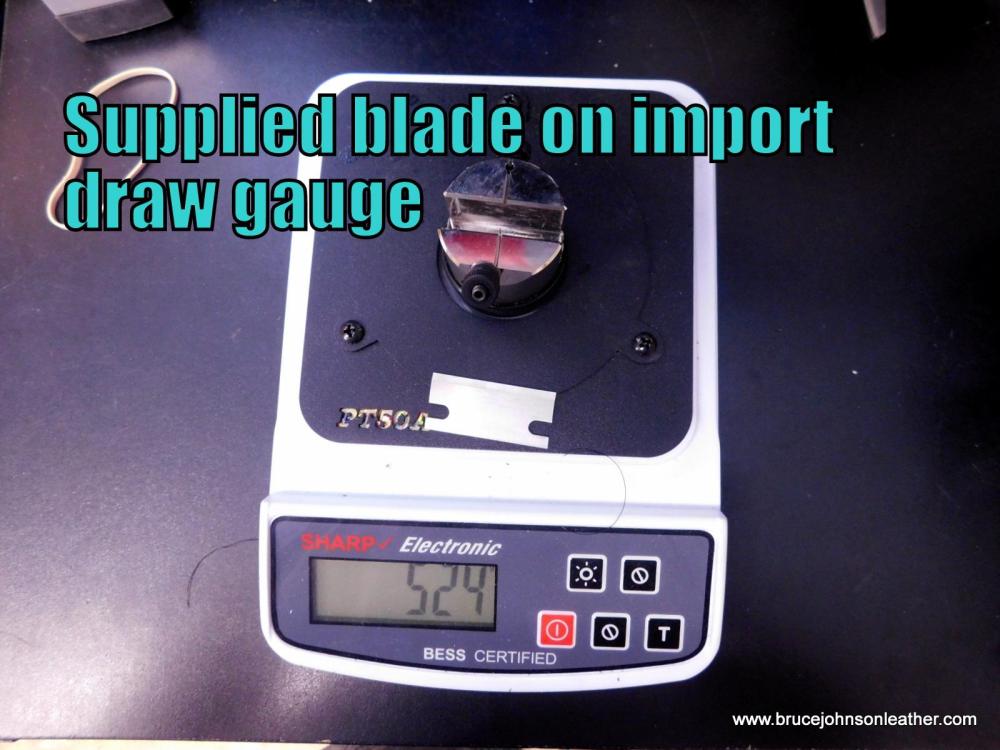
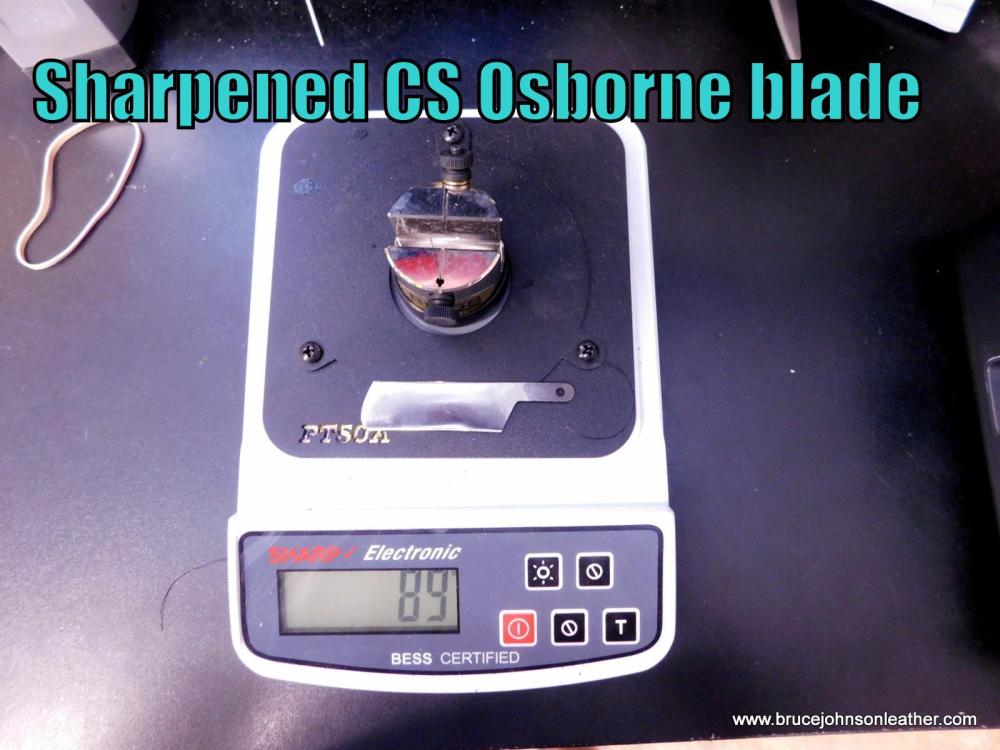
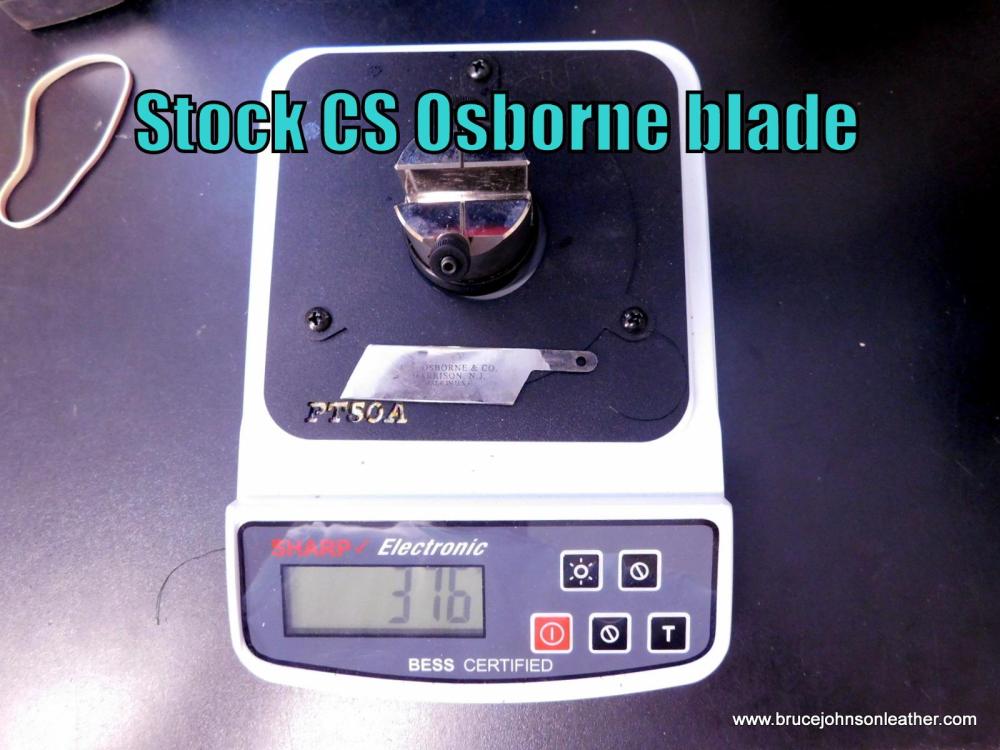
You all got me curious today. I pulled out 4 common blades that have been mentioned and compared them on my edge tester. The Irwin utility knife blade, NEW CS OSborne, and supplied blade commonly seen on other website draw gauges are all stock - new and untouched. The sharped blade is just a random I pulled from my drawer of "ready to go" CS Osborne blades that I reprofiled and sharpened. The lower the numbers the better. Kind of interesting results and realistically, I was a little surprised on both ends of the spectrum.

-
Thanks Bruce and Billy! I sharpen pretty much everything I sell so they are ready to go. I’m adding to the lineup of new tools pretty regularly from Osborne, Wayne Jueschke, and Richard Brooks. As I get calls for something i don’t carry yet I order extras for the website most of the time.
-
That is a common thing with superglues on cotton swabs and I’ve had it happen on cloth scraps and paper towels too. The cyanoacrylate curing can be hastened by moisture (breathing on it even) and it is exothermic. I’ve had swabs and strips of cloth or paper towels scorch but not flame up. The smell is like cyanide. A second coating on top of some that hasn’t cured can really off gas. I use it in cross ventilation.
-
You mentioned Palosanto. I've had some through here. They come sharp, that's not a problem. They are also sharpened on the bottom like the Barry King although to a lower angle bevel. The top sides can be pretty rough. I am attaching pictures of one I have left I got in this spring. It came like this to him (new) and he traded for another maker's set from me. He bought a few of them in a size range - this was the worst of the bunch but none were really smooth. They were bargain table tools for me at the Sheridan show. They aren't all like this but I would check. In use they can be brittle. For soft leathers and skiving I haven't heard of many problems. My wife gets along good with one for wallets and bags, it goes a long time. For saddlery and doing bigger skives a few have had the blade just chunk out. Granted they are scooping on some of the saddle fit up skives and not doing a straight flat work, but it happens. Blade edges are thin with a low bevel and that is a trade off of really fine edge geometry vs durability.

-
Yes, I use stock Osborne blades. I take the shoulders down some to a lower angle bevel and sharpen them. My final step is rounding the pointed tip at the top end.
-
Here you are https://peccaryleather.com/ https://www.etsy.com/market/javelina_leather
-
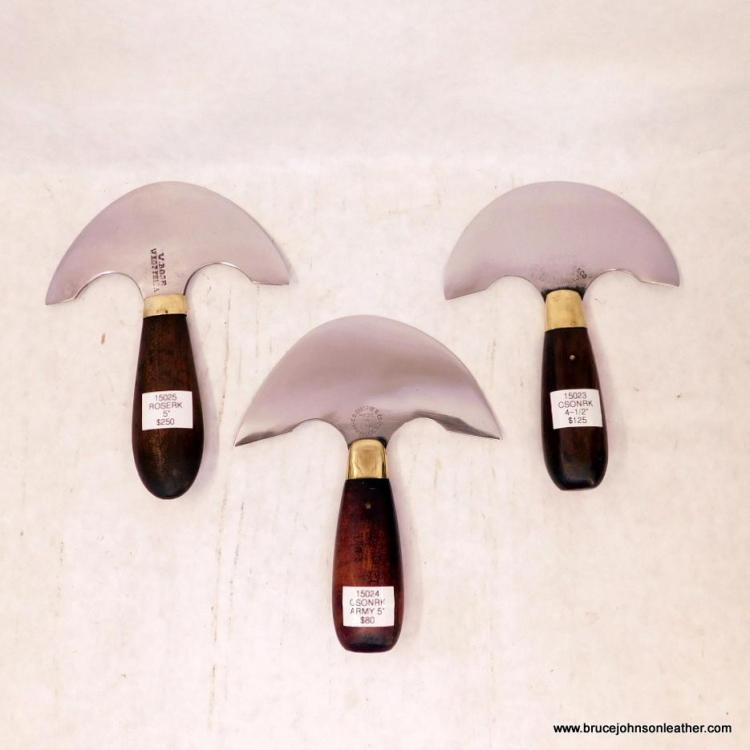
My blast cabinet gun took a dive today so I switched gears from splitters and did the next tray in the lineup, happened to be knives. I cleaned and sharpened these three knives today. The Rose on the left has about 5 hours on it and turned out well. The right side is an older CS Osborne. The old Newark marked Osbornes are one of my favorites as well. I got a little surprise with the other Osborne in the center. The handle is stamped ORD DEPT USA. It is an Army issue knife and I don't come across them very often. It is always fun to find one. Its a good day in my playpen!
-
I am convinced there are about as many treatments as there are restorers and collectors. One of the favorite commercial ones is Renassaince Wax. I like that one pretty well. I haven’t used Josh’s mix from Montana Knife yet. Boeshield is good. Easy Glide for power tool beds is OK too. Lots of homemade formulas around. , beeswax/boiled linseed oil/mineral spirits, paraffin and different solvents, carnauba mixes, etc. there’s a bunch.
-
Is this an authentic Blanchard knife?
bruce johnson replied to SUP's topic in Leatherwork Conversation
No reason for me to suspect it isn’t original. -
They hold up well.
-
I don't have a way to test the hardness but sharing my experience comparing several different makers. Yes the Roses are brittle and yes they will likely chip or crack if you drop one on concrete. Same with Joseph English, Huber and English, Harrington, and some of the other early and mid 1800s makers. Keith Pommer and I shared the conversation once. I brought up that I saw more cracks in Rose knives than other makers and he figured that was a fair assessment. Obviously the steel is brittle. The worker bee in the harness factory drops one and it cracks. It was not worth the time and effort to grind one back with a short crack and salvage the knife for these guys. They were workers paid by the production not paid by the hour to spend half a day sharpening their own tools. Brittle steel and easier for the worker to replace than repair. They tossed it in a box and bought another. It rusts over and the crack isn't visible. A hundred years later somebody finds it, Bruce Johnson gets excited and buys it. Once the rust is gone, the crack is evident. Once I traded up from entry level round knives I favored the Shapleigh or Clyde knives. They were fairly easy to sharpen, held a decent edge, and good for learning what worked and what didn't for edge geometry and sharpening techniques. If you screwed one up, it didn't take a a couple hours to fix. My joke was that I'd drop or knock off a knife and you could watch it turn 180 to land on concrete floor edge first. It would bounce on that edge three times in three different places before falling over, leaving three places to fix. Once I installed stall mats on the floor, I found the mats carried a repellent force field that prevented knives from ever falling in the first place. I don't think any hit the floor again and if they had would not have been a problem.
-
Barry's French edgers are sharpened on the bottom and there is a bevel on the bottom. The blade is a little thicker than others and more durable, but there is that edge bevel to live with or not. There are other makers like McMillen that are the same. You can't hold them flat and push forward as you probably can with your Owden or others. You do have to raise the handle to a higher angle and find that angle that they will cut at. If that wont work for you, It is unlikely that replacement will be much different for your intentions. I would not resharpen it. Decide if it will work or not and if you return it as-is then they just have to touch up the edge, not a full regrind and polish.
-
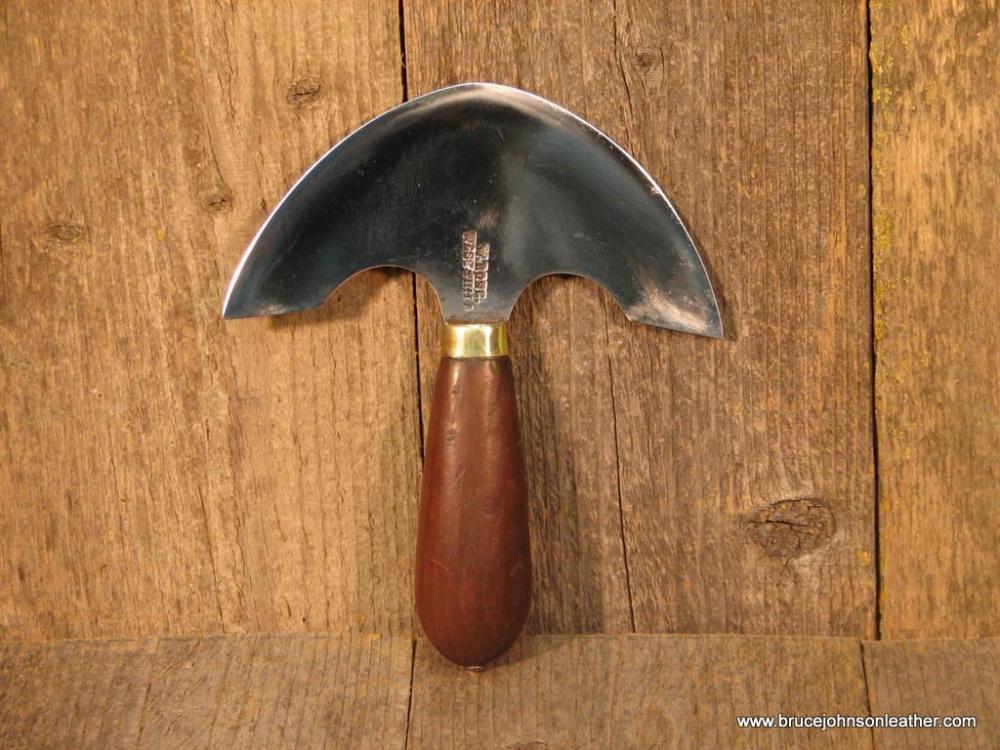
I'm not sure how many Rose knives have been through my shop - but quite a few. I've got pictures of 34 different ones and there were more that pictures were lost. I am attaching a picture of one of my favorites that I did here. First off, these really are not like many other round knives with the exception of some Huber and English or Joseph English knives I have done. The steel in these was small batch crucible steel and hand carboned. If you have not worked with a Rose knife before get in the right frame of mind - these knives can frustrate you every step of the way. This is among the hardest steel I've seen in knives. The old guy who taught me a bunch said a Rose knife is harder than a whore's heart and will get sharper than a mother-in-law's tongue. True enough. Old men are generally wise. It is prone to pitting, and prone to cracks. Check it closely with magnification as you progress for cracks that may reveal as you work it. One in five of mine end up in the garbage on inspection. Rose knives tend to be a bit thicker than many other knives. Fact is that as a short cut, a lot of times the previous users did not take the shoulders of the bevel back as they sharpened the edge. They just raised the angle. A lot of the time the current edge is now too steep. That shoulder should be taken down some for a lower angle bevel. I shoot for about a 1" bevel back from the edge at least before I think about an edge. How much of the pits and grind marks behind that you choose to take out is up to you. I use a light convexing on the final edge. If you choose to use stones - have at it but realize if that knife is good then you will be there a while. I tried a couple English and Rose knives on stones. What would have taken a good HF Osborne, Gomph, or Newark CS Osborne knife down with a bit of time will make a little scuff on a Rose. First time I saw that I was floored. I did one to completion on stones - a little time spent here and there so I would not know exactly how many hours I had into it. I'm guessing double digit hours over about 6 months time. You will be reworking and flattening your stones a bunch. I have changed how I sharpen a lot of things over time. Now for knives I use almost entirely mechanical stuff - knife grinder through the grits, then wheels with aggressive compounds through finer compounds. I can usually do most knife refurbishments in about an hour, Roses are a few to several hours depending on condition. On most Roses I am usually going through at least 6 grits on belts, then 5 grits of greaseless compounds, followed by 3 colors of buffing compounds. Granted my knife grinder and bench ginder-buffers are all variable speed and I slow them down to avoid heat build up and not dip as often. The finer the grit the slower the speed or lighter the touch to avoid overheating. Barehanded to feel for heat as mentioned above. Wide open 3450 RPM bench buffer and you can kill one pretty fast. I've mentioned in articles and interviews that I think most people stop sharpening too soon. They get to a serviceable decent edge where if they spent five minutes more refining that edge they'd have a sharper edge. On a Rose, make that 5 minutes at least a half hour. When I am done and have a fine cutting edge on one there are not many accomplishments I like more. Are they worth the effort - yes I think so. Stand on the top step of the podium and play the anthem! The good ones like a Rose will hold an edge quite a while, but not forever. Stropping - you can clean the blade edge with green compound. If you want to dress an edge that is starting to sound off or drag, then black compound is my choice. Like everything so far, It is going to take more strokes on a strop than most other knives. Quick little story to finish this. Keith Pommer from Worthing SD was a great leather tool and machinery guy. Maybe 12 years ago I visited him and he offered me a really pretty Rose knife. He said I probably wouldn't believe him but he had 6 hours in that knife. I had no doubt, but a lot of people who didn't know would have questioned it. I had a couple Roses at home I was using already and passed, told him he ought to keep it as nice as it was. Several more visits and every time that knife was still on that same work bench. Eventually they auctioned the shop out but kept his personal tools out while he was still alive. He passed away later and his daughter offered the tools for sale last year in one lump deal. I flew back, bought them, and packed to ship home. There were a few touchstones but one of the highlights was finding that Rose knife in the bunch. I was not expecting it to be there and said a few happy bad words. It It is one of my prizes now.
-
Contact Tippmann. I saw a video several years ago where they used a cam and arm to power one. I think they were just playing around in the shop trying it but they probably have advice
-
It looks like the Rolling press is only for dies that height. If you get dies from other makers you may find those dies are 3/4 or a more universal 1-1/4". A benchtop shop press conversion will work no matter the die height and be in that same pricing or a bit less. I have used one for years.