DJole
-
Posts
1,091 -
Joined
-
Last visited
Content Type
Profiles
Forums
Events
Blogs
Gallery
Store
Everything posted by DJole
-
A narrow escape for you!
-
I got a scrap piece of broken granite countertop. Two ragged edges, but two smooth rounded edges. It was free, from the scrap pile of a counter manufacturer. Rectangular, about 8 X 14 inches. I move it around as needed, so it's basically portable... in a sense. ;-)
-
For a Christmas party last year, I made this as a "White Elephant" gift. It is a Poop Emoji luggage tag.

-
Ohio Travel Bag is located up in Cleveland: https://ohiotravelbag.com/
-

Skull & Roses Clutch Wallet
DJole replied to AndyL1's topic in Purses, Wallets, Belts and Miscellaneous Pocket Items
That's a sharp looking piece of work! I especially like how you took care to get the snap in the center of the rose. -
When You're Not That Into Leatherwork...
DJole replied to Sheilajeanne's topic in Archery Quivers and Bow Cases
Heh! -
Hey, you're just down the road from my house. Welcome to the forum, and ask away -- there are many good folks here with lots of answers willing to help out.
-
Welcome back!
-
I have a few hides that were very inexpensive, remnant sales from Tandy. 30 dollars for a nice red pebbled chrome-tanned full hide is a deal! I also have some veg-tan bellies that I picked up for 10 dollars apiece, so I could have cheap leather to work with. So I have leather to learn with, and some nicer stuff for other projects. Like the above poster mentioned, what you plan on doing with it is the first step -- if you're going to learn tooling, wet-forming, and other projects which require stiff leather, you'll need veg-tan. For other projects, chrome-tan may be just fine.
-
Wallet with Celtic pattern
DJole replied to DJole's topic in Purses, Wallets, Belts and Miscellaneous Pocket Items
I bought the thread from Rocky Mountain Leather Supply, who will make 25 meter spools for about 7 dollars apiece, with free shipping. Good folks there. -
Wallet with Celtic pattern
DJole replied to DJole's topic in Purses, Wallets, Belts and Miscellaneous Pocket Items
I noticed that too. It's the only corner where the holes just don't quite line up right! ;-) That's a good tip to start from the corners, and get those even, and then maybe have a slightly longer stitch in the middle of the straight line. -
Wallet with Celtic pattern
DJole replied to DJole's topic in Purses, Wallets, Belts and Miscellaneous Pocket Items
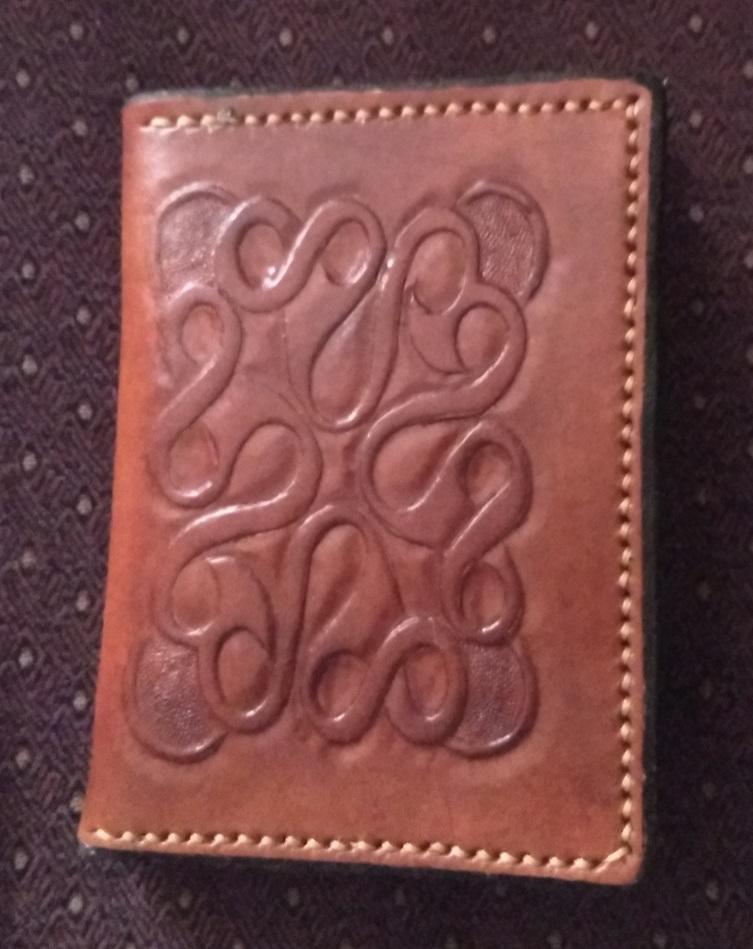
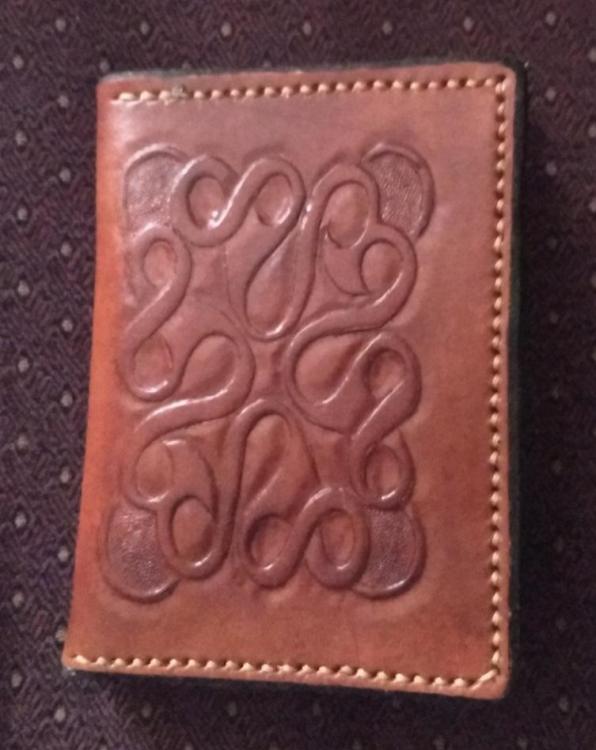
Thank you-- I worked hard to get good lines on the tooling pattern. The thread is Ritza Tiger 0.6. The stitching chisels are Japan Goods 3mm. In a couple places (where the leather stacks up in multiple layers) I also used Kevin Lee 3mm reverse irons to make sure the lines were straight. I discovered that to get the stitching lines straight, as I was pounding from the tooling side down, I needed to hold the chisel a couple degrees slanted from vertical, since the thickness of most of the red pocket leather doesn't go all the way to the edges. I also cut the interior pocket pieces (and their backing) a bit bigger so that I could trim them all after stitching, so I have a nice, even edge. -
Wallet with Celtic pattern
DJole replied to DJole's topic in Purses, Wallets, Belts and Miscellaneous Pocket Items
A view of the inside: Black Tokonole on the edges, light brown Ritza thread, and some nice red leather from a remnant sale.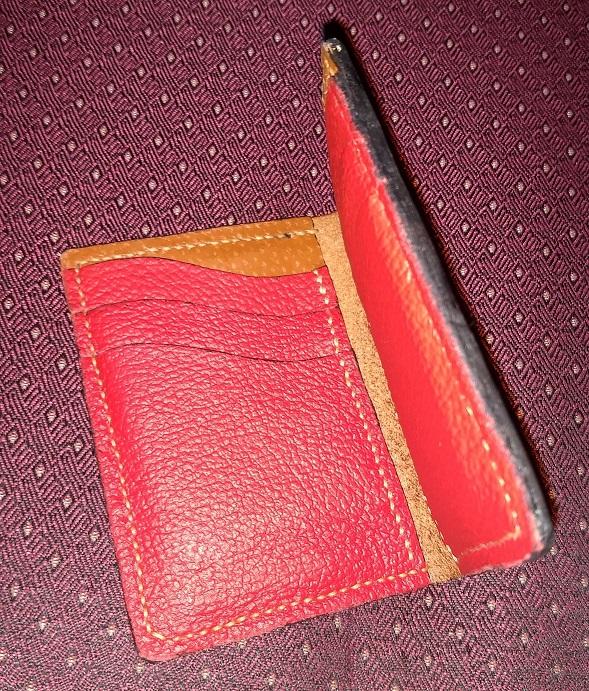
-
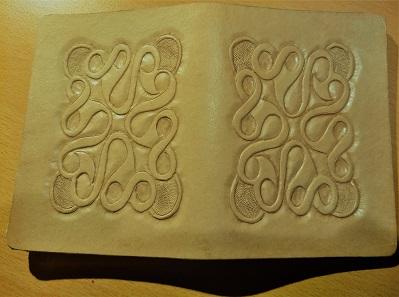
Just finished this up last night. Here's the outside with the tooling pattern completed: And here's the completed piece: I used Angelus Light Brown dye on this piece.
-
I also made a modification on the the "buckle" end. The original has three decorative domed rivets: http://djole.altervista.org/djole/Publications/Leather/A/Arming Scabbard hanger/Hanger 1.jpg But they didn't hold up to the strain, so I replaced them with the copper "burr and washer" rivets.
-
I just saw that the Ye Olde Gaffer's website has vanished into internet ether... But the Wayback machine has it available : https://web.archive.org/web/20200731202515/http://www.yeoldegaffers.com/project_scabbard.asp I followed his recommendation: I used a cloth measuring tape and wrapped it around the scabbard in the same pattern as the lacing would be. This gave me a baseline length, but I cut it longer and after actually doing the lacing, I trimmed off the excess leather. I didn't have to trim too much. If you don't have a cloth measuring tape, you can use a length of string instead. And remember -- some of the straps require a slit so that another section of the strap can go through it --- don't cut those slits in advance! Cut them as you are lacing.
-
A quick internet search brought up the following-- maybe they will work for you? > https://www.instructables.com/A-leather-Altoids-tin-case/ >https://www.outdoorcore.com/courses/how-to-make-a-leather-altoid-tin-belt-pouch
-
To help you on your way, here are the websites I used for reference: Leather Wrap a Scabbard Core. These are illustrated step-by-step guides (pdf format) posted on Sword Buyer's Guide, using routers and other tools, explaining carefully how to do it. Ye Olde Gaffer's web page (http://www.yeoldegaffers.com/project_scabbard.asp), Long video--> < And a single picture for reference: http://djole.altervista.org/djole/Publications/Leather/A/Arming Scabbard hanger/York Minster Hanger.jpg
-
Nice work on both the inside and the outside! I really like how one of the inside pockets mimics a fiddle shape.
-
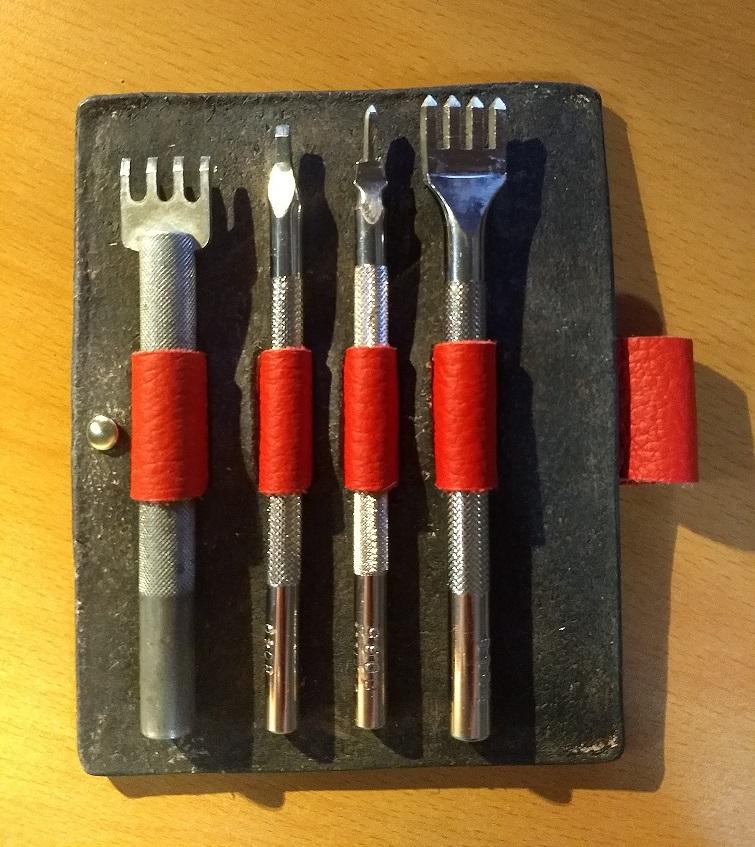
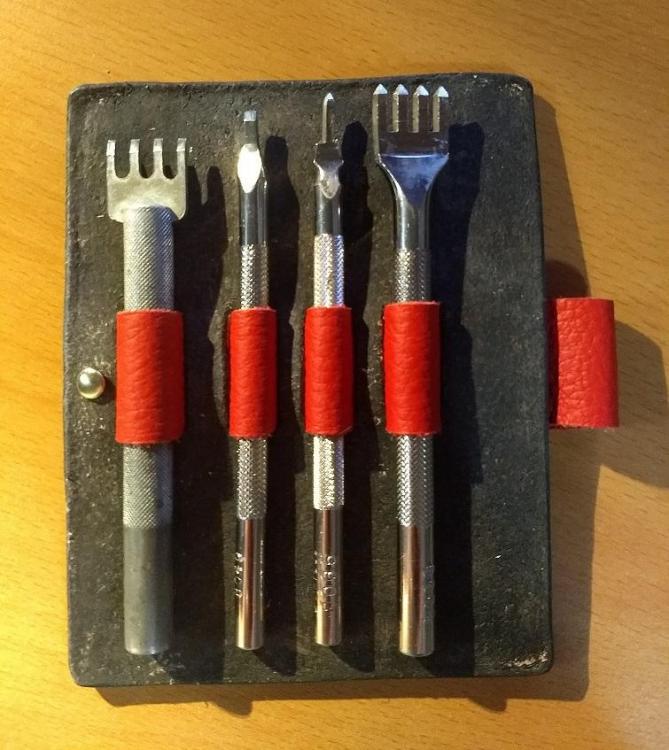
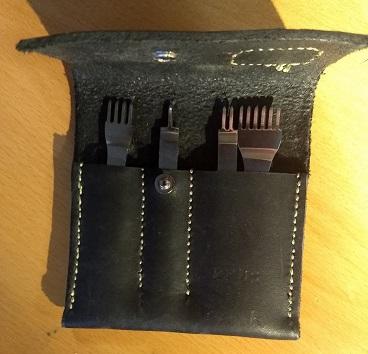
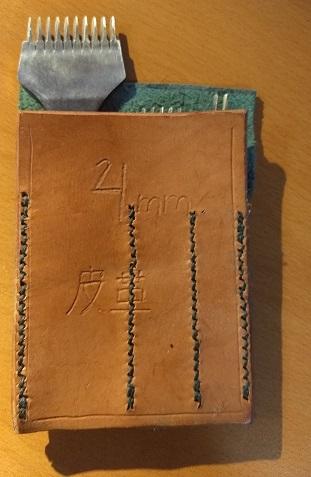
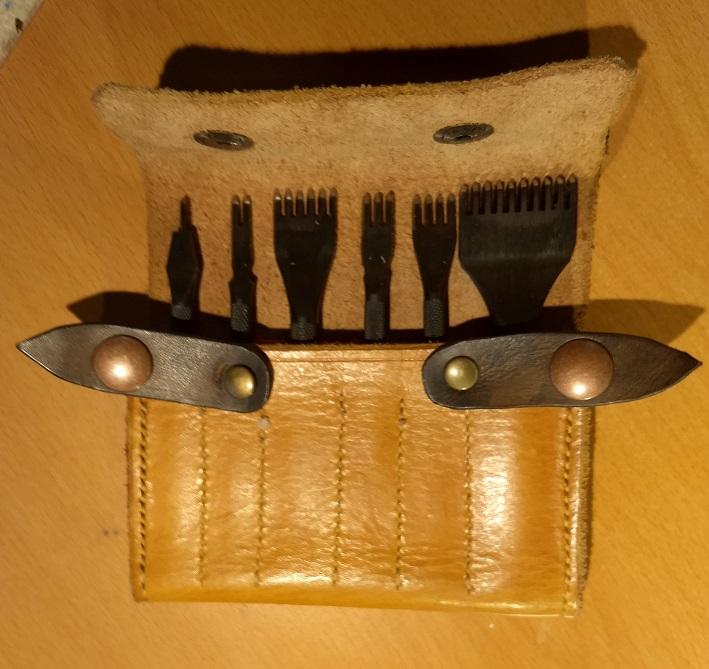
For full pictures (front and back) as well as some information, see my webpage: http://djole.altervista.org/djole/Publications/Leather/I/Irons/IronCases.htm These are nice small projects for practicing various things, without having to toss them if I mess something up (such as crooked stitching lines...heh!)
-
My ancient lacing chisels from Tandy (left two) and the nearly as old Tandy diamond irons. Kevin Lee 3 mm Reverse irons.
-
Chinese 4 mm pricking irons Goods Japan 3 mm diamond irons
-
Hi Xig, and welcome to the forum! The leather in many tutorial videos, which can be beveled and tooled, is called "vegetable tan leather" or "tooling leather." Your soft leather is probably garment leather (like cloth) or "chrome tan leather," neither of which is meant to be tooled or beveled.
-
Yes, that's the kind of thing I am looking for.
-
Is there a supplier for snaps in which the snap button looks like the firing pin end of a rifle or pistol cartridge? if so, this is perfect for a new project I'm planning out.