Bolt Vanderhuge
Members-
Posts
250 -
Joined
-
Last visited
Content Type
Profiles
Forums
Events
Blogs
Gallery
Store
Everything posted by Bolt Vanderhuge
-
Hand Sewn Motorcycle Seat with Pleats?
Bolt Vanderhuge replied to doorty's topic in Motorcycles and Biker Gear
Sorry I have no clue what woould be a good choice for the top layer. -
Hand Sewn Motorcycle Seat with Pleats?
Bolt Vanderhuge replied to doorty's topic in Motorcycles and Biker Gear
I was saying use strips of foam . Stitching only thru leather that is glued together. That way the needle has only one hole to go thru instead of having to feel for the hole in the second piece of leather that is on the other side of foam. So basically your alternate suggestion was what I was trying to say. -
Hand Sewn Motorcycle Seat with Pleats?
Bolt Vanderhuge replied to doorty's topic in Motorcycles and Biker Gear
Just spit balling here. What about using two pieces of leather and strips of foam or are these already using two pieces of leather? Either way, it looks like you could stitch the leather to the leather at the outer edge then glue your first foam strip then glue and stitch the two leather layers then repeat. Alternatively, you culd glue the strips of foam to one of the two leather layers then glue the other leather layer to them. Then move on to stitching. -
This works for me too. You just have to put in the time both in prep work before edging and then when finishing the edges. By putting in the little bit of extra time you can make 4 layers of leather have no visible line.
-
Tandy Craftool Pro Diamond Stitching Chisels
Bolt Vanderhuge replied to Tugadude's topic in Leather Tools
I use the black pro line Tandy tools. I think they are 4mm spacing. Here is an example of what I get with them. This is with 1.0mm Tigre thread. This is a test holster I had made. This is the backside. This is the front side of that same part of the holster. I had tried some other diamond tools but ended up back with these. Now I just stick with them. It is good to know that if I were to do smaller items with thinner stitching I can get smaller Tandy irons. -
Custom Glock Holster assistance
Bolt Vanderhuge replied to bland's topic in Gun Holsters, Rifle Slings and Knife Sheathes
The optic is a non issue. Look at how it lines up just a smidge behind the trigger guard, roughly in line with the magazine release. The leather does not need to go higher than that. For the light you can build up some leather or foam on the trigger guard to match the width of the light. Yes you will not be able to add any retention in the forward portion of the trigger guard but I see two other viable spots. One is the recesses on both sides of the frame for the slide release levers. The second is on the light itself where it necks down between the bulb and the body. I would just do it lightly on the sides and the bottom of the light. I would leave the gap between the odd non threaded extended barrel and the light alone. In other words I would not try to mold to the shape inbetween them but rather smooth the leather like ther was no gap there but instead like the slide continued to the end of the barrel. -
Saddle Stitching - Looks Good on the Backside
Bolt Vanderhuge replied to superpacker's topic in Sewing Leather
I punch all the way thru. I do not use an awl. My holes are full thickness all the way thru. The size of your holes is only the problem if the smaller holes are the cause. I noticed it mentioned to pull straight. I personally pull the threads in the direction I want them to lay. If the thread is the lower thread I pull it down and the upper thread gets pulled up. I pull these at about a 45* angle to the work piece. I am thinking that your issue is the way you are laying your thread in relation to the angle of the holes. This is a test holster I had made. This is the backside. This is the front side of that same part of the holster. -
Saddle Stitching - Looks Good on the Backside
Bolt Vanderhuge replied to superpacker's topic in Sewing Leather
Are you using a groover to cut out stitch lines? If so then stop. By grooving you are creating a narrow channel that will force the stitches towards the center of the groove. I mark the lines by creating a very shallow line on the surface of the leather. This lets the tread stay at the ends of the holes and gives the zigzag you already have in the back. As for stitching/placement I have the front of the item on the right side not the left. -
Recent Builds
Bolt Vanderhuge replied to IngleGunLeather's topic in Gun Holsters, Rifle Slings and Knife Sheathes
Those are some beauties for sure. -
It does not sound like thickness is the actual issue. It sounds like you need to apply or apply more netsfoot oil on the leather. Especially if you are thinking your dye with alcohol.
-
Latest belt
Bolt Vanderhuge replied to gigi's topic in Purses, Wallets, Belts and Miscellaneous Pocket Items
Very nce.- 10 replies
-
Flap Holster
Bolt Vanderhuge replied to Rohn's topic in Gun Holsters, Rifle Slings and Knife Sheathes
That is top notch for sure. -
I have to second the all I got is WOW.
-
Hand sewed camera bag
Bolt Vanderhuge replied to Bonk's topic in Purses, Wallets, Belts and Miscellaneous Pocket Items
That looks great. Thanks for sharing.- 12 replies
-
- handsewed
- leathercraft
-
(and 2 more)
Tagged with:
-
YinTx was referring to this post of yours. Not HO making thread.
-
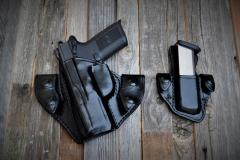
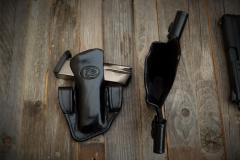
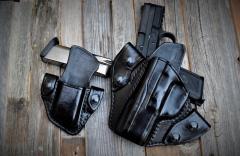
FN 40 snap on holster set
Bolt Vanderhuge commented on Bolt Vanderhuge's gallery image in Our Leatherwork Galleries
-
Latest holster
Bolt Vanderhuge replied to alpha2's topic in Gun Holsters, Rifle Slings and Knife Sheathes
I used a ruler and lined it up with the exposed portion of the gun mold. Then made the line down the holster front. -
From the album: Bolt's holsters
-
From the album: Bolt's holsters
-
From the album: Bolt's holsters
-
There are rulers that alrady have the cork installed. I got mine at Walmart. Though I do not always use it.
-
Drop Holster for Snubby
Bolt Vanderhuge replied to Eddie Q's topic in Gun Holsters, Rifle Slings and Knife Sheathes
That looks great. I really like the tooling and coloring. Good job. -
Ruger LCP IWB Holster
Bolt Vanderhuge replied to alpha2's topic in Gun Holsters, Rifle Slings and Knife Sheathes
That looks great. Chicago screw posts work great for providing threads while holding the base of the snap to the leather. I use them all the time. I use black screws and get them from knifekits.com although my local Ace Hardware store has stainless ones that fit too. Lining the holster should not add any thickness. You would want to use thinner leather that when glued together will be the same thickness as what you normally use in single layer leather.


