


fredk
-
Posts
5,974 -
Joined
Content Type
Profiles
Forums
Events
Blogs
Gallery
Store
Everything posted by fredk
-
Whilst the above book is excellent for 'hard' cases and bags I'd advise you to get 'Handmade Leather Bags & Accessories' by Elean 'Birdy Teacher' Ho It has several styles of tote type bags, patterns and instructions on how to make them https://www.amazon.co.uk/Handmade-Leather-Accessories-Design-Originals/dp/157421716X/ref=sr_1_1?crid=217P9W958CL5S&keywords=handmade+leather+bags&qid=1555806996&s=gateway&sprefix=hand+ma+leather+bags%2Caps%2C150&sr=8-1
-

Latest 1851/60 Holster...
fredk replied to Chakotay's topic in Gun Holsters, Rifle Slings and Knife Sheathes
I concur . . . . agree; An excellent photo. Nicely focused, well lit with the right amount of skiffing light, well exposed and the rough log[?] background is a great contrast to the smooth leatherwork -
Latest 1851/60 Holster...
fredk replied to Chakotay's topic in Gun Holsters, Rifle Slings and Knife Sheathes
N . . . I . . . C . . . E -
I'm in Northern Ireland if Harry is not handy to you I have relatives in the very Highlands of Scotland in case you're located up that way
-
How did they do this technique? I want to duplicate it!
fredk replied to HoneycuttMachine's topic in How Do I Do That?
possibly the B202R or B202L beveler https://www.tandyleather.eu/en/product/b202r-craftool-beveler-stamp -
A; what diameter are the nail holes and how thick is leather you need to mount to? you can get ready-rivets with a 4mm head - they look smaller than they sound but they are only good for about 2mm thick leather . Mount to thin leather then glue and/or sew that to thicker leather b, use the supplied nails or softer copper nails, put through, put a small round washer on the back and bend the nail over onto that and flatten as best you can in either case use a piece of thick neoprene rubber against the ornament face side; this will prevent damage to it
-
Holster for percussion pistol
fredk replied to bjornk's topic in Gun Holsters, Rifle Slings and Knife Sheathes
Looks most excellent Did you do a bit of wet-moulding around the stock/barrel part? Moulding the outer part of the holster after assembly? -
Resolene, etc.
fredk replied to jsangl's topic in Dyes, Antiques, Stains, Glues, Waxes, Finishes and Conditioners.
A form of dubbin has been around since early medieval times. After removal of edible meat all animals were rendered down for their fats and grease and anything else they could supply, eg glues. Fats and greases from animals were used to make soap, grease cart axles, pack with iron arrow heads to prevent rusting, slicked on long bows to keep the wood supple and many other uses. In medieval times it would be a poor goodwife who could not render down and get the fats and greases for trading for candles, use of grease round the house. Since the first third of the 18th century at least various leather food compounds have been available for buying by those who didn't make their own. My 1907 Sears, Roebuck catalogue lists a 'Leather Preservative' but the relevant page is missing. to answer the OP: I coat with a couple of coats of diluted resolene, then apply beeswax/nfo mixture. I've not found that the resolene has prevented the nfo penetrating the leather -
I think you mean the other way round? put the adhesive sheet on the piece of leather to be filigreed, cut out leather filigree and adhesive sheet at the same time 'Heat Bond' is a trade name. Virtually all haberdashery supply shops sell a fabric heat bonding material and its usually thinner and cheaper than 'Heat Bond'. I use a generic fabric one which comes in at 25% of 'Heat Bond' prices
-
To add or not to add? (the wooden board to the back)
fredk replied to Mocivnik's topic in Leatherwork Conversation
I agree that the back board will shake about too much whilst working on the bench. Get a big board.Tall enough to go right from the floor to above your bench. Make it wide. Slide it between the bench and the wall; lean it on the wall, leave a small gap between the board and the bench. That board aint going nowheres; it'll just stay there not needing any extra support -
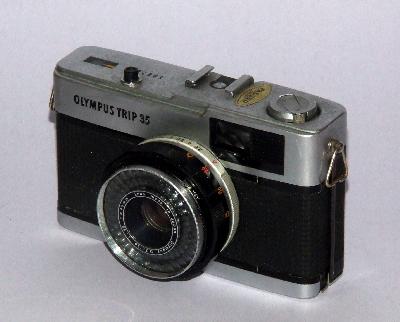
Look what I found today, in a box of junk photo stuff in my storage unit Do you still require info on this? A thought; if you are will to pay the postage cost I'll send you the camera. The camera is one I kept for spares for another one. This one does not work. After you make the case you can give this camera to your friend and he can keep it for spare parts
-
No, you don't need to apply nfo, but it does help to restore oils lost during the dyeing. My end job is applying a beeswax/neatsfoot oil mix. The oil gets into the leather, the beeswax not only seals the leather but also burnishes/polishes up to nice satin-glossy finish It is better to put on several coats of diluted/thinned resolene. It goes on more evenly, gets deeper into the leather and won't leave brush or sponge marks if applied that way The dye has not been fully sealed into the leather. Several coats of thinned resolene or Super Sheene should seal it in, then apply and buff a beeswax mixture of your choice. Beeswax on its own might be alright but I add carnauba wax which not only adds hardness to the wax but raises the melting temperature a wee bit yes There are no short cuts to getting a good finish. Its time consuming but that is the nature of it. Obviously from your experience, as said above, dye followed by bees wax is not enough. Buff, buff, buff again, then buff again, two or three coats of diluted resolene or Super Sheene, then a coat or two of beeswax/carnauba wax/neatsfoot oil mix, buffed up is my finishing method.
-
Keeping workbench clean
fredk replied to AmyK's topic in Dyes, Antiques, Stains, Glues, Waxes, Finishes and Conditioners.
I can beat that ! I re-use sponges I've used for dish washing. I buy cheap washing-up sponges, usually 20 for £1. Use them for dish washing. I replace that sponge about every third or fourth day. Its always clean but replaced for hygiene reasons, then it goes into a box for either general purpose cleaning or leather work. I cut them up into pieces for leather work -
Years ago I had a small-holding, a bit of a wee farm sort of thing. By law we needed to weedkill every year. Government recommendation was to use Roundup. As I had only about 1 acre I bought Roundup in 1 litre concentrate. The stuff I got was diluted 1 to 50, ie I had 50 litres at a time, more than enough. I did two or three weed killings a year. Then the EU said Roundup was bad for me. I could not buy the 1L units anymore. But, a farming supply shop, where I bought animal feeds, was able to sell me 50L drums! Previously they never kept Roundup as it was easily bought in every shop in the area. Years ago the EU outlawed the selling of creosote. Poor alternatives came on the market. I was no longer able to buy creosote for my fences and sheds. Well, not in N.I.. In Eire creosote was still available to farmers. I had simply to drive 20 miles across the border, and buy what I needed.
-
Keeping workbench clean
fredk replied to AmyK's topic in Dyes, Antiques, Stains, Glues, Waxes, Finishes and Conditioners.
Same as the others. I use cardboard a lot. And sometimes free newspapers which drop thru my letter box. I've never had old dye transfer but I have had newsprint transfer occasionally - fortunately on the reverse side. I recently picked up some odd rolls of wallpaper being given away at a DiY store. They should do nicely when I don't have cardboard handy. All paper/card is put into the recycling bin when I'm done with it -
Oval Eyelet Changing Leather Color
fredk replied to LeatherCritic's topic in Hardware and Accessories
I concur - agree - it looks like iron staining. If you really must use them you can get a clear metal lacquer which is meant for brass to prevent it tarnishing but works well as a barrier on iron things -
The catalogue is available free from the Tandy Library : https://www.leathercraftlibrary.com/product/2003/100th-anniversary-tandy-leather-factory-buyers-guide-193-2019 I just like to have paper copies of Anniversary editions of things
-
That reminds me; I've ordered it three times so far and not received a copy
-
a; yes, I find resolene will stiffen leather - a very wee bit in my experience but the coating of beeswax/nfo I then work into the leather returns the suppleness b. I don't trust commercial 'leather foods' either*. I used to make leather food and furniture polish using my own bees' wax and other ingredients for sale to the public. These were, complying with packaging laws here, labeled with exactly what they contained. * my no.1 son uses a commercial 'leather food/cleaner' in his BMW cars he sells. The food/cleaner has an ingredient which gives off a scent which replicates the smell of leather, so even on PVC/leather cloth seats in his cars they can smell like leather. What it is that makes the smell is not listed on the tin, thus if there is that ingredient I don't trust it.
-
another use for extremely high prices on items on ebay is as a place holder. It holds the space for the seller and also they don't have to fill in the selling list every time they need to relist after an item went out of stock and then came into stock again.
-
I prefer a few coats of thinned resolene to seal the dye into the leather, then a coating of beeswax/nfo mix. Without the resolene to seal it I find the dye can rub off onto clothes
-
On this point; at least one airport here is stopping flight-line ground crews from wearing yellow hi-viz vests. They now have to wear a blue one. Its because every person around the airport, from cleaners to ATC all wear the yellow. Its so common that the flight crews have become 'blind' to them and don't see the aircraft handlers
-
The knife ban came into force about 25 - 30 years* ago but the plods only enforce it if a local council complain about a shop selling knives. Usually its ignored by most except the shops who really know the rules. I had to give my details on buying a set of three craft knives, plastic handles with 1.5 inch blades, at a hardware store where they know me. Knife crime is rising here so I expect one of the regular clampdowns and raids for a few months then it'll be back to normal with the terrorists just using guns again. * about the time the UK introduced that the carrying/possession of a blade over 4 inches was illegal
-
As usual in the UK, N.I. has different laws. The ban on knives is already in force - although not really enforced. You have to be over 25 to buy a knife anywheres. ASDA, Tesco etc do sell single kitchen knives still but actually they shouldn't according to N.I. law, only certain places like hardware or sports fishing shops are allowed to sell knives. Name and address of buyer is supposed to be taken.
-
1/4 - 24 is a very old machinist's thread size. Used on Veteran/vintage [antique] cars, Steam Traction engines and industrial machines from the mid 19th century onwards. Its continued use is like 1/4 - 20 still being used on camera equipment and bicycles. I think, afair, my 1930 Austin 7 has some bolts of this fitting