Dwight
-
Posts
5,273 -
Joined
-
Last visited
Content Type
Profiles
Forums
Events
Blogs
Gallery
Store
Everything posted by Dwight
-
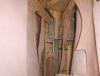
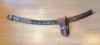
 This is about all I ever saw as a kid growing up, . . . in the '50s, . . . except for those the police carried, . . . and many times they were very, very similar but were black. This is a Heiser holster, . . . and was laced around the outside edge, . . . the ones I saw were all sewn along the edge. May God bless, Dwight This is about all I ever saw as a kid growing up, . . . in the '50s, . . . except for those the police carried, . . . and many times they were very, very similar but were black. This is a Heiser holster, . . . and was laced around the outside edge, . . . the ones I saw were all sewn along the edge. May God bless, Dwight
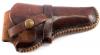
-
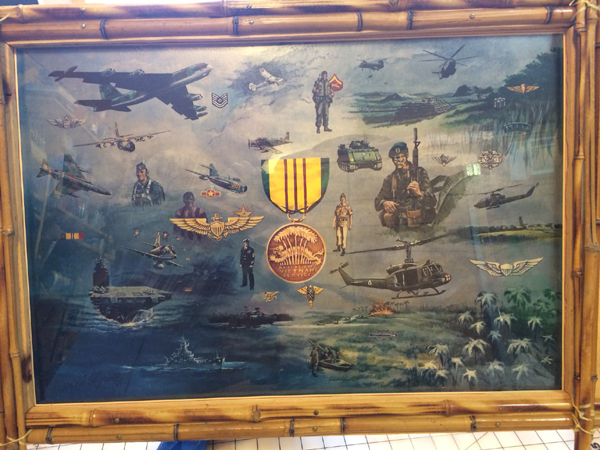
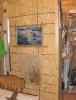
No insignia on it, . . . in fact everything but the New Jersey is not ID'd. The manager of a local VFW gave it to me, . . . it actually is a beer promotional poster, . . . they had one for WW2, Korea, 'Nam, and the sand box, . . . I talked him out of this one, . . . cut up a bamboo fishing rod, . . . framed it, . . . It reminds me from time to time just how well I've been protected.............. May God bless, Dwight

-
How Do I Make Lower Half Chaps For Motorcycle Riding.
Dwight replied to SFC Morris's topic in How Do I Do That?
If I was doing MC chaps for the lower half of my legs, . . . I'd just rip out the seam in my jeans, . . . sew the leather to the jeans, . . . sew the seam back up and be done with it. I took the seam out of two pairs of jeans a couple years ago, . . . lined them puppies from top to bottom, . . . and they are so warm, can't wear em any length of time in a warm house. May God bless, Dwight -
I like to use the hammer and dome the outside piece, . . . but inside where it will rub on a gun magazine, . . . cell phone, . . . etc. . . . I prefer them to be flat. I've got several pieces of steel and lumber out there in the shop, . . . some specifically sized to go right into the box. I also made a tool that uses a small paper clip, . . . I slip the rivet into it, . . . goes down into the pouch and out the hole, . . . slip in the lumber, then the steel piece, . . . pull out the tool, . . . put on the cap, . . . SMACK, . . . done. I believe it was an M14 magazine pouch that I first did this with. Double cap rivets are what I've just always called rivets: May God bless, Dwight
-
I make similar boxes for cell phones, . . . magazine carriers, . . . etc. I set the rivet by sliding a piece of lumber in the pouch, . . . then a 1/4 or 3/8 inch piece of flat stock steel, . . . one smack with a hammer, . . . rivet is set. I can set that rivet with a hammer faster than I can even think about doing it with the setter. Just the way I do things. . . . works for me. May God bless, Dwight
-
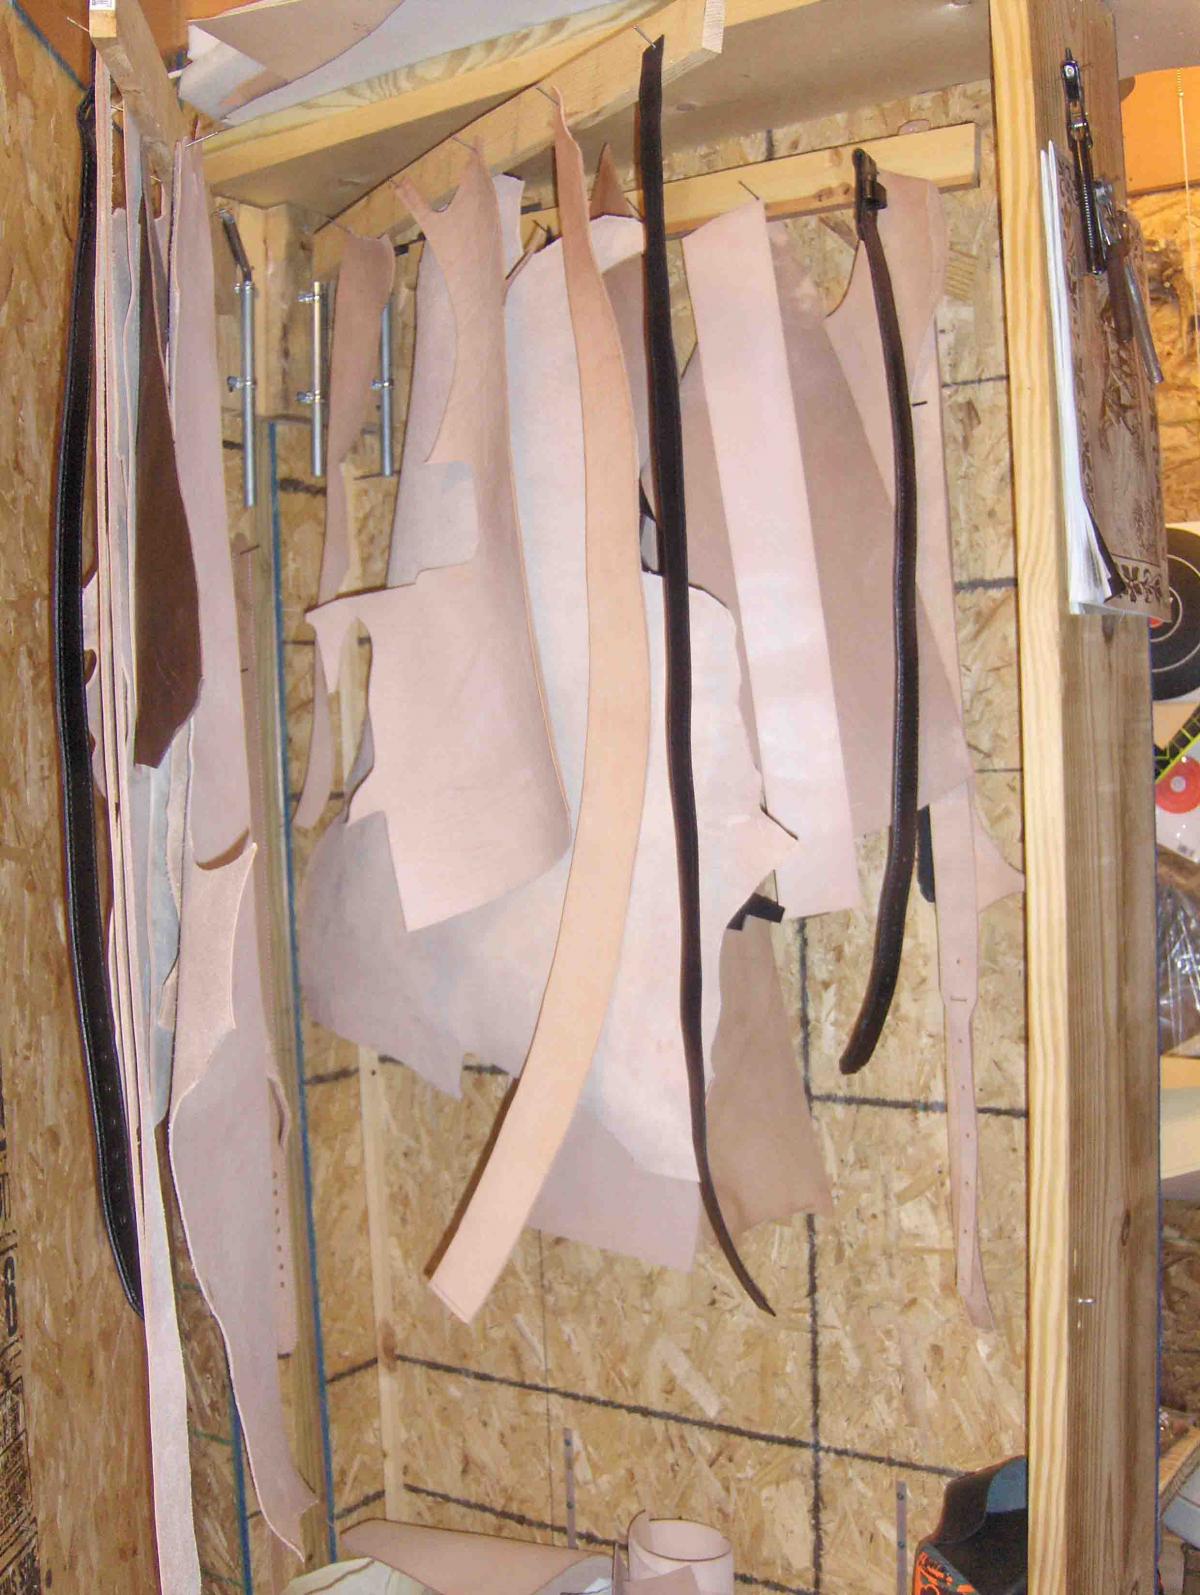
Actually, . . . the original plan was for a table with drawers or a lifting top, . . . something where my leather would lay flat. I wound up not having as big a place for that table as I felt I needed, . . . had to look for another way, . . . got the inspiration just as I was getting ready to make that wall, . . . and as the saying goes, . . . the rest is history. What I really like, . . . is once it has hung in there for a couple of days, . . . most of the curl from being rolled goes away, . . . and it makes life easier down on the cutting table. Good luck.... May God bless, Dwight
-
My source said he was all but thrown out on his ear, . . . hoping for a bus to get him before he bounced, . . . But we all know how those stories get manipulated to agree with the teller's point of view. He did agree, though, with the earlier post about folks having a party because of the news. My only hope is that this bodes well for us as consumers of their products. May God bless, Dwight
-
I am not going to be one of those dozen posts, . . . but I would encourage you not to give up on the weldwood. I personally have never had your experience, . . . BUT, . . . we don't do things alike either. My belts, . . . like yours, . . . get a coat on each piece of leather, . . . but I force dry mine, . . . with a heat gun, . . . and they are not tacky, . . . they are DRY. You can take a cotton ball all the way from one end to the other, . . . you will not lose one fiber of cotton to a tacky place when I am getting ready to put my belt pieces together, . . . and owing to the heat gun, . . . they will be slightly warm. I put them together, . . . and my marble rolling pin comes out, . . . after I have first "set" them together with the palms of my hands. My opinion, . . . you got some foreign something or other in that weldwood, . . . and the same thing will happen again, . . . regardless of the brand, . . . if the new stuff is equally contaminated. In almost 50 years of using contact cement, . . . I did get one bad can once, . . . a couple years back, . . . worked good at first, . . . then seemingly overnight it got all thick and stringy, . . . totally unuseable, . . . I pitched it and did not look back. I've never used Barges because I like weldwood, . . . understand it, . . . am familiar with it, . . . and am not with Barges. BUT, . . . best wishes on whatever decision you make. May God bless, Dwight
-
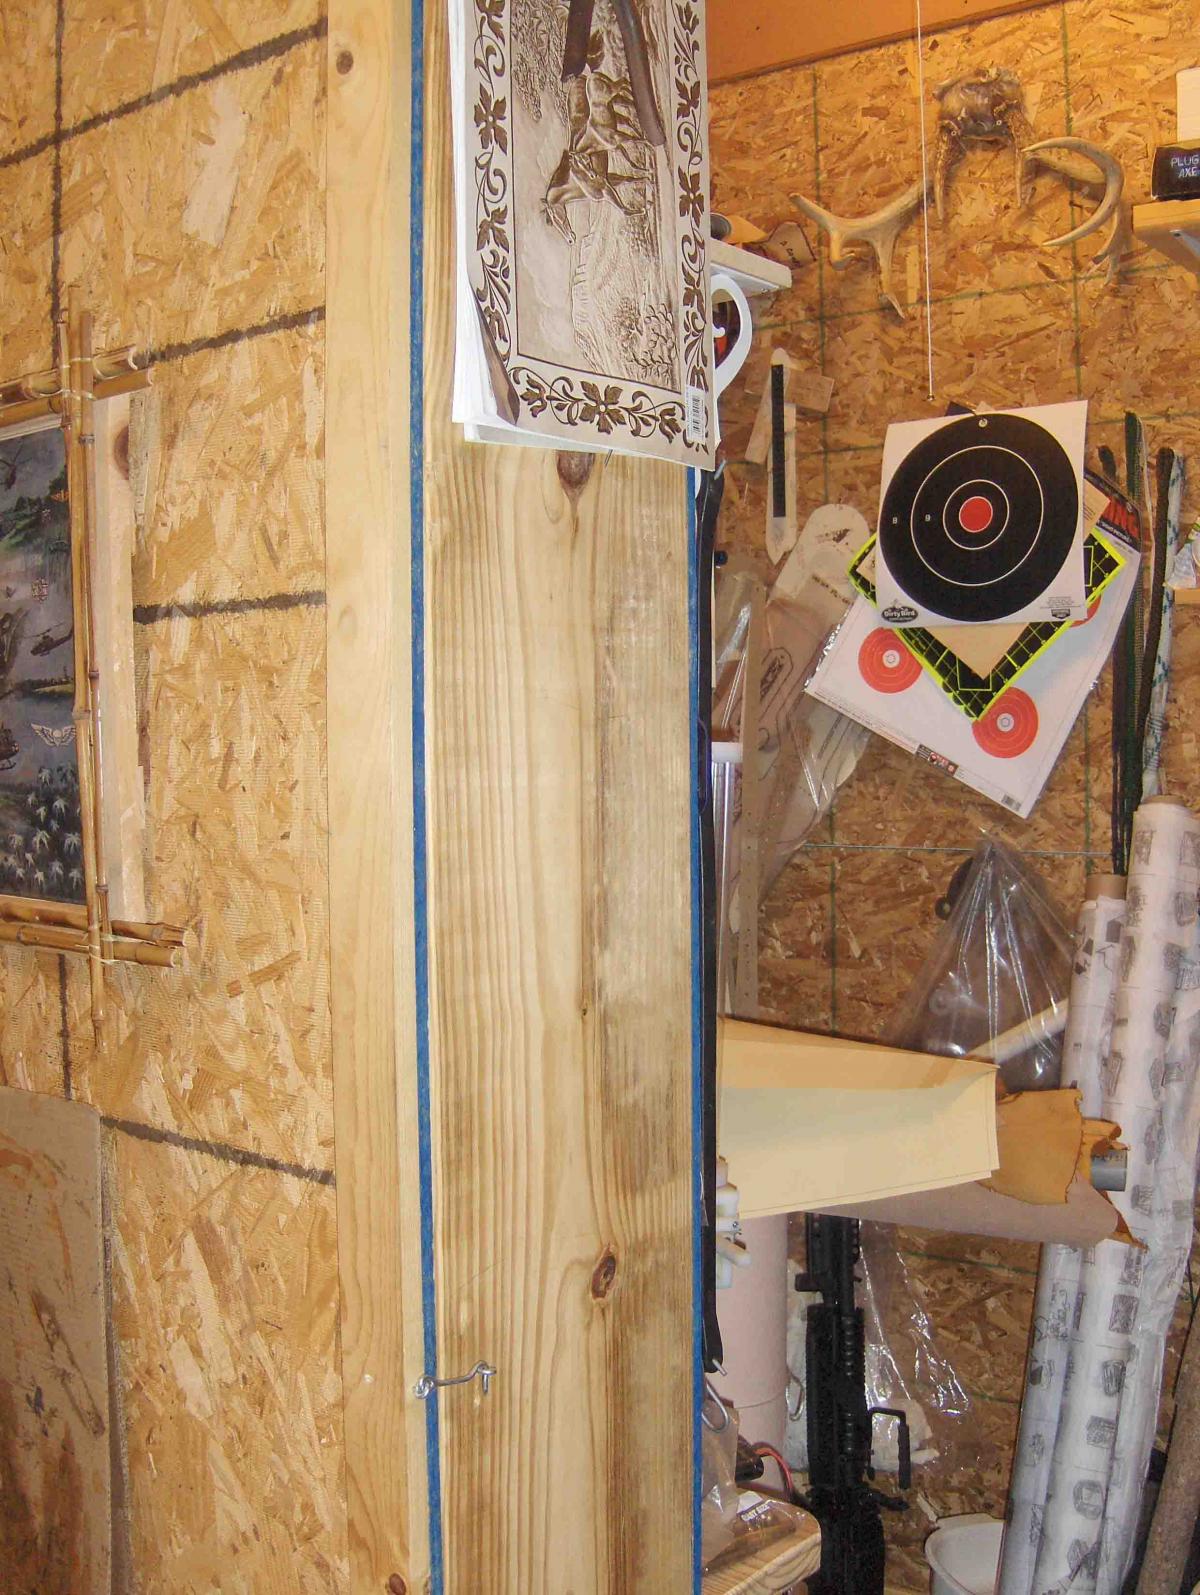
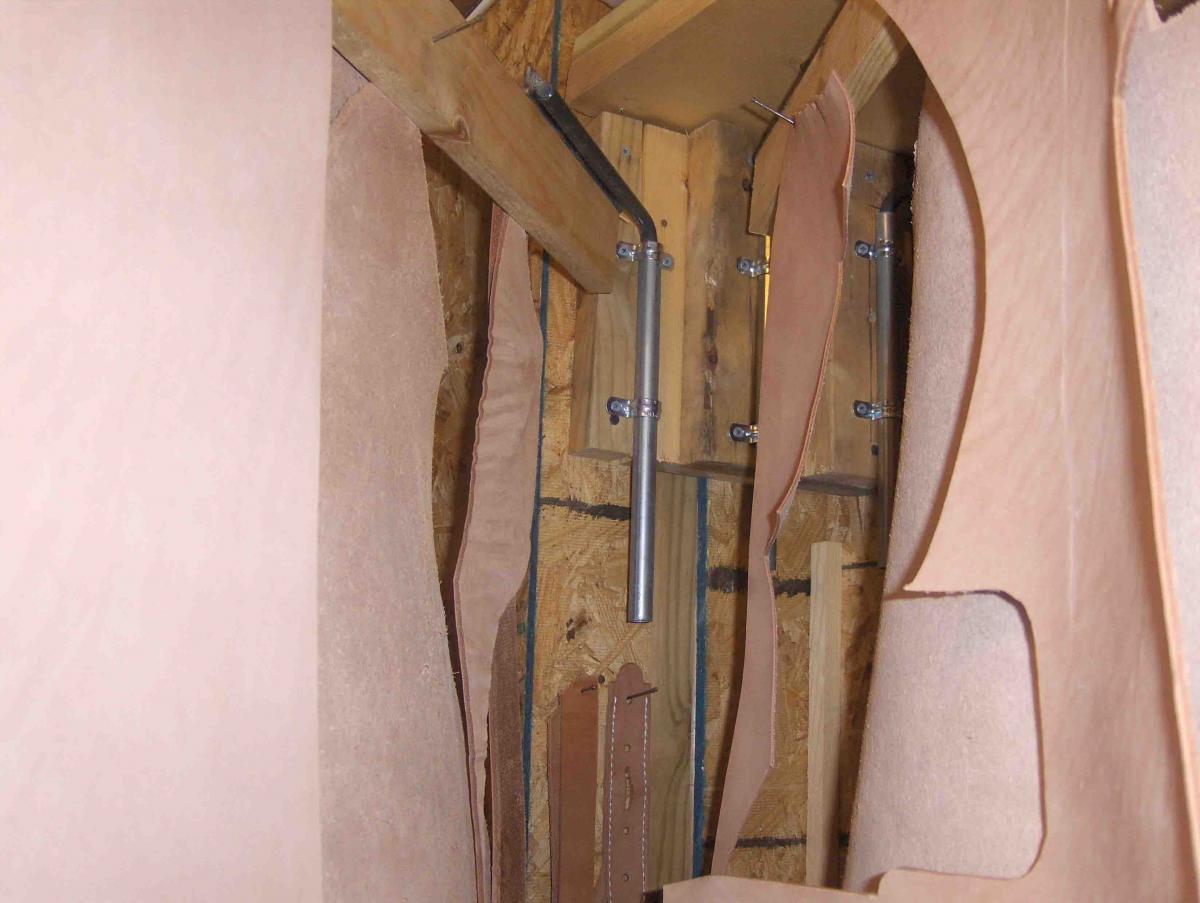
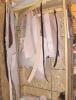
Actually, . . . what I have is nothing more than a big box, . . . almost 8 feet tall, . . . 4 feet wide, . . . 12 inches deep. I have racks inside, . . . that swing, . . . allowing me to pick what ever piece I want for this item, project, or task. Really pretty simple when you come down to it, . . . and as I said before, . . . was putting up a wall anyway, . . . just made it thicker and hollow, . . . serves as my "vault", . . . so to speak. May God bless, Dwight

-
We added a car port to the house, . . . and on the other end of the car port, . . . I built the hobby / leather shop, . . . needed to get it out of my family room, . . . made my wife VERY happy. It would never do for anything above a 2 or 3 man operation, . . . and that would be crowded, . . . but it works really great for me. May God bless, Dwight
-
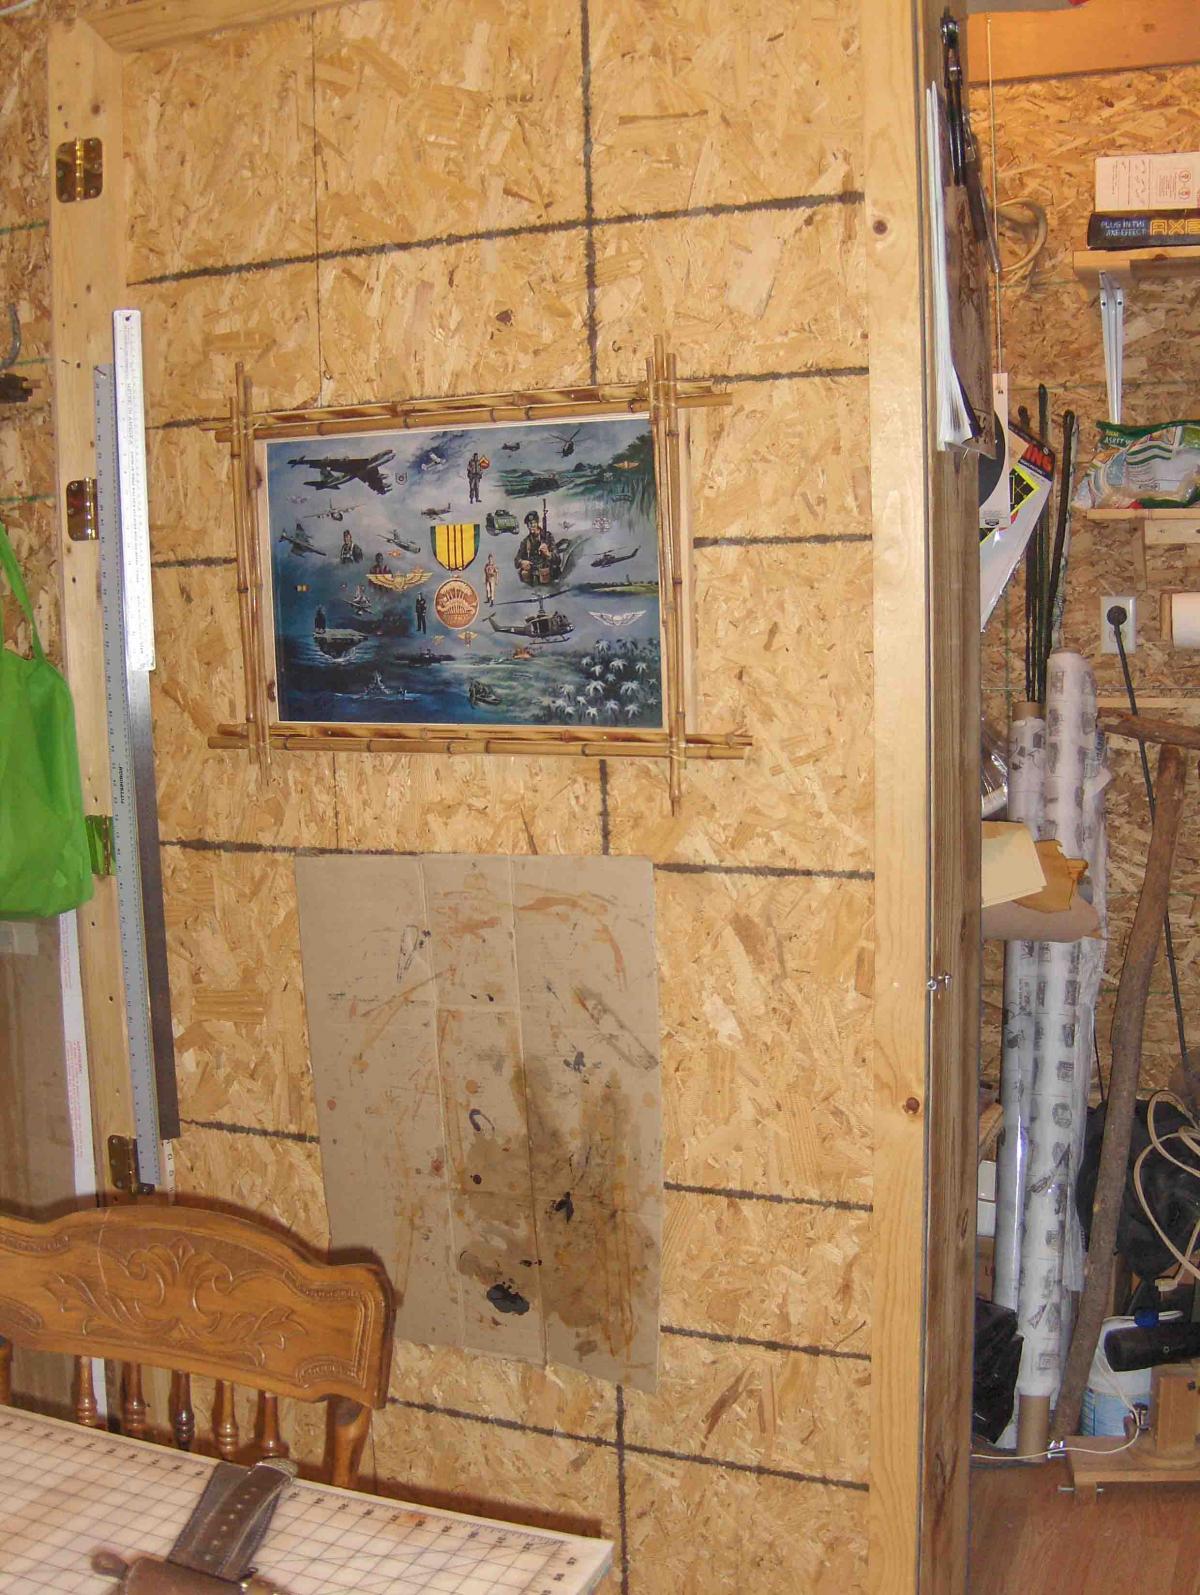
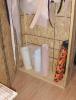
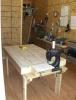
I have a relatively small space in which I work. The table in the picture is 3 feet wide, 5 feet long, . . . the covering is 1 inch squares, and is a "cut proof" bench top piece from Joann Fabrics. As you can see, . . . my sewing machine is at this end, . . . everything sewn flows up and onto the table. To the left of the table but unseen is a belt sander and a tube sander, all I do is turn around, . . . they are there, . . . turn them on, . . . go at it. To the right of the table is all the punches, and other tools that would be used to shape or decorate or stamp the leather. Additionally all my snaps, grommets, rivets, and their associated punches and tooling are all there. Farther back in the shop on the same side as the tools is the sink, . . . above which is all the finishing products and stains. The "wall" you see behind the table is indeed not a wall, . . . but my leather vault, . . . 12 inches deep, . . . 4 feet wide, . . . 7 feet tall, . . . with swinging arms inside that hold my leather in a vertical position, . . . open the vault, . . . thumb through till you find the piece you want, . . . take it down, . . . cut it, . . . hang it back up. Everything is designed to be within arms length of the table. Works for me. May God bless, Dwight
-
I use 346 thread, . . . top and bottom, . . . belts, holsters, purses, billfolds, knife sheaths, . . . and an occasional "whatever" I might make. No one has ever complained. The few comments on the stitches, . . that I've gotten, . . . were all good. Generally I'm about 5 1/2 stitches per inch. May God bless, Dwight
-
Gary, my man, . . . get on them edges, . . . they haven't shaved for a week Seriously, . . . good looking holster, . . . just needs some serious edge work done, . . . it'll turn into a great looking holster. May God bless, Dwight
-
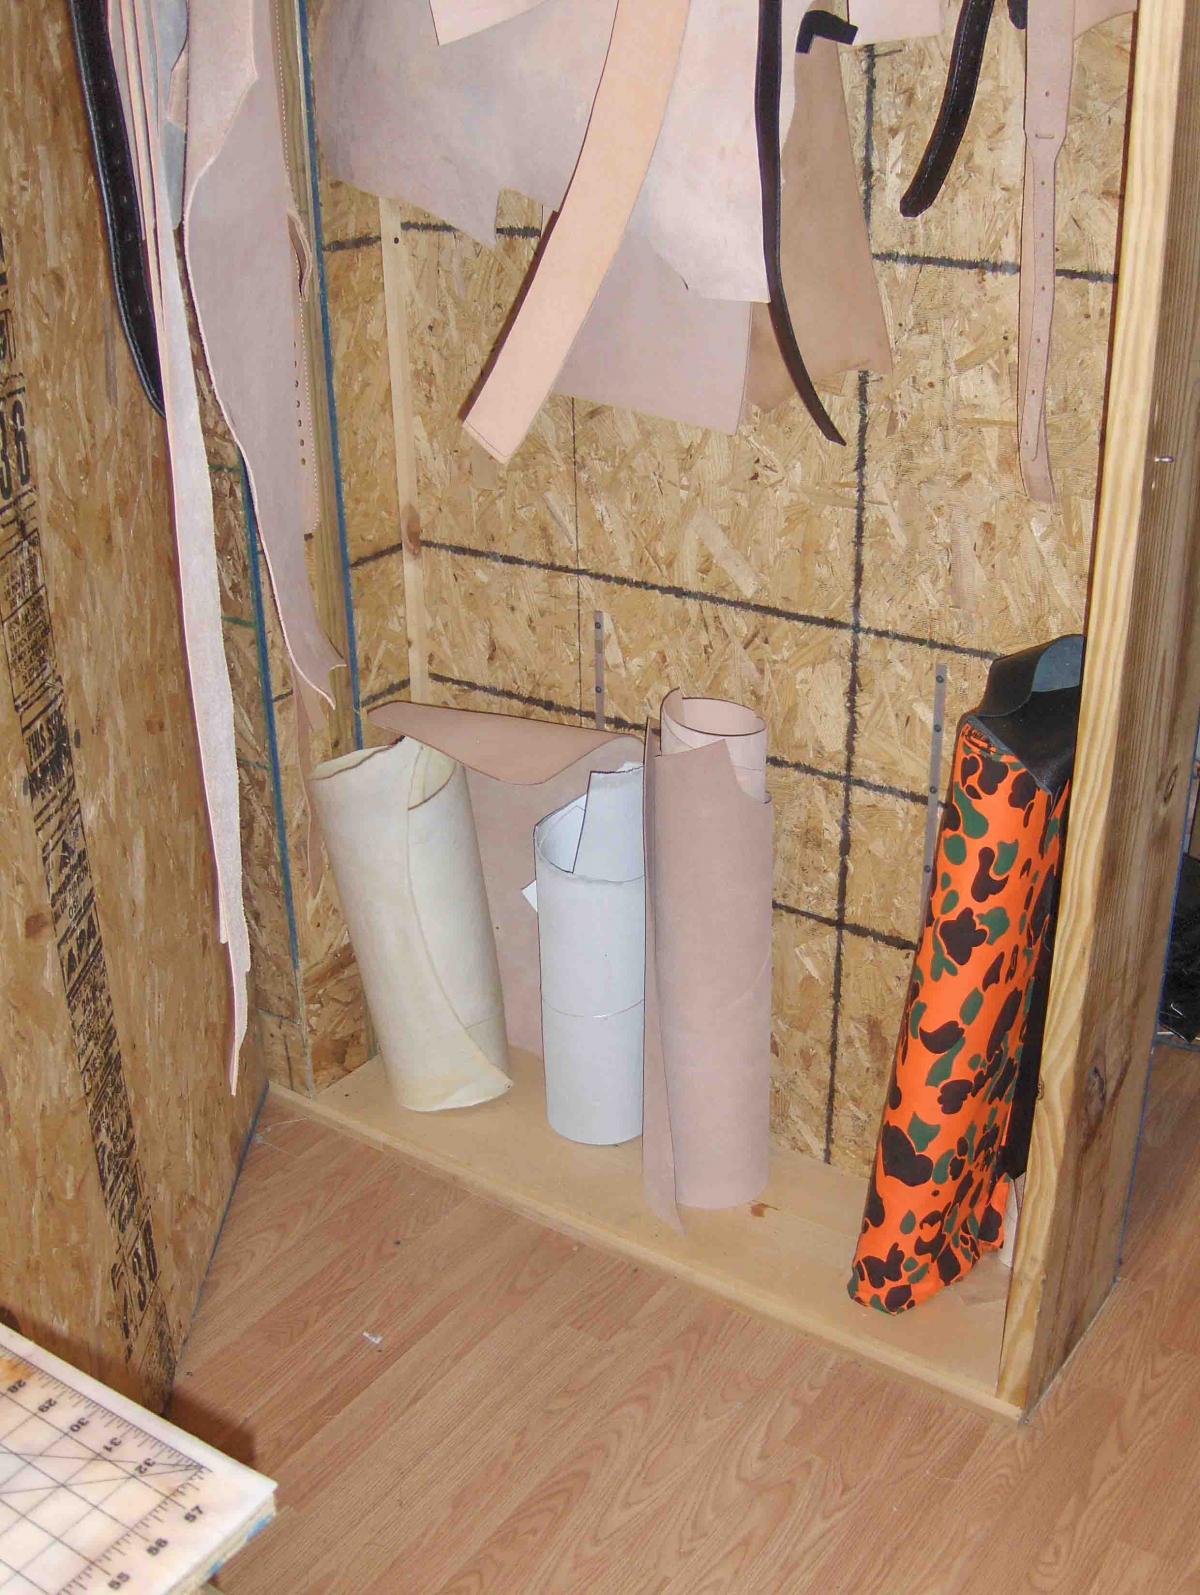
When I built my hobby / leather shop, . . . that was one of the concerns. I had to put up a divider wall between two sections, . . . instead of a 2 x 4 wall that would be all wasted space, . . . I used a 2 x 12 on the end of it, . . . put an OSB back on it, . . . an OSB door on the front, . . . and all my leather hangs in the "vault" nowadays. I made swinging arms that would hold 6 or 8 pieces each, . . . so I can just open the door and thumb through what I have until I find what I want. What little I have rolled up, . . . sits on the floor of the vault, . . . awaiting a day when it too will be hung up. Greatest invention I've done in a long time. May God bless, Dwight
-
OK, . . . that's an easy one, . . . I've had to do that on occasion or two, . . . pull your leather through the hole while you still have 3 or 4 inches on it, . . . cut it so it is half the distance to the next slot, . . . skive it and the new piece so they will lay flat, . . . use a little dab of contact cement to hold them together, . . . put a staple through both pieces or sew a couple of stitches, . . . just to hold them together. Go on and pull it through the rest of the slots, . . . and when you put the belt together, . . . MAKE SURE, . . . that area gets good cement. It'll work, . . . been there, done that. May God bless, Dwight
-
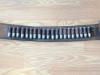
I try to look at reloads, . . . not bullet count. Also, . . . are you making a belt, . . . or a bandolier? A 72 inch belt is a pretty BIG guy , . . . but just figure out how much space you want to put bullets in, . . . divide that by your .550 spacing, . . . you'll know then how many you can do. My personal rig for my .45 LC, . . . has 20 loops, . . . 4 reloads of 5 each, . . . also space on the right hand side for the holster, . . . and a space on the left side for a knife, . . . another holster, . . . canteen, . . . possible pouch, . . . May God bless, Dwight
-
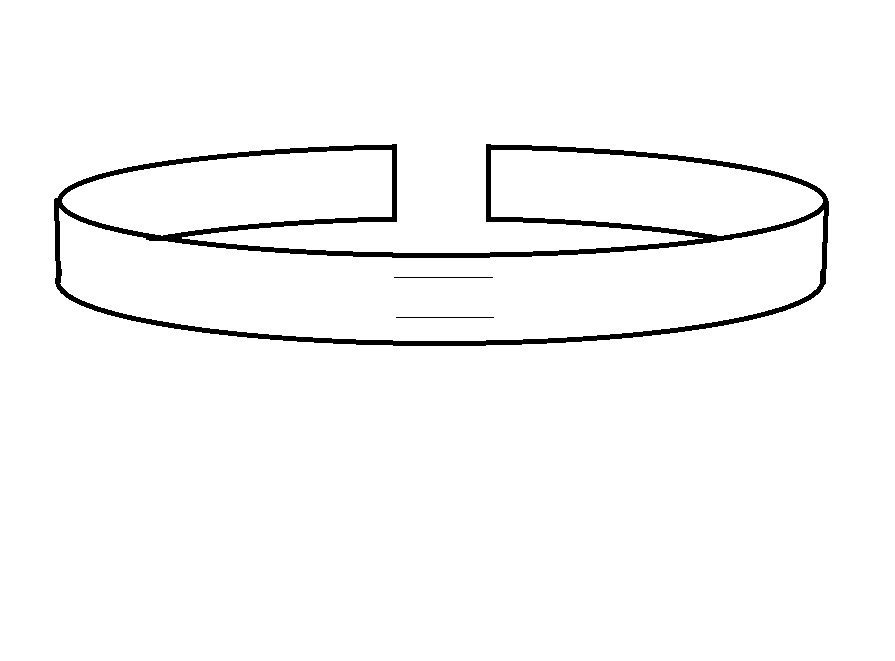
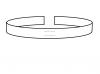
You have to "figger" this one. Two cartridges, .375 (+/-) in diameter, . . . with two pieces of 5 oz leather between them. We're talking "center to center", . . . so we can start out with the .357 diameter being the minimum distance (if you laid two of them side by side, and if there was no rim on the cartridge. Add to that the two pieces of 5 oz leather which must go between the two cartridges, . . .that equals one piece of 10 oz leather, . . . which equals 10/64ths of an inch. The decimal equavelent is .156 inches. .375 plus .156 equals .531. That will give you a belt with loops right together when it is laying flat on the table. Hanging off your body, . . . there will be slight air gaps between them. Set your set of dividers at maybe .550 or so and you won't get in trouble. Look at the little drawing, . . . notice the two lines, . . . they are the top and bottom of the cartridges LOOPS, . . . I prefer mine fixed so the cartridges are actually centered on the belt, . . . some folks like em up a bit higher, . . . it's your choice, . . . it's your belt. Scribe a line that goes from one end to the other of your line of cartridges (multiply .550 by the number of bullets you want to put in there to get the length of that line). Again scribe that line, . . . and then take your dividers set at .550 and make marks on the TOP line, . . . the one closest to the top of the belt, . . . make your punches at each of those points, . . . thread your loops, . . . and you are good to go. I start out with the left end (I'm right handed) and work my way around, . . . having riveted the left end about an inch or so to the left of the first cartridge. Dampen your loop leather (don't soak it, . . . just a moderate dampening), . . . pull it up, . . . push it back down, . . . put a bullet in the loop, . . . pull it TIGHT. Do the next one the same way, . . . I leave the bullets in until about an hour after I finish weaving the loops, . . . while the leather is still a tad damp, . . . and then I very easily, . . . very gingerly, . . . take the bullets out. Hang it up to dry. Come back tomorrow, . . . you got a cartridge belt, . . . well, . . . almost anyway, . . . add the buckle and the tongue billets, . . . I contact cement the two pieces together, . . . sew the edges, . . . now you got a cartridge belt. Have fun, . . . may God bless, Dwight
-
Thumb Break Stiffeners
Dwight replied to GaryNunn's topic in Gun Holsters, Rifle Slings and Knife Sheathes
Beat me to it Red Cent. -
Found In The Rafters Of Old Garage!
Dwight replied to yotebuster1200's topic in Saddle Identification, Restoration & Repair
That is a great find, . . . congratulations. My old saddle doesn't have any history to it, . . . supposedly a turn of the century company making a Jumbo saddle. It ain't much, . . . but it's mine, . . . and it rides good. Came out of a Denver, Colorado pawn shop. May God bless, Dwight -
I had the same question a number of years back, . . . just for kicks and giggles, . . . I built an IWB holster for a Bersa Thunder, . . . patterned after my Cactus design. I carried it on and off for a year or so, . . . gave it to a friend, . . . in all probability, it is a drawer ornament today, . . . but when I gave it to him, . . . it was still intact and totally functional. I do not use glue, . . . I use Weldwood contact cement. GOOD STUFF !!! May God bless, Dwight
-
Thumb Break Stiffeners
Dwight replied to GaryNunn's topic in Gun Holsters, Rifle Slings and Knife Sheathes
It's a little hole in the wall place, . . . not very well known, . . . called Tandy's.............. Seriously, . . . I quit kicking around other places, . . . Tandy is only 35 miles from me, . . . near my wife''s aunt's place. She sees her aunt, . . . I go to Tandy's and get what I need. Their snaps have done every thing I've ever asked them to do, . . . and thumb snaps on holsters is one of those things. It may be the tool I use, . . . it is a plier looking thing from Walmart originally, . . . last one came from Hobby Lobby, . . . this is similar to it. This one is lighter duty than my old one though, . . . once they are set, . . . they are SET, . . . and have to be cut off http://www.amazon.com/Dritz-Heavy-Duty-Fastener-Plier/dp/B005BB5GYS May God bless, Dwight -
draw using the computer and print out the pattern
Dwight replied to Sjm1027's topic in Patterns and Templates
For the drawing that I do on the computer, . . . Windows Paint serves me quite well. Most of my drawings are done freehand, . . . then on to my Epson scanner, . . . and tweaked as necessary with paint. Kinda simple, . . . low budget, . . . but it works. May God bless, Dwight -
Yes, . . . but it takes 5 layers, . . . and a lot of work (at least the one I did, . . . was a lot of work). I did the front and back out of two layers, . . . cemented together, flesh to flesh, with weldwood contact cement. That was the first 4 layers. I then made a layer to go between the front and back, . . . so that the edges of the sword would not cut into the stitches. I then cemented this all together, . . . sanded down the edges, . . . sewed the thing (wow what a job), . . . dyed and finished it, . . . and sent it back to my customer, . . . who was tickled pink. I also used vegetable tanned leather, . . . soaked it in hot water, . . . and force dried it, . . . it became HARD, . . . HARD, type HARD, . . . But it was not for a saber, . . . but one similar to a Roman short sword. I would not be afraid to use this same process on a broad sword, . . . one like old Lancelot's, . . . or even a Viking 2 handed sword. May God bless, Dwight
-
Tardis86 wrote: "i feel like im missing something here, i put alot of time in this stuff and it looks like crap. any helpful ideas are appreciated." And: "i REALLY don't want to use an awl for poking holes. is there another way?" A carpenter could use a rock to drive nails, . . . and a truck delivery driver could use a Mini-Cooper, . . . but neither one was designed for the task at hand. You asked for good suggestions, . . . suggestions that would help you make your work look good, . . . that is exactly what we gave you. If you use a drill or even a drill press, . . . you will NEVER be as accurate making holes as you will be with an awl and a stitch marking tool. Making the hole, . . . determines what the overall stitch looks like, . . . and the example you gave us in post # 1 shows you did not take the time to make the holes so that the stitches would line up correctly. Two needles and an awl are the leatherworker's equivalent to the carpenter's hammer, or the delivery drivers Peterbuilt truck. Beat yourself up if you want to, . . . but until you are willing to follow the suggestions of people who are and have been in the industry, . . . you are just not going to create an esthetically pleasing product. May God bless, Dwight
-
Weldwood contact cement, . . . and a leather working awl to do the holes. The first one will hold it, . . . the second will poke it. May God bless, Dwight