Dwight
-
Posts
5,261 -
Joined
-
Last visited
Content Type
Profiles
Forums
Events
Blogs
Gallery
Store
Everything posted by Dwight
-
 Been doing belts the Lobo way, . . . John Bianchi way, . . . for over 15 years now, . . . never found a good reason to put a liner in one, . . . Probably wouldn't waste my time doing it anyway. May God bless, Dwight
 -
If you have never done a belt before, . . . you need to carefully measure the length you need, . . . by taking a belt worn by the customer, . . . measuring from the front edge of the buckle, . . . back to the most used hole. That is your belt length. I punch 7 holes in the belts I make, . . . so when I get to this point, . . . I will later mark that as the middle hole length. Then you work the end for the buckle, . . . do you have a pattern or template for that?? Do you also have a pattern or template for the tongue end?? When I cut the belt blanks, . . . I actually "need" right at 9 inches beyond the measurement for the belt length. I will cut 10 or 12 inches over, . . . just in case there is a flaw or something I need to work around. I make the outside piece, . . . and do whatever decorations are necessary, . . . I then lay the liner down on the belt with the buckle end folded over like it would be to put the buckle on, . . . measure and cut the liner. I use Weldwood contact cement to put the two pieces together, . . . Once they are together, . . . I even up the edges all around with a belt sander. Stitch the two pieces together, . . . bevel and burnish the edges, . . . punch the 7 holes at the tongue end, . . . dye, . . . finish May God bless, Dwight
-
Dual SA Cowboy Rig
Dwight replied to MLGilbert's topic in Gun Holsters, Rifle Slings and Knife Sheathes
Yep . . . good lookin rig, . . . Go in hock, . . . get that other pistola, . . . it's worth it, . . . May God bless, Dwight -
I make and sell my CCW belts by cutting two consecutive strips 1 1/2 inches wide from 7/8 oz veg tan leather, . . . glue em together, . . . sand the sides smooth, . . . stitch the edges, . . . punch the holes, . . . dye and finish, . . . put on a buckle, . . . send it to my customer. That's the way I do it. May God bless, Dwight
-
I guess I'll play odd man out, . . . I have a leather western style hat, . . . a grey Kepi, . . . and a military style ball cap, . . . none are lined and have all served me well for decades. Ummm, . . . why a lining? Sounds like a lot of work for something totally un-necessary. But if you got to have it, . . . Joann Fabric is the place to go for material, . . . go see the folks there, . . . they'll help you. May God bless, Dwight
-
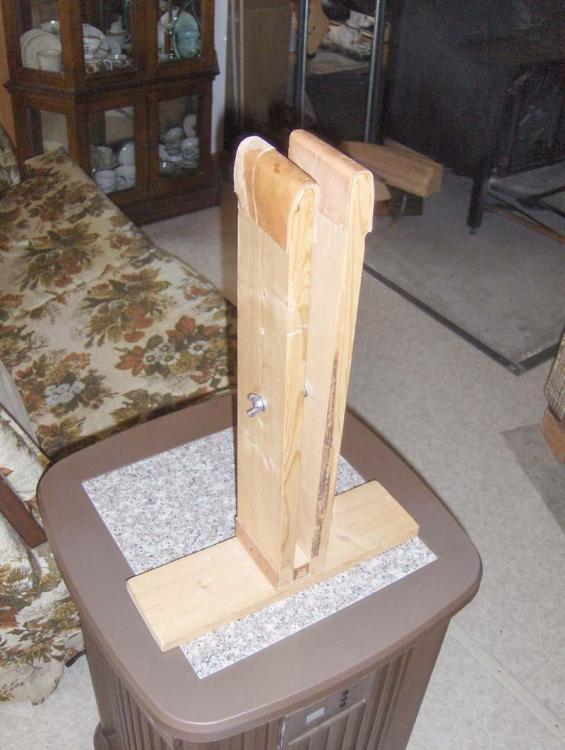
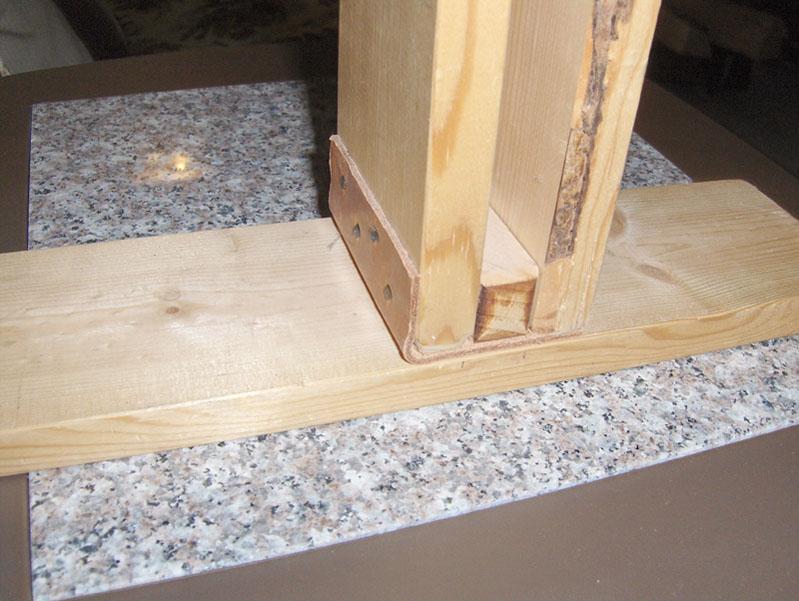
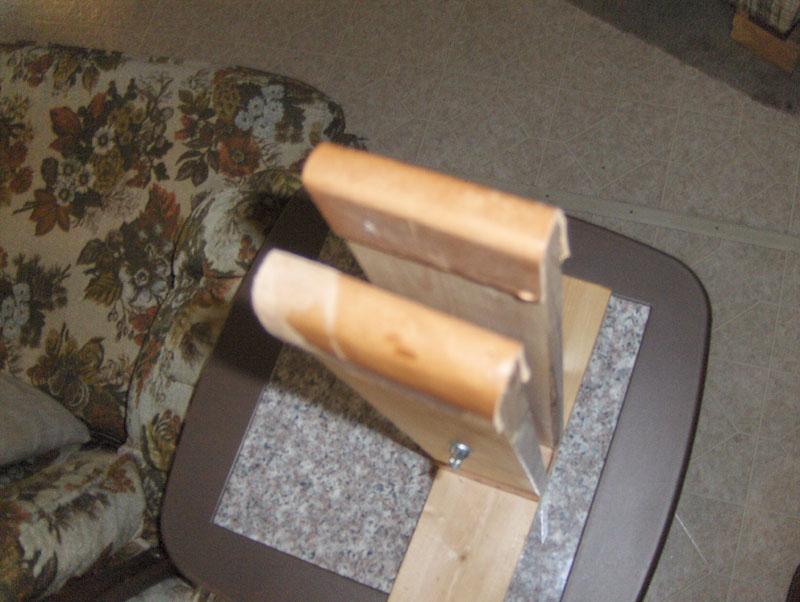
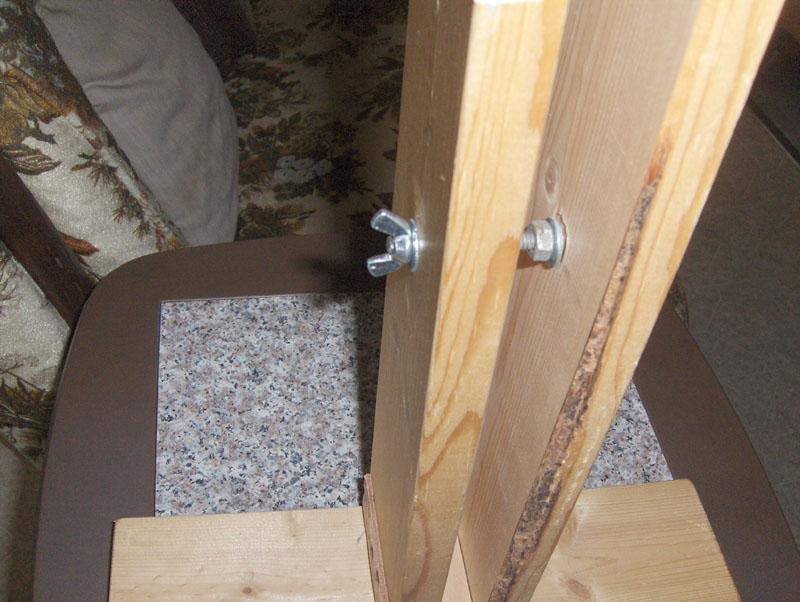
Yes, . . . the brace would be about 2/3 the thickness of the pliers. And yes, . . . the basic terminology is a welt. I always put a welt up the outside seam of my cowboy holsters, . . . knife sheaths, . . . and tool holders like this. 1) it makes the molding easier and 2) it gives the finished product more of a professional look I think and 3) the tool holder will eventually become looser, . . . allowing the tool to bottom out, . . . and the tip of the pliers hitting a welt will not hurt the holder, . . . but if it gets to the stitches, . . . trouble lays ahead. I would suggest a couple things, . . . google "drill sander" and take a look at some of the ideas there. Any kind of a powered sander will give you a quicker and more professional looking edge. Plus, . . . stitching pony's are a piece of cake to make, . . . see below. You are doing good, . . . keep up the good work. May God bless, Dwight
-
For something like this, . . . I would first cut a rough shape of the front, . . . and I would not have cut the top edge straight off, . . . a slightly rounded up look. Bevel and burnish that top edge. I would then make something or find something that is about 2/3 the thickness of the pliers, . . . wood, plastic, other leather, etc, . . . but which outlines the pliers fairly close. Lay that all around the pliers. Next, . . . wet mold the front piece, . . . hang it up to dry for 24 or so hours. When dry, . . . lay the front face down on a terry towel, . . . put braces under the edges, . . . lay the pliers in that front "shell". For these types of "holsters" I also will put in another piece of leather between the front and back, . . . it is the basic outline of the tool itself, . . . will be about 3/8 of an inch wide, . . . and will follow the coutour of the edge of the holster, . . . all the way around. I usually get it by first making the front piece, . . . laying it down on another piece of leather pretty much the same size, . . . outline it, . . . cut it out, . . . then lay the tool on that piece, . . . outline the tool, . . . cut out the outline, . . . discard that piece from the middle. Glue it to the front piece, . . . making sure the tool will slide in and out easily. Cut out the back piece, . . . cut, bevel, and burnish the belt loop piece, . . . put my makers stamp on the back of the belt loop then wet it and fold it over, . . . sew in place. Wet mold the back piece, . . . shaping it over the tool laying in the front piece with the spacer glued in place. Allow back to dry for 24 hours or so, . . . glue the back to the other two pieces. Note: always cut front and back and spacer piece bigger than the final product will be, . . . by a good half inch. In that half inch you will have wiggle room for gluing and shaping your final product. Also that will aid when they are glued together you do not have to fuss and sweat getting it lined up perfectly. After all is glued (I only use Weldwood contact cement for my gluing) I use a roller, . . . pincher, . . . something to seriously squeeze the edges together. Go to the belt sander, . . . sand those edges flat and even all the way around. I also would sand away that little peak you had sticking out on both sides about half way down. In about a month of good use, . . . that tip point will get frayed and funky looking, . . . will ruin the looks of an otherwise good looking holster. Prick . . . punch, . . . and stirch the edges (or in my case, . . . hit the sewing machine). Bevel and burnish the edges, . . . dip dye, . . . finish, . . . and congratulate myself on a good job. Anyway, . . . that would be my process. May God bless, Dwight
-
Acrylic belt hole template
Dwight replied to Airplanedoc's topic in Gun Holsters, Rifle Slings and Knife Sheathes
Just google the "Adams leatherwork belt slot template" pages and pages of them there. Ebay has em too . . . but just search the three words belt slot template. May God bless, Dwight -
Acrylic belt hole template
Dwight replied to Airplanedoc's topic in Gun Holsters, Rifle Slings and Knife Sheathes
You'll have to do better than that in the description, . . . I can come up with something near 200 possibilities. Got a drawing, . . . pic, . . . ?? May God bless, Dwight -

From the album: dwight
-
From the album: dwight
-
From the album: dwight
-
From the album: dwight
-
Taking the questions one at at time: 1. Contact cement is THE product for putting two pieces of leather together, . . . 2. Your fear will never happen, . . . we put curves in cowboy belts so they stay up on the cowboy, . . . and don't slide off. Standard 1 1/2 gunbelt does not need it. And, . . . no, . . . if you do the contact cement correctly, . . . it won't come apart. 3. You'll have to play with that one, . . . it is a personal preference and has a lot to do with the border stamp you use 4. I never mess with it, . . . damp and stamp. 5. You don't say what size thread you are using . . . let me suggest you use the pricking tools to mark where the holes go, . . . buy the thread from Tandy, . . . and the appropriate needle for that thread that they would sell for their Cowboy machines, . . . and instead of the drill bit, . . . use the needle with the drill press not running, . . . you will like the finished product better. I do that sometimes with my Tippmann Boss sewing machine, . . . use it to punch the holes, . . . then hand stitch the product. May God bless, Dwight
-
Odd stitch line on Cross Draw
Dwight replied to Viking's topic in Gun Holsters, Rifle Slings and Knife Sheathes
One thing you always have to remember about holsters and revolvers, . . . with the hammer thong holding it in place, . . . it does not have to be "molded" to fit the weapon for retention like is done for a semi-auto, . . . especially when it is a Western style rig. Run your outside stitch line, . . . mold it in a bit, . . . see where you are. My bet is you can sew that dude far enough out to not make the bull mad, . . . and yet make a decent holster. And the worst that can happen, . . . it don't work, . . . and you're out what, . . . 15 to 20 minutes??? Would be worth a try in my book. May God bless, Dwight -
I cut two blanks side by side out of the same hide with the same gauge knife, . . . one after the other. I look over both pieces, . . . decide which is outside, . . . which is inside, . . . make the correct cuts for buckle etc, . . . I contact cement them both together, . . . run it all on a belt sander to sand the edges perfectly smooth. Sew the whole thing, . . . edge it, . . . burnish the edges, . . . give it a light coat of neatsfoot oil, . . . dye it, . . . 1 or 2 coats of resolene. Add buckle and keeper . . . send belt to customer. That's my process in a nutshell. May God bless, Dwight
-
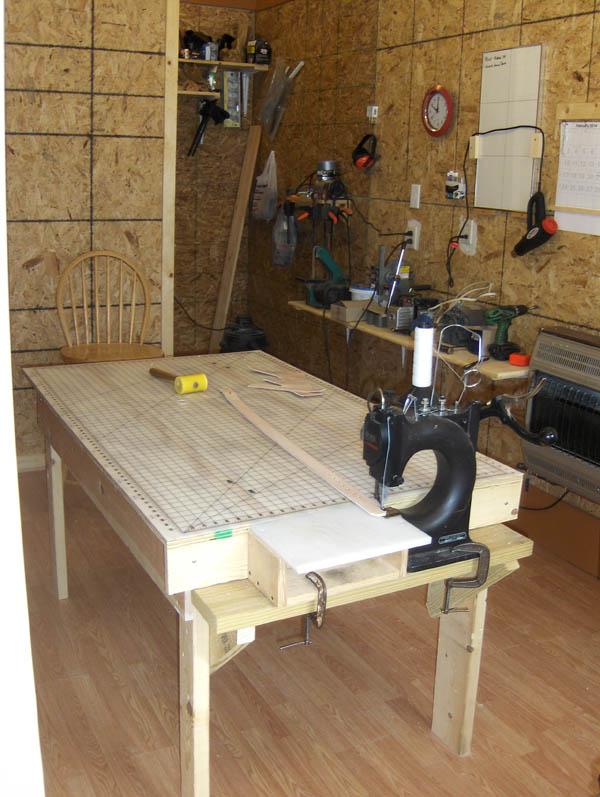
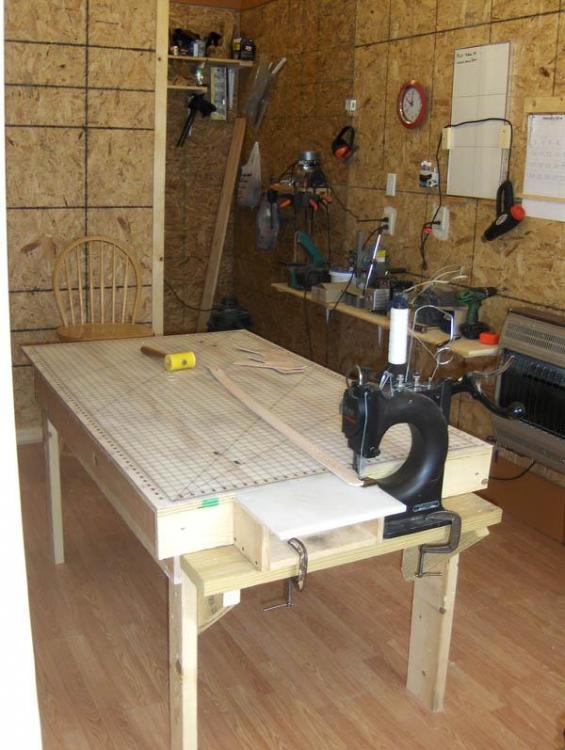
You are going to have to make a decision as to what you want. If you want a top that will not dull your knife, . . . then the blade will cut into it slightly, . . . and drag. If you want a top that will not create drag, . . . it will dull your blade. I chose the 36 by 60 cutting mat that is sold by Joann fabric for folks cutting fabric. It works great for me, . . . there is a slight drag at times, . . . but slightly lifting up on the pressure will usually alleviate most of it. Mine as been on there for over 10 years, . . . works great in my opinion. May God bless, Dwight
-
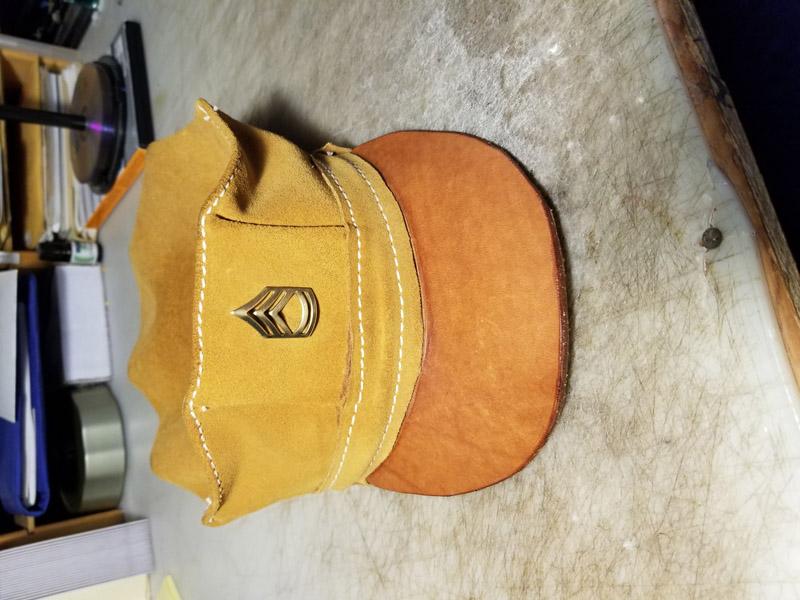
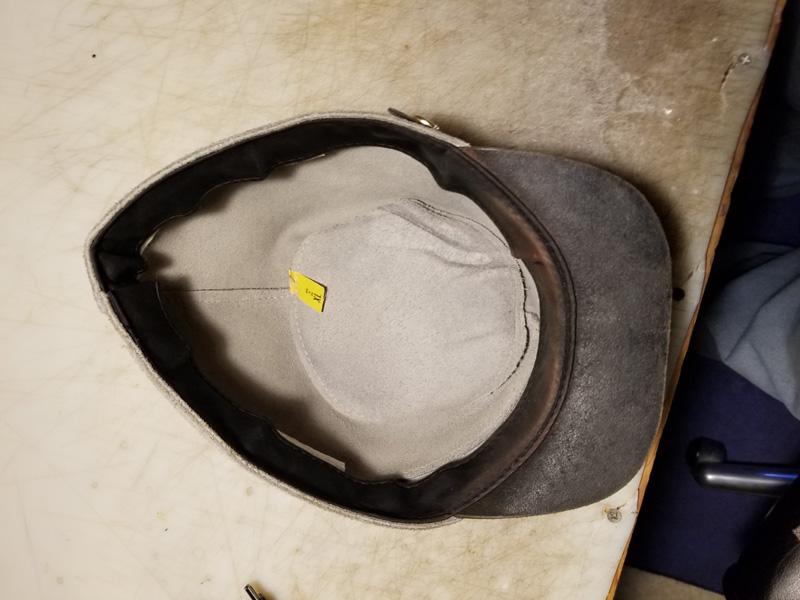
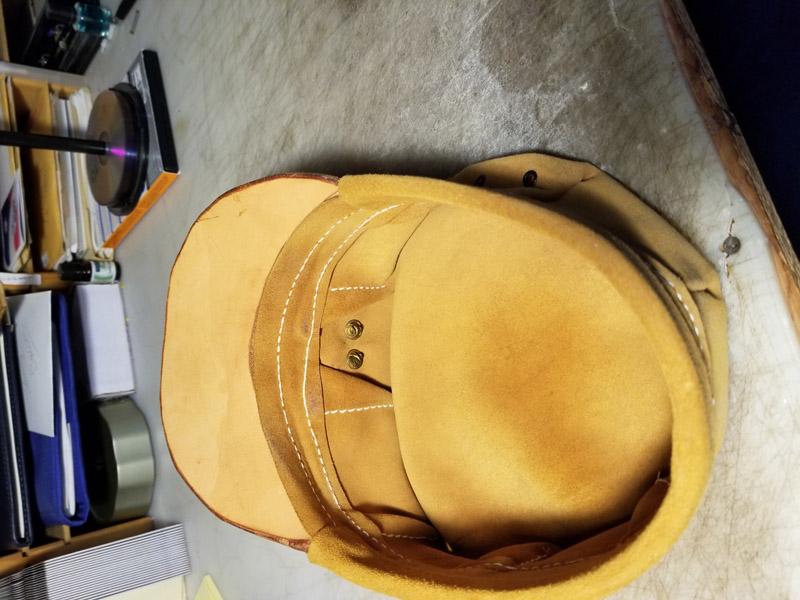
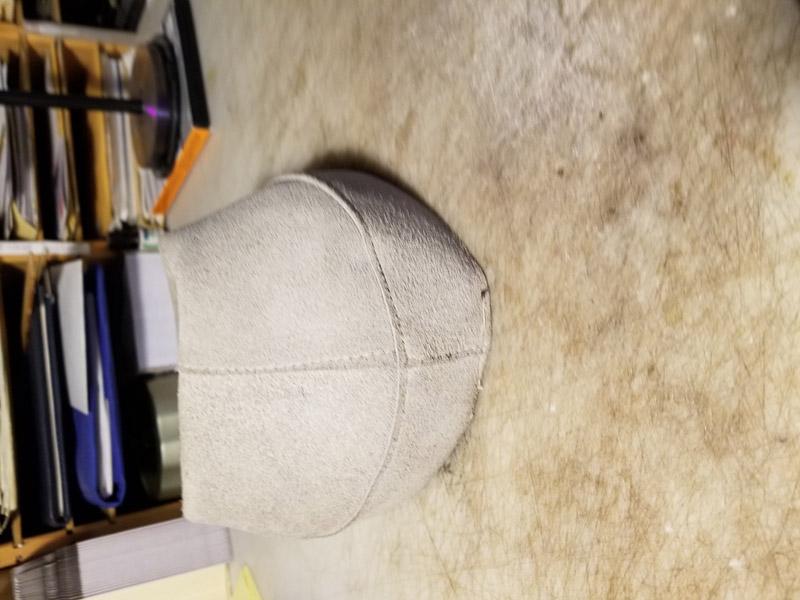
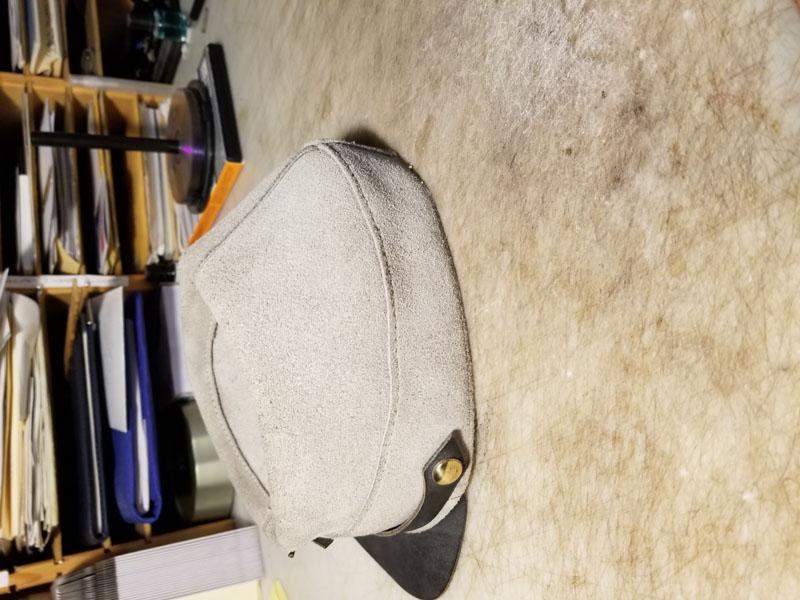
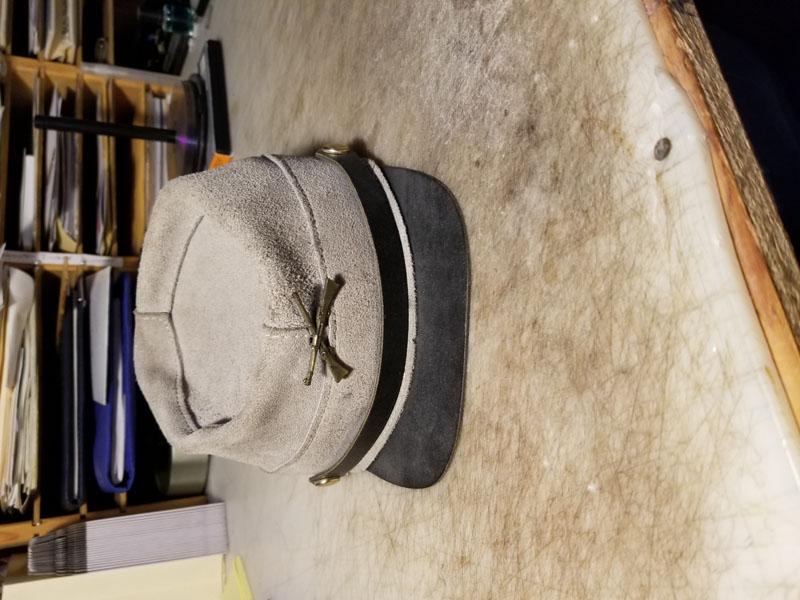
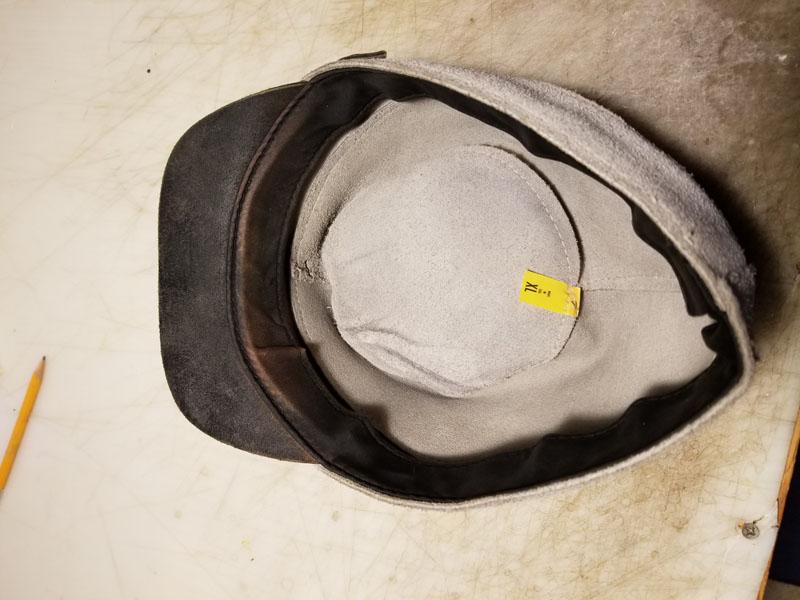
Hey Harley, . . . Don't have a pattern per se, . . . but several years ago I walked into a local what-not store, . . . found this, . . . bought it, . . . and every now and then when I feel like just jerking the chain on any loose snowflakes, . . . I pop it on my head and go shopping. I DO GET some looks at times. Take a look, . . . not that hard to make. I did the tan one by cutting up an old hat I loved, . . . but had worn to the point it was almost white on top. Leather hats are not that hard to make. May God bless, Dwight
-
Tapered Cowboy Rig
Dwight replied to Bayou Bengal's topic in Gun Holsters, Rifle Slings and Knife Sheathes
Fine stuff, . . . need to be proud of that. May God bless, Dwight -
Another vote for Weldwood, . . . Put many a piece of suede onto veg tan, . . . works great. If you are gluing to the hair side, . . . scuff it up with a wire brush first, . . . sticks better. May God bless, Dwight
-
Go to Joann Fabric, . . . get their plastic 36 x 60 inch mat, . . . you can layout anything on it . . . within the 60 inch limit. It keeps me centered on belts, straps, holsters, you name it. About 60 bucks, . . . but they do coupons for up to 60% off at times. May God bless, Dwight
-
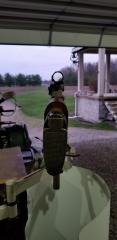
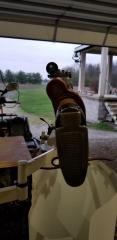
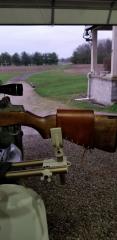
I like it, . . . best of all, . . . it does not scream "GUN INSIDE, . . . BREAK WINDOW AND STEAL ME" like a lot of em I've seen. At home I use a Canon camera bag, . . . would never take it with me anywhere else though, . . . thugs bust windows for a pair of shoes or pack of cigarettes, . . . That looks more like a gym bag full of sweaty old exercise togs, . . . good camo job, . . . should be safe and do what you need at the same time. May God bless, Dwight
-
I use a Tippmann Boss, . . . 346 thread top and bottom, . . . usually make the belt from two side by side cuts of 7/8 oz. Occasionally will lighten up and use a thinner liner, . . . but only when I got a skinny dude, . . . or a skinny gal. Most of em are carrying handguns on them, . . . plus cell phones and magazines, . . . so I give em a belt that they should never "have to" replace. Kinda puts me out of business in one respect, . . . but makes for happy customers. May God bless, Dwight
-
The one I'm wearing is 16 oz, . . . had it for over 10 years, . . . but you are right 15 and 16 are pretty much up at the top end unless it is a 3 inch wide police belt or fireman's belt, . . . where you could probably do a bit more, . . . but certainly not much. And to answer the OP question, . . . it will absolutely add 10 oz to the length, . . . which is in effect 5/32 of an inch. Yeah, . . . not much. May God bless, Dwight
-
First thing, . . . I only make two layer belts, . . . those are all single layer. My belts are a much better quality, . . . and if the one I'm wearing right now is any indication, . . . my belt just may last me a lifetime, . . . theirs will not. Second, . . . they have their own leather suppliers, . . . buy in big bulk, . . . and as previously mentioned, . . . child labor laws are never enforced on them. You are competing against the American version of China in that line of belts. And when they tell you they adequate for CCW, . . . they are hoping what they said is the truth, . . . as they do not CCW, . . . therefore are taking someone else's word or ............... May God bless, Dwight