


RockyAussie
-
Posts
3,265 -
Joined
-
Last visited
Content Type
Profiles
Forums
Events
Blogs
Gallery
Store
Everything posted by RockyAussie
-
 Yes I forgot when I set up the bobbin earlier for this video that I had the bobbin running with the spring (anticlockwise) and in the video I loaded it up to run clockwise which does give that thick thread a lot more tension. Just lazy of me but I often just switch the thread direction in the bobbin when I go up in thread size rather than adjust the bobbin spring if I don't need to. Thanks @adventureleather, I think that people will always find different ways to try and get their machines to do something more than they can as made and for me with all of the crazy stuff I make it is great to find ways to do this when I need to.
 -
Improve Look Of Back Side Of Stitching
RockyAussie replied to Kcinnick's topic in Leather Sewing Machines
Thanks for sharing that @bruce johnson I have had one of these for like 30 years and had not realised that potential. Only does a bit over 1/8" but with a bit of luck I will be able to get one with a bit wider spacing. Now I will have to look to set my stitch length to near perfectly match the overstitch wheel but for some jobs it should be well worth the effort. -
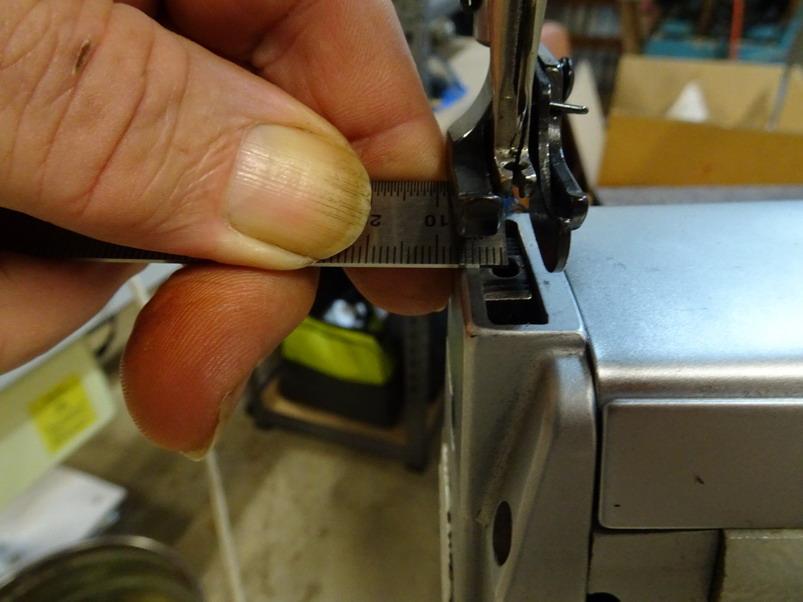
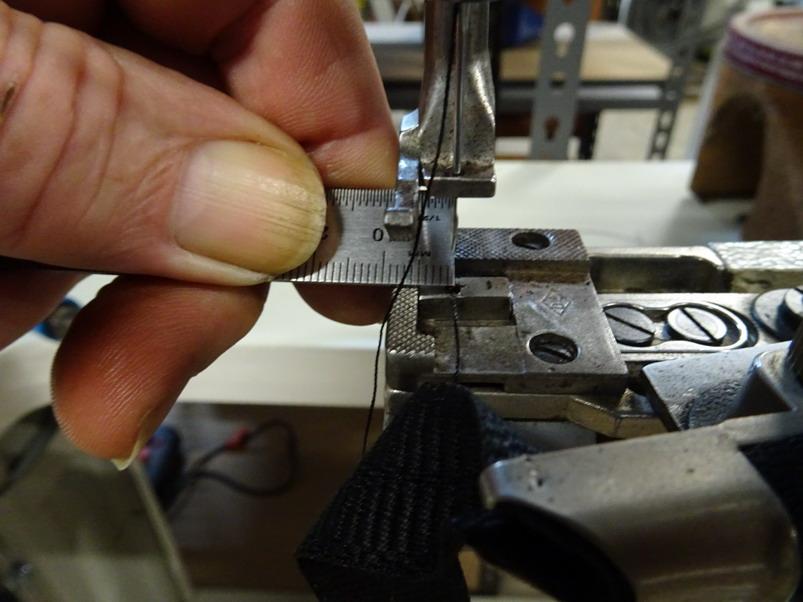
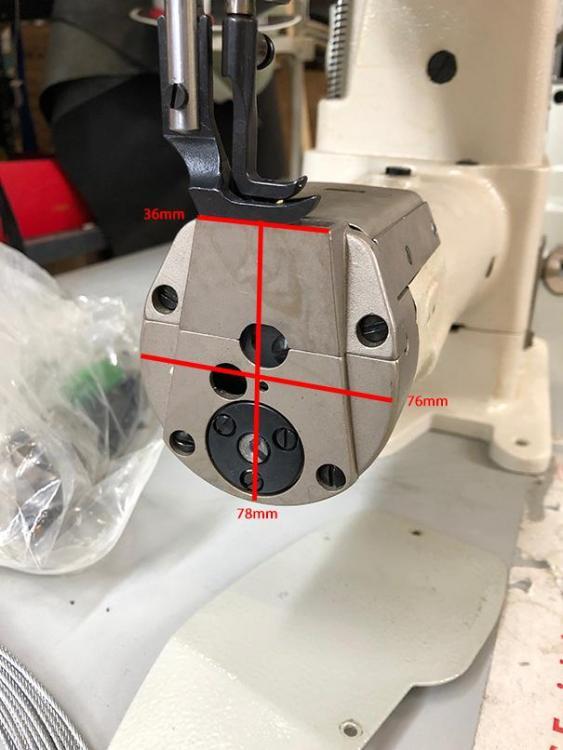
This post I have done to assist buyers of the narrow needle plate sets we developed here in Australia for the Cowboy CB4500, Cowboy CB3500, and most other 441 clone machines including the Techsew 5100, and Cobra Class 4. Many of these machine owners have now purchased these sets and couple have reported back some rubbing issues when changing over to the new plate. In most cases their machines are set up well but occasionally some machines over time get a little out of ideal alignment with how either the needle centres into the fee dog or the feed dog locates into the needle plate. These instructions should help for any needle plate feed dog relationship alignment issues on these machines, whether it is for the standard needle plate feed dog set or our Narrow needle plate combination set. For those of you that have not seen the narrow needle plate set in use and what they can do you can see some here in this video link - https://youtu.be/a83lCJe4JKo or this one - https://youtu.be/wdloxyjeB1w You can see more on these plates in this earlier post I made here - The next video I will do is to show the drop down guide for these machines and how easily they can be installed and why they can be a better choice. Follow my Channel if you want to catch more like it.
-
Laser engraving / cutting of leather
RockyAussie replied to Dwight's topic in 3D Printers and Lasers
No the 2.5 watt laser. I am not sure if the 5 watt would do it that neat but I have not tried it yet. If I get the time I will give it a go and let you know. -
Laser engraving / cutting of leather
RockyAussie replied to Dwight's topic in 3D Printers and Lasers
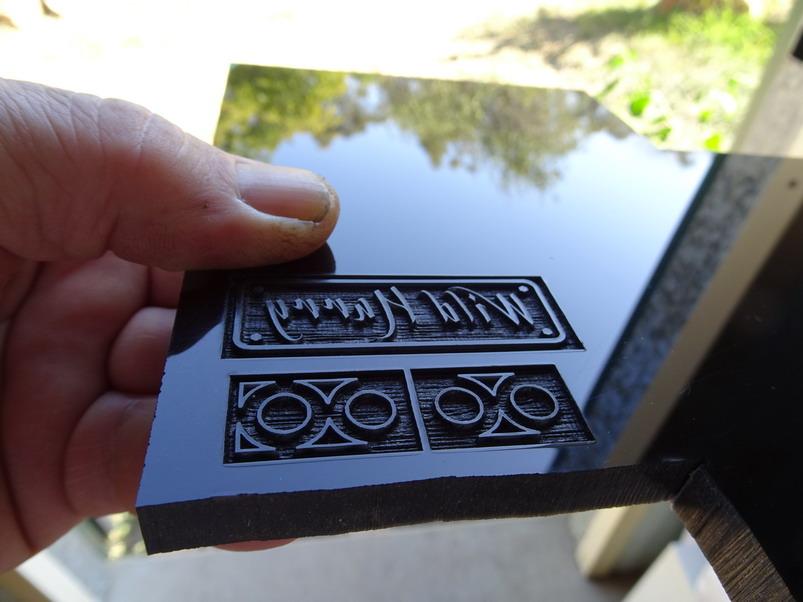
I could do that but I am thinking of setting up another laser for cutting the leather. I do a lot of product box cutting and the fine beam of the 2.5 watt is excellent for cutting the fine lines into the cardboard for folding and it does that better than the 5 watt diode one does. The 5 watt cuts twice as quick but does not do it quite as fine. the beam does not go down that small. Same with the engraving a bit. I was surprised awhile back that when I started making stamps out of black acrylic that on the finest setting it cut through 3mm no problem at all and I had to speed it up quite a bit to get the cutting to only go 2 or 2.5mm deep.I now only do the stamps on 10mm thick.
-
Laser engraving / cutting of leather
RockyAussie replied to Dwight's topic in 3D Printers and Lasers
So that means you are using only around 40Watts? The 4" lens gives you that sort of improvement? I was thinking awhile back on one of these 50watt fibre lasers that I think are getting better on price. One fella over here said he only paid about $7000 for one and another said he got one out of China for under $4000. I know they can cut metal to some degree (they make stamps) so now I am really starting to wonder if they could do leather as well as you can with yours. -
Yeah I shoulda done it but that knife/die was made ages ago and I have not had any negative feedback on it before now. Sometimes I just don't like the look of slots with holes at the ends. Rather than use a crew punch often I will hunt up a bit of box tube and make a punch that cuts a U shape instead. That has the advantage of keeping whatever strap that goes in tight and neat looking when finished. In the right side back of this picture you can see one of these punches I made to use in the tote bag I was making.

-
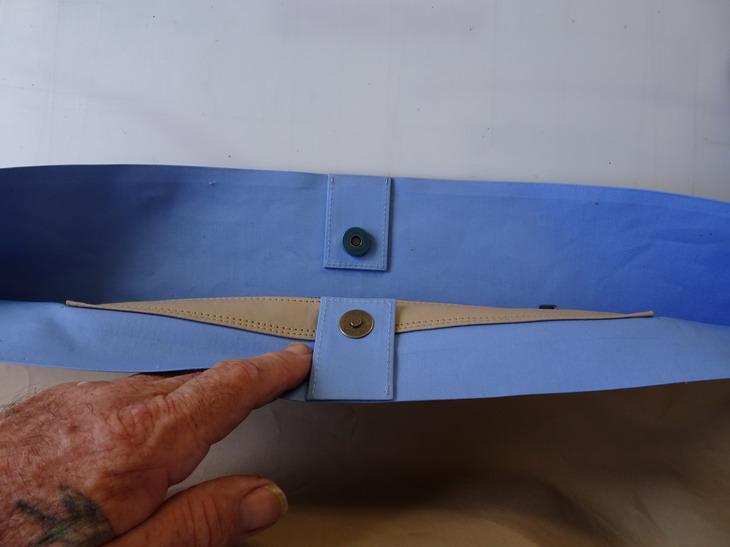
The top and bottom have to be open if the wearer prefers to wear it in line with the belt horizontally. They have to be open just enough for a belt to be pushed through. If worn vertically in the direction you have your strap attached then the 2 slits allow you to feed the belt through that way. In wear this method will not hang out as much as the folded over strap does at the top as in how you have yours at present. Yes it means 3 layers to be stitched and I would have thought that would not be a problem with your machine but as you say maybe you should just give it a go. Another view in case it helps - Ignore the crappy stitching, one of my staff asked me to make it up 1/2hour before his finish time and I did not even have a mould to start with.
-
Option 4......Put a piece right across to the sides with 2 slots down the middle of it. This has the labour advantage of not having to add any extra stitching at all and the pouch can hang vertical or horizontally. If used vertically the 2 slots will form out nicely with a little use and be easy to thread the belt through. Here is a picture of one that has not formed to the belt yet but will show what I mean

-
I had looked previously on how some have gone about setting these holster plates up and using them and I think that may have left me thinking that it was all too much trouble to bother with. After doing a trial for myself I think that I was WRONG. 2 minutes if it was that and I was sewing. I was on the understanding that the feed dog had to come out and maybe it does on the standard feed dog but I can say that it does not with the narrow needle plate dog foot set. I just switched the needle plates over (remove 2 screws and put back 2 screws) and reduced the foot pressure down and that was that, I was stitching. Reverse on mine also worked fine but that may be just mine who knows? Now there may be some confusion as to what is a holster needle plate and what is a stirrup plate. The smaller one is the stirrup plate and that does have to have the feed dog removed to use it and the bigger one is the holster plate which in my experience does not. I do have to point out that you need to check that the holster plate can go back in far enough for the needle to be in the centre of the needle plate slot. I had a check on 2 machines and it showed that I had to grind the needle plate back edge about 1mm (about 2.5 oz) to get it right. Anyway ...I found a video that shows a holster plate being used to stitch some stirrups and in that part it is good to see. I would take not much notice of the set up procedure. It is great that at least he made the video and shared it which is more than can be said for many other that could have. https://youtu.be/WCoamFAgxng
-
I think I have been using the same oil and not have had any problems like that yet. I will have to do some testing on it now. What type of leather did it leave a mark on? Brand wise I have used the Singer oil you can get on line and never had any issue but may depend on the leather as well. I generally keep a cloth under the feet when not in use and I also wipe the feet down before I start a job and that may help but on the other hand I also often put a felt somewhere in the sewing thread line to oil the thread which helps to stop the glue from sticking to the needle. Doing that sometimes leaves a little hint of oil around the needle hole but that has always disappeared by the next day.
-
Laser engraving / cutting of leather
RockyAussie replied to Dwight's topic in 3D Printers and Lasers
Thanks for sharing @Gulrok. It gets very interesting when you experiment and come up with good solutions. The few changes I have made on my little one have worked out very satisfactory for me and it gets a lot of use nearly every day. Putting a larger cooling system (2" fan) and a shroud to give some air assist as well allows me to run a full power for hours at a time. There seems to be no drop off in performance over the last couple of years to my surprise and I think the larger fan aside from keeping it cool, helps to keep any smoke away from the lens as well.I do run an extraction system as well which works very well as well. My bed I rebuilt to do poster size and that works well but I would not mind if it was a fair bit larger. Where yours will do it in seconds mine would take a lot lot longer but good thing it keeps going while I get to do other stuff instead. It started off as a 2.5 watt Elksmaker pro which was open air (scary) for just under $400AU and I think I would have spent about another $600 getting it way larger and safer. Again I thank you for sharing -
Laser engraving / cutting of leather
RockyAussie replied to Dwight's topic in 3D Printers and Lasers
Thanks for the video @Gulrok I would not have believed that possible without seeing it. Now I am starting to think of going bigger than my little 2.5 watt diode laser. How big a size cutting area can yours handle? Must be fairly big if you can cut belts. I assume there is some serious $$$$ to spend to get that far. -
Another bucket bag attempt...
RockyAussie replied to Chux's topic in Purses, Wallets, Belts and Miscellaneous Pocket Items
Certainly not the type of machine I expected to see and considering that ....I have to say for a beginner you are doing pretty darn well. Sort of like going to a fight with one arm tied behind your back I think. A cylinder arm can be a flat bed as well if you want but not so good trying to make a flat bed be a cylinder. It is good to see that it has not stopped you and no doubt in time you will find ways to make it work. -
Laser engraving / cutting of leather
RockyAussie replied to Dwight's topic in 3D Printers and Lasers
That for sure would be a dream to see. What thickness and type of leather may I ask? Do you top seal the leather first? -
My attempt to enter the machine sewing world
RockyAussie replied to Tio's topic in Leather Sewing Machines
@Tio I would try loosening the bobbin spring by about 1/4 turn and try that on the same weight leather and thread. It looks to be pulling in down well on top so the bobbin tension is where I would be looking. -
Start-up machines on a small business budget?
RockyAussie replied to Vermontleatherworks's topic in Getting Started
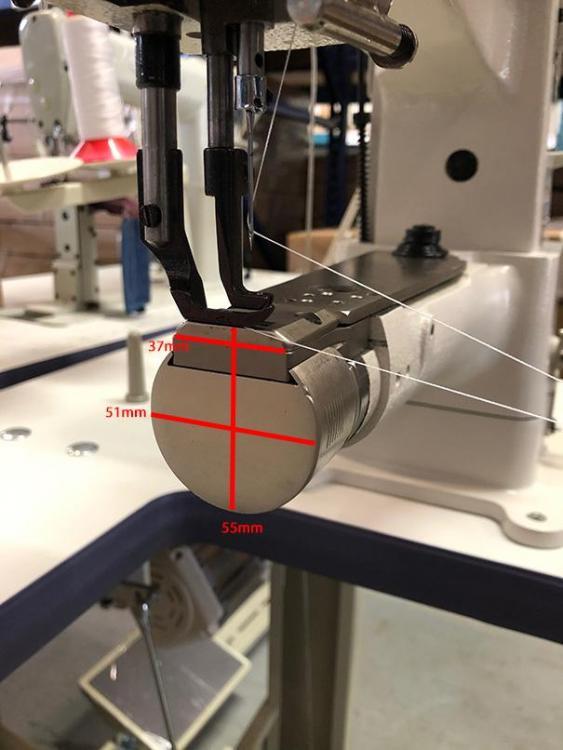
I am having a suspicion that the Techsew 2600 may be getting over looked here and I believe it would save you some $ as well. I am in Australia and about the only stuff that goes into the states from me is some sewing machine needle plates and stuff. If that means you can show me in a pm what it is you want to make I would be happy to advise what machine type I think would be best. I make a broad range of products with a broad range of different sewing machines. Little things like the cylinder arm diameter (51mm on the 2600 and 76 on the 27500 and the distance the needle sits from the end are all important things to know before you buy. Do you need a full open table or just the standard U shape table? The size of the hole in the feed dog can make a fairly big difference, on thin soft stuff a small hole will give you less trouble and the 2750 is not all that small. Ignore the needle plate in the first picture that is just one I am working on for a special job. This video shows off the cowboy CB246 in action (at around 1.5 minutes in) which is pretty much the same machine as the Techsew 2600.


-
Another bucket bag attempt...
RockyAussie replied to Chux's topic in Purses, Wallets, Belts and Miscellaneous Pocket Items
@Chux design looks good the stitching not so. The tension looks too tight on the top line in the first picture but I am wondering if it could be because it looks like you have run off of the edge on the inside lining. I have to ask what sewing machine you are using and whether it has a guide or not? Does it have a servo motor? Maybe you need to get it to slow slower. I can see some talent here but not with your stitching....yet. Thread tension - If the thread is coming off the cone alright and smoothly then check your bobbin is also able to pull out smoothly. After that get some scrap and start stitching then tighten the top tension 1/2 turn and check the results then take it back. When you go from thick stuff and then down to thin stuff you can normally get away with a half turn tighter on the thicker stuff and 1/2 turn looser when going over the thin stuff. I adjust on the run quite often like this. -
Leather tote bag
RockyAussie replied to Chux's topic in Purses, Wallets, Belts and Miscellaneous Pocket Items
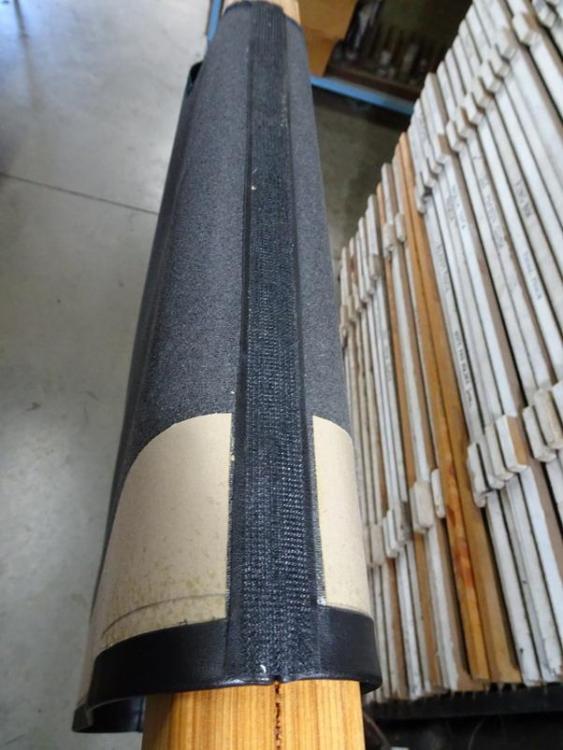
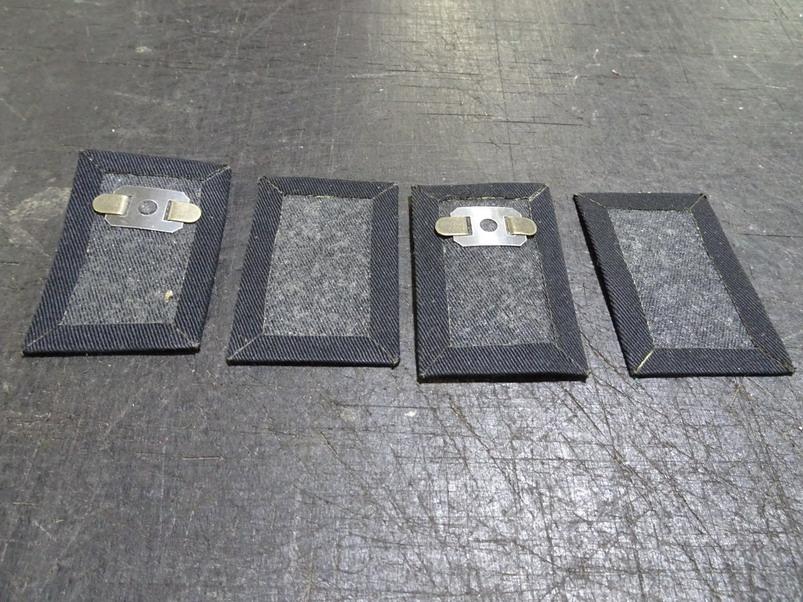
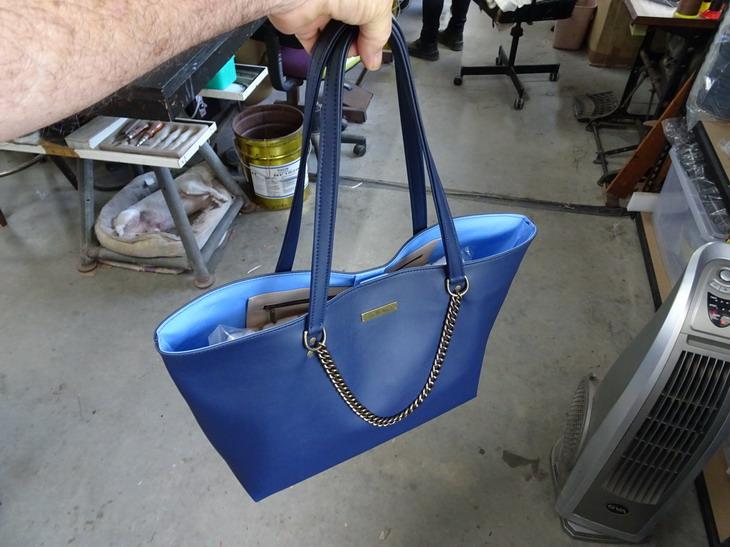
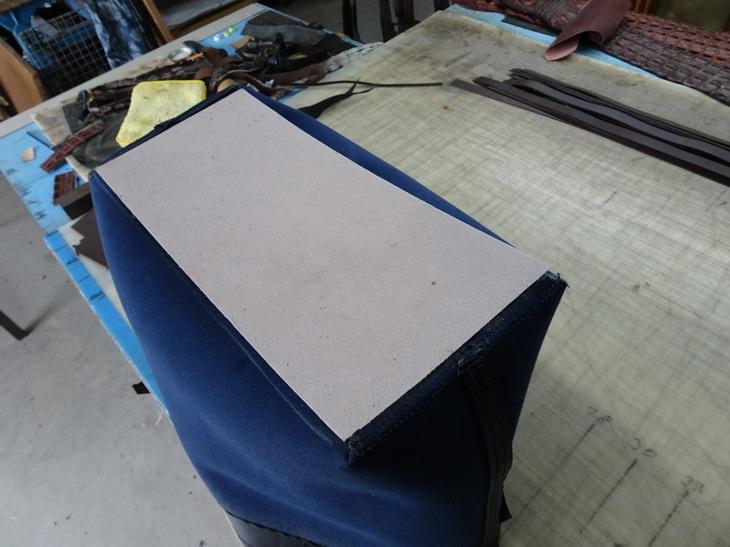
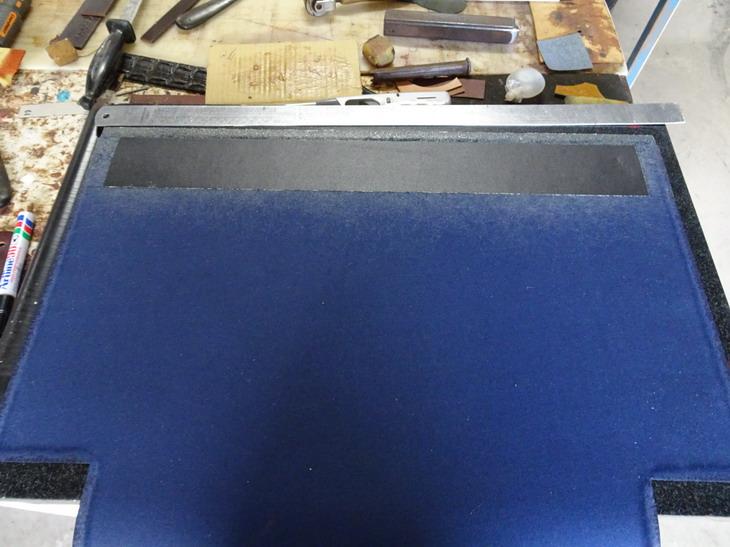
@Chux A skiver of any type like that will not work well if at all on the softer upholstery type leathers. For medium to firm veg tan leathers you may be lucky. @MtlBiker Yes it is permanently glued in place but not all the way to the bottom in this case. If a stiffener that only goes down partly inside on the outer skin you stand the risk of having a line show up on the outside. The stiffener in this product also serves to give an extra reinforcement for where the straps go into the bag for the rivets. These pictures are from the same bag design but in black. You will notice that the heavy fabric that is reinforcing the top line finishes short of the ends and that is to allow for the backfolding of the sides when they get done before the restitching down the sides with a tall post machine. Below you can see where I have attached a fabric tape to further reinforce the edges Yes that was mentioned above. There are many types of reinforcing boards made by various brands and in this case the Texon board is mostly used for the insoles in shoes. The size is normally about 1.5m x 1m and costs around $30.00 I think per sheet. Bontex is another brand that Blue Duck mentioned above and it also is mostly made for insoles of shoes. They are separate pieces that get sewn in at the same time as the top line stitching. Here below you see 4 fabric pieces that are folded and they have been folded over a inner piece of fabric. Those 4 pieces get attached together to end up like this which then gets attached to the top line lining edge and stitched with the top line stitching. I don't have any good ones showing down inside the bag but this picture shows the lining with an inside flap pocket. This is inside out and the magnet tabs are not attached until the lining gets put inside the outer.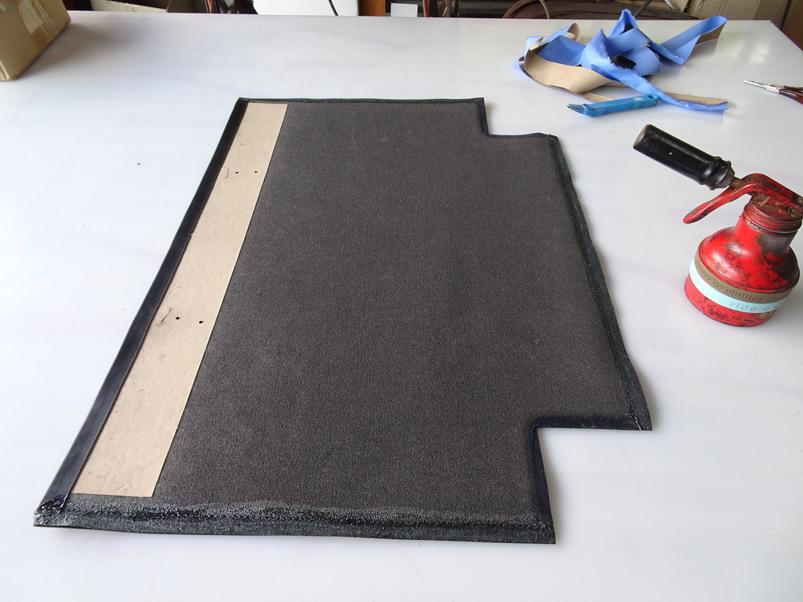


-
If it is not the leather making it squeak then something that seems to get overlooked in video instructions is a LOT inside the end cover but more to my surprise is the large oil hole up on top which often has a rubber cover over it. It is not marked around with red paint so I guess it gets overlooked. Take the rubber cap off if it is there and you can look down in and see the top of the needle bar where it rides in its guide. If you take the needle down to the bottom you can then put a few drops down the tube to lubricate the needle bar there. Same a bit with the presser bar, it has a funnel shape at the top and no paint but if you want to oil that presser bar guide you put a few drop there as well. I spent about 2 hours going over one machine oiling ever little thing I could find only to find out the the speed reducer pulley had an over tightened Allen head bolt. The squeak stopped when I loosened it. Had to replace its bearings.
-
cylinder arm machine - which is best for my needs
RockyAussie replied to Blanka's topic in Leather Sewing Machines
You will be hard pressed to find another more capable machine than the Adler 669 for what you have described for your needs. Even that machine will not go anywhere near I believe that the 669 would handle up to about 9 maybe 10mm tops. Other than that the Pfaff 335 has one BIG disadvantage in that they are mostly set up for binding operations and the needle from the end is about 9mm which is not ideal when trying to stitch in gussets etc. Also the old models come with a standard bobbin size about half that of M size bobbins. This video shows me sewing the gussets in on a small handbag and in it the gussets do touch the edge of the cylinder as it stitches around. This is being done with a Cowboy CB 246 which has an up/down dog foot feed and the needle is about 6mm from the end. This is a picture of it showing the needle distance and a new throat plate I am working on for stitching some bulky handles that you can see in the above video. In the video I have used a 69 Adler but I wanted the more positive feed the CB 246 can give. It works good and video is coming soon. The CB 246 and the Techsew 2600 are pretty much the same but neither have the adjustment knob on top for raising the feet on the run like the Adler 669 does. Both machines would be probably half the price though and can have the feet adjusted from the back to lift higher if needed just not practical on the run. The Tecsew 4800 or the CB 6900 (In Australia or 1341 In the USA) do have that feature but are wider at the end. 51mm as against 76mm. These 2 following pictures were kindly supplied to me by Ron from Techsew I believe - The distance of needle from the end on the last pic is about 7mm This video is one I did awhile ago showing off the CB 6900 There are a few more showing this machine in use on my video channel if that helps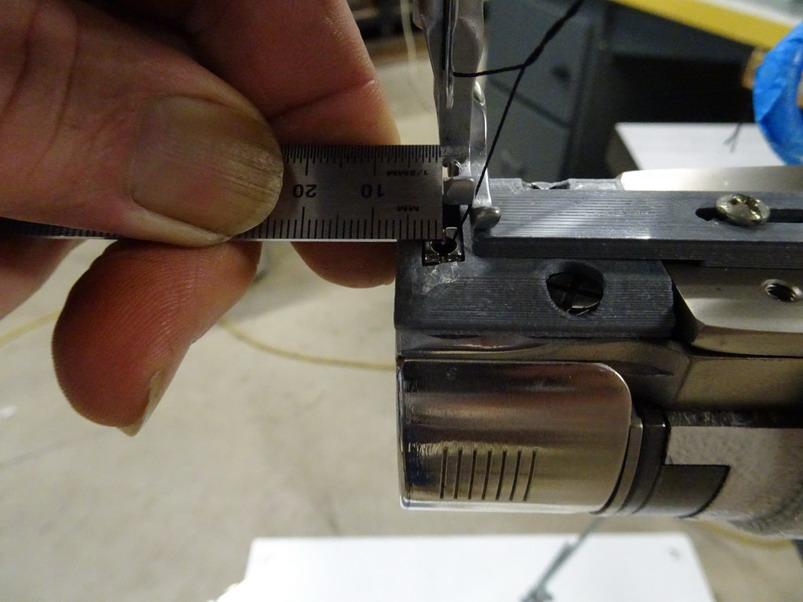
-
He is and that is just one more good reason to buy from a reputable dealer. He also helps keep the forum here going
-
Leather tote bag
RockyAussie replied to Chux's topic in Purses, Wallets, Belts and Miscellaneous Pocket Items
This video I did is a bit painful to watch but if you have not seen it already it will help you with getting it set up right - https://youtu.be/SjYI5DIzKBs With the top edge of your lining fabric I would suggest that you either cut the fabric to line up at the top with an allowance (3/8"?) for the leather outer to fold down over or fold the lining out the other way and attach it just a smigeon lower to the outer leather folded top line Like here shown below - You will find it easier to get a nice even top line fold if you use a heavy fabric stiffener as shown here attached before folding the top line Magnets attached in the middle with tabs is often used The base would be better with a stiffener in it like 3mm Texon board between the lining and outer.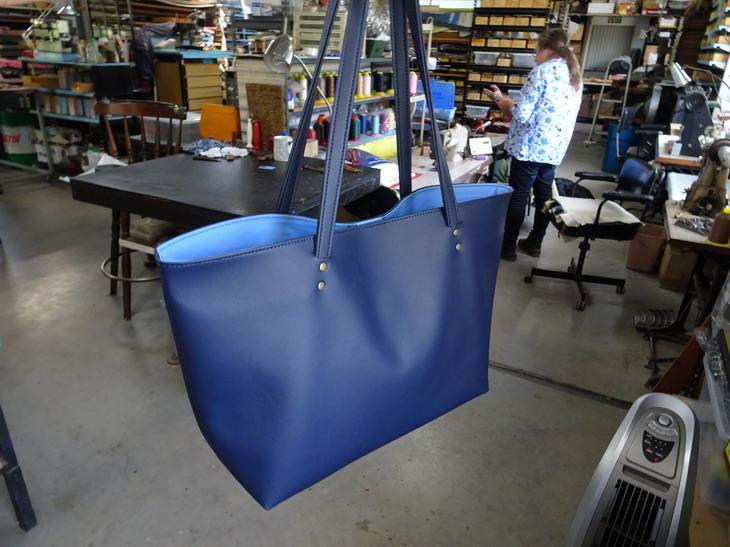
-
They are a pain to set up with all of the changes that have to be done for sometimes 1 job. Probably not to bad if you do it often enough I suppose. I don't get any call for making up holsters and since I have set up the narrow needle plate set I have not had to take them out for anything in the last couple of years now. Do you need the holster plate to do holsters or does the narrow needle plate allow you to do with them?
-
Good thing is generally most sewing machine oil does not leave any marks on leather after it dries out absorbs or whatever. To skip a good oiling practice is not a good idea especially if you think that 6 years between is alright . I do agree but I will add that to the best of my knowledge here in Australia the machines are checked and adjusted if need be before they go out to the customers. The shim for aiding in getting the back stitch length correct is more of a recent addition on these machines and I believe it is provided so as to make it easier for the customer to do it them selves if things move out of place over time. It is a fairly difficult procedure to explain and show all the steps involved to the average person and they can end up creating more of a problem if they do it wrongly. I do believe it would be a good idea to add into the dealers manuals and or video library an explanation on how to use the shim if ever needed so I think I will try and put something together for the dealers to use if they want. The dealers look after me pretty good over here so it will help me pay back some. (They sent me a new drop down guide and stainless steel flat table top attachment today for the CB4500 to test and try)
