RockyAussie
-
Posts
3,265 -
Joined
-
Last visited
Content Type
Profiles
Forums
Events
Blogs
Gallery
Everything posted by RockyAussie
-
Thanks for sharing @jimi . Have you got any pictures to add to that. I will throw in the stl 335 bobbin cover end caps later today when I have a bit more time.
-
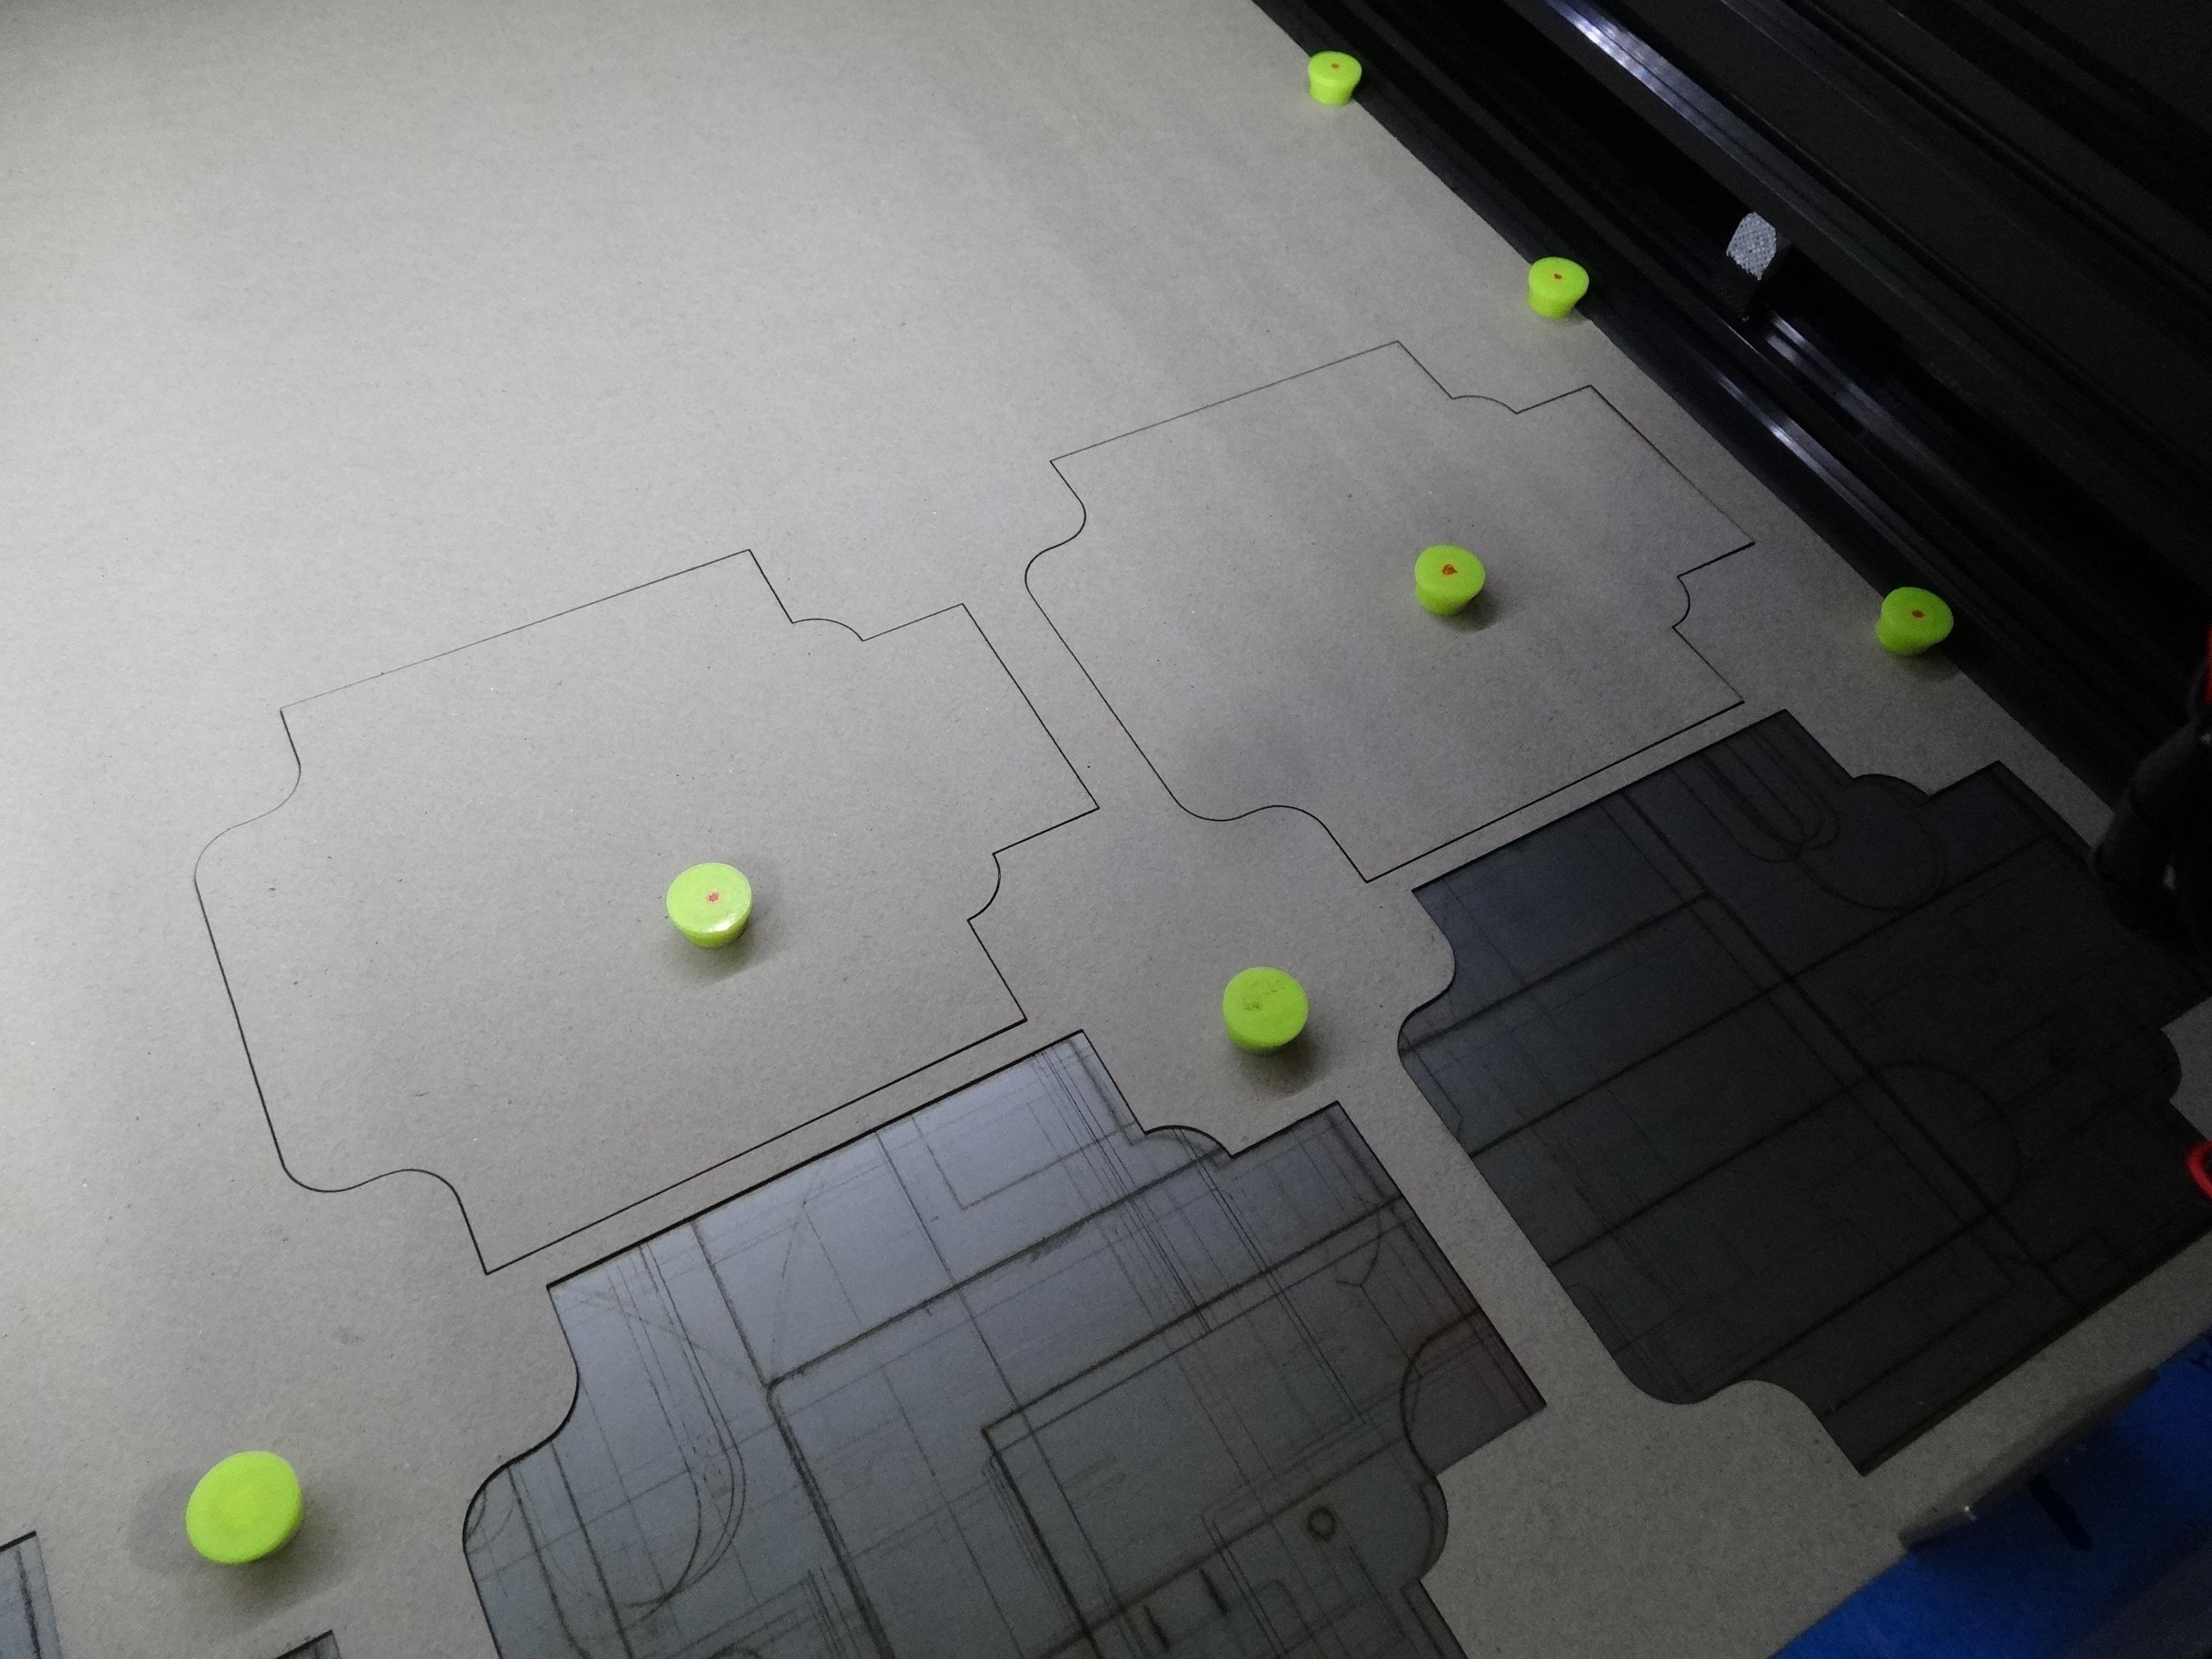
I been thinking that we should have a file repository for making it easy for people to find anything that might be of use to them for laser or 3d printing. I will start this of with a small stl file which comes in useful for both these technologies. It should take about 5 minutes each to print and weighs 1Gram which is less than 5c each. The magnets can be found on ebay easily enough such as this one - https://www.ebay.com.au/itm/Super-Strong-N35-Round-Disc-Neodymium-Mini-Fridge-Magnets-Rare-Earth-New/333227699575?hash=item4d95eb2d77:g:EaUAAOSwTfFbTxto&frcectupt=true From where I see it, that is about 27c US each if you get a hundred. This is for a holding magnets and make them easy to remove from the job due to the shape that it has. It is designed for 9x3mm magnets that get superglued in after the print. If it is tight a little heat should work well usually. The picture below shows how I use them on the laser to hold down anything in place as it cuts. A quick tip here is to do a double or multiple cut allowing a stop between cuts as this shows areas on the run which may want to be held down more closely. Here is the stl file - Laser magnet holders.stl You can play darts with them onto your fridge if the missus isn't watching too. I will try and load another new one again tomorrow. Please feel free to load any files on to contribute. If you would like to donate anything at all for the use of any of these files of mine at least please donate it to this Leatherworker forum that provide so well a way for us all to share. If you are not already a contributing member that would also be a great way to go.

-
Most excellent work all the way and thank you again for sharing this with us.
-
Is the piece in the top picture the same piece as the pieces in the pictures below it? If so that is good looking work.
-
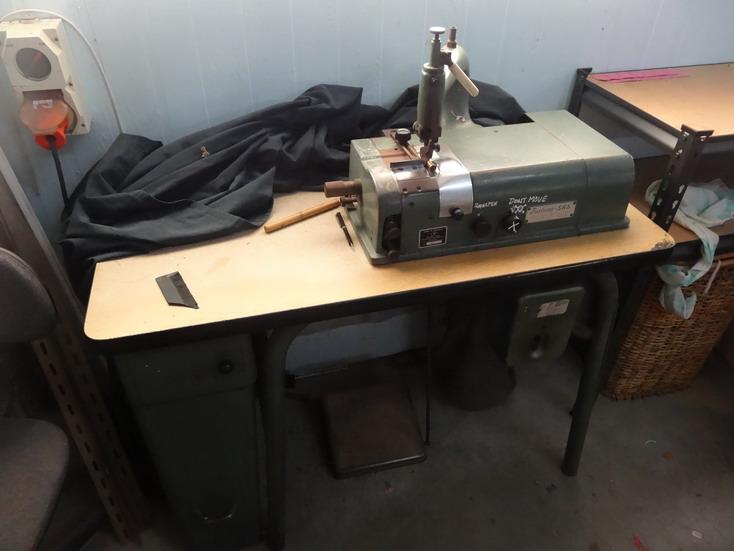
The white machine on the bottom picture would be quite a lot newer and with a bigger bobbin capacity I believe of around 40% more than the old standard bobbins. They will work fairly well and about the only reservation I would mention is that the distance of the needle from the outer edge is a fair way in at 9mm. That can sometimes make tight gusset work and such fairly difficult. BUT the price is amazing and if the were here in Australia I would buy them both in a heart beat. The EFKA motors with the needle positioners etc are really great to use and help a lot getting quality stitching. Here is a link for the Pfaff 335-G-H3 - https://www.pfaff-industrial.com/en/portfolio/sewing-machines/cylinder-arm/pfaff335
-
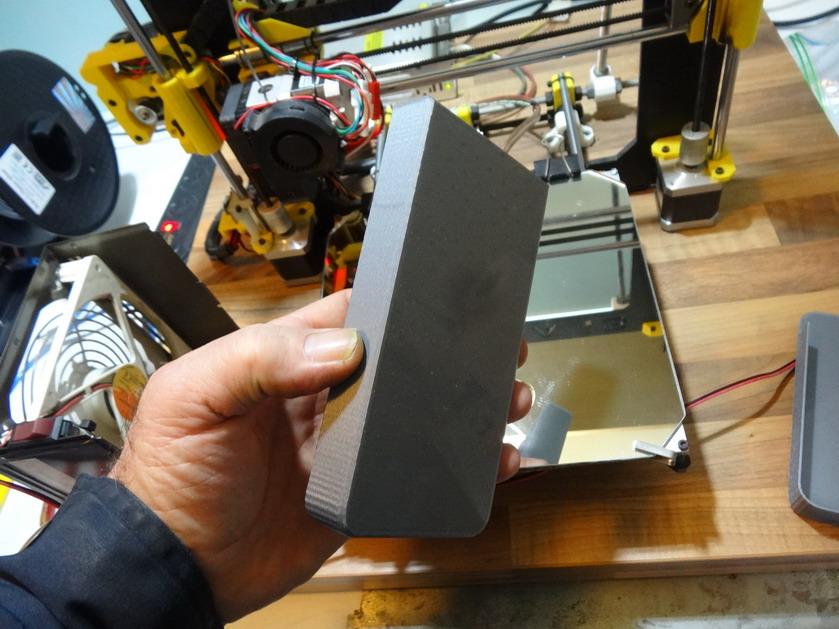
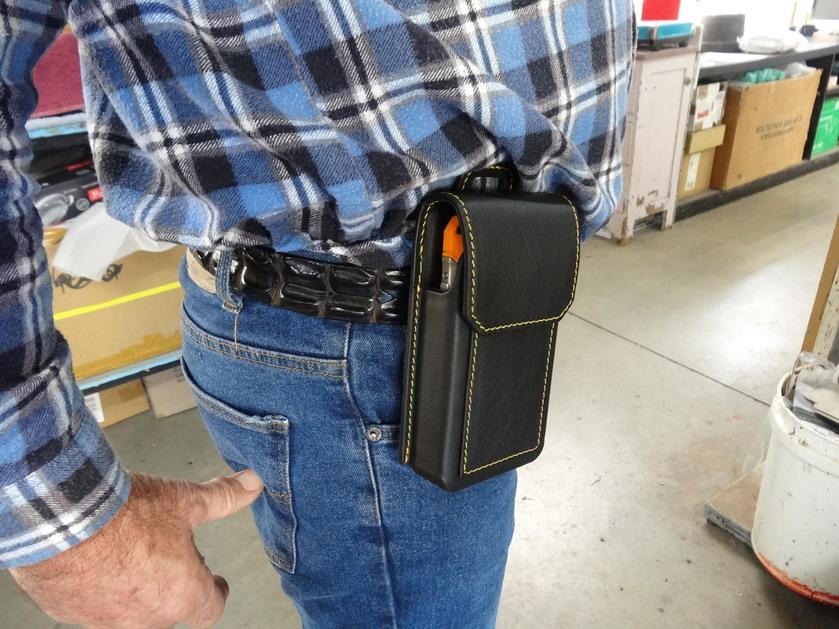
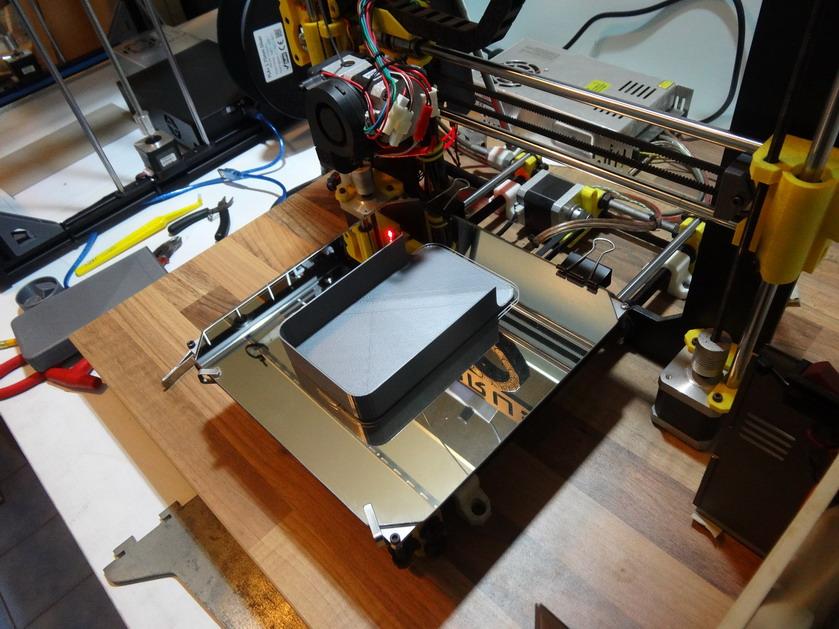
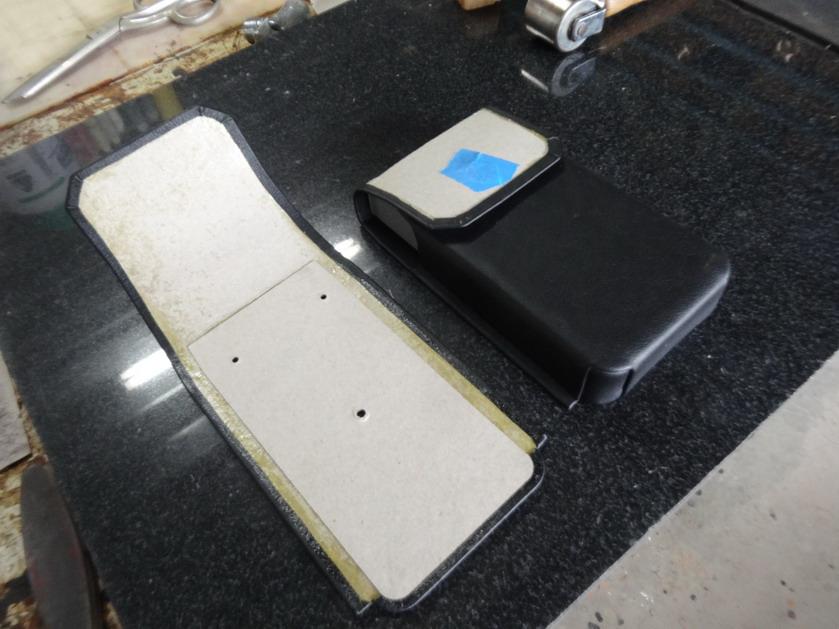
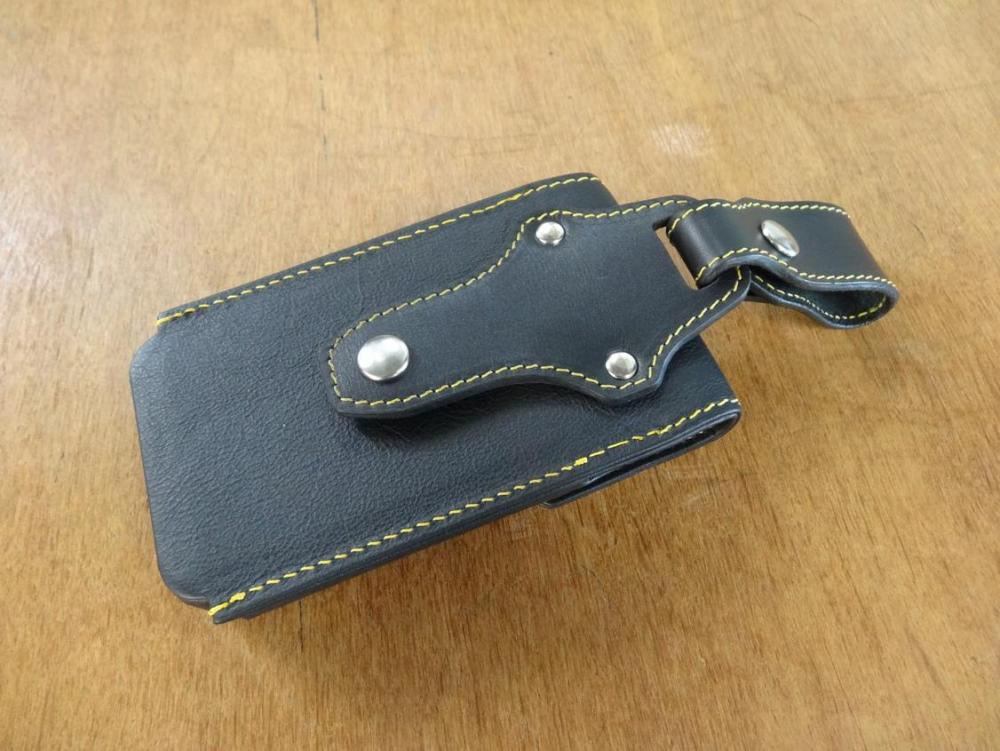
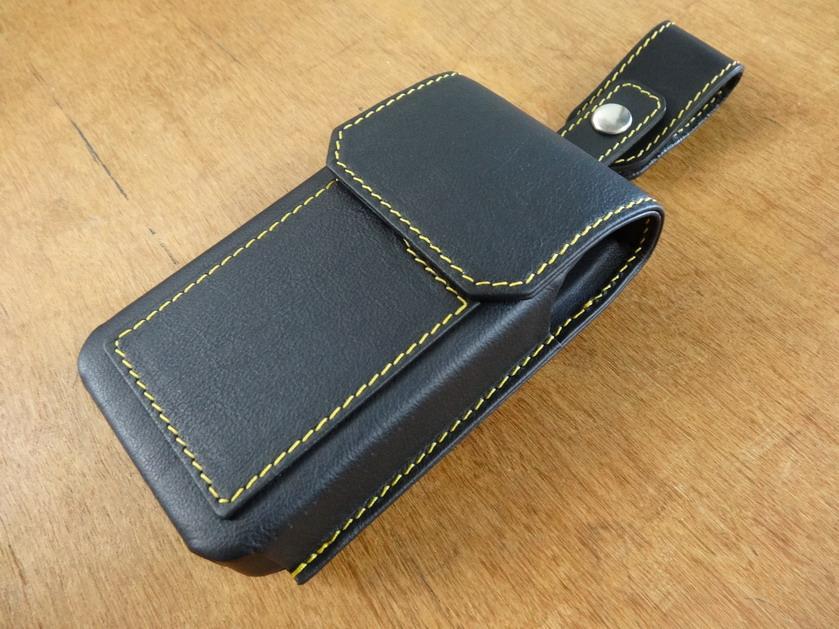
I would dearly like to get the time to make a vacuum table under so that the magnets were not needed at all but that takes time and money. The quickest way of getting the magnets around is to start off with magnets just around the outer edges. Sometimes I do a outer perimeter run with the safe light on just to see where the thing is going to cut first. After that I make a habit of doing a double or more cut which means I increase the speed by 2 times. Once the first run is done and not cut right through you can see where the magnets will be best put before the following runs are done. I will post the magnet holder stl files in a post I intend to do soon in this forum with the intention of starting a repository section for stl files to be found and shared by anyone on this forum. Re the webcam ....I do have a camera in there but found that I never use it. In the phone case above I wanted a sturdy case that allows the phone to be easy to get in and out. Nearly all examples I found enveloped the phone to closely and I don't think its right that you should have to use 2 hands to answer your phone. The 3d insert in this case costs 81 cents including power usage and takes very little time to set up. It takes 1 hour to print on the little printer but I am able to keep working whilst that is happening. The big one should be able to do maybe 8 at a time I think. There are many many different applications for the 3d printing in leather work and one of the main ones would be the mould shapes. Although I have the printed insert in the phone case, there is also a master shape that allows me to form everything over and bash into shape and get length measurements around etc. Further to this if sales warrant it I will print up negative shapes to expedite the forming and folding processes.(similar to wet moulding a bit) Here is a picture of the master mould being printed - You can see this in place in the pics above where I am getting to attach the outer cover on. This mould is the size I want for many phones and by building from the inside and working my way out I can check the required measurements as I go. Leather does not always play by cad rules and measurements. If you have a look in my how I make wedding ring boxes you can also see how I am able to print out shapes to reduce the need for skiving the leather and make forming tools as well. Hope that helps some Brian
-
3.5 Watts will be good when you get the hang of using it. You will find that you can use it for cutting fairly well as well. Do think about how to vent your fumes as aside from your health it can help in keeping things to run cooler keep smke out of the laser cutting path and give you longer cutting times. With the larger fan I incorporated on mine I often get away with 1 hour plus cutting jobs. One little thing to keep in mind is that you can do multiple passes on a cutting job which means that you can have it run for say 10 minutes doing 1/2 of the cut and let it sit there for 5 minutes to cool down and set it off again to finish the cut. With the T2 laser program I use I can set it off doing a multiple pass job with a inbuilt pause of however many seconds I want it to cool down between passes. They call it the "cool down time" when you instruct it as to how many passes you want it to do. Smart Hey. You may not be able to run that with out the GRBL coding but you can just start it off again from where it stops again anyway. They are amazing how accurately they follow the path, in the phone pouch cutting I put in cut lines for the magnets at a spacing of.25 mm apart for the thickness of the metal prongs and they came out perfect. Have fun and let us know how it goes for you.
-
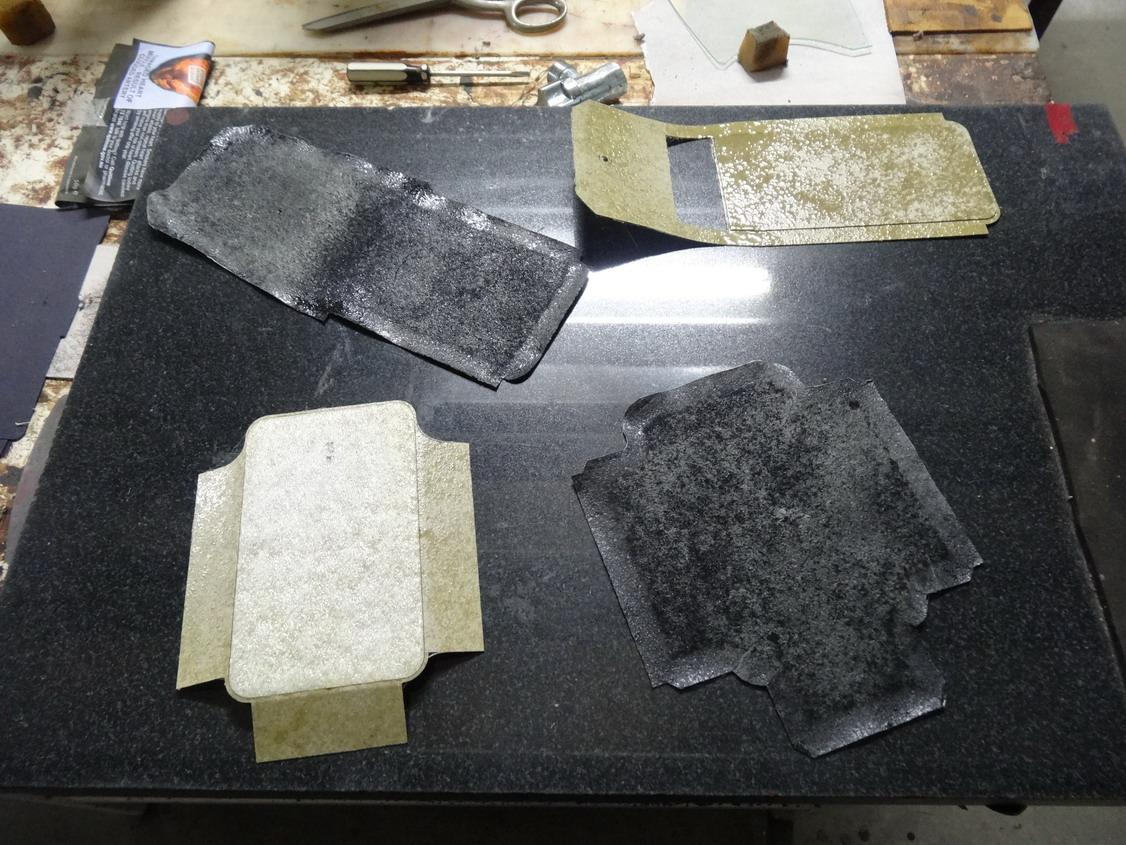
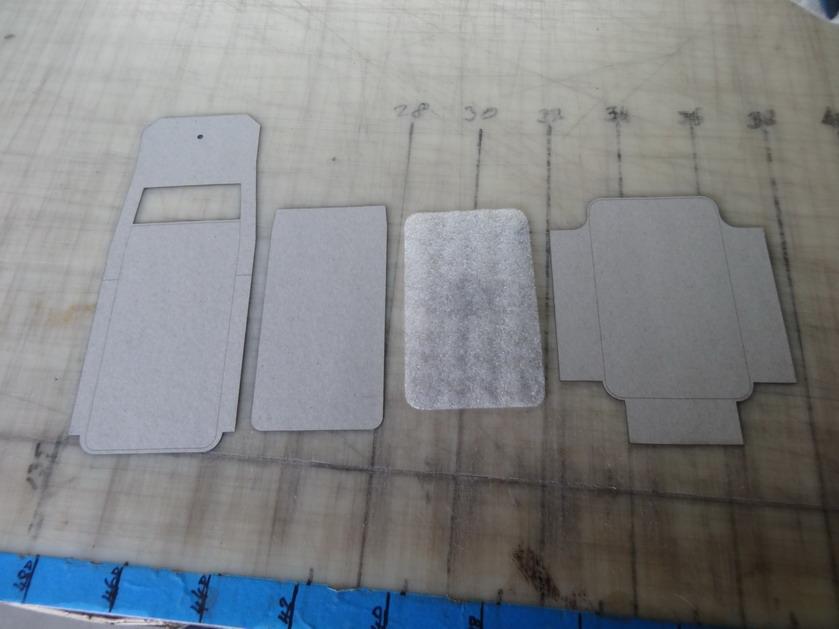
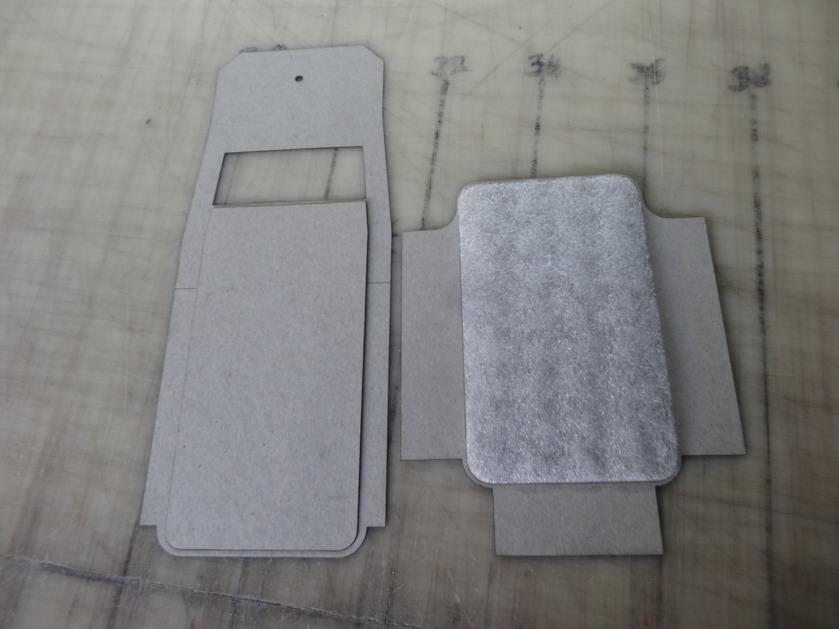
Sorry for such a very late reply on this I only saw it by accident the other day. I use mostly what started off as an Elksmaker A3 laser which came with a 2.5 watt diode. After getting into it a bit I decided to run with a program called T2 Laser which was written for the Elksmaker machine by a very smart fellow called Zax I believe. Within the forum that he runs for this T2 laser he has mentioned the 2.5 watt as being the most ideal for laser engraving as it has the smallest focal point and can thus do the finest engraving. With the T2 laser you can opt for black and white or grey scale or dithered, photo and velocity mode etc etc so yes it does gradients truly as well as dithered. Recomendation wise I would go with an Elksmaker A3 and progress on bigger if you want. I say that as it takes the GRBL (open source) and it is fairly easy to make a lot larger if you want. I don't do much engraving really but I do, do a lot of cardboard pattern cutting and box making and stuff with it. One of the best things about the T2 laser is that it allows me to put in DXF cad files which can have different coloured lines and depending on the colour of the line it will cut them at a lesser percentage than the other cut lines. For box making that means I can cut the fold lines in at say 20% depth (green) and the rest all the way through. On some jobs like this prototype phone pouch I am currently working on I can have a mark line put on at the same time as cutting to help in later on lining up foam or other stiffeners and such. All of the patterns for this pouch are cut out on the laser because that allows me to go back and alter the drawings most easily. A couple of pictures should help to explain this better I think - The first pic is just to show relevance - This one shows why having something able to cut poster size and can cut many different pieces or multiples is a major advantage. Note the little yellow things a pieces I 3d printed to hold 9mm magnets and make them easy to remove. The base under is all metal. Here you can see on the cardboard the mark lines for the pieces beside them to attach in the correct place. As below Now showing them glued and ready to put together A little bit of 3d printing for extra strength - Hopefully getting clearer now All stitched up on my Cowboy 4500 with 138 (20m) thread. Now I can go back and fine tune the design a little more.


-
With the bobbin case in your hand can you pull the bobbin thread fairly easily? Sometimes needles hit the case when they break and the damage can cause a sticking of the bobbin as it revolves. I am guessing that the bobbin case is not letting the bobbin thread come out smoothly. Try another bobbin and another bobbin case if you have them.
-
Those motors do look to be very large to me. Is this because you had them already? You are planning on using a foot control for the feed speed I hope. On my Fortuna it has a fairly heavy foot pedal with a solid shaft to the clutch lever and this allows me to just kick the pedal in a bit if I want to have the speed running continuously. That is fairly rare but does help on repetitive jobs sometimes. This picture shows the foot pedal and shaft.
-
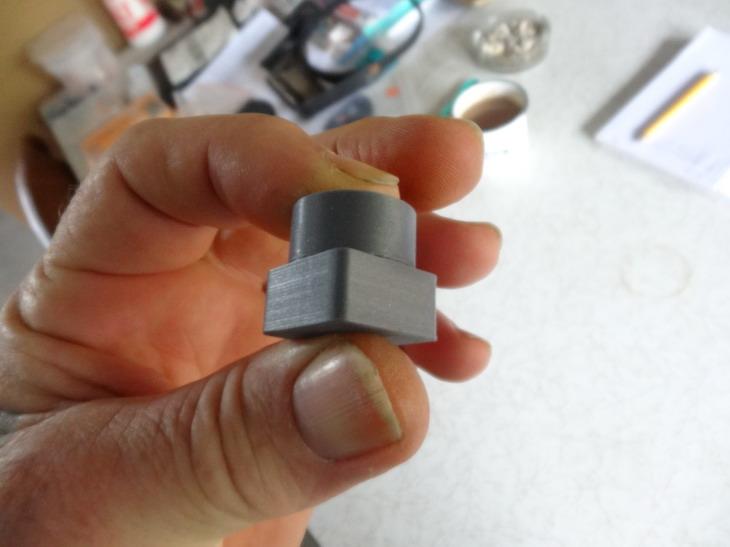
Might be time to do a 20mm cube and cylinder test to check how true the measurements come out??? I know if you up the flow rate as I do with my 1.75mm filament where I change that to 1.74 caus I like the tight layering does make the prints come out a little over size. Sometimes that means we draw to allow for these changes and the file sharing is not important at the time. A simple scale increase or decrease in Curra should be an easy fix though.
-
Me too, but it will have to be in the 3D printer and laser section. Just waiting on a few more mod parts to come in and we will see how it goes.
-
I don't do much dyeing of leather edges myself and for every person out there, there is almost as many methods. What type of product you are doing will often change how you go about it. I would have a good look through this post which can be found pinned in the How to section forum along with a few other similar subjects-
-
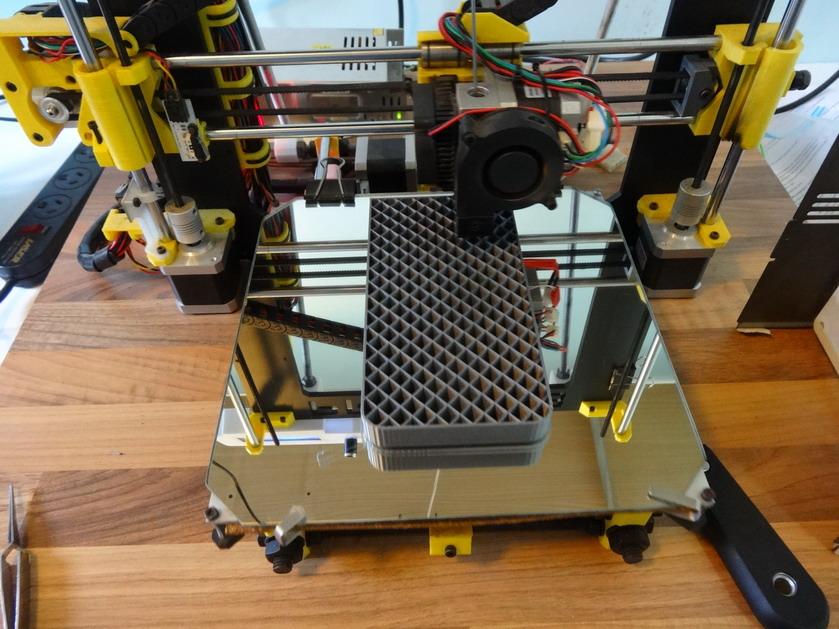
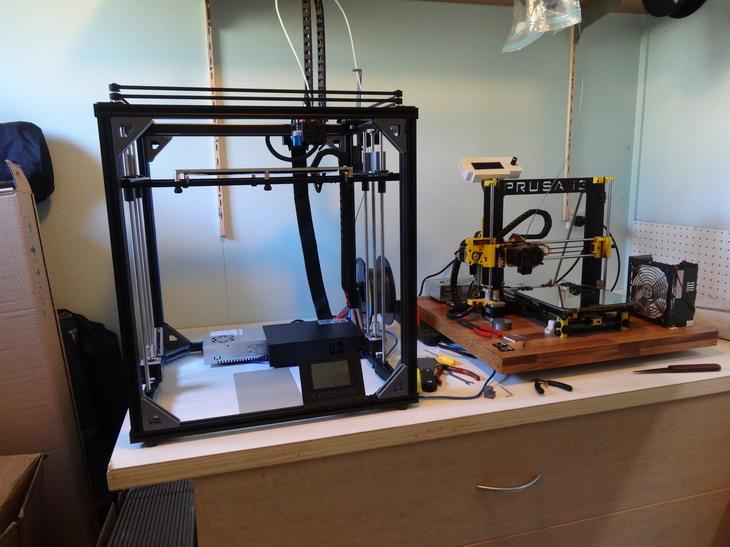
Wow they are neat. The layers on the first print is .2mm believe it or not. I did a lot of mods with regards to stiffening the frame like the large printed corners and raising the cable chain up for it to move smoother and so on. With the raised extrusions some times like in an O or a letter with holes in it you need to - the 15 degree or just make a positive of the same height from the base and then remove it. Simple after you do it a few times. re the Bowden tube I hope to get the speed up from my average 60 to at least 80 or a 100. With a print bed that is over twice that of my little one means that it can make a 6 hour print job take 12 if the speed is not there. NOT my ideal work time. I am thinking any bigger would be useless for a lot of the bulk work and more printers would perhaps be better. Example these wedding ring boxes be that the are probably way too strong and a little slowly printed take about 8 hours to print. The new large one can do 20 at a time easily so it better move faster I reckon.


-
Most of the answers to these questions and a whole lot more you can see within this post I did awhile ago. Although this is about making croc belts the same procedure is applied to most of the other products as well normally. https://leatherworker.net/forum/topic/86675-how-i-make-crocodile-skin-leather-belts/ If you care to go to my profile section and have a look in the about me section you can find a lot of other projects that will show you a bit more here and there.
-
I think that you may be mixing up 2 different processes here. You either burnish or you edge paint. The edge paint is the split lines I think you are seeing which is a pretty common thing to experience with a lot of the edge paints types. You did not mention which type of dye you are using and that could also be having a detrimental effect on the edge coat as well. I generally use an iron to smooth out my edge paint and sometimes a little sanding and grey scotch bright pads and follow that up with some wax polishing. I never try and burnish in any way when doing edge painting. If you burnish before the paint then the paint will peel off easily. If you burnish after applying the paint you could easily make the paint go all over the place and it will not shine up well. Note: many of the edge paints available are not thermo mouldable any longer and these require more of a sanding process unfortunately.
-
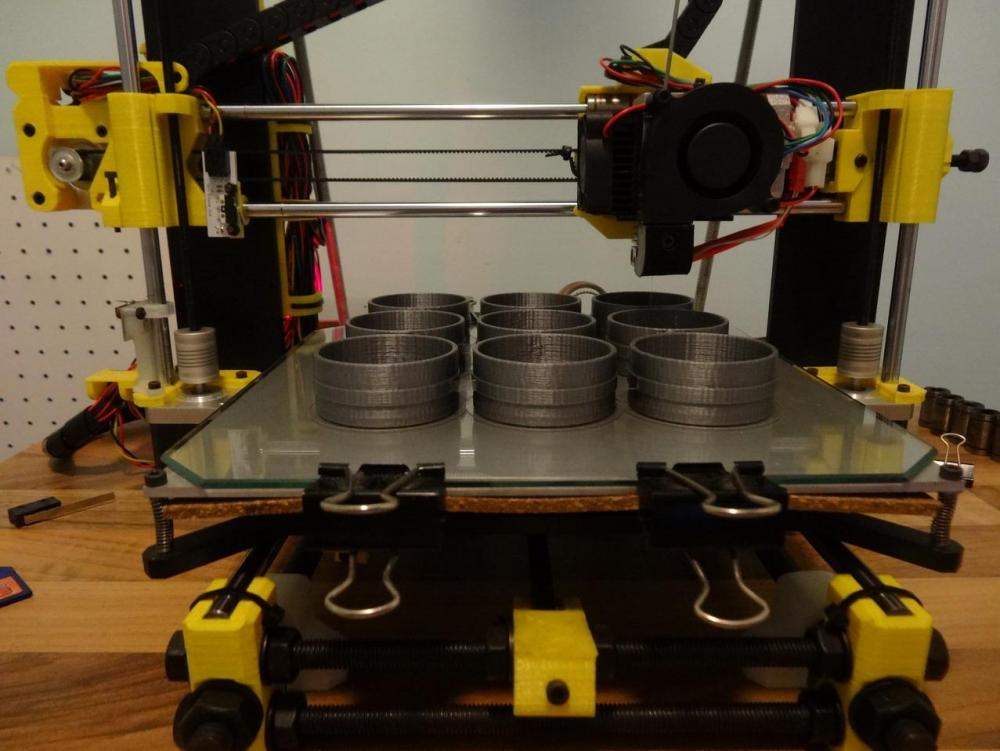
Ha Ha well done @jimi. Just a suggestion on your stamp prints......When you extrude give a thought to putting in a taper of say 15 degrees as you go up. That means making the base polylines a little wider firstly but that makes the top edge stronger and less likely to twist under pressure. I did this procedure on the letter set I made up in an earlier post and it really improved it. Also it comes in handy for tapered pulley holes. @Matt S I wondered that when I first got mine and I can honestly say that barley a day goes by that there is not some job going through one of my printers. The new big one is almost going and ready to further ramp up production. Phone pouch forming structures will be the next big thing coming through on them. This is the first print test on the big one and its looking pretty good to me.
-
That sounds wrong to me. Normally the hook comes across the needle when it is on its way up and somewhere in the needle scarf area. As you have had the hook off I would guess that you need to loosen your hook and turn it to the right enough so that it comes across the needle when the thread loop has formed properly. As for the hook to needle gap if you put in the largest size needle in that the machine can use and set your hook so that it almost touches it, it should be alright for the other sizes.
-
Quite a few I'm afraid but mostly I use Sekisui foam Softlon 3002. (33kilo per metre) mentioned because that gives you the weight/softness. It is very easy to skive if needed on a skiving machine and takes stitching through it without creating missed stitches on a sewing machine. There are a lot of different densities with foam and thickness and it is a good idea to ask for a sample range to have on hand.
-
First thing is to check that the long needle groove is on the left. After that as @Matt S rightly said ...change the needle as a little bend is all it takes to do the above. If that don't work then you are looking at timing perhaps. As best you can watch the needle take the thread down and when it starts coming back up the hook should be coming around to grab the loop in the thread somewhere in the scarf of the needle area. If you have no loop forming then find out why. That would mean your thread is being held up by something that it should not be. If the hook does not come around as the needle scarf area is there then you have got a timing issue. If so check first that the needle bar has not been knocked high. If it is correct then you need to loosen the hook and align it so that it will come around just when the thread loop is looking nice and open. Rough I know but it will get you out of trouble.
-
Mostly I only ever use left over split leather from belt backs as a filler in my combination dress belts. In some applications it could be used elsewhere but generally the weight increase compared to the foam is not as desirable. The foam allows more flex as well.
-
Some bags I use just foam to give structure and some have a combination of a stiffener and foam on top. Most of my totes/backpacks and such use just a foam.
-
another- dcs-s3.pdf
-
Your most welcome and I hope that it all goes well. I will attach a couple of pdf's of some manuals that could help a little in some places. I see that this file may be too large by itself so I will give it a try and see how that 1 goes first. Fortuna 50 p ag.pdf
-
Yes it is painted and the rep should also be told to find out what a semi aniline leather really looks like. This is a typical upholstery grade leather and IS fully embossed. If taken to court they will lose for sure with such claims. That said these sofa's and such sometimes come with cleaning instructions and if so I doubt very much they will include diluted isopropyl alcohol. There are recolouring companies around that specialise in fixing this sort of thing and it may worth getting a quote to get that done.