


RockyAussie
-
Posts
3,265 -
Joined
-
Last visited
Content Type
Profiles
Forums
Events
Blogs
Gallery
Everything posted by RockyAussie
-
You think it should have music? or should I be talking through the steps? I like a bit of music but I've seen a lot here don't in the past.
-
I had to go and find out about them Cricut cutters. I was a little curious what sort of critter or grasshopper could do that. The elastic I used is 2mm shock cord which so far seems to be well excepted. It will last well at least.
-
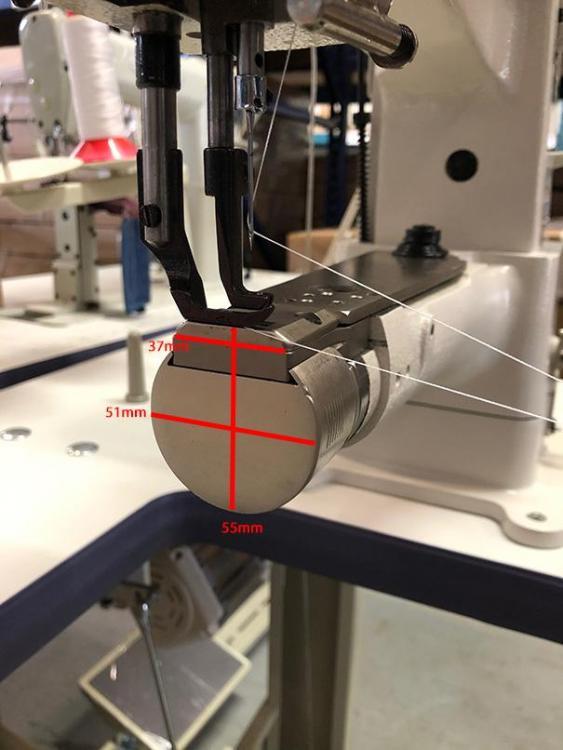
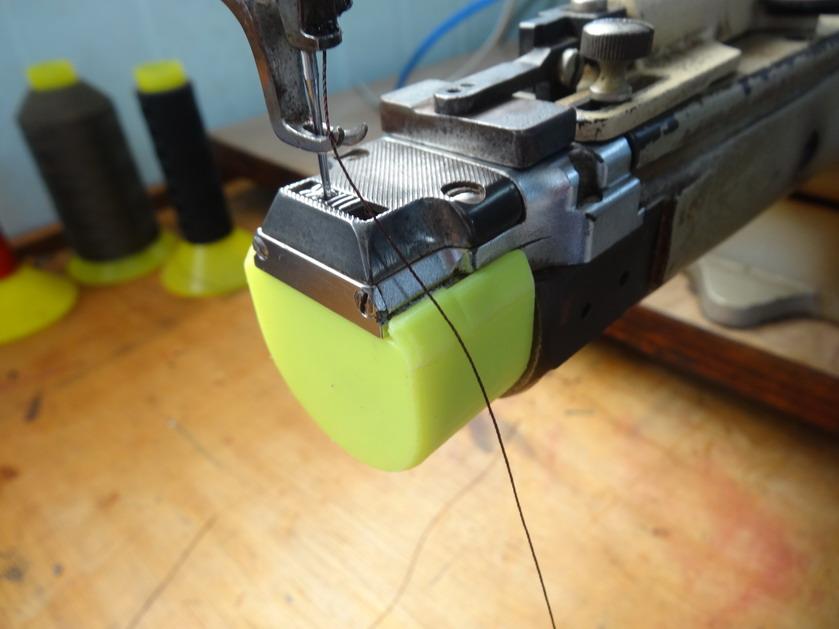
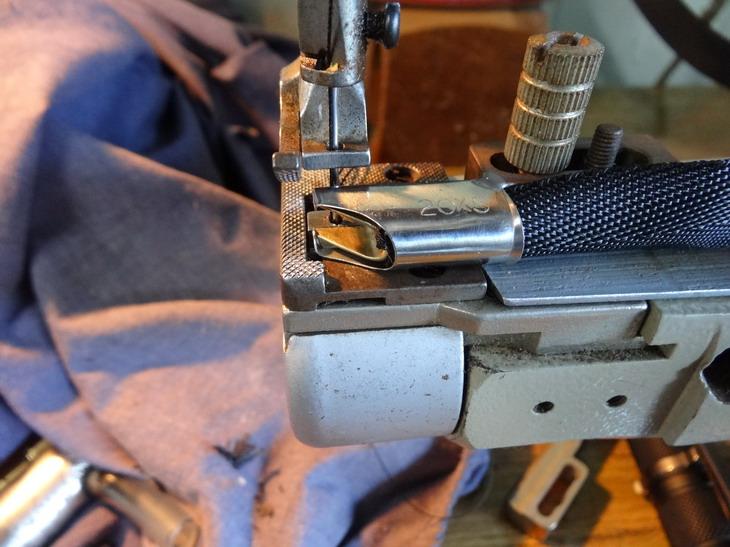
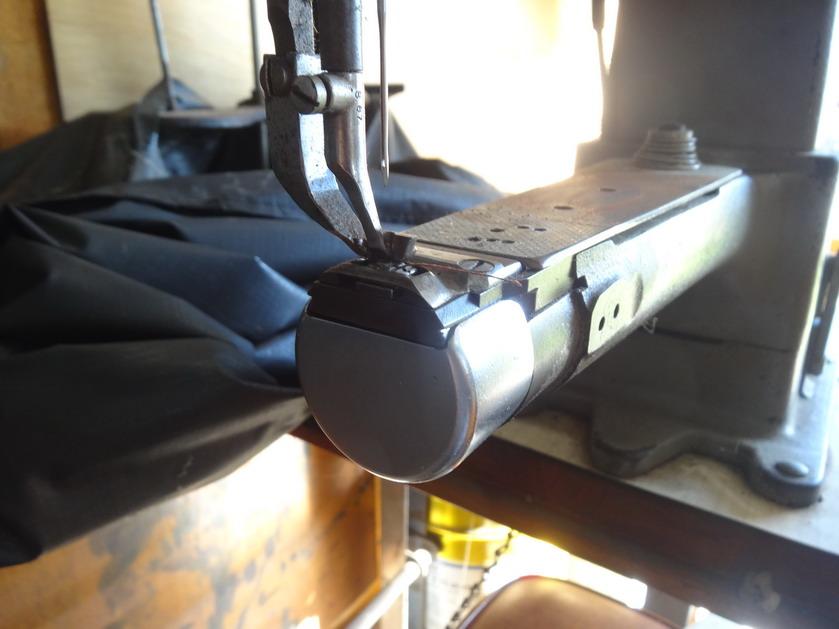
This is just a short 2 minute video showing some of the steps and processes used in making our first batch of these. My granddaughters, son and friends have been all been wonderful to send me some pictures of them being worn. The lady doing most of the work in it is MY wonderful wife. I hope there may be a couple of useful bits that may be of help if you are doing any of these. In case your are wondering how many pieces of fabric I am cutting with the Fiskars circular knife, I found that initially when it was extra sharp I could cut 8 layers but that dropped back to 4 layers as is bluntened off after the first 200 masks or so. The cutting table has a 3' 4" square top of HDPE. The lacing tool for the elastic is a reshaped bicycle spoke.
-

FACE MASKS 101
RockyAussie replied to Ferg's topic in Purses, Wallets, Belts and Miscellaneous Pocket Items
I totally agree and well said. Thank you Ferg. -
I reckon your right - https://www.greggrantsaddlery.com.au/stable-and-grooming/leather-care-and-tools/tanning-formula-and-kits/commercial-tanning-knife?gclid=Cj0KCQjwtLT1BRD9ARIsAMH3BtUx1UMzygKMNG6SQ6N7nVDzCbt-n975IS7WiivZATs6jWEte_B_oS0aAs0CEALw_wcB
-
Pondering over machine size CB3200 or CB4500
RockyAussie replied to TJStrand's topic in Leather Sewing Machines
I believe that both these machines are getting a bit too big for purses. You can not run thin threads through either due to there being no leather point needles less than NM 160 size 23. A CB 341 might be a better choice and will give thread sizes from Thread Sizes: #46 - #207 Needle: #135x16/17: #16-#24. A bell skiver is a must if you are looking for production but maybe a bit expensive if just for a hobby. -
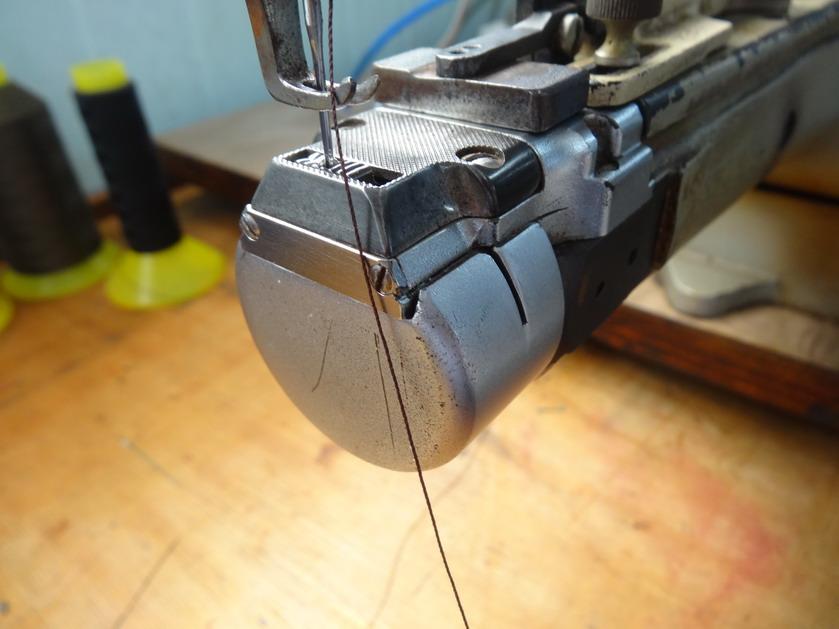
I have seen in a catologue at some time where the pfaff 335 was available with an oscillating dog foot but it is very difficult to find. From memory they have to have the letter P after say 335-H3-P sort of. The best I can find at the moment is possibly in this pdf where there is a difference shown on page 21 and 30. https://www.google.com/url?sa=t&rct=j&q=&esrc=s&source=web&cd=7&ved=2ahUKEwjtvbiY4oXpAhVCT30KHcNVATUQFjAGegQIBBAB&url=https%3A%2F%2Fwww.supsew.com%2Fdownload%2FPfaff%2FPfaff%20335%20H3.pdf&usg=AOvVaw3_CKC405UTEGZCwwcT3jDf I will try and find the better descriptive one and post it up when I do. Also note that the techsew 2600 cylinder comes with an oscillating dog foot as standard. https://www.techsew.com/us/techsew-2600-narrow-cylinder-leather-industrial-sewing-machine.html Note: There is no dog foot tab sticking out the end as there is in the picture below it. https://www.pfaff-industrial.com/db-downloads/technicaldoc/teilelisten/300/tl_335_06-09_de_en_es_zh/@@download/file/TL_335_06-09.pdf Page 55 on this one above.

-
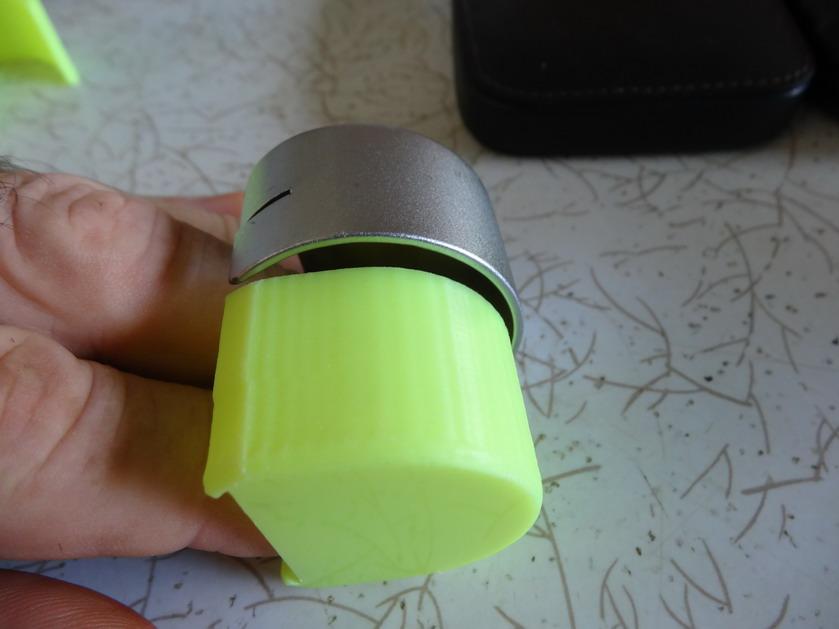
That would be hard to get I think but you could try Pfaff direct. If you have a 3D printer available I could send you a file for one that I have done in order to have it smaller than the original.
-
Here is a couple of pics of my Pfaff 331 close in on the feed dog. My favourite machine. At about 1minute in on this video you can see it action. https://www.themorningbulletin.com.au/videos/wild-harry/43913/
-
I only ever use a belt sander a rag wheel mop with tripoli polish myself. Check this post out I did awhile back that shows one of the knives in action. If doing a new knife from scratch I would do a sharp belt clean up to start with to keep the heat down then redo with a bluntened off belt to smooth up following.
-
Well done!!!! Add some turks feet and a head and you got a pet rock dressed I think. PS ...dont forget his little mask
-
Frustrated by Consew 199 - Timing Issues
RockyAussie replied to spotty's topic in Leather Sewing Machines
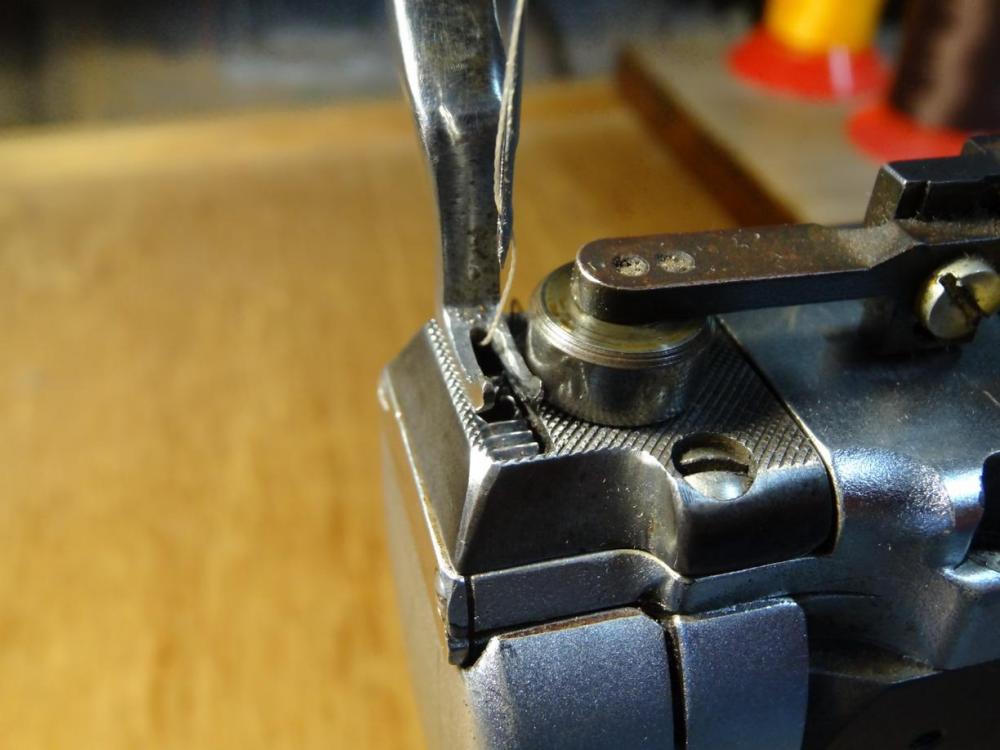
Looking at your picture above it appears to me that you have the thread going incorrectly in that the thread should be going from your tension discs straight up to the thread return spring and then back down to the hook then on up. Although this video shows a different machine if you check at about 2.5 minutes in you will see what I mean. -
Help! Which machine for this stitch please?
RockyAussie replied to johnnywalks's topic in How Do I Do That?
A tall post machine would do this quite easily. Remember the leather is flexible and you can do this by stitching one side first followed by the other side by flexing the leather down a little as you go then you do the bottom before pulling the corners up to be stitched across. This needs to be done on leather that doesn't crease up when pulling the corners up or turning inside out to do those corners. This sort of post would be ideal but a shorter one can manage it as well but will be more difficult. https://www.techsew.com/us/techsew-85017-high-post-walking-foot-industrial-sewing-machine.html -
Need Help With Cobra Class 4 ... Stiching Issue
RockyAussie replied to RoosterShooter's topic in Leather Sewing Machines
Check that the screw that gets undone first when adjusting the bobbin tension has not worked its way out and hitting the race occasionally. Check there is no threads stuck down in the race. If they are not the problem..... to quote a very wise Wizcrafts... -
Need Help With Cobra Class 4 ... Stiching Issue
RockyAussie replied to RoosterShooter's topic in Leather Sewing Machines
That also would be my best guess. Getting snagged at the bottom on a large spool would be about that sort of measurement I would think. Note that the knot shows its coming up higher as it comes to the missed stitches which also indicates a varying tension somewhere. Crooked sitting cone? -
I would think that is too high to be much use Mick. Look at page 36 in this manual and see if that helps you. Regards Brain. inst-441.pdf
-
second column down and 4 across? https://www.sewingpartsonline.com/singer-14u595-sewing-machine-parts.aspx?sort.ss_cat_sort=desc&index=1 some more info here may be of help.https://leatherworker.net/forum/topic/73822-parts-for-singer-29-4-patching-machine/
-
Break them knives down to single or at most doubles. It will work out quicker in the end and allow less wastage. The long strap knives have VERY little chance of working as the leather has no where to move between the straps except inward which means your trying to get around 5mm per strip to condense out of the way. The knives can cut better if you give them a polish with a rag wheel and tripoli polishing compound but that won't work with this set up either. Just for your information, a proper clicker press can normally cut to cut at about 30 seconds a change and gang knifing can save a little but the right gear will save a lot more.
-
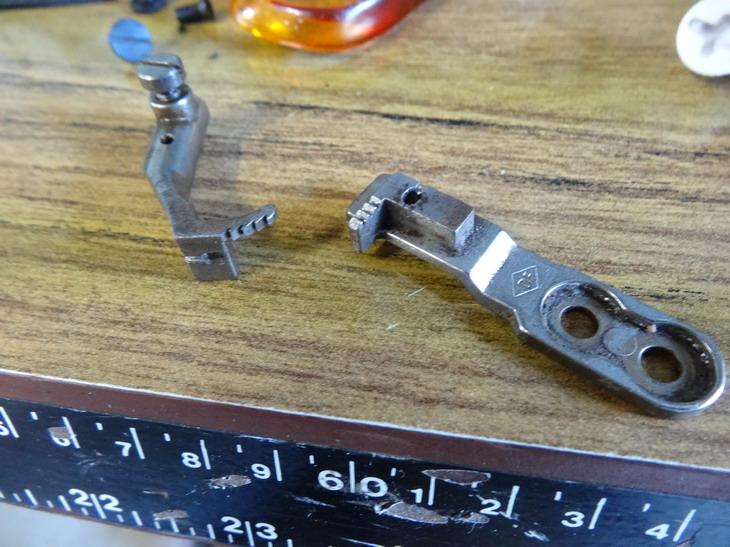
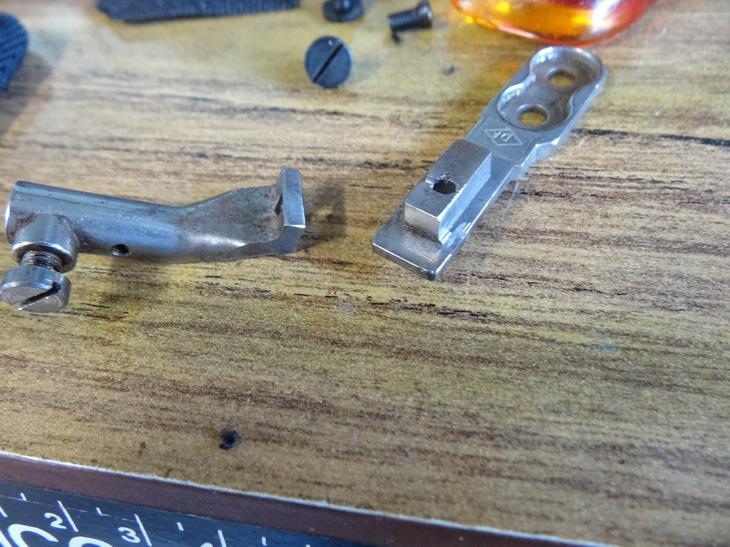
It all depends on how they supply it. I have actually had it come all loose in a bag once. The lid I use is about 20cm if that helps. A bit wider might be better. What I did with the wood piece under the lid is get it so the height is about level with where it feeds into the prongs on the machine. Being on a heavy wood block enables me to position it where ever I want on the back of the sewing table. To me its a bit like getting a good thread run to the tension discs with the thread, You want nothing to hook up or cause any intermittent tensions as it feeds through the prongs and on into the binder shape thing. Warning some tapes feed way nicer than others and you may want to do some machine alterations in order to get the tape to feed more fully in. I removed the left side of the back foot for a start. Original in this pic Now altered below Now able to get the tape further over another 2mm and it works way better especially when going around curves and corners.
-
If I were to tackle this I would start off with some medium soft eva foam and sand it rounded on the edges. I have done this on a lot of bag handles in the past. This gets stuck down onto a backing leather or stiffener and then the top leather gets lightly glued down and then pushed into the hollows with a bone slicker. That then would be stitched down firm to the hollow being carful not to let the needle ride up the foam bulge. The foam allows the leather to be firmly pushed out and keep the shape nicely in place. Below are a couple of pictures of the handles I am referring to.The eva in them starts off at about 10mm thick. In the case above I would start off with about 5mm + -. Sewing machine wise you would want a roller foot or a single sided set similar to the ones in the last picture. These are just a standard set that I have sanded down with an angle grinder and they allow me to get the needle right in the spot.
-
Now yous gone and made me all self conscious ....I'm a going to paint that nail now. You know that,that is a real rust version I got not one of these new paint on versions of it you get nowadays. P.S. I am not going to match the paint with the cake tin lid. Doesn't matter what you say ....it won.t happen.
-
Welcome @Wicky. There are some real nice members down there in Sth.Aus.
-
Upholstery suppliers normally have it. I go through this one a fair bit- https://www.hamlinsacc.com.au/ I made up a feeder by putting a nail through a cake tin lid into a block of wood with a bearing in between.It just sits behind on the sewing table.
-
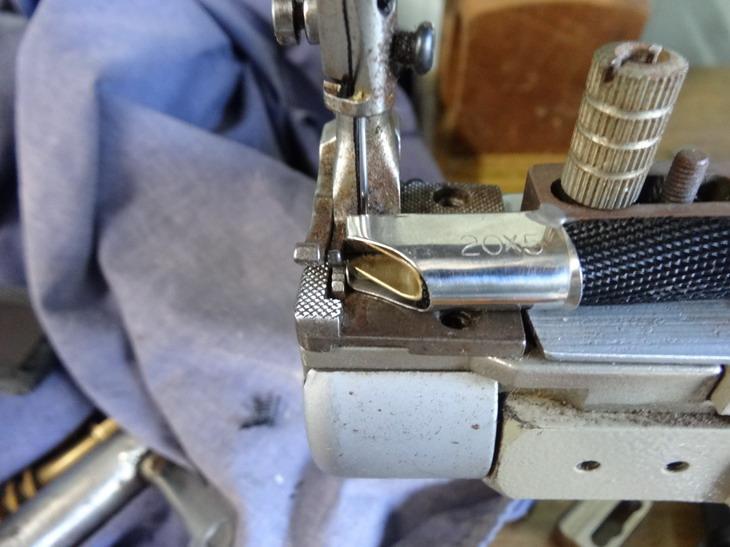
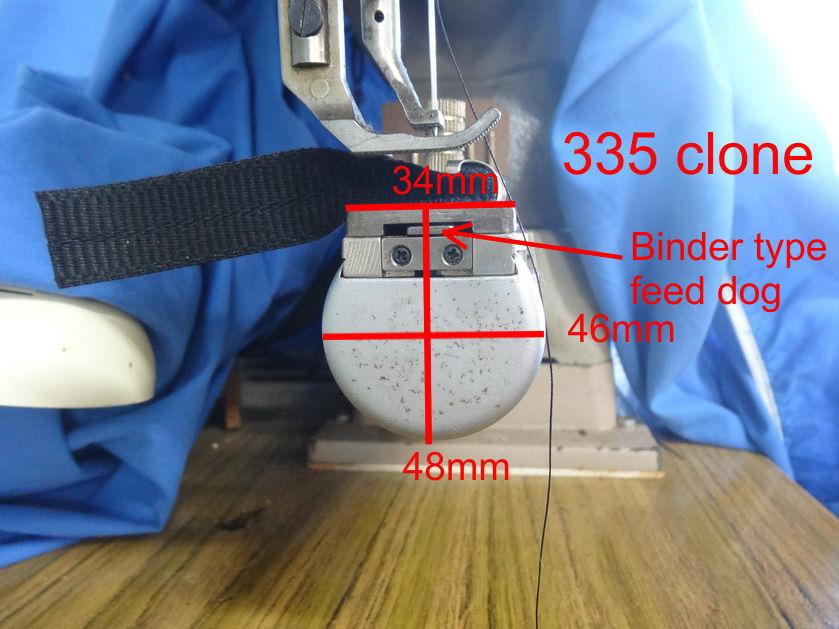
I can not be sure what type you have. As far as I know they only sell ones like in this link below which are a binder type configuration which has no adjustment to go lower or higher that I know about. AS they don't show any thing about them on the Toledo site I would just give them a call. In the top right hand picture in the link you can see the flat tab sticking through which means back and forward movement only. The other picture here shows more closely the tab I am referring to. https://www.cowboysew.com/335-leather-sewing-machine-for-binding.htm
-
Looks good to me Doc. The big machine makes me think it could have had a heavy stitch line around the edge maybe but I like the heavy lettering work all the same.
