Outfitr
-
Posts
125 -
Joined
-
Last visited
Content Type
Profiles
Forums
Events
Blogs
Gallery
Store
Everything posted by Outfitr
-
How to add Gel Antique in specific areas instead of all over
Outfitr replied to swhoelefp69's topic in How Do I Do That?
I think if you just want to target some areas I would use a resist then a paste antique. -
I know they're pricey but Barry King steep bevelers transformed my floral carving work. I've got both the steepest and next steep 3 widths each and I don't ever touch my old bevelers.
-
I recently switched from Barge to Aquilim contact cement. So far so good. Nice not to have those fumes. And I also got a glue pot for the Aquilim which is working great.
-
Duty Belt and Badge Holder
Outfitr replied to Bayou Bengal's topic in Purses, Wallets, Belts and Miscellaneous Pocket Items
Excellent work! What is purpose of the larger keeper strap? Is it machine stitched? -
Stepped WAAAAY out of my Comfort zone.. and used Paint!
Outfitr replied to YinTx's topic in Books, Journals and Photo Albums
Looks good. I assume the paint is the pink and green over dyed red leather? Did you dye the brown first? Looks a little tedious. My eyes are getting old and when I paint I use my optivisors and small brushes....really helps. -
Chaps are really nice! So what do you use to draw your pattern onto the leather?
-
6 coster set
Outfitr replied to LeatherLegion's topic in Purses, Wallets, Belts and Miscellaneous Pocket Items
Ya great design! Are the pieces die cut? -
Fancy Scabbard
Outfitr replied to Josh Ashman's topic in Gun Holsters, Rifle Slings and Knife Sheathes
That's a gorgeous scabbard. I recently purchased a Marlin model 95 45-70, I think it would fit perfectly. .....just sayin. The darker color I believe is caused by all the tooling, notice that's where it's at. All the cutting, pounding, beveling definitely changes the way the leather absorbs. -
Thank you so much!
-
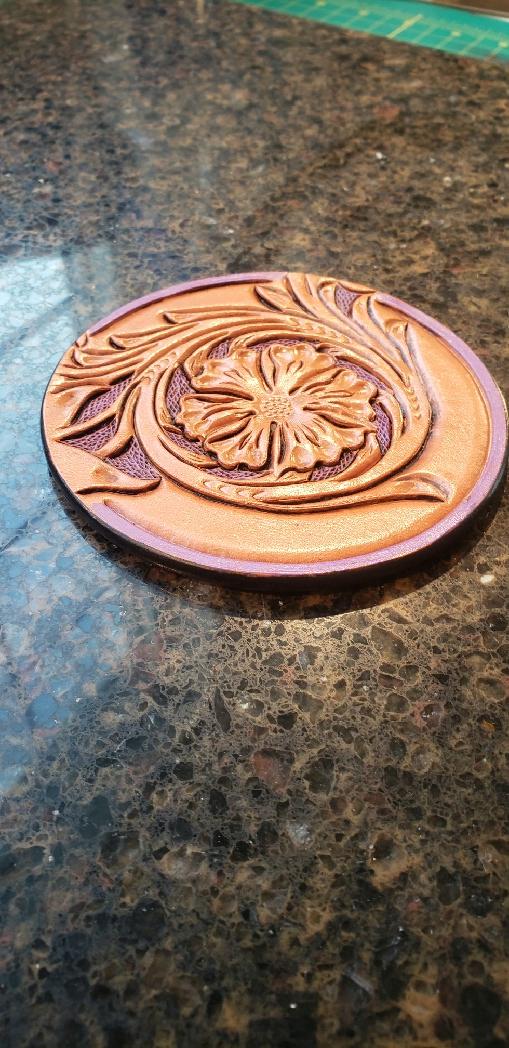
Oh you're saying don't use background tools just paint those areas then the antique will wash off. Interesting, never thought of that. I'm trying to do both, drop and color the background. Here's a pic if a coaster I did and tried to use purple. It came out OK but the antique did darken it some.

-
Very First Knife Sheath
Outfitr replied to SLP's topic in Gun Holsters, Rifle Slings and Knife Sheathes
Well done! -
For wet molds I always set the item on a board and lay the oversized wet piece of leather which is cut straight on top and layed over the item at the right position for the top line. The rest of the leather drapes over at least an inch too big. then start molding with appropriate modeling tools while stapling the leather to the board. When its molded enough I remove the item and put in oven till pretty hard. Using dividers mark a fat quarter inch boundary line and cut there. Then the back piece is just flat leather bigger than the front, glued on to the front and then trimmed exact to the front. Then stitched.
-
I think your right, they just don't work together. The areas I'm referring to are tapped down with textured background tool then color dyed or painted.
-
On some floral tooling projects I like to use bright colors like red or green or blue instead of the normal black or dark brown in the background areas. Problem arises when I use paste antique and it gets down in those areas and hides the nice colors. I usually do a "wash" after the antique with tan kote but it's almost impossible to get it out of all the background areas and it always at least darkens or totally ruins the colors. I should also mention that I always use a resist like super sheen before the paste antique . I really love the effect of paste antique on floral carvings but I'm thinking it should not be used in conjunction with a colored background. Any ideas?
-
I hand stitch everything also. Haven't really tried too many thread types. Started using tiger thread a while back and haven't had a reason to look otherwise. I love all the great colors. Mostly use 0.8 for the stuff I make.
-
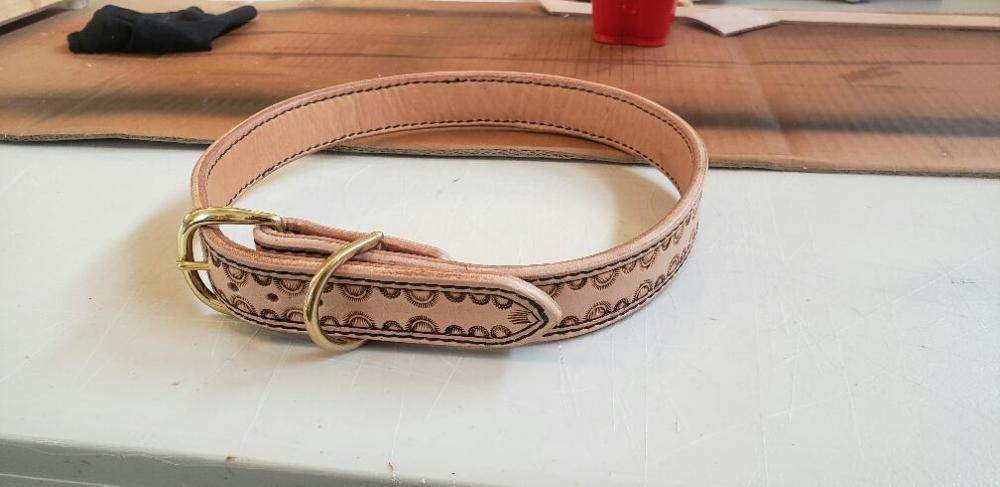
Awesome! The collar I made was for a friend also, I charged for the hardware only. What a deal huh? I never know what to charge. Here's the one I made.
-
I just made one like that for a friend for his huge rottweiler. I think it was 33" long, almost a belt. Also 2 layers sewn, some stamping and name and leash ring. Mind if I ask what you charged? I was thinking with all the work close to $100. but then I thought who would pay that for a dog collar.
-
Ya it's just a 1-3/4" floral carved everyday belt. I made it for myself and I love it but I think for most customers it would be a little over the top.
-
If you're willing to experiment, I'd just try a half inch longer going from 7 to 12 ounce. I've been making a few lined belts lately experimenting with different weights. Just finished one and its a monster, I think I reached the thickness maximim 15+ ounces. I made it the same length as the other thinner ones and it seems fine for lenght. The one previous is 12-13 oz. and I think it's perfect.
-
Filigree knife sheath
Outfitr replied to Rolandranch's topic in Gun Holsters, Rifle Slings and Knife Sheathes
Me too. And an idea for my next project. Thanks great job! -
Sheridan Tooled Belt
Outfitr replied to MLGilbert's topic in Purses, Wallets, Belts and Miscellaneous Pocket Items
Looks good! Machine stitched? Did you create the pattern? Looks like you have an oval punch for the belt holes and a double border cut in. Nice. -
Pretty sure it would be a crowner.
-
So what are your thoughts/preferences? I recently made several lined belts to give them a try and they are really nice and heavy feeling (western carved types) but man they are a LOT more work, especially the hand stitching. Guessing at least 3 hours. Plus the liner, glue, etc. Even though they are somewhat nicer than unlined I'm trying to determine if the extra work is worth it.
-
Gorgeous saddle, well done! Any idea how many hours you have into it?
-
Tooled Iphone cover
Outfitr replied to YinTx's topic in Purses, Wallets, Belts and Miscellaneous Pocket Items
Really nice work. How is it attached to the cover? Upper right, is that just a fancy S or is it something else? I've been struggling with small carvings lately. I need some smaller petal lifters. I struggle with cutting the small curves on the petal tops.