


kgg
-
Posts
3,344 -
Joined
-
Last visited
Content Type
Profiles
Forums
Events
Blogs
Gallery
Store
Everything posted by kgg
-
Personally I think what factors that are contributing / causing you to breaking the needles are: 1) Needle size: a 160 (#23) needle is meant for V138 thread in thinner leather. i) On a straight run a 160 (#23) needle may work as there is just enough room in the needle hole to allow for the 3 threads in the hole (1 for the top thread, two for the loop). ii) On a turn there isn't enough slop in the needle hole to allow the twisting movement and the bending on the needle. iii) When you are finishing off by reversing into the same last couple of holes you now have 3 stitches that are all ready in the needle hole and you want to add 3 more. In thin items this may not be as much of a problem but in 8mm (5/16") it probably will be ending with cutting the thread or broken needles. 2) Friction on the needle. i)When the hole isn't big enough, diameter wise, there is friction being created by the threads grabbing the walls of the thread and pulling on the needle. As the thickness and toughness increases so does the friction. ii) This friction will increase ever so slightly with darker coloured thread. iii) If you are using a edge guide the leather will not move sideways but when free handing you are going to add an additional twisting / bending moment on the needle. iv) Also when using a cylinder arm machine you get additional twisting and bending as the item moves farther back as most times the item wants to move to the left. Also unless you are using a flat bed table attachment the item will want to droop down once it doesn't have any support from the needle plate. Probably will be ending with a broken needle. Suggestion: i) Change needle to a 180 (#24) and see if that works. ii) change thread size to V207 and use a 200 (#25) needle. iii) Add a flatbed table top attachment. kgg
-
I typically use one of two rivet setters a brand name ( Weaver ) and unknown brand ( Chinese ). What sparked this topic was when adding a magnetic holder to my new leather apron to hold small items I noticed the Weaver would hold while the Chinese one wouldn't and would have to be placed back into the tool holder. Here is my comparison: 1) Weaver #12 Heritage Rivet and Burr Setter ( https://www.weaverleathersupply.com/products/heritage-rivet-burr-setters?srsltid=AfmBOorZa03-7yJXd4NK0J7ms-NhaPObUqG9y6-cYWW633ChiNRKtNjq ): i) colour: gun barrel black, ii) length: 112 mm ( 4.4" ) iii) weight: 198 grams (6.9 oz) iv) Construction: Ferromagnetic metal (holds to a magnet) v) Country of Manufacture: Unknown. On a brief search I was unable to determine if it was made in the USA. Cost: $36 CAD ($26 USD) per size plus shipping 2) Chinese Not Branded #12 Rivet and Burr Setter ( https://www.temu.com/goods.html?_bg_fs=1&goods_id=601101822896581&_oak_stage=6&_oak_page_source=703&_x_vst_scene=adg&_x_ads_sub_channel=shopping&_x_ns_prz_type=-1&_x_ns_sku_id=17592387188379&_x_ns_gid=601099558219698&_x_ads_channel=google&_x_gmc_account=695390730&_x_login_type=Google&_x_ads_account=6910707695&_x_ads_set=21445371984&_x_ads_id=163985514426&_x_ads_creative_id=705187068636&_x_ns_source=g&_x_ns_gclid=EAIaIQobChMIh8-XxtqJiAMVckp_AB0yLi9TEAQYBiABEgKM5PD_BwE&_x_ns_placement=&_x_ns_match_type=&_x_ns_ad_position=&_x_ns_product_id=17592387188379&_x_ns_target=&_x_ns_devicemodel=&_x_ns_wbraid=Cj8KCQjwoJa2BhC-ARIuAK-YPyAPBRiMisytKWY4gCe42YwLmzWGnnz3z3Cv-X8BXZO0JO9OMpk78c8fmBoC3BY&_x_ns_gbraid=0AAAAAo4mICGOP3XszhHdJ9mfoJkEYI7ia&_x_ns_targetid=pla-2322529874778&_x_sessn_id=m1vl5lgo1t&refer_page_name=goods&refer_page_id=10032_1752786185211_my3616b3n9&refer_page_sn=10032 ): i) colour: Shinny Chrome ii) length: 112 mm ( 4.65" ) iii) weight: 193 grams ( 6.8 oz) iv) Construction: Non Ferromagnetic metal (will not hold to a magnet at room temperature) v) Country of Manufacture: Unknown, probably China Cost: Budget friendly from Temu at $12.24 CAD ($8.90 USD) for two setters a #9 & a #12 free shipping Conclusion: Both rivet setters: i) Do the job very well and have installed many a copper rivet and burr. ii) Hold up very well to being stuck with regular metal hammers. I'm not particular on what I use to strike them using a 10 oz, 16 oz or a 22 oz regular hammer whatever is the closest at hand. iii) The doming of the copper rivet over the burr is consistently good. What do you use???????? kgg
-
The question you need to answer is what you want to sew. With such old machines certain parts can be difficult or impossible to get. The clutch motor presently on the machine should be replaced with a servo motor to get your sewing speed to a comfortable level which will cost about an additional $200. Learning to use a clutch motor can have a very steep learning curve, sort of like learning how to drive a car with a stick shift. Since your bio you mentioned wallets a flatbed machine would be a better choice then a cylinder arm. When you add in the cost of new servo motor cost would be about $1400. A new flatbed clone of the Juki DNU-1541S a Cowboy CB-1541S will cost $1600 plus shipping. Personally I would go with a new machine particularly if this is your first machine. kgg
-
Keep in mind no one machine will do everything. That is why a lot of use have more then one class of machine. If you are going to specialize in that type of work by the proper machine as indicated by @Wizcrafts and @mbnaegle. If you want to do flat work (wallets, belts) buy a flatbed, if you are going to do circular items get a cylinder arm machine. As a note you can sorta kinda turn a cylinder arm machine into flatbed by installing a flatbed table top attachment. If you want to use thread above V207 get a class 441 cylinder arm machine (manual or motorized). Buy Once, Cry Once kgg
-
Development of best servo motor for leather sewing machine
kgg replied to CowBoyOUTLAW's topic in Leather Sewing Machines
Agree. One of the members on the forum has a brushless servo motor that has a fin system moulded right into the small pulley. I am assuming that was done to try and help keep the housing cooler. Lets face it brushless servo motors are designed to last too as long as the warranty period and utilize a design to save on manufacturing costs. I doubt any brushless servo motor will ever come close to lasting as long as the big old heavy clutch motors that weight about 40 lbs. with real metal housings verses about 18 lbs of plastic and aluminum. Sort of like a Zippo lighter lasting a life time verses a BIC lasting a week or two. kgg -
Development of best servo motor for leather sewing machine
kgg replied to CowBoyOUTLAW's topic in Leather Sewing Machines
My experience with a cheap digital brushless servo motor that came with my TSC 441, 16" cylinder arm clone has a speed range of 500 - 5000 rpm on it's 800 watt, 9 coil and with no reducer pulley on the machine: Calculated: 1. Top speed of the hand-wheel pulley should come in at 156 rpm using: i) a 160 mm hand-wheel pulley size, ii) a 50 mm motor pulley iii) with the motor speed set to the minimum speed of 500 rpm's. This particular servo motor is a 800 watt brushless 9 coil servo motor with a speed range of 500 to 5000 rpm's. Measured: i) The hand-wheel pulley measured out to be 159mm. ii) The small pulley at the motor measured out at 49mm. Measured results: i) with 500 rpm's showing on the controller screen ii) with the foot pedal fully depressed the rpm's with my digital tachometer showed 154.5 rpm's with no material under the needle iii) with the foot pedal feathered to get the minimum hand-wheel pulley speed the digital tachometer showed a low rpm reading of 61 rpm's with no material under the needle. From that I can assume a no load ramp up speed of 61 rpm's. I'm assuming the 50 rpm speed they are quoting is done in a similar manner. With everything being equal a 12 coil should get rid of the heat better then a 9 coil operating under the same load conditions. kgg -
Incorrect: 0.6mm thread is just slightly smaller then V346 ( T350). Reference Chart use ( https://www.tolindsewmach.com/thread-chart.html ). To handle thread above V207 you need a Juki TSC-441 or clone similar to the CB4500 or a one armed bandit like the Cowboy Outlaw, Tippmann Boss or the Weaver Cub. kgg
-
In addition to the other comments you never mentioned what size of thread being used with what size of needle in how thick of leather. kgg
-
The two pieces which are "L" shaped can slide independently in the two tracks, one track in the front and one in the rear. They are locked down by tightening the two purple knobs in each track. When I'm not using the binding attachment I move the guide on the right side of the needle to whatever distance I need and lock it in the track. The guide for the right hand side of the needle has a cutout to prevent the tightening bolt for the needle from hitting it. Then I move the other guide on the left right side to the proper distance to guide the belt. I can remember seeing a binding tape setup where the binding attachment was mounted vertically rather then you standard horizontal just above and in front of the needle with the binding tape / webbing being feed down from the top of the machine. kgg
-
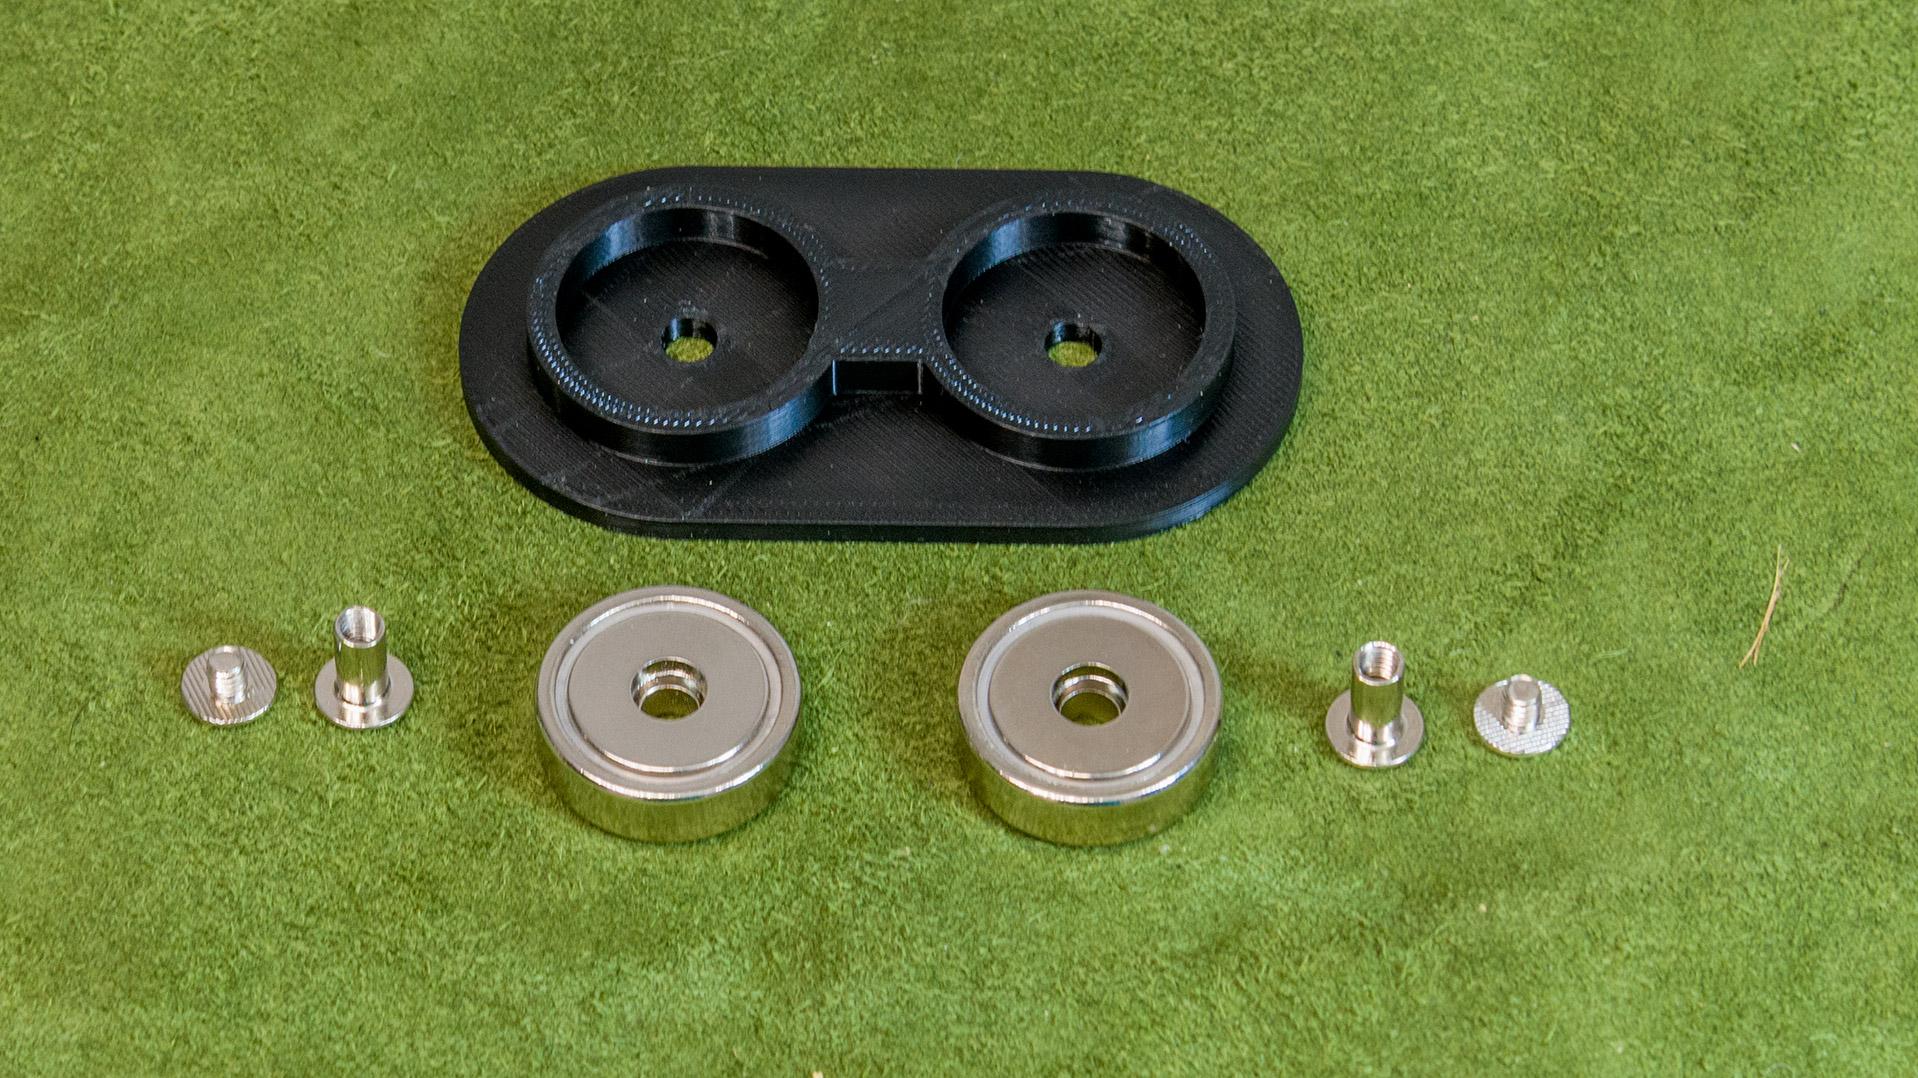
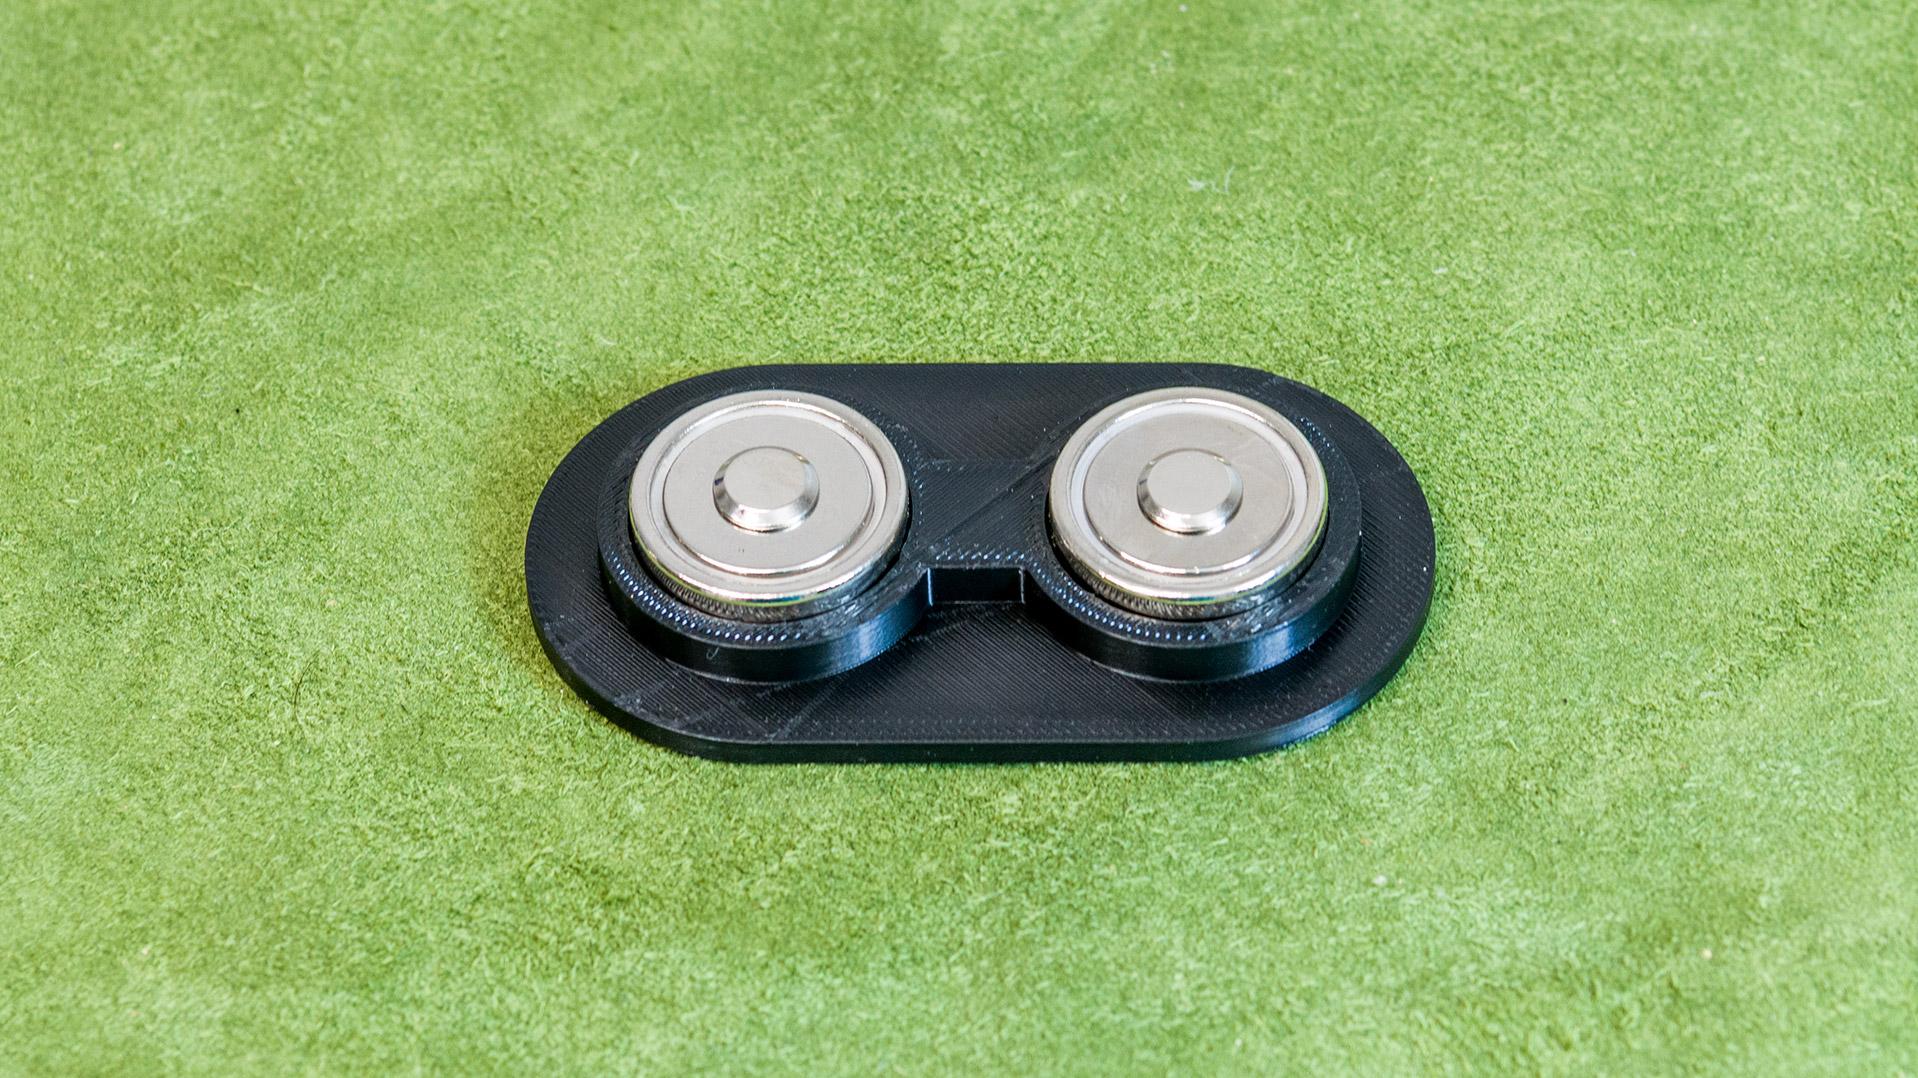
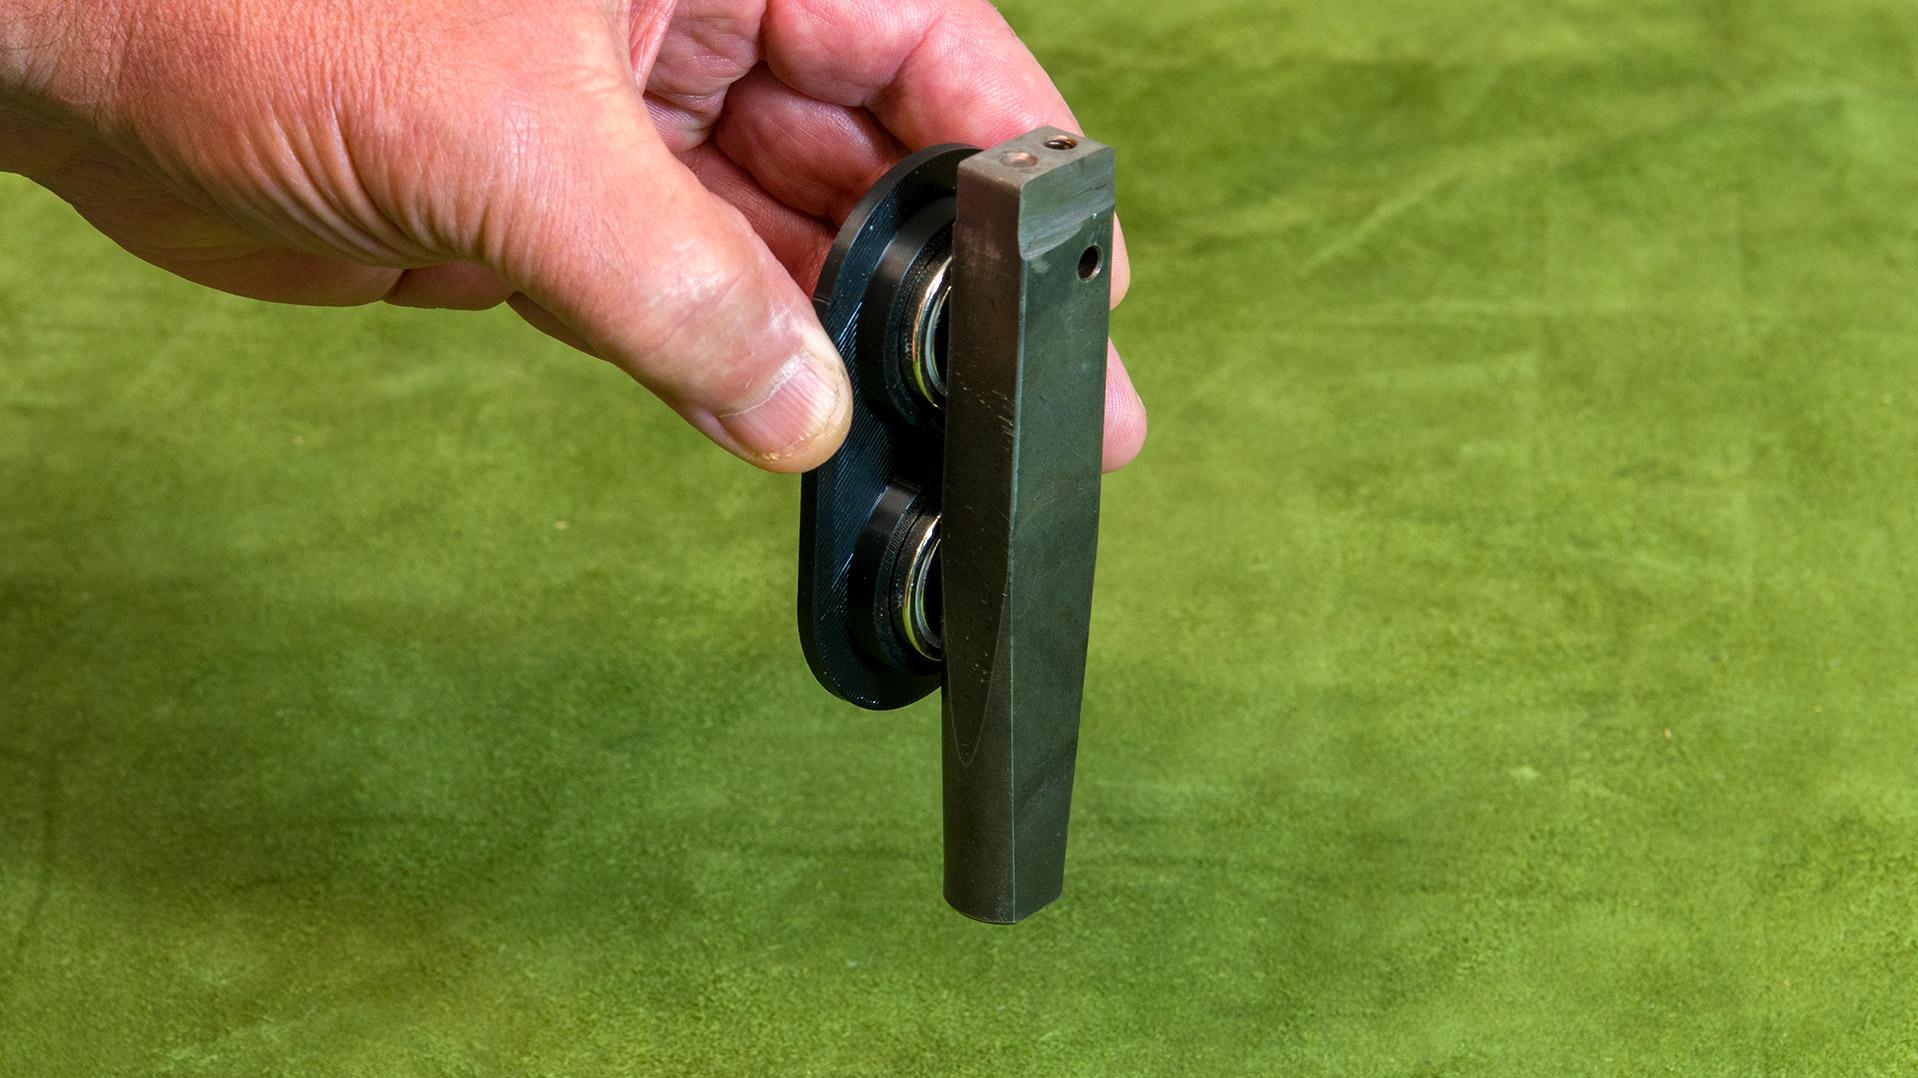
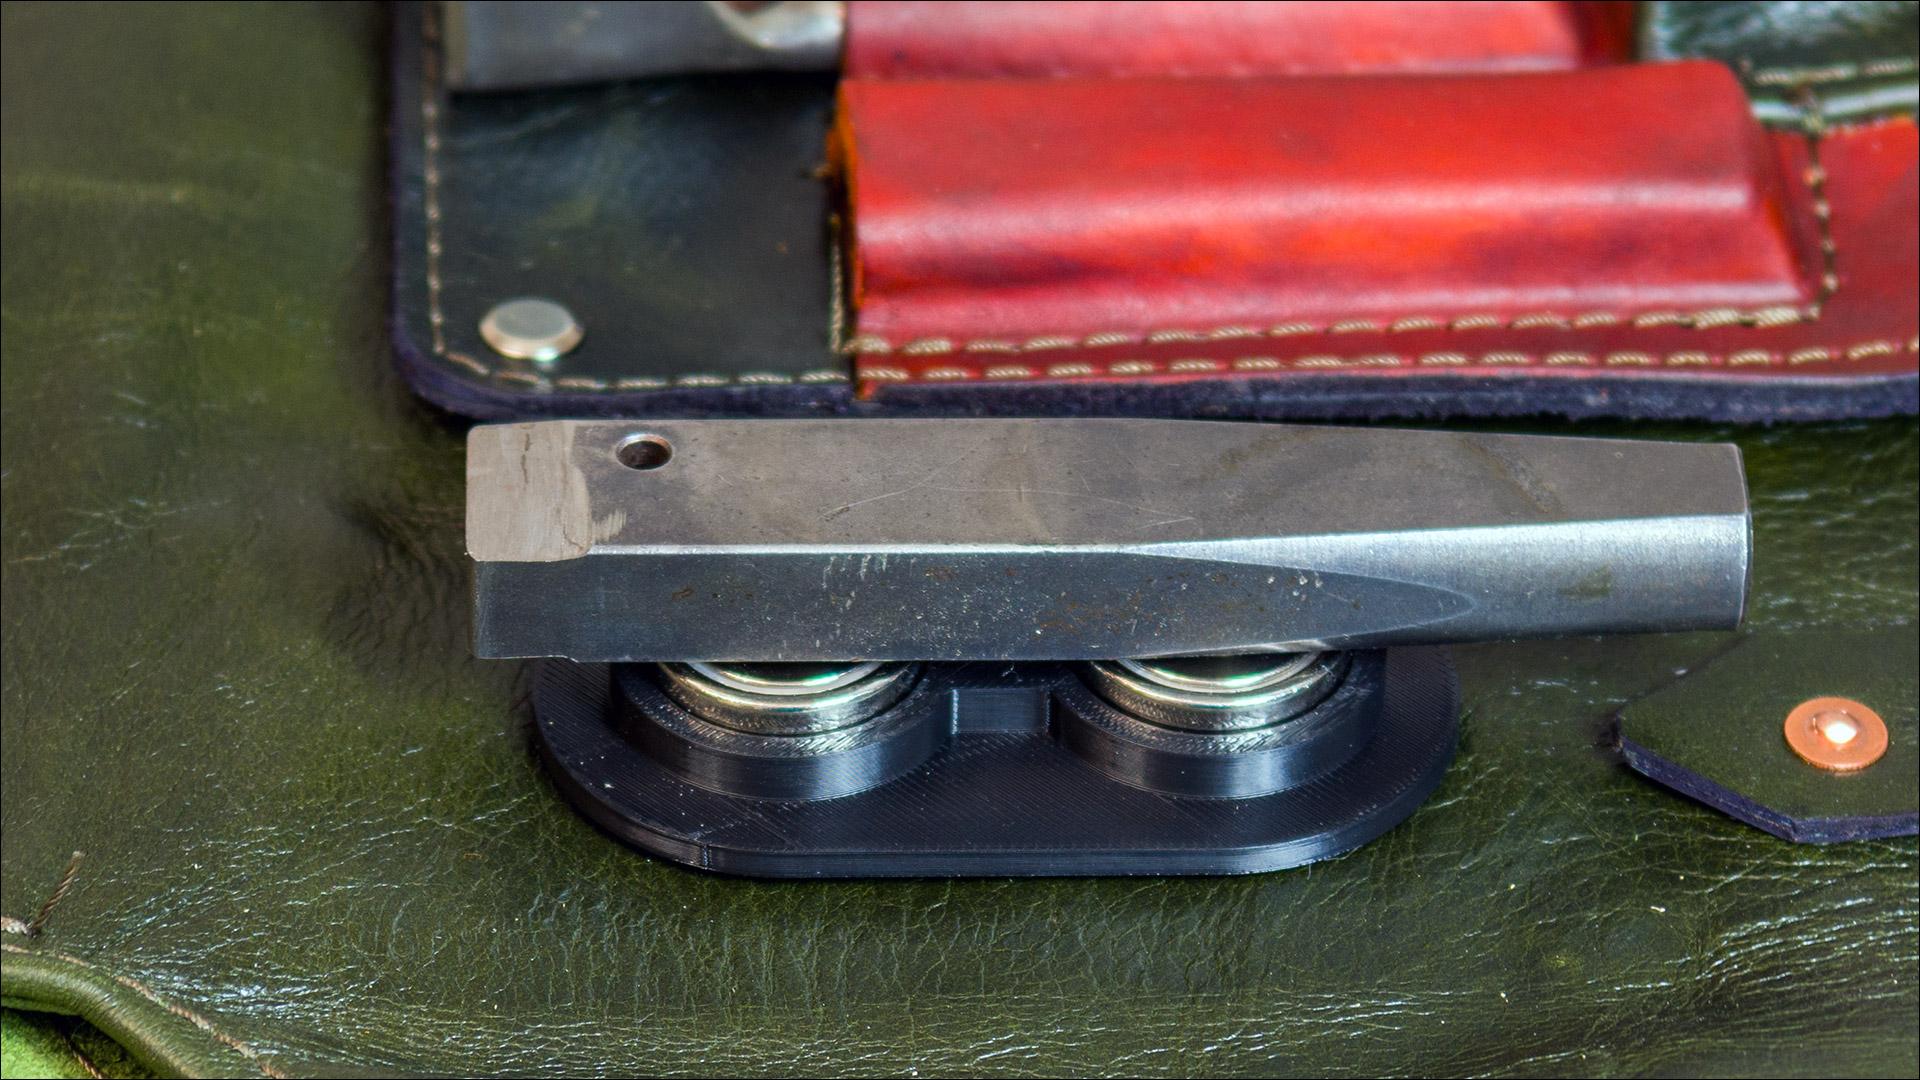
Why not use a simple double edge guide that would be attached to the bed that way it creates a track that you would feed the webbing into???? I did a small table top attachment for my 441 clone that I think the same principal maybe would work for your needs. You can see the two edge guides to the left of the binder attachment in the photo. kgg
.jpg.d69f4e49724e4bde336456bc462ff84a.jpg)
-
Advice on a Recently Purchased Claes 8346-30 Patcher Sewing Machine
kgg replied to ya2daup's topic in Leather Sewing Machines
I am wondering what you mean by " up to max thickness "????? In my opinion Patchers are not meant for boot soles. The max sewing thickness of that machine is less then a 1/2" at 12mm (15/32"). I assume you meant Claes 8346-30. Here is a good manual that you can download ( https://www.manualslib.com/manual/3027579/Claes-8346.html?page=3#manual) kgg -
You just got to weight the risks. When I'm using a bench grinder, drill press, angle grinder or my metal lathe I use a full face shield. I have had to many bits and pieces of metal hit my face and throat. That said I have never had the unpleasant experience of having an accident related to sewing and I have had many a needle break. That said the old leather worker guy in the next community did put a couple of stitches in his finger while using his needle and awl machine. He made the mistake of letting the customer, a doctor, watch while he repaired some of his horse related items. He got chatting and naturally distracted by the conversation and .... Two stitches latter he had his finger sewn to the leather.
-
@Northmount @DieselTech @RWentz OP hasn't been back since asking. kgg
-
help choosing first leather sewing machine
kgg replied to TakashiOkada's topic in Leather Sewing Machines
Maybe they will drop their price if you say "I can import one myself for $XXX." There is quite a bit of difference dollar wise (1916-1124= $794) but as @Cumberland Highpower has noted for the first time / novice buyer having no support could be a bad gamble. I think you will be very disappointed with the ability / performance of the 335. I would steer clear. To bad Jin doesn't do cylinder arms. Jin is the Juki line of "budget" machines. kgg -
help choosing first leather sewing machine
kgg replied to TakashiOkada's topic in Leather Sewing Machines
The typical price for a Juki LS-341 clone from China including table, brushless servo motor and delivered to the US off Alibaba is about $1400 to $1500 USD. Whereas a comparable clone machine would cost about $2600 -$2700 USD. The downside is probably the lack of support / etc. The upside is the $1200 USD in savings. kgg -
Development of best servo motor for leather sewing machine
kgg replied to CowBoyOUTLAW's topic in Leather Sewing Machines
I totally agree. However, it is a good discussion about what is used / needed by the average leather hobbyist or small commercial user which is often completely different then what would be needed in a large manufacturing environment. My opinion is the hobbyist sews for pleasure while the commercial user sews for profit. I am still a bit confused about whether this new motor has a build in gear reduction which would be just another take on what Landis had done back in 1998 by putting a 52 to 1 helper geared motor on the Singer 29-71 patcher. I figure if they were doing it today they would have used a brushless servo motor with a gear box attached. I did a video of the one I owned and the geared helper motor can be seen at 4:18 in the video ( https://odysee.com/@SingerSewing:0/singer:a ). kgg -
I want to get into leather holster making
kgg replied to Angrywrench's topic in Gun Holsters, Rifle Slings and Knife Sheathes
How true. If a machine was ever built someone on the forum probably has it. kgg -
I want to get into leather holster making
kgg replied to Angrywrench's topic in Gun Holsters, Rifle Slings and Knife Sheathes
Maybe new members should have to post a couple of times before asking a question like on some other forums I'm on. Nothing surprises me anymore particularly since the China Cough. What I have found is people seem to be more noticeably thinking they are entitled somehow with no manners and demanding as all get go then before the Cough. Basically a** holes. Then again it could be just me being me. kgg -
Development of best servo motor for leather sewing machine
kgg replied to CowBoyOUTLAW's topic in Leather Sewing Machines
Like @dikman I did a similar search for servo motors and I find that I can get a Brushless for about $150 CAD or a Brushed for about $200 CAD. As I don't need or want a Brushless servo motor or any of the additional features the documentation needed for a Brushed servo motor is so basic. 5 easy steps: 1. how to install the servo motor and mechanical linkages, 2. install belt to the machine or belts if you have a speed reducer, 3. set speed by turning the speed dial, 4. plug it in to a wall outlet, 5. turn power switch on and hit the "go" pedal. If at some point a Brushed servo motor fails you typically have to replace the servo motors fuse and brushes. If a Brushless servo motor fails chances are you replace the complete servo motor setup. kgg -
The part # you are looking for is B1525-053-0A0. An original Juki part will have the needle guard while a lot of after market ones will just be the presser foot. If you contact a Juki dealer and ask for the complete presser foot assembly you will get it with the needle guard. Another alternative is to buy a Needle Finger Guard off places like Amazon. Example: ( https://www.amazon.ca/YICBOR-Sewing-Machine-Brother-Machines/dp/B08ZCF899N/ref=sr_1_17?crid=UO5IAKRG7BVO&dib=eyJ2IjoiMSJ9.2fLw6Era9Ry_EQb4ctlNR0XMnKd9cxPTyATq6kljrRUsFAsAY60K0rL24TCK1bhBM71KGBRj_bN5NkMMVaN4cKrL0Ttl1dPFMzVojOWsPo7wY9ruXUERvP51UQ9Z6Ws0-PC59GirIwKvznJSxcsbXhB2D9FV30xEjQtKF_ez23X6JfLEHT1L_DGHy5IyTM5Gud5gVQ5sQeej1YO1MFbOCaz30Vq3Omf80-yk9hkngzDM7Zv7Kht2CXjrZ-tNUZxKCzXU_reMtpUjrD4o9CfPCmsvX480rlFWypy8fpcw3Lw.v6_DjuKOKwrz96P_yooYKPm6sQqqEQ2RE5efMMrS0UU&dib_tag=se&keywords=needle+guard+for+Juki+presser+foot+for+juki+ls-341&qid=1751713038&sprefix=needle+guard+for+juki+presser+foot+for+juki+ls-341%2Caps%2C317&sr=8-17 ) kgg
-
Development of best servo motor for leather sewing machine
kgg replied to CowBoyOUTLAW's topic in Leather Sewing Machines
I totally agree. I think as a cheap old geezer the hobbyist is looking for simple operation, reliable and most importantly cost effective. I can count on one hand the number of times I have changed the speed on my servo motors. Once I find the comfortable "spot" that is where it stays. To the average hobbyist cost is always king whether it is a complete machine setup or a servo motor. Why?? Just build simple good working motors for the majority of your customer base that are cost effective. kgg -
Development of best servo motor for leather sewing machine
kgg replied to CowBoyOUTLAW's topic in Leather Sewing Machines
Need a basic servo motor that has: 1. Has to have excellent low speed startup. 2. Has to have a 12 coil servo motor or at less 9 coils if it is a brushless electronic servo motor. 3. Give the customer the option of a Brush or a Brushless servo motor. i) If the customer chooses a Brushed servo motor if the speed dial was able to be mounted on the front of the table rather then on the motor's body they would be perfect particularly for new users. ii) If the customer chooses a Brushless servo motor it should be just a simple matter of being able to flip a toggle switch like @Cumberland Highpowerhas suggested rather then having to disconnect the needle positioner plug from the electronic control panel or having to go into the menus. I prefer the brushed rather then brushless servo motor. No fancy menus or electronics, no needle positioner just set the max speed hit the " go" pedal and sew. I have two brushless servo motors, one on a LS-341 clone and one on a TSC-441 clone and two brushed servo motors, one on a Juki DNU-1541S and one on a Juki du-1181N. The needle positioner on both the Brushless servo motors have been Disconnected. The brushed servo motors are much simpler to use for new people and are a lot easier diagnosed when a problem arises. 4. All new features like "Jog" should be options that the customer can choose to purchase if needed. I follow the "KISS" rule. To reduce startup jump, more controllable sewing speed. However even through you get increase torque it from adding a speed reducer it should be not used as the main reason for installing one as you don't want to over stress internal parts on some class of machines. I disagree. Push the "go" pedal and sew. kgg -
help choosing first leather sewing machine
kgg replied to TakashiOkada's topic in Leather Sewing Machines
The thread size for a #12 needle would be probably something like V33 (M80, Tex 30) range. Most of the Juki LS-341 clones will handle down to V46 (M60, Tex 45). True Juki's will handle down to V33 (M80, Tex 30). That said they are not going to be happy and will require a lot of adjustments as V33 has such a low a breaking strength of less then 2 lbs (.9kg). My opinion is that the Juki LS-341 and clones are better suited for a minimum thread size of V69 but prefer V138. kgg -
help choosing first leather sewing machine
kgg replied to TakashiOkada's topic in Leather Sewing Machines
From the information I have seen: The p335vb is a binding machine that has a max thread size of V69 which is the cross over thread size from domestic sewing thread to industrial with a breaking strength of 11lbs. The 18L can take a max thread size of V138 with a breaking strength of 22lbs. I agree with @RockyAussie neither are the right machine. If you have only one source for new machines the one I would suggest looking at is their Typical TW3-341 which by the looks of it is a clone of the Juki LS-341. Also consider a used brand name like Juki in the Class 341 / 1341 or import a Juki LS-341 / 1341 clone from China. Buy Once, Cry Once kgg -
A couple of questions and suggestions. 1. What size of thread are you using?? 2. What size of needle are you using?? There is a good needle to thread chart: https://www.tolindsewmach.com/thread-chart.html Going around a tight corner you may want to hand-wheel through and after each stitch raise the presser foot ever so slightly. Just enough to turn the leather a touch. I do this with the needle just on it's way up from the bottom dead centre position. That allows the needle to hook the bottom thread otherwise you will skip a stitch. The tension on your top thread is not high enough to pull the bobbin thread into the leather so you get a seam like your last photo. Suggestions: 1. Check you are using the correct needle for the size of thread you are using. 2. Check your top thread path from the thread spool to the eye of the needle is correct. 3. Suggest you first check the bobbin thread tension, do a drop test. 4. Increase top thread tension as needed. Use scrap leather in the same thickness as your project and do a few four to six inch seams. 5. At the start of your stitching hold both threads for the first three stitches and while still holding the threads reverse back to lock the threads then do your seam otherwise there is no back tension on the top and bobbin threads. You need a thread anchor point otherwise you can get some funky stitching as the thread tensions will vary. 6. Back stitch the end of your seam to lock the stitching. kgg